A Zendesk account. Create an account at www.zendesk.com/register.
1. Log in to your Zendesk account.
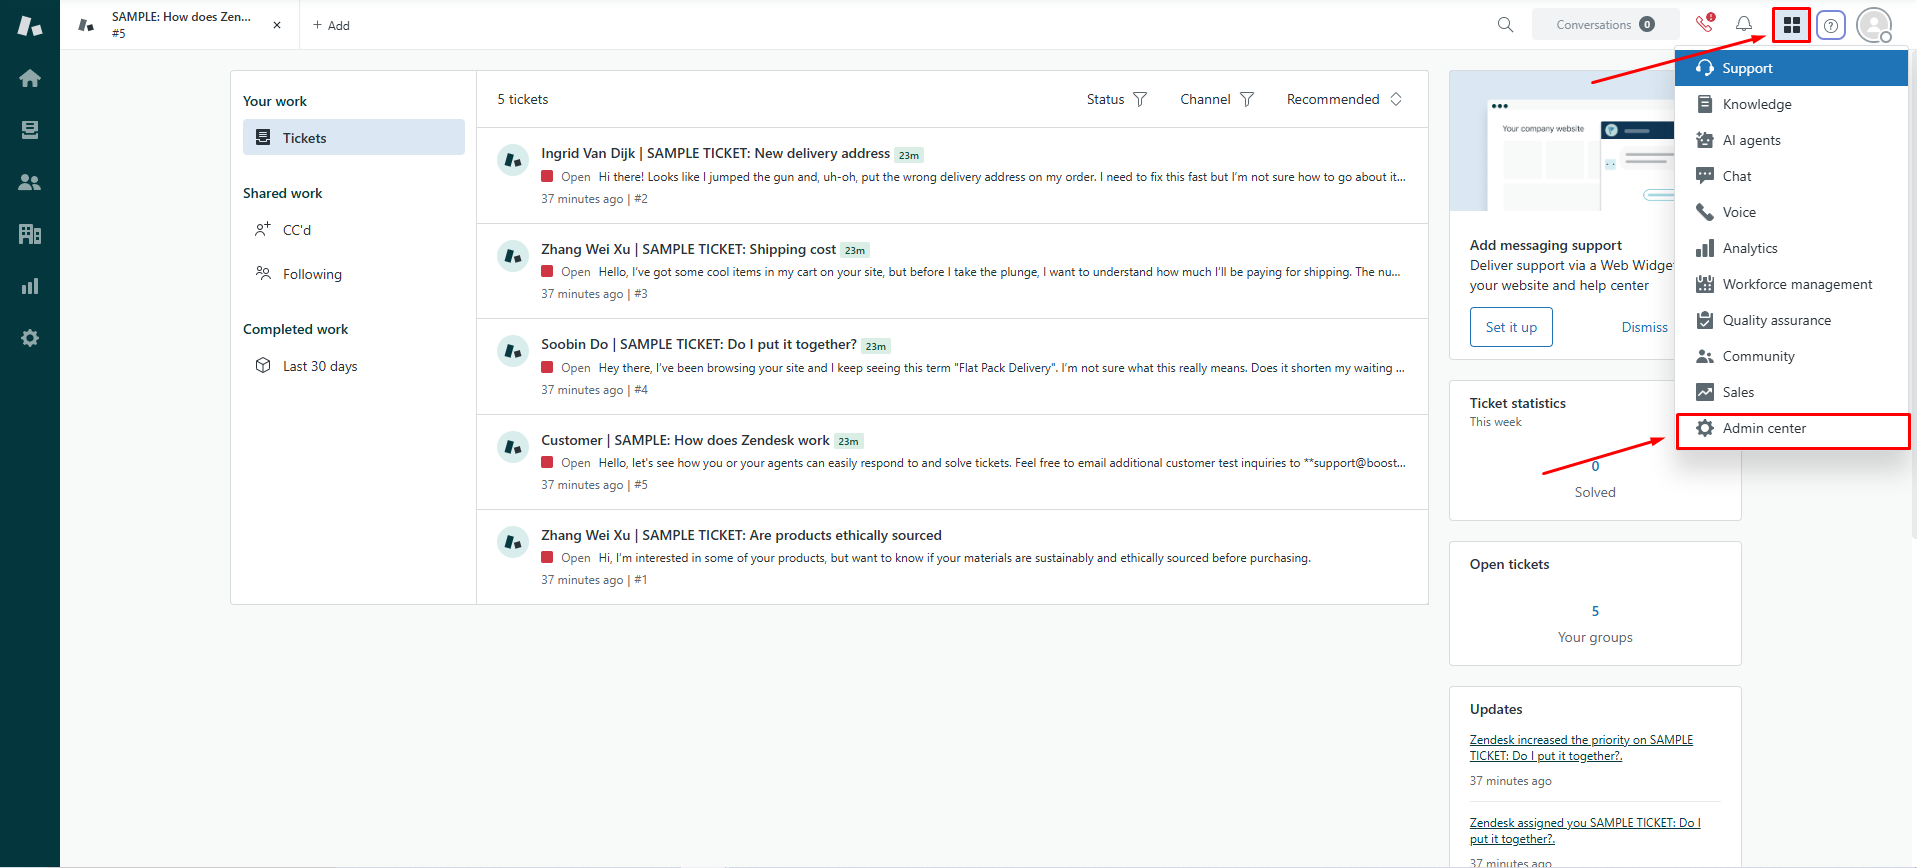
2. Click the four-square icon in the right corner menu and open Admin center.
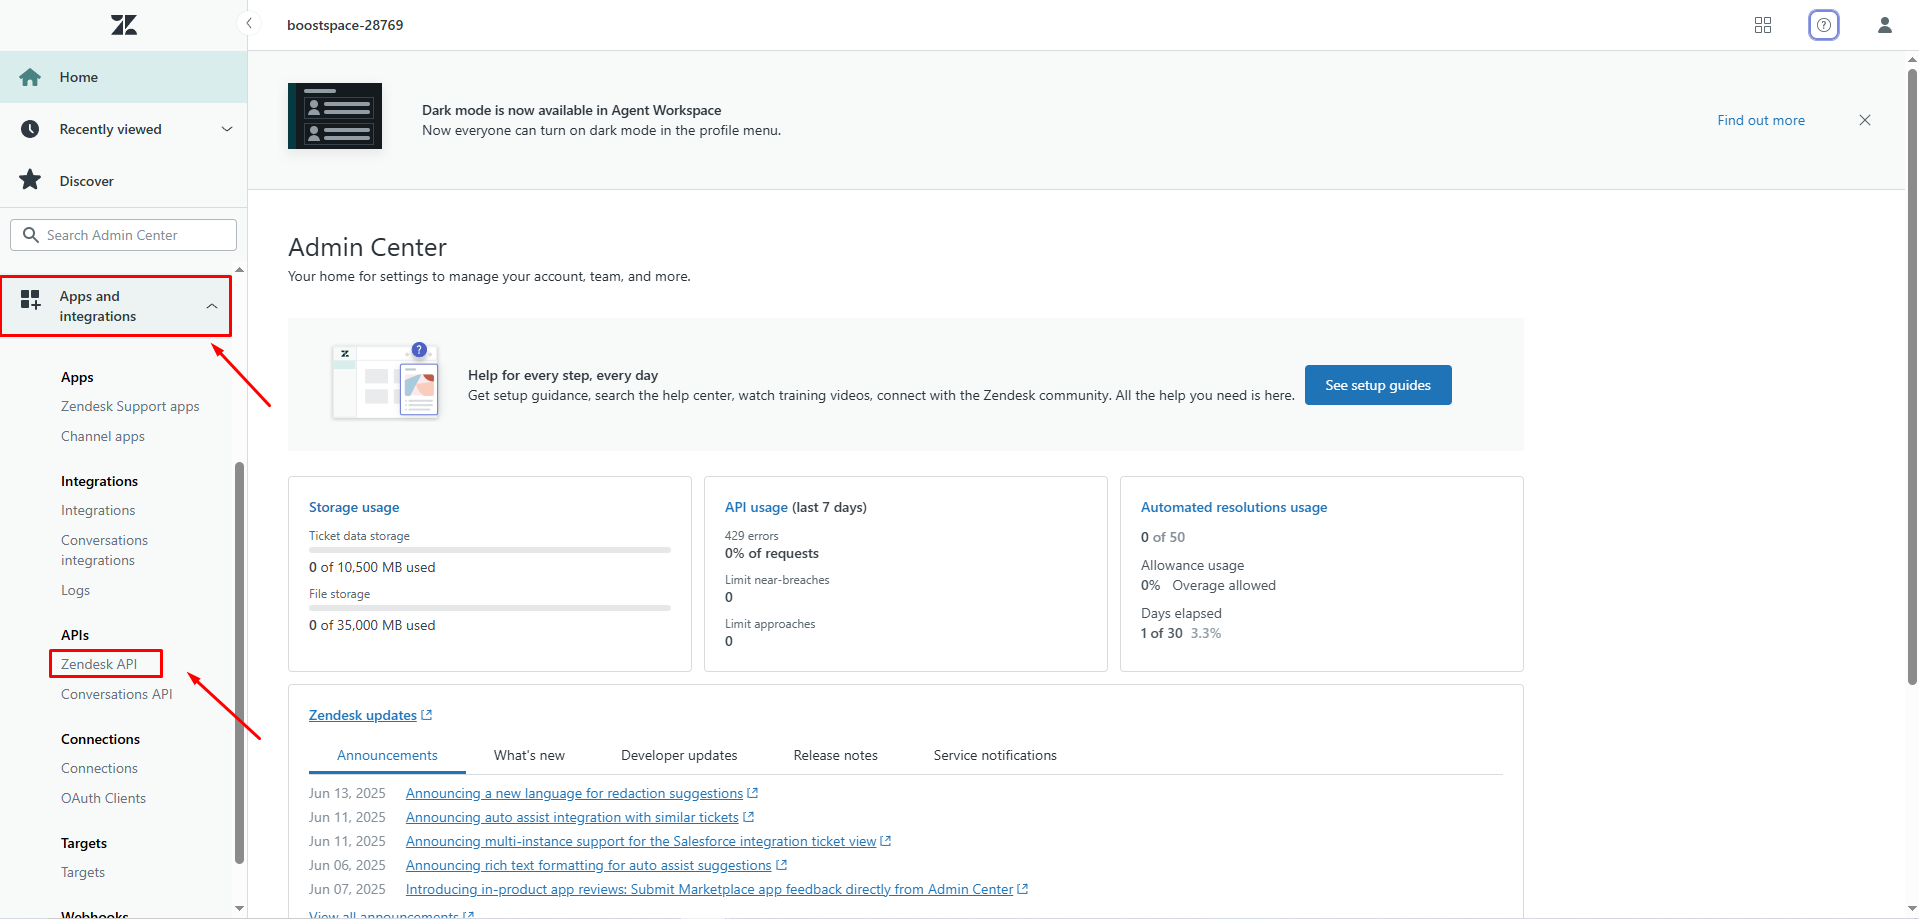
3. In the left navigation menu, click Apps and integrations > APIs > Zendesk API.
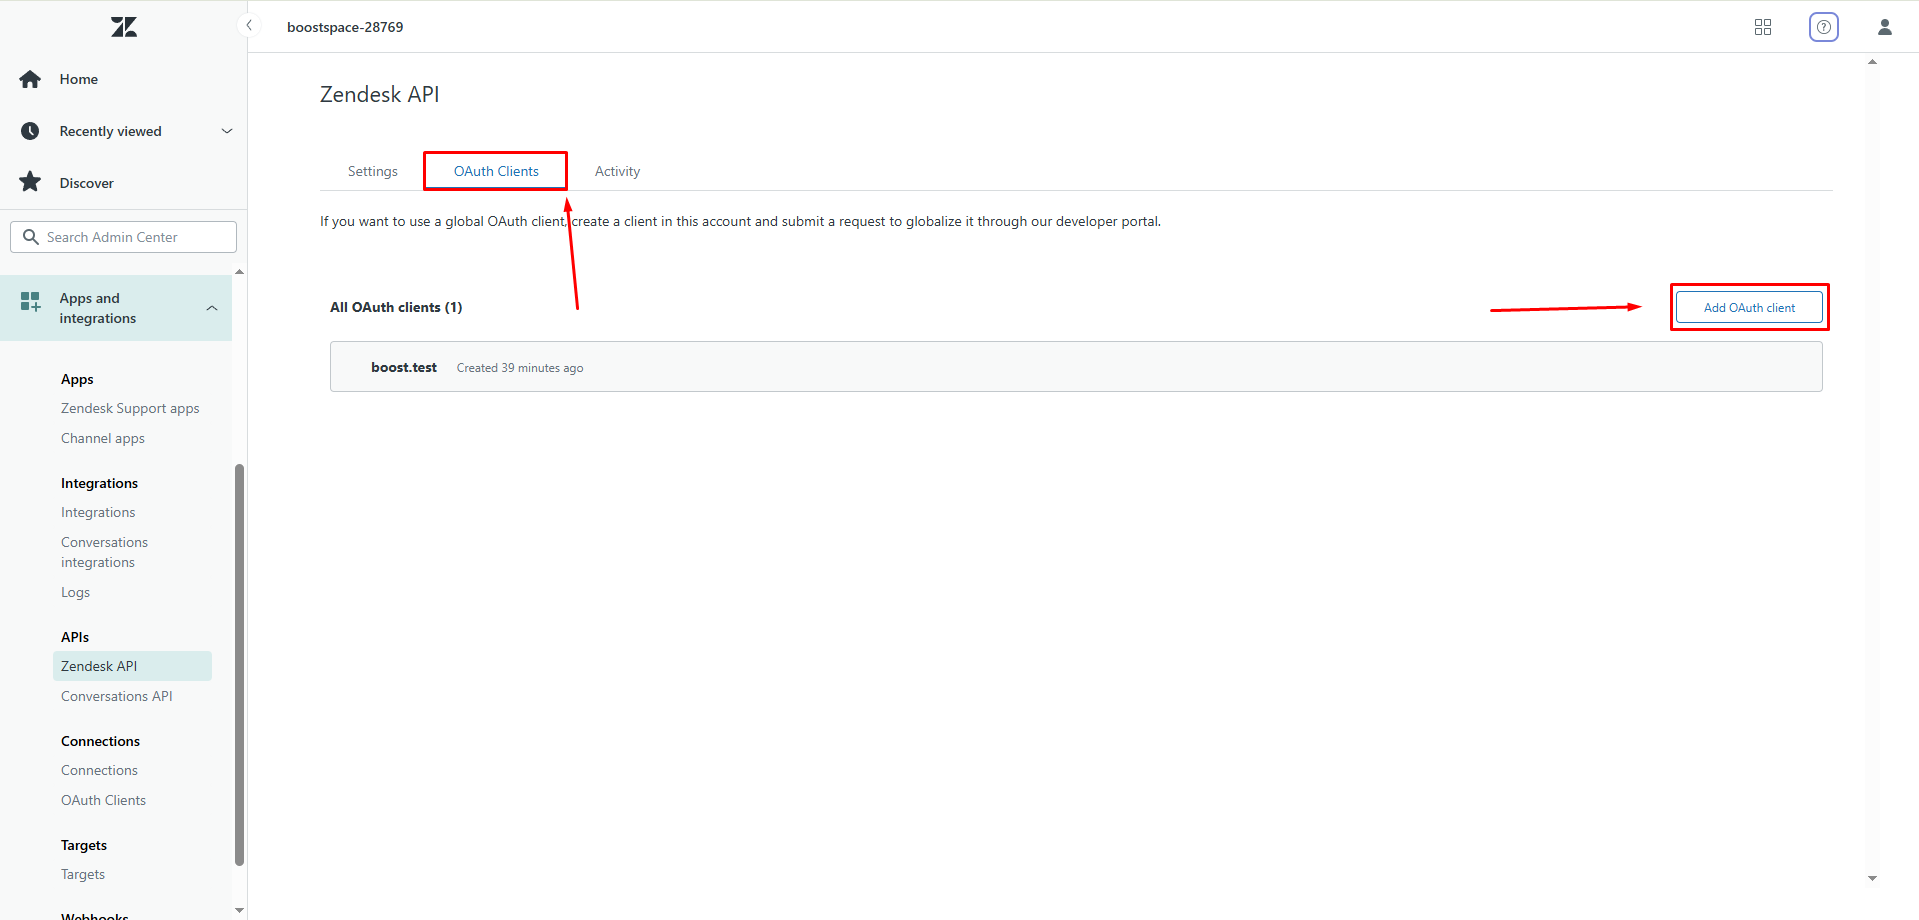
4. Go to OAuth Clients and click Add OAuth Clients.
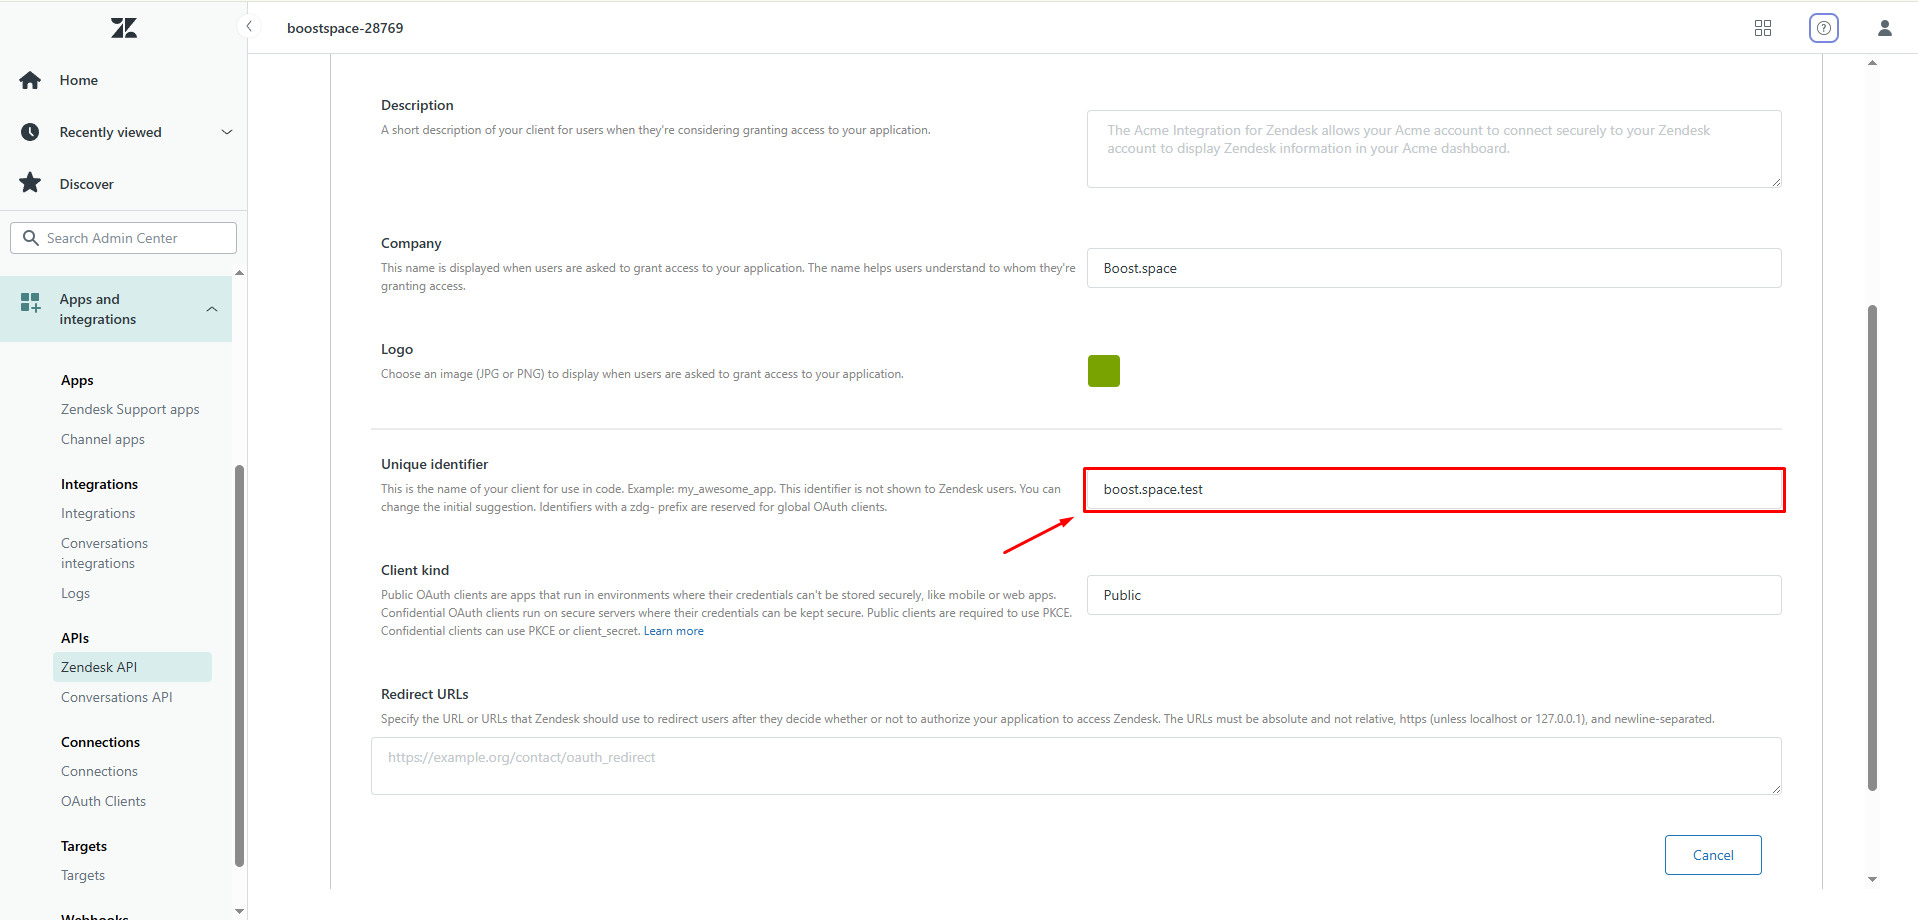
5. For Client name, enter a name. For example, we used Boost.space.test.
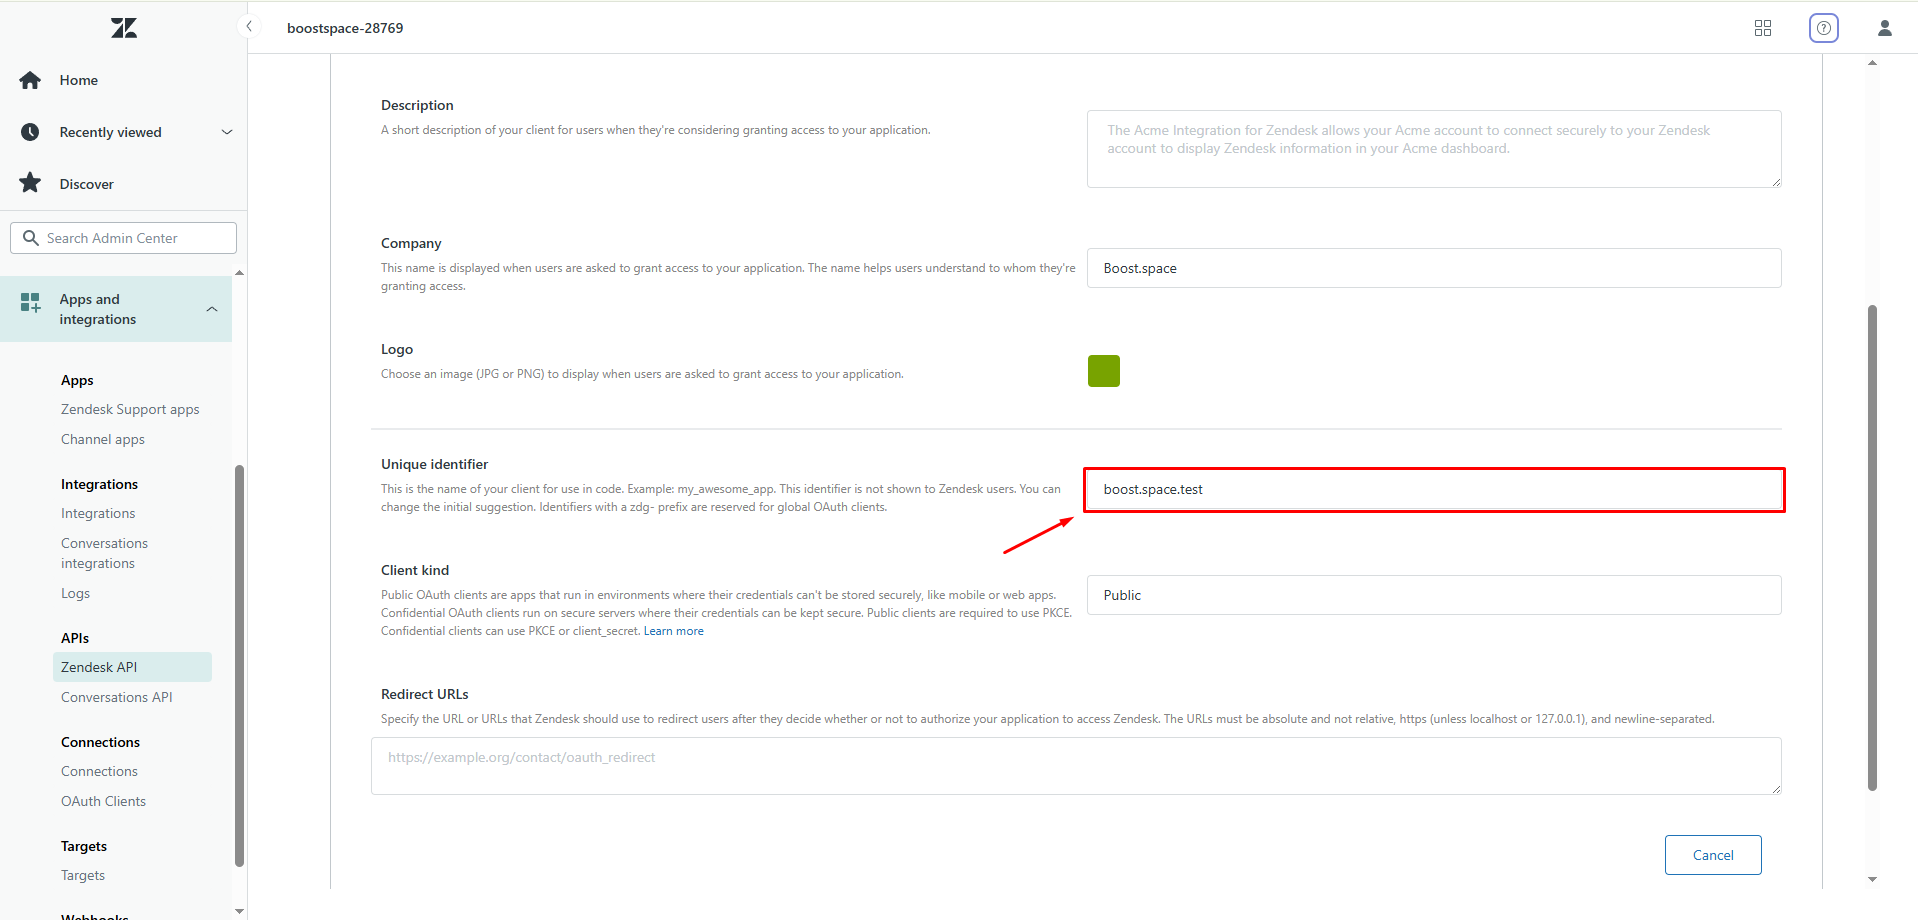
6. For Unique identifier, you can use the default suggestion or you can change it. Copy the Unique Identifier value and store it in a safe place.
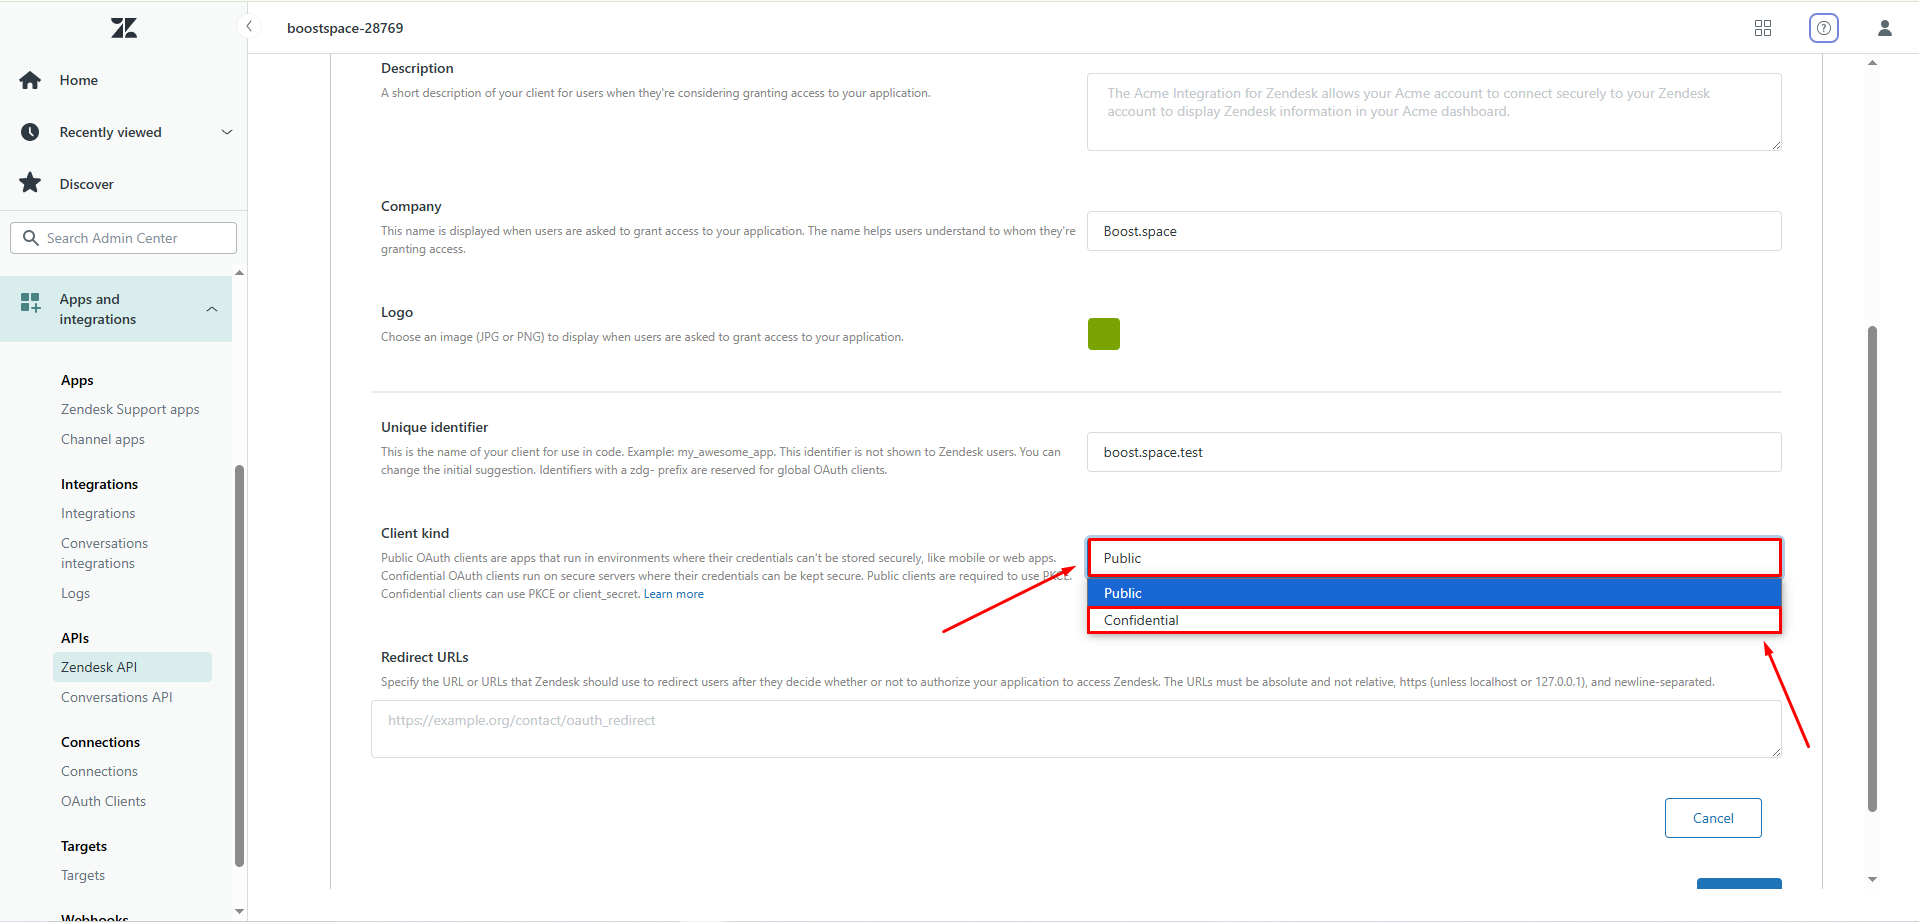
7. For Client Kind, select Confidential.
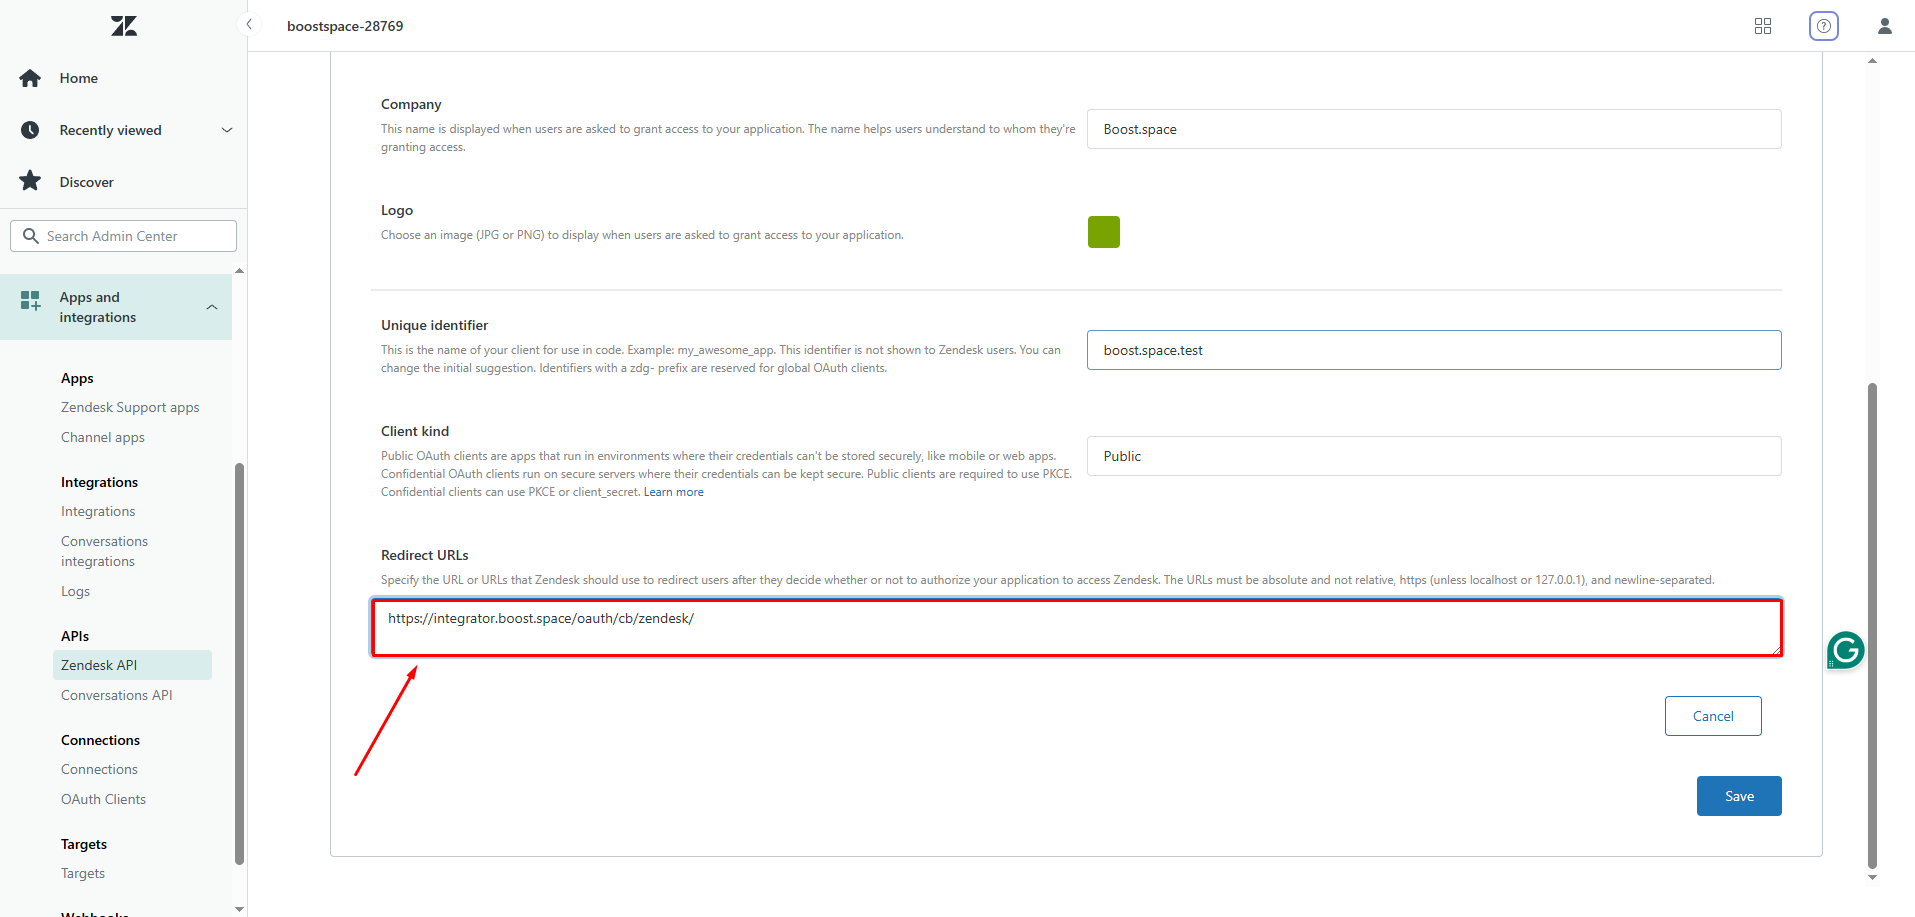
8. For Redirect URLs, enter the following: https://integrator.boost.space/oauth/cb/zendesk/
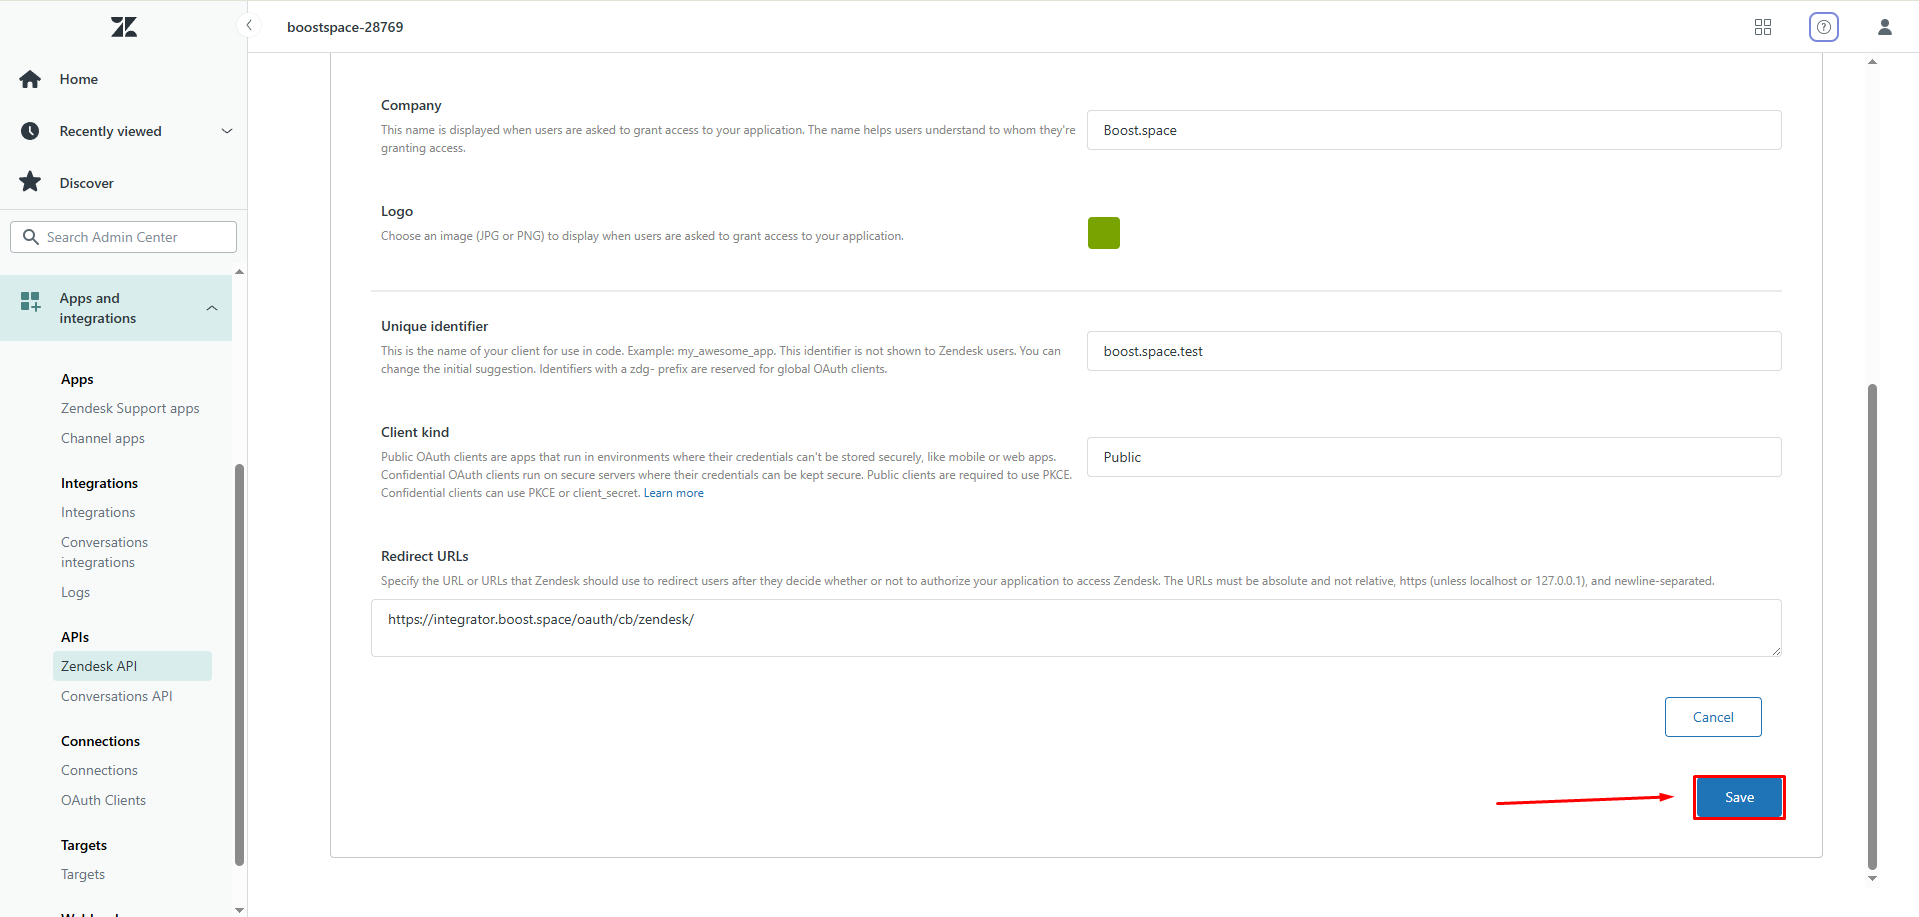
9. Click Save.
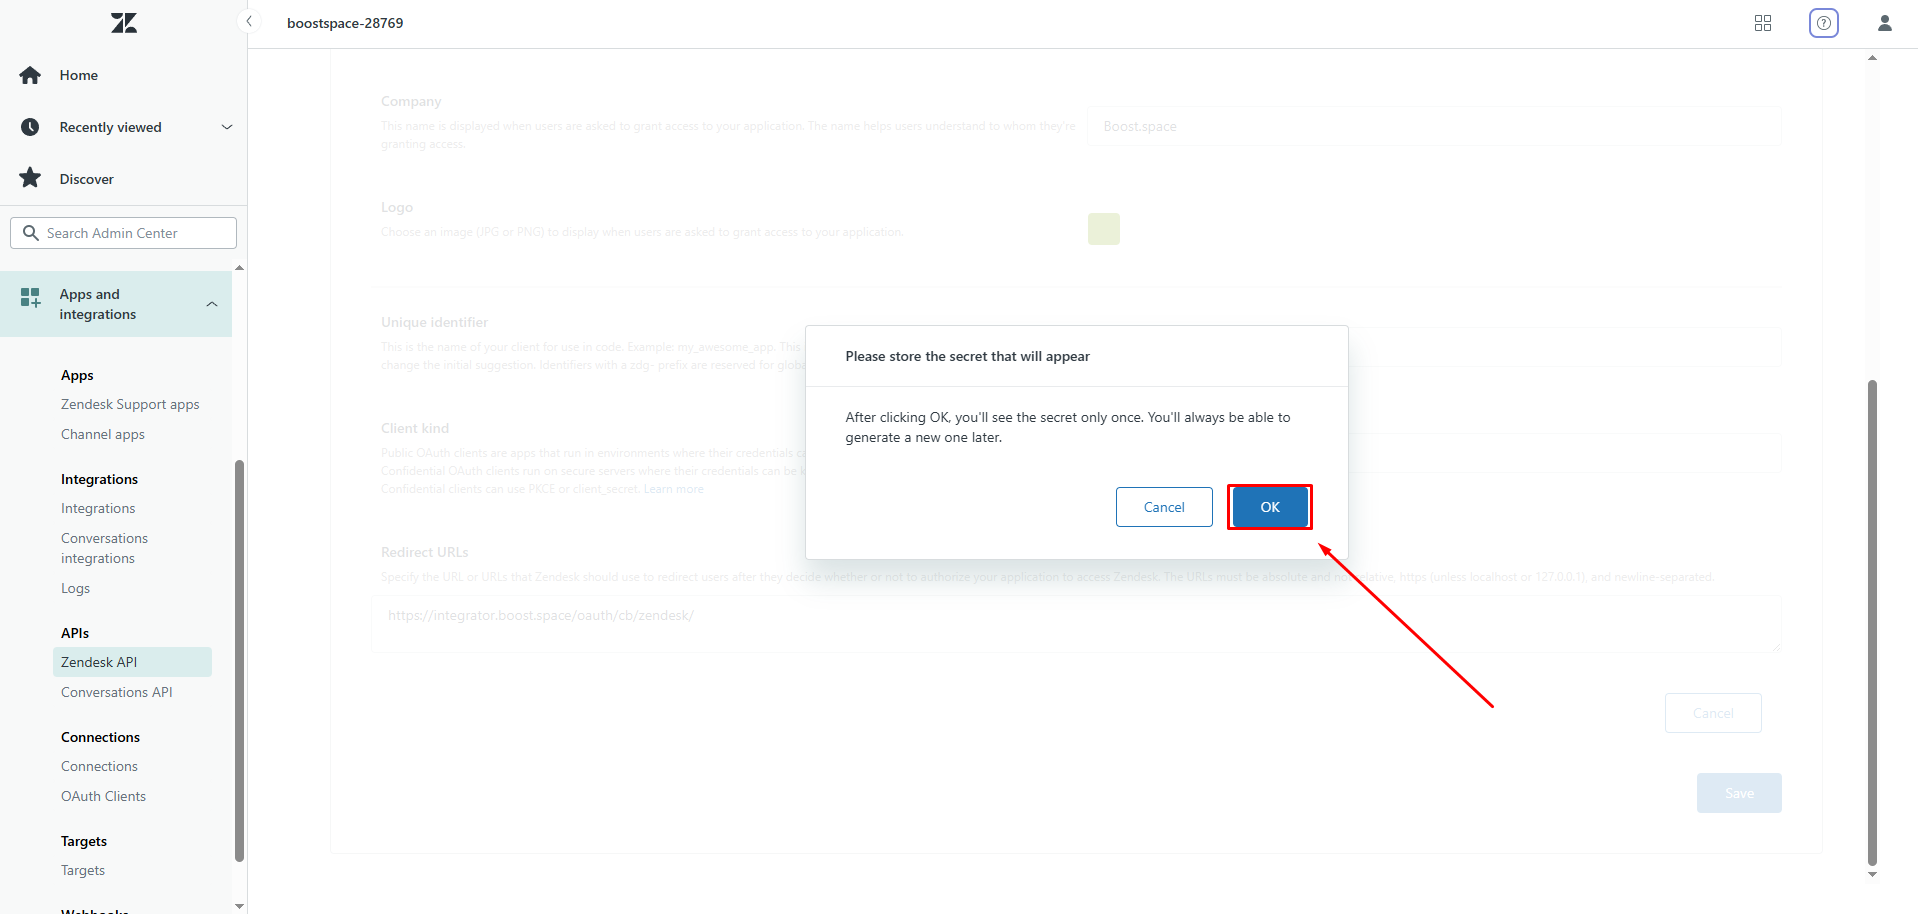
10. A dialog box will open, advising you that the Secret value will only be shown once. Click OK.
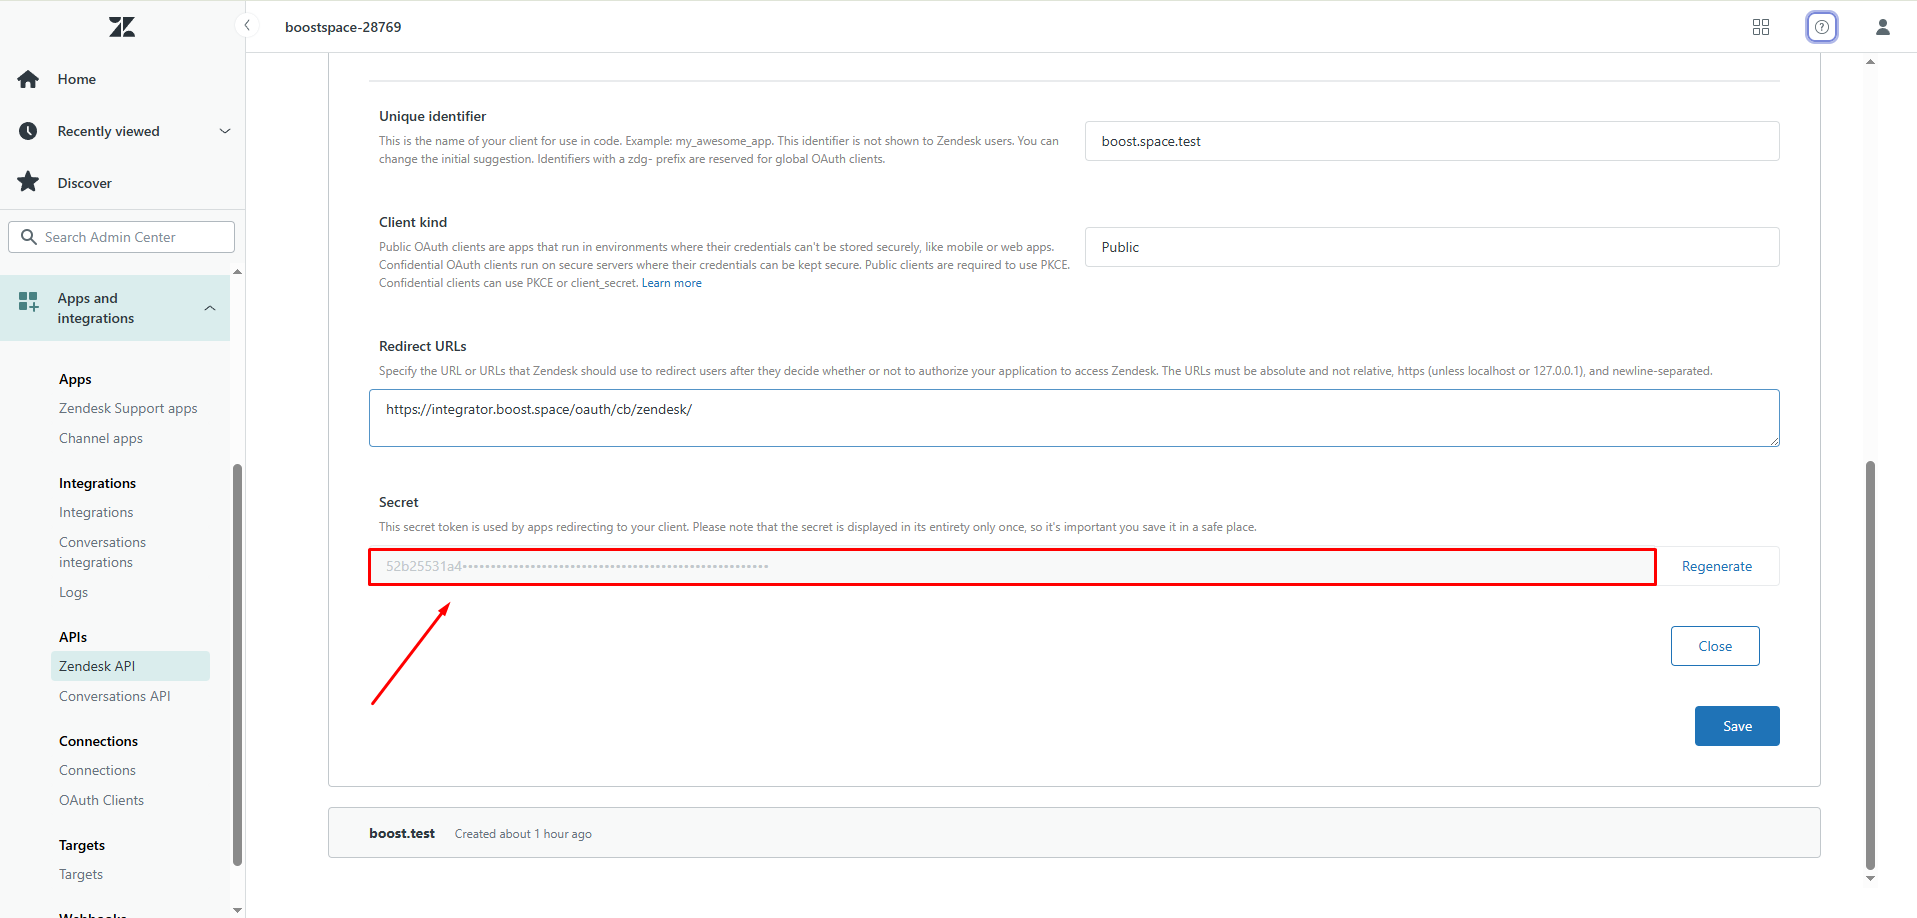
11. Copy the Secret value and store it in a safe place.
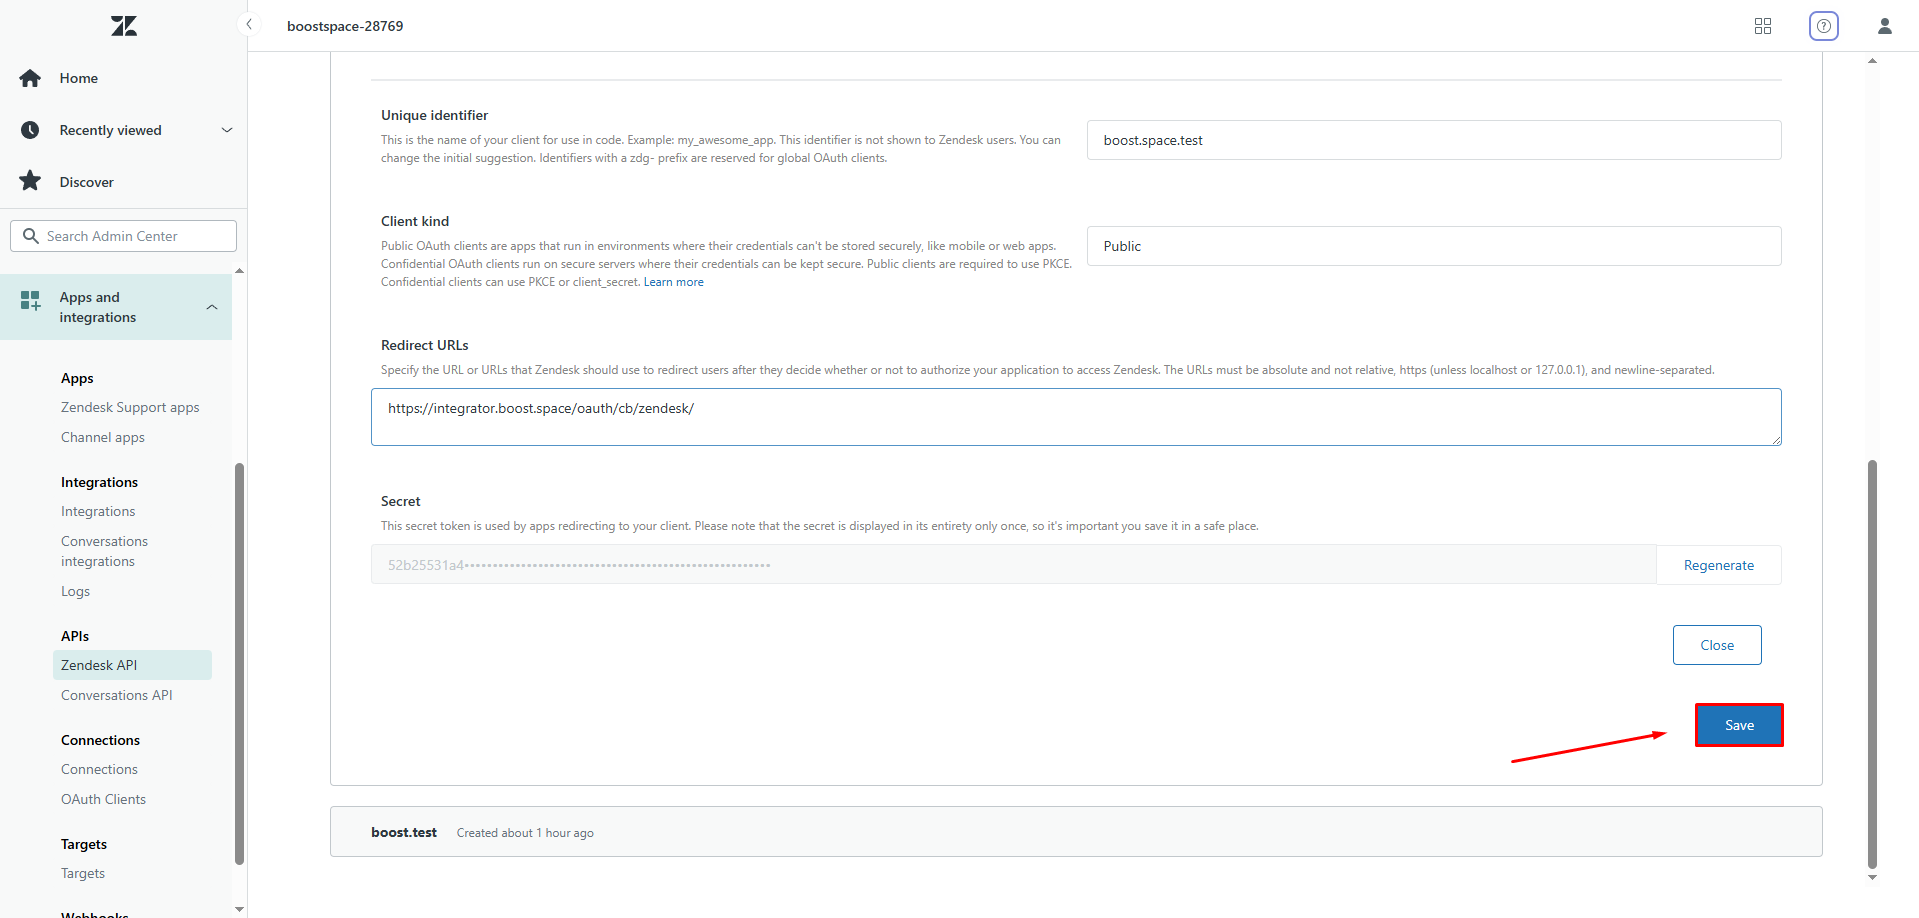
12. Click Save.
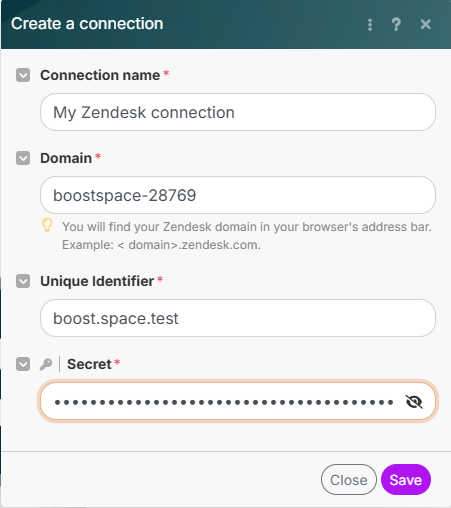
You will use these values in the Unique Identifier and Secret fields in Boost.space Integrator.
13. Open the Boost.space Integrator module and enter the Domain, Unique Identifier, and Secret values into the Create a connection dialog. Create a connection by clicking the Continue button.
Retrieves article information when an article is created or updated.
| Connection | Establish a connection to your Zendesk account. |
| Section | Select the section you want to watch for changes. |
| Locale | Select which article language you want to watch. |
| Trigger by | Select whether you want to watch for new articles or changes in existing articles. |
| Limit | Set the maximum number of results in one scenario run. |
Moves the selected article to the Archived articles.
Zendesk may need you to extend the access rights. Click the Allow button.
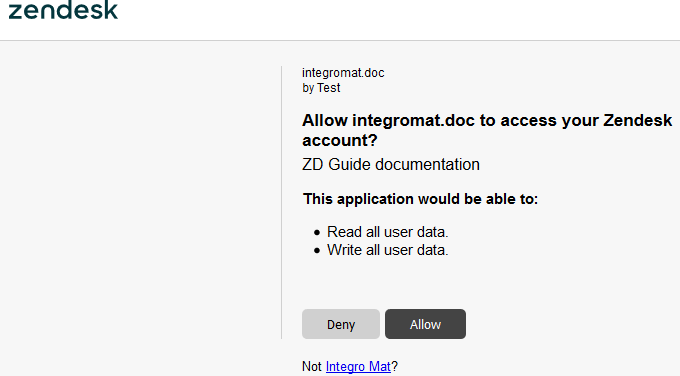
| Connection | Establish a connection to your Zendesk account. |
| Article ID | Enter the ID of the article you want to archive. |
| Connection | Establish a connection to your Zendesk account. |
| Section | Select the section you want to create the article in. |
| Locale | Select which article language you want to set. |
| Title | Enter the article title. |
| Body | Enter the article content. |
| Connection | Establish a connection to your Zendesk account. |
| Article ID | Enter the Article ID. |
| Inline | If checked, the attached file is shown in the dedicated admin UI for inline attachments and its URL can be referenced in the HTML body of the article. If not checked, the attachment is listed in the list of attachments. |
| Source file | Set the file you want to attach to the selected article. You can map it from another module, e.g. Dropbox> Get a file. More information about working with files. |
| Connection | Establish a connection to your Zendesk account. |
| Attachment ID | Enter the Attachment ID. It can be retrieved by the List Article Attachments module. |
| Connection | Establish a connection to your Zendesk account. |
| Article ID | Enter the ID of the article you want to retrieve information about. |
| Locale | Select the article locale from the drop-down menu. |
Updates a translation article.
![[Note]](https://docs.boost.space/wp-content/themes/bsdocs/docs-parser/HTML/css/image/note.png) |
Note |
|---|---|
| The translation must already exist. This module does not create a new one! |
| Connection | Establish a connection to your Zendesk account. |
| Article ID | Enter the ID of the article you want to retrieve information about. |
| Locale | Select the translation article locale from the drop-down menu. |
| Title | Enter the title update for the selected translation. |
| Body | Enter the article content update for the selected translation. |
Deletes an article vote.
| Connection | Establish a connection to your Zendesk account. |
| Vote ID | Enter the Vote ID. It can be retrieved by the List Article Votes module. |
| Connection | Establish a connection to your Zendesk account. |
| Article ID | Enter the ID of the article you want to get a list of attachments. |
| Locale | Select the article locale from the drop-down menu. |
| Connection | Establish a connection to your Zendesk account. |
| Section | Select which section you want to get the list of articles from. |
| Locale | Select the locale of the retrieved articles. |
| Limit | Enter the limit for the number of articles in the list. |
Lists all votes cast for a specified article.
| Connection | Establish a connection to your Zendesk account. |
| Article ID | Enter (map) the article you want to get votes from. |
| Locale | Select the locale of the article whose votes you want to retrieve. |