Table of Contents
This is a step-by-step guide on calling Google APIs like:
- Google Drive API
- Google Tag Manager API
- Google Docs API
- Google Ads API Beta
- Google My Business API
- Google Cloud Pub/Sub API
- Google Search Console API
- G Suite Groups Settings API
- G Suite Directory API
- BigQuery API
- Google Cloud Natural Language API
- G Suite Reseller API
- Google Sites
- Google Apps Script
- Gmail API
- and many more
For more information on required APIs, scopes, redirect URIs, and connectionUnique, active service acces point to a network. There are different types of connections (API key, Oauth…). details, please see our documentation for the Google app that you are using.
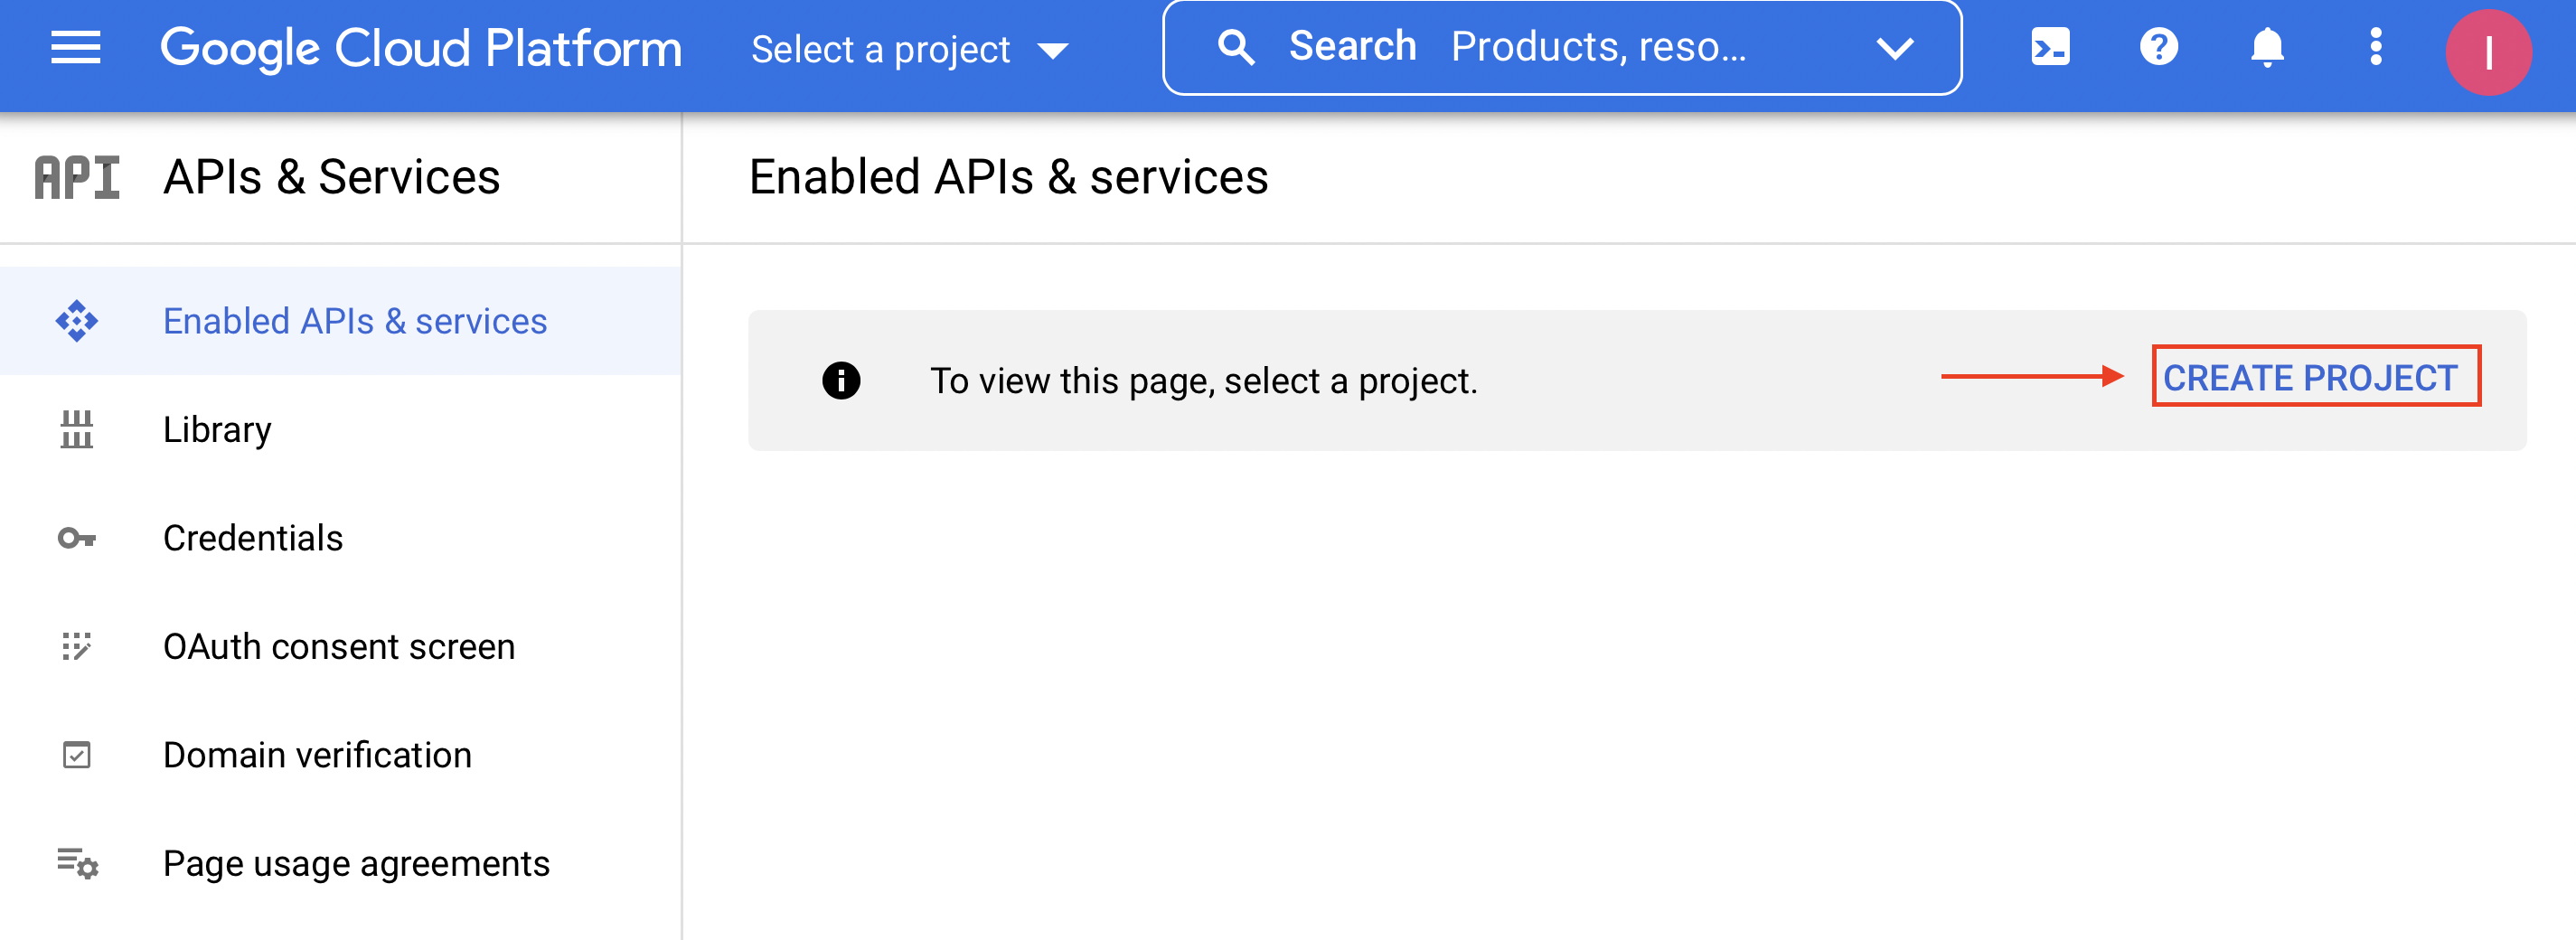
- Open the Google Cloud Platform APIs & Services dashboard and login with your Google account.
- Click CREATE to create a project.
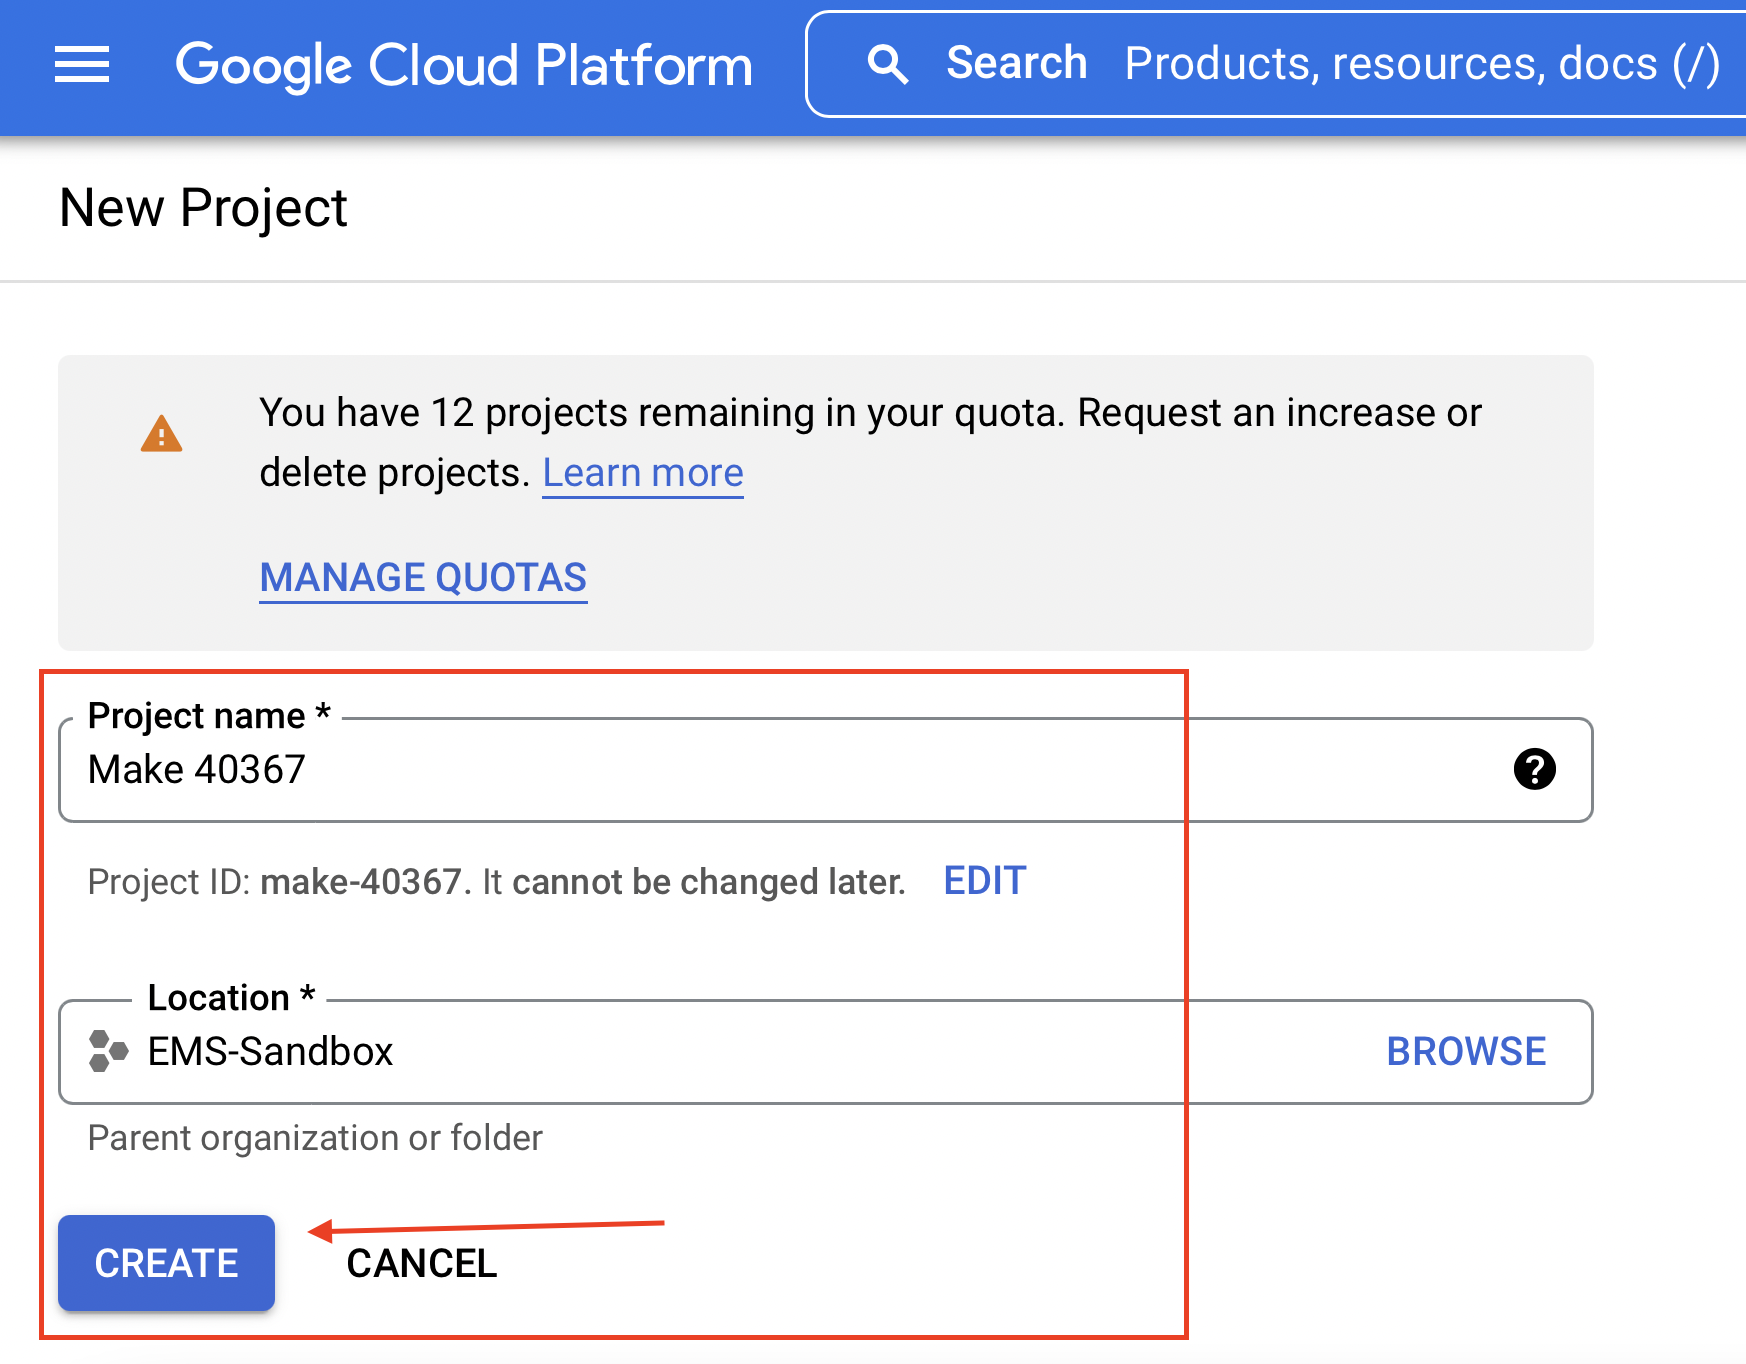
Enter Project name and choose Location. Click CREATE.
- Click ENABLE APIS AND SERVICES.

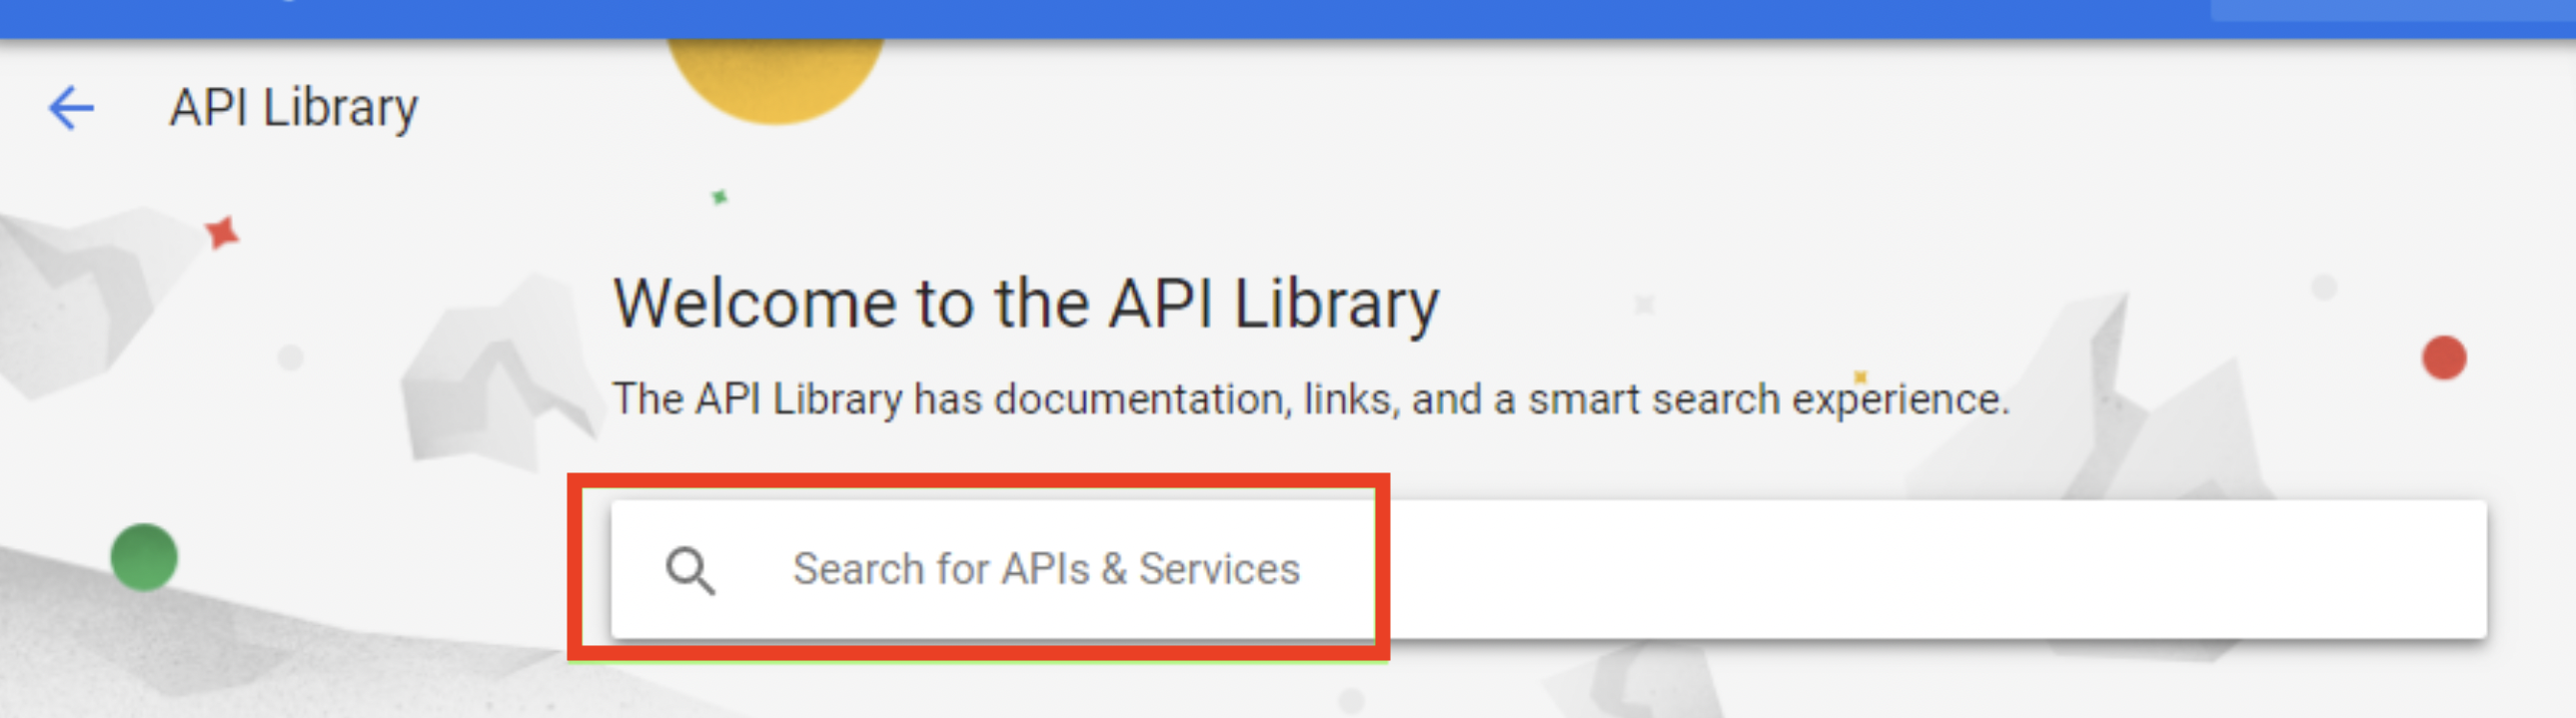
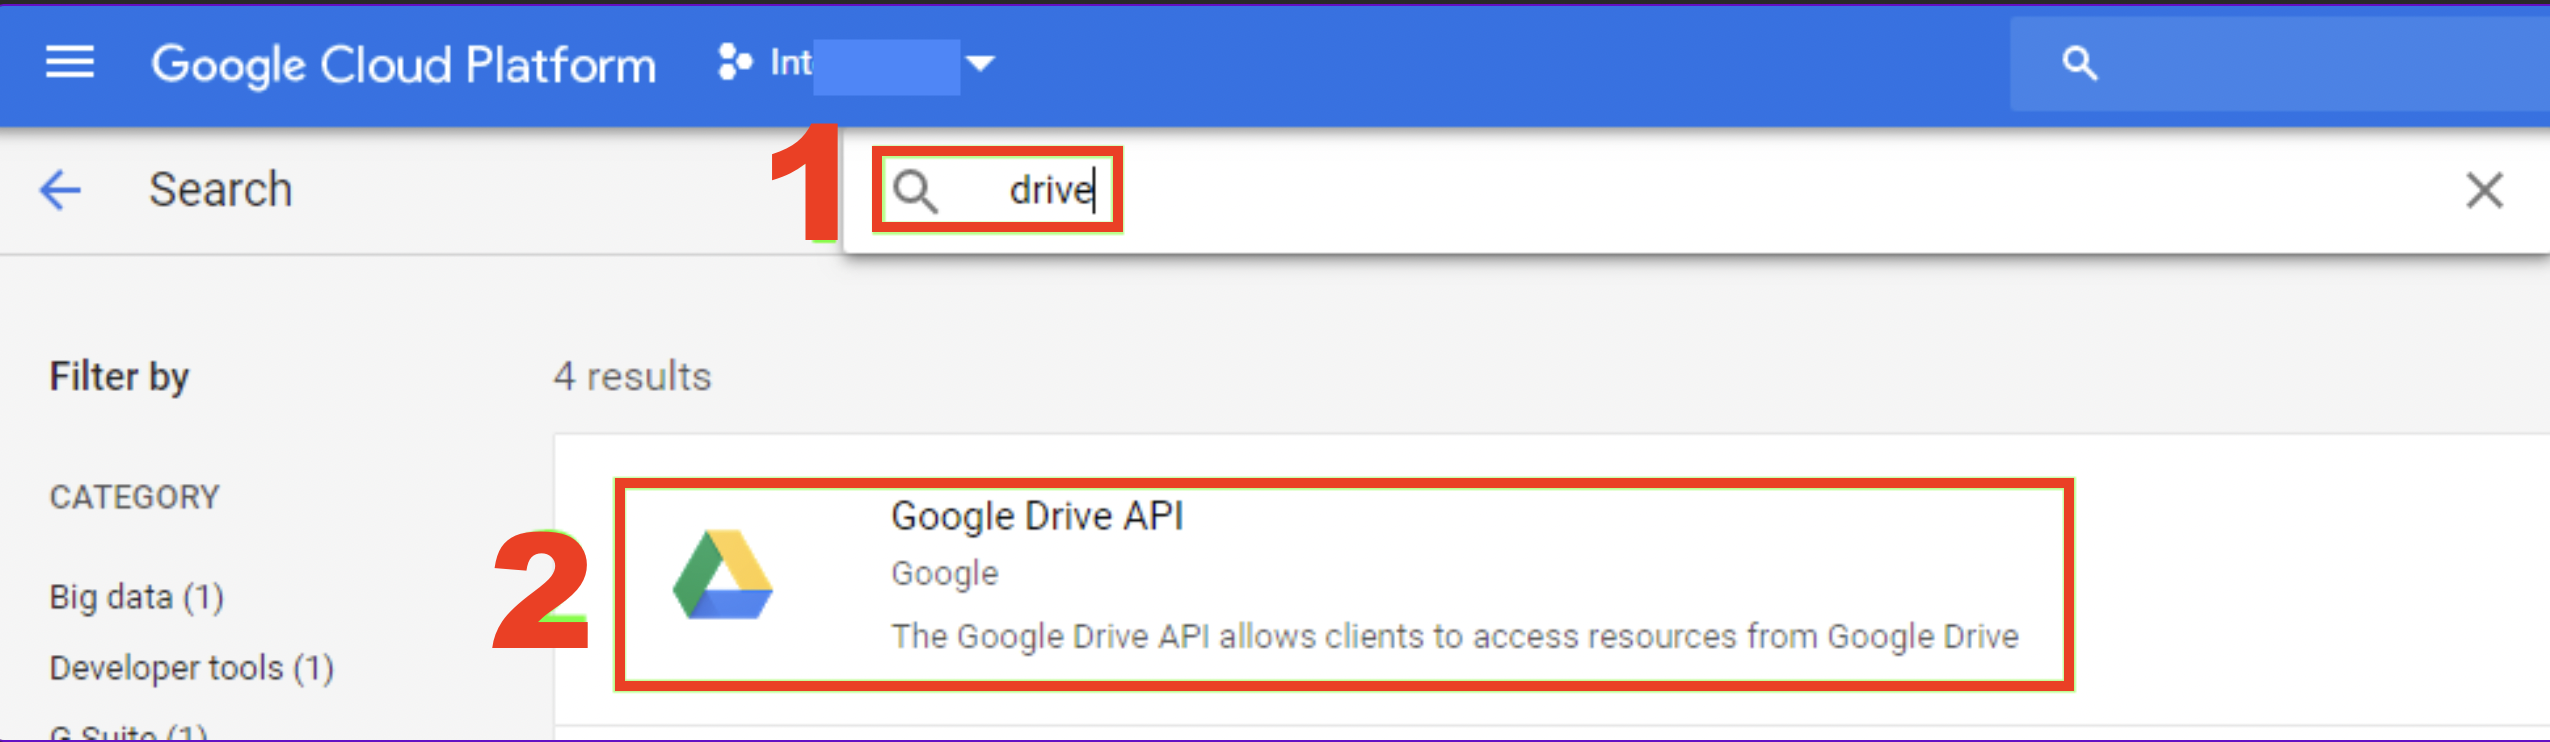
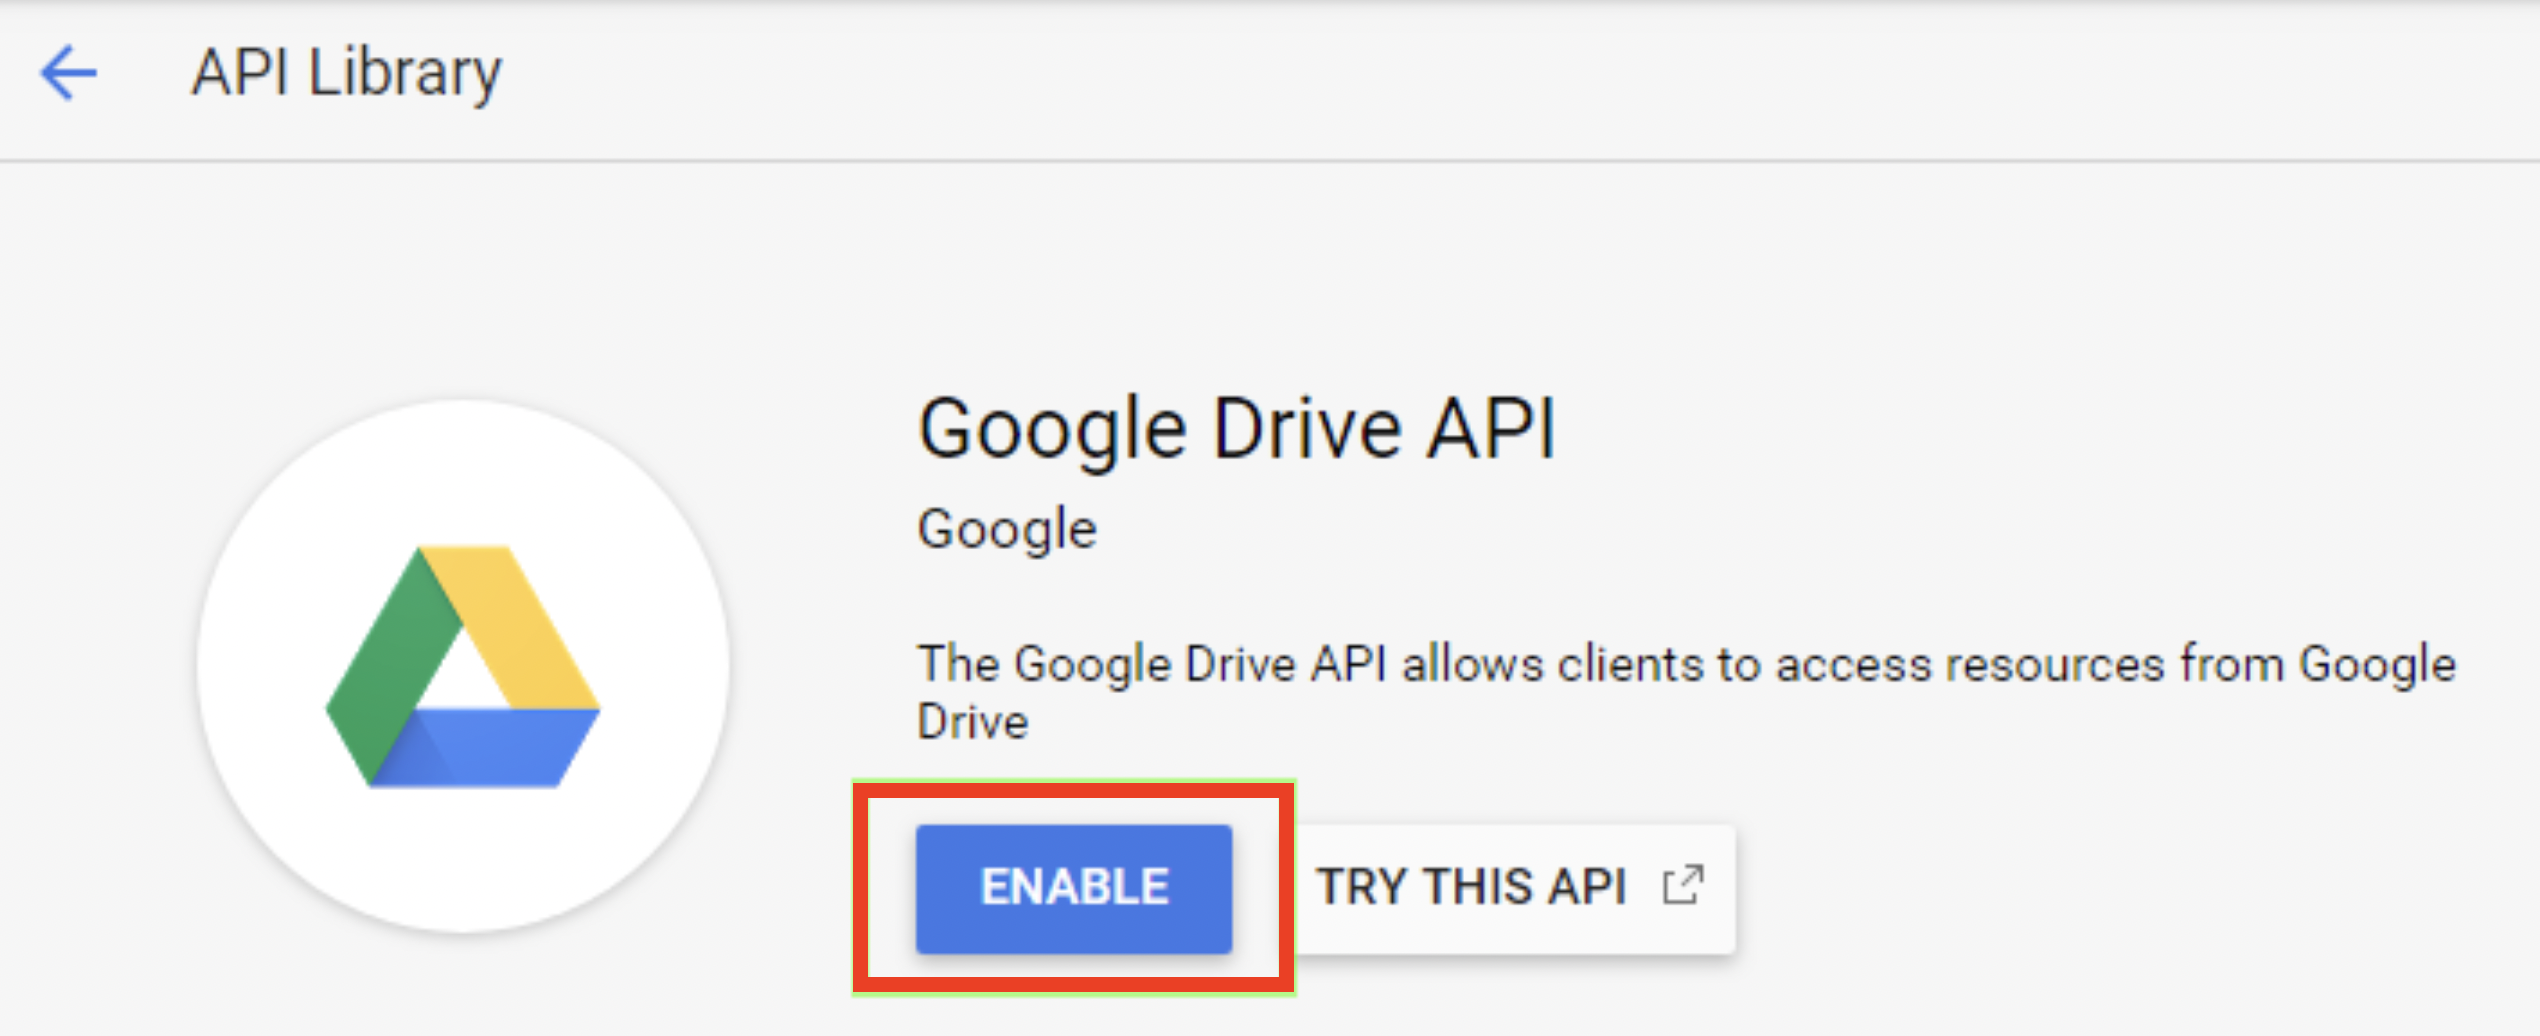
- Type the name of the API you want to call in the Search for API & Services field and click on it.
- Click ENABLE to enable the API.
- Open the Google Cloud Platform APIs & Services Credentials OAuth consent screen tab.
- Fill out the form as follows and click Save to save the settings:
Application name e.g. Boost.spaceA platform that centralizes and synchronizes company data from internal and external sources, offering a suite of modules and addons for project management, CRM, data visualization, and more. Has many features to optimize your workflow! IntegratorPart of the Boost.space system, where you can create your connections and automate your processes.Authorized domains Make.com Integromat.com
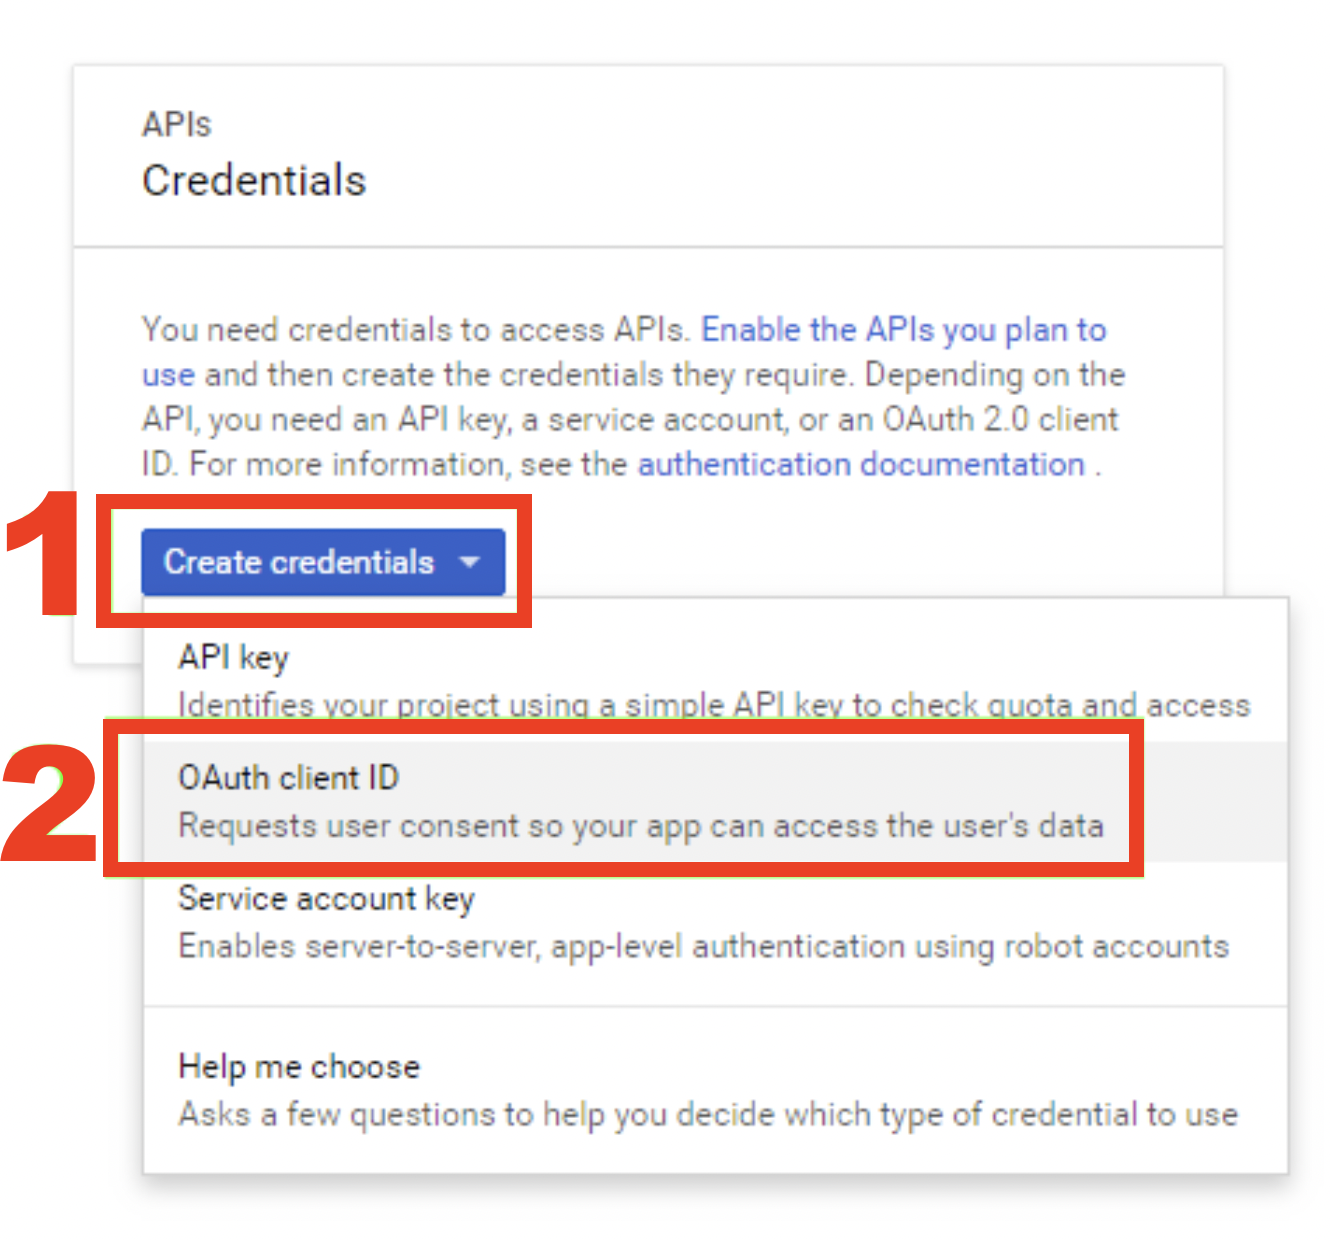
- Open the Google Cloud Platform APIs & Services Credentials.
- Click Create credentials dropdown and choose the OAuth client ID option from the menu.
- Fill out the form as below and click Create to create the app:
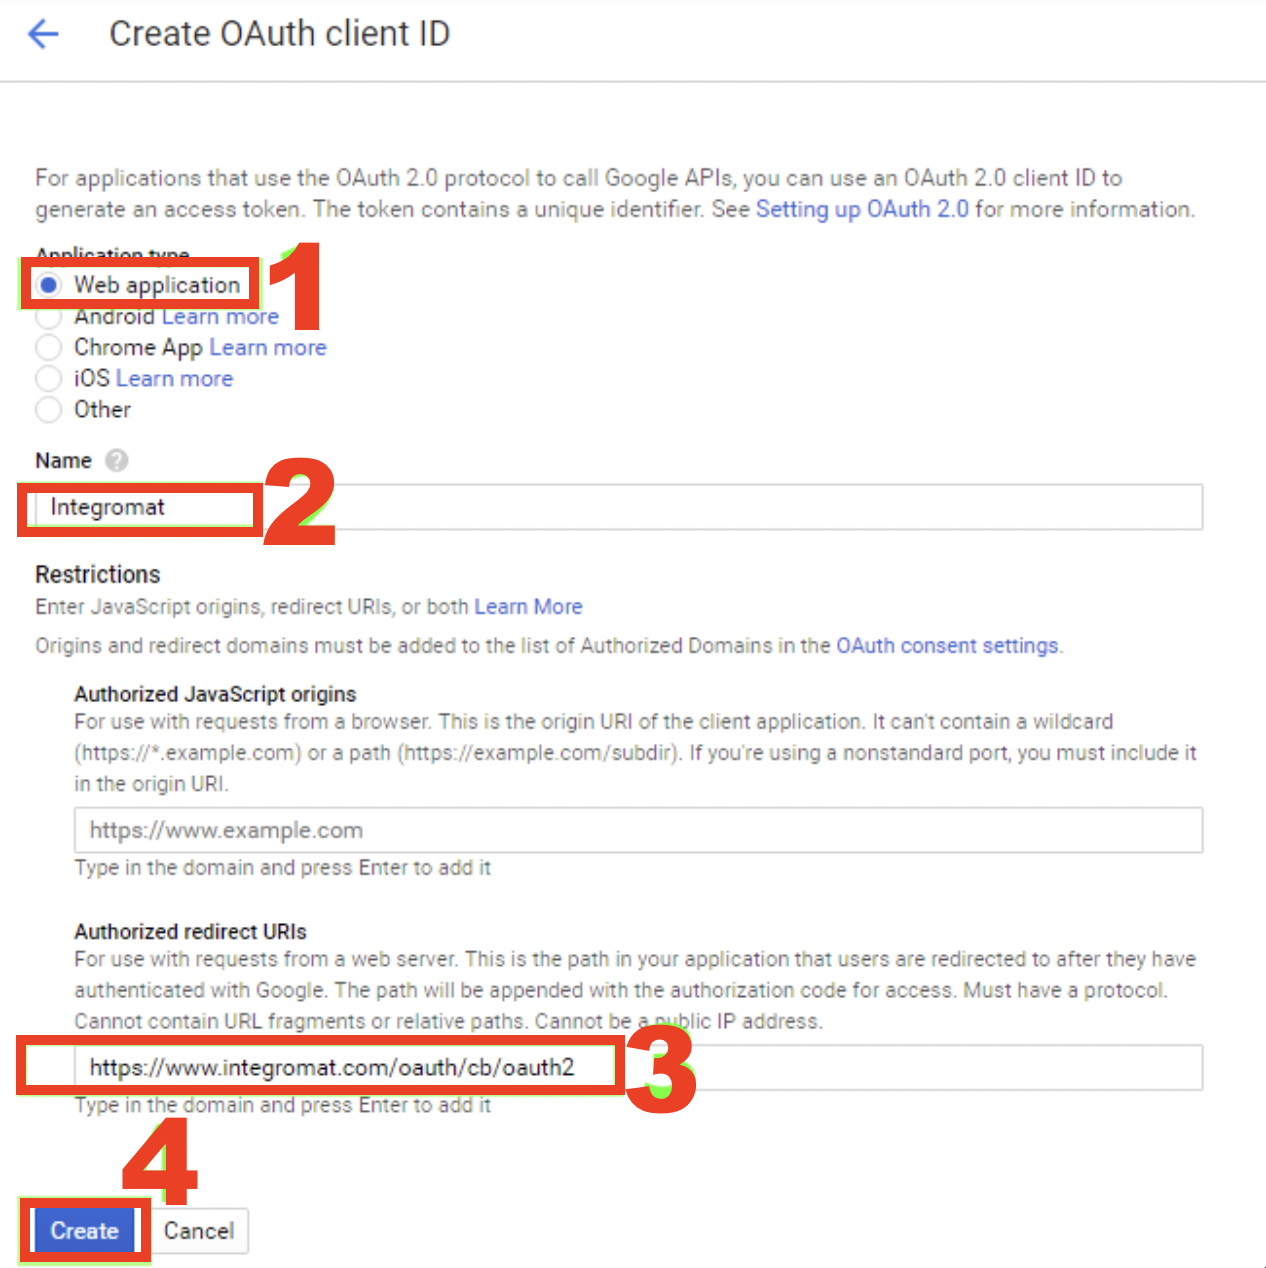
- A dialog containing app’s Client ID and Client Secret pops up.
- In Boost.space Integrator, create a new scenarioA specific connection between applications in which data can be transferred. Two types of scenarios: active/inactive..
- Insert the HTTP > Make an OAuth 2.0 request modulea module is an application or tool designed to handle specific business functions, such as CRM, project management, or inventory. The system's modular architecture allows you to activate only the modules you need, enabling customization and scalability as your business requirements evolve..
- Open the module’s configuration and click Add button next to the Connection field to create a new connection.
- Tick the Show advance settings option.
- Fill the connection setup as follows:
Flow type Authorization CodeAuthorizeURI https://accounts.google.com/o/oauth2/v2/authTokenA secure code used to authenticate and authorize access to API endpoints, enabling users to connect with third-party applications. URI https://www.googleapis.com/oauth2/v4/tokenScope Add all the scopes the API call requires (check also OAuth 2.0 Scopes for Google APIs for a complete list of scopes): - Google Drive API
- Google Tag Manager API
- Google Ads API Beta
- Google My Business API (step 6)
- Google Cloud Pub/Sub API – see CloudPub/Sub reference for per-method OAuth scopes (e.g. Method: projects.topics.publish)
- Google Search Console API
- G Suite Groups Settings API
- G Suite Directory API
- BigQuery API
- Google Cloud Natural Language API
- G Suite Reseller API
- Google Sites
- Google Apps Script
- Gmail API
Scope separator SPACEClient ID The content of the Here is your client ID field from step 11. Client Secret The content of the Here is your client secret field from step 11. Authorize parameters Add access_type–offlinekey-value pair: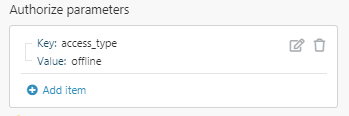
- The connection setup should look like this:

- Click Continue.
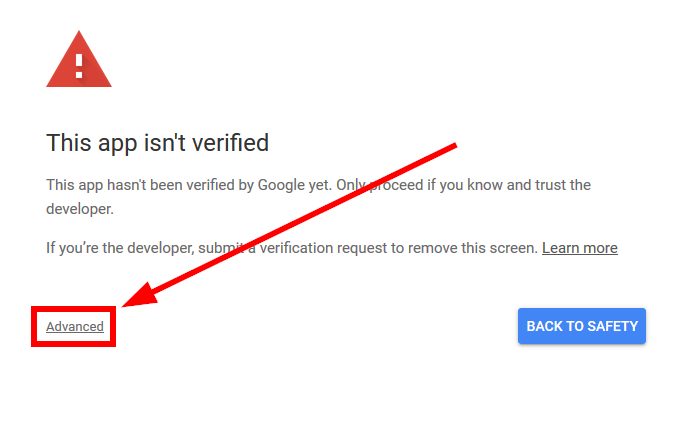
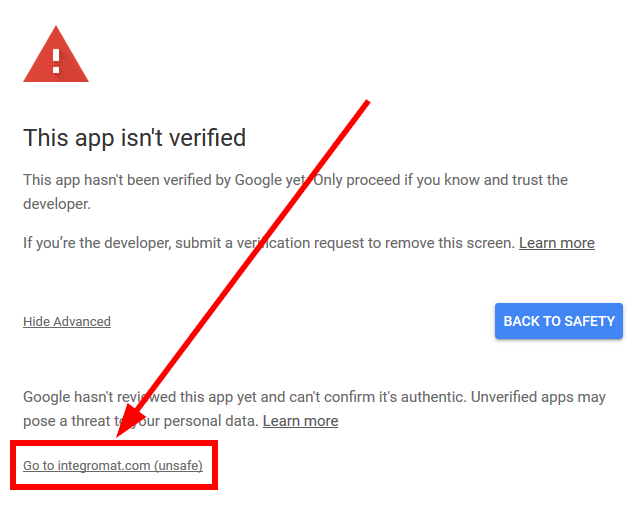
- If a popup titled “This app isn’t verified” appears, click on the “Advanced” link and then on the “Go to Boost.space Integrator (unsafe)” link:
- A window pops up. Review the permissions and click Allow.
The connection is successfully created.
- Configure the module to make an API call:
- Google Drive API
- Google Tag Manager API
- Google Docs API
- Google Ads API Beta
- Google My Business API
- Google Cloud Pub/Sub API
- Google Search Console API
- G Suite Groups Settings API
- G Suite Directory API
- BigQuery API
- Google Cloud Natural Language API
- G Suite Reseller API
- Google Sites
- Google Apps Script
- Gmail API
![[Note]](https://docs.boost.space/wp-content/themes/bsdocs/docs-parser/HTML/css/image/note.png)