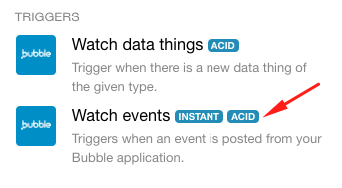
This tutorial covers how to send data from a Bubble workflow by triggering the Watch events modulea module is an application or tool designed to handle specific business functions, such as CRM, project management, or inventory. The system's modular architecture allows you to activate only the modules you need, enabling customization and scalability as your business requirements evolve. in a scenarioA specific connection between applications in which data can be transferred. Two types of scenarios: active/inactive. on Boost.space Integrator. This is what you need when you want to start a Bubble workflow when an action such as clicking a button takes place on a page in your Bubble app.
You may watch the video tutorial or continue reading below:
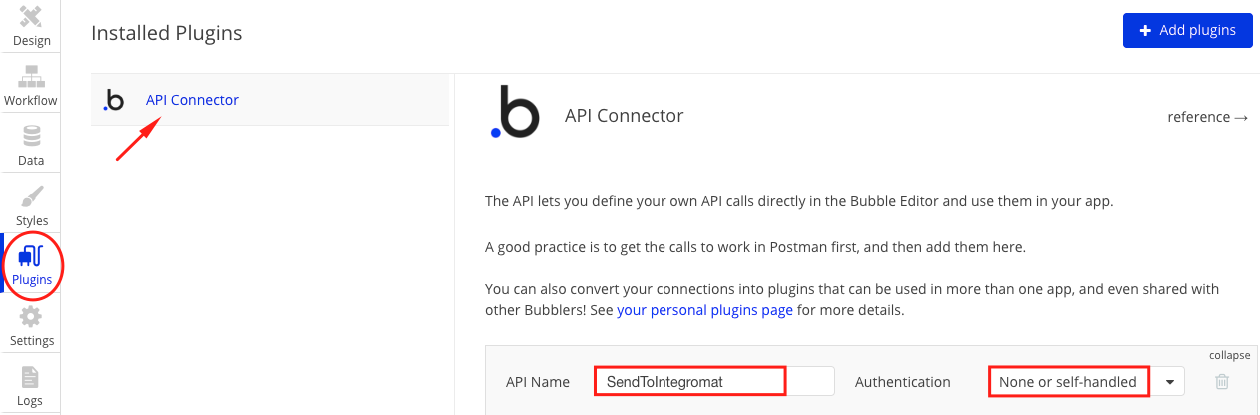
- Install the API Connector plugin in your Bubble application and define an API call to send data to Boost.space Integrator webhookA webhook is a way for an app to send real-time information to a specific URL in response to certain events or triggers..Let’s call this endpoint ‘SendToBoost.space Integrator‘ and under authentication, select None or self-handled as shown below:
Next, add an API call to POST an ACTION to the Webhook URL which will be obtained from Boost.space Integrator in the next step.
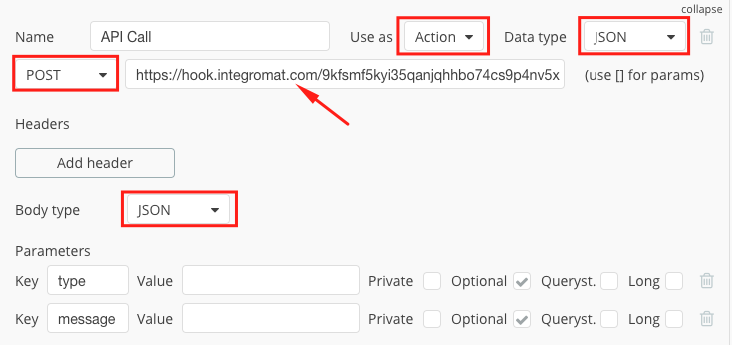
Make sure you add the parameters
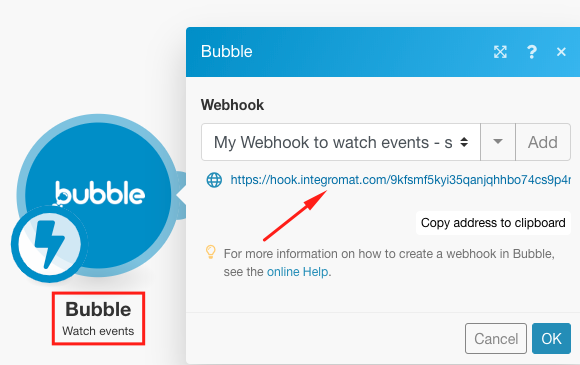
typeandmessageto the call. - Create a scenario with the Watch events module by Bubble as the triggerThe initial event that starts a scenario. It can be an action, a scheduled time, or a custom event, and is essential to define at the beginning of each scenario..Here, add a new webhook, copy the URL and paste it in the API Call plugin shown in the previous step.
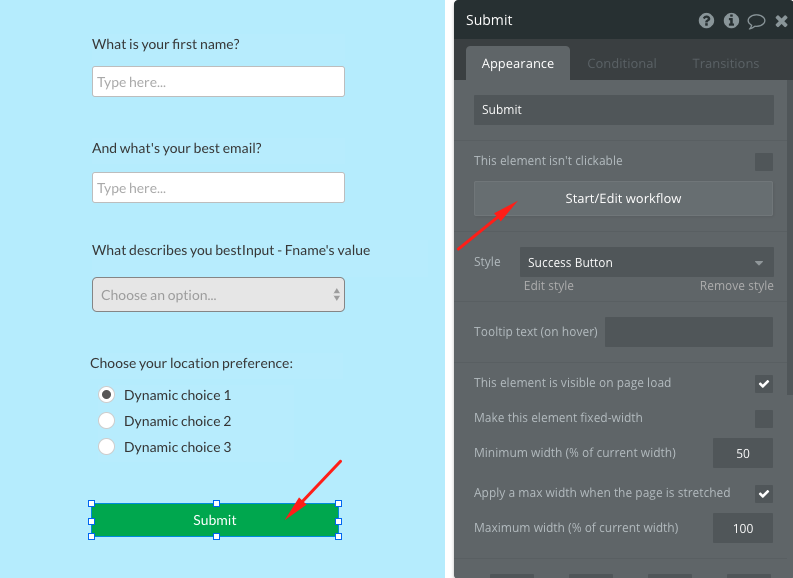
- Create a button to start a workflow on BubbleWe will use the same form used in the Create a Data Thing or a Bulk of Data Things on Bubble. Check it out if you haven’t already.The form looks like the one below and the Submit button starts the workflow:
- Add an action to the workflow which starts when the button is clicked.
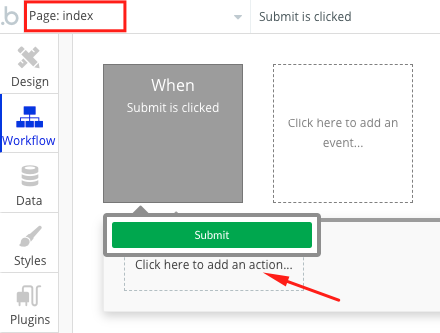
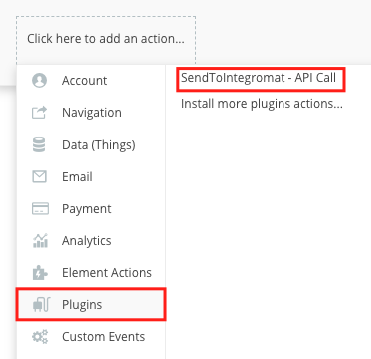
This workflow needs to have an action to make the API Call created in the first step. Since the API Call was used to post an Action, it will be visible under Plugins as shown below:
After selecting the API Call, the body has to be added as a JSON in the message field as shown:
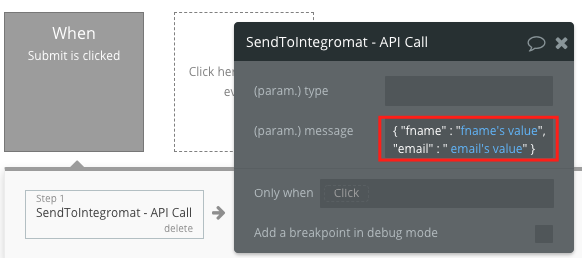
Here, we pass the values of fname and email which refer to the fields on the form. You can add all the required parameters here. The JSON body is as below:
{ "fname" : "fname's value","email" : "email's value"} - Complete the scenario and run it.The final step in this tutorial is to add the rest of the modulesa module is an application or tool designed to handle specific business functions, such as CRM, project management, or inventory. The system's modular architecture allows you to activate only the modules you need, enabling customization and scalability as your business requirements evolve. to your scenario and run it. Since the data is sent as a JSON from the Bubble Workflow, it’s recommended to use a Parse JSON module unless you are using a service that accepts JSON directly.To trigger the scenario, you need to start the Bubble workflow by clicking on the submit button in the preview mode on Bubble.
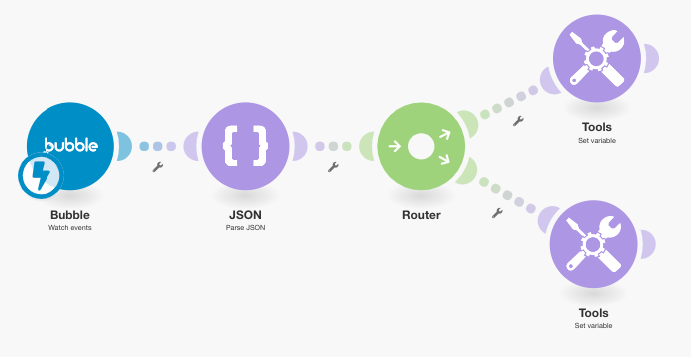
In the scenario above, the JSON is parsed to extract the fname and email elements which are then mapped to two Set variable modules respectively. You can however map the elements directly to one or more modules from the app you wish to send the data to.