| Active with remarks |
|---|
| This application needs additional settings. Please follow the documentation below to create your own connectionUnique, active service acces point to a network. There are different types of connections (API key, Oauth…).. |
The WP WebhooksA webhook is a way for an app to send real-time information to a specific URL in response to certain events or triggers. modulesThe module is an application or tool within the Boost.space system. The entire system is built on this concept of modularity. (module - Contacts) enable you to receive data from other services to, for example, create a userCan use the system on a limited basis based on the rights assigned by the admin. or a post on your WordPress website, as well as it can send data for you for certain actions.
Prerequisites
-
A WP Webhooks plugin installed
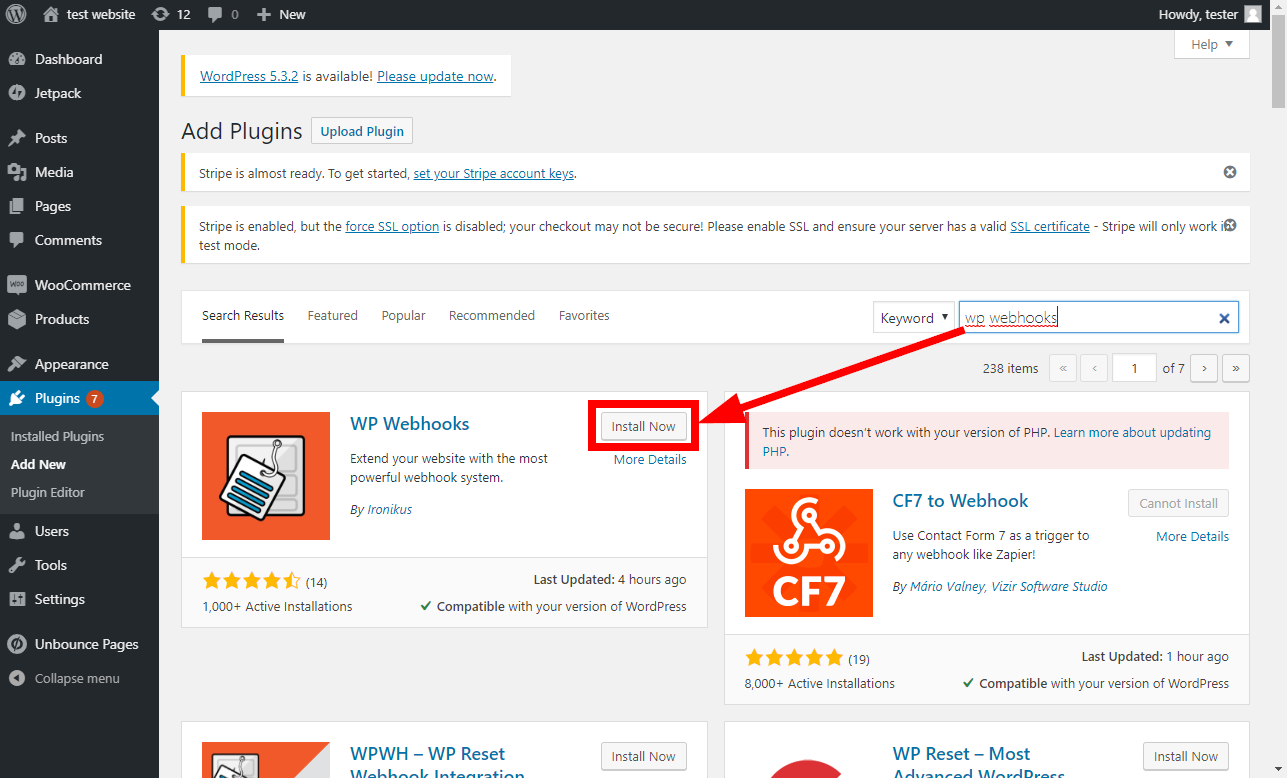
In order to use WP Webhooks with Boost.spaceCentralization and synchronization platform, where you can organize and manage your data. IntegratorPart of the Boost.space system, where you can create your connections and automate your processes., it is necessary to have a WP Webhooks WordPress plugin installed and activated.
![[Note]](https://docs.boost.space/wp-content/themes/bsdocs/docs-parser/HTML/css/image/note.png) |
Note |
|---|---|
|
The moduleThe module is an application or tool within the Boost.space system. The entire system is built on this concept of modularity. (module - Contacts) dialog fields that are displayed in bold (in the Boost.space Integrator scenarioA specific connection between applications in which data can be transferred. Two types of scenarios: active/inactive., not in this documentation article) are mandatory! |
Follow these steps to connect your WP Webhooks to Boost.space Integrator:
-
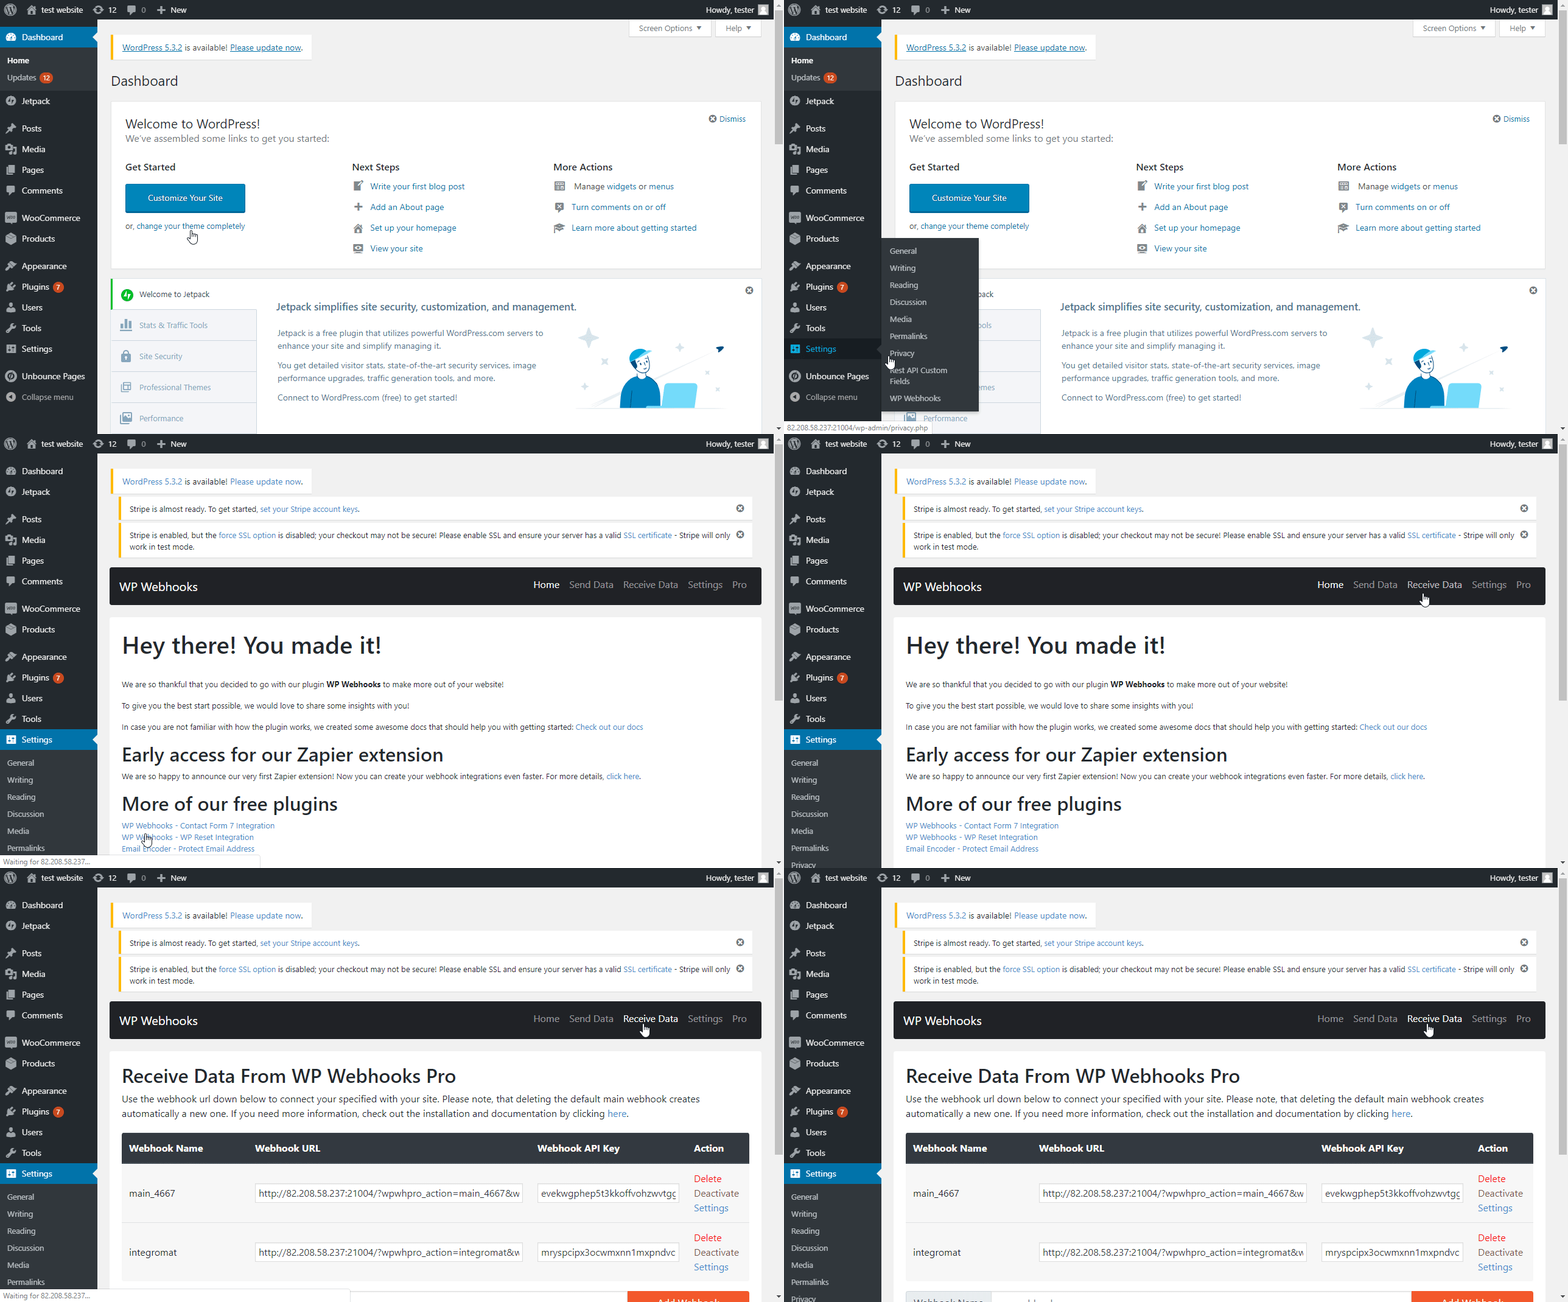
Log in to your WordPress administration.
-
Install and activate the WP Webhooks plugin.
-
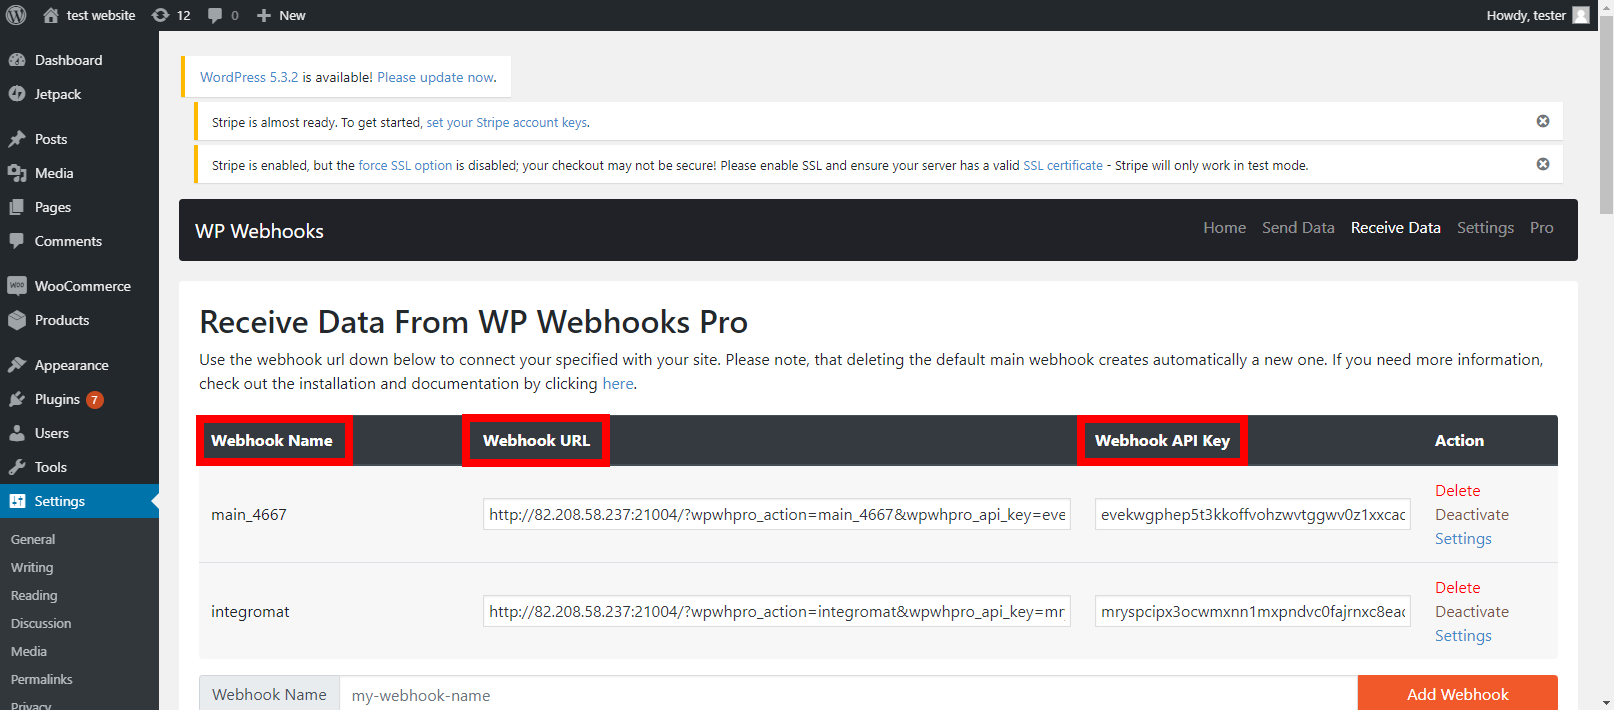
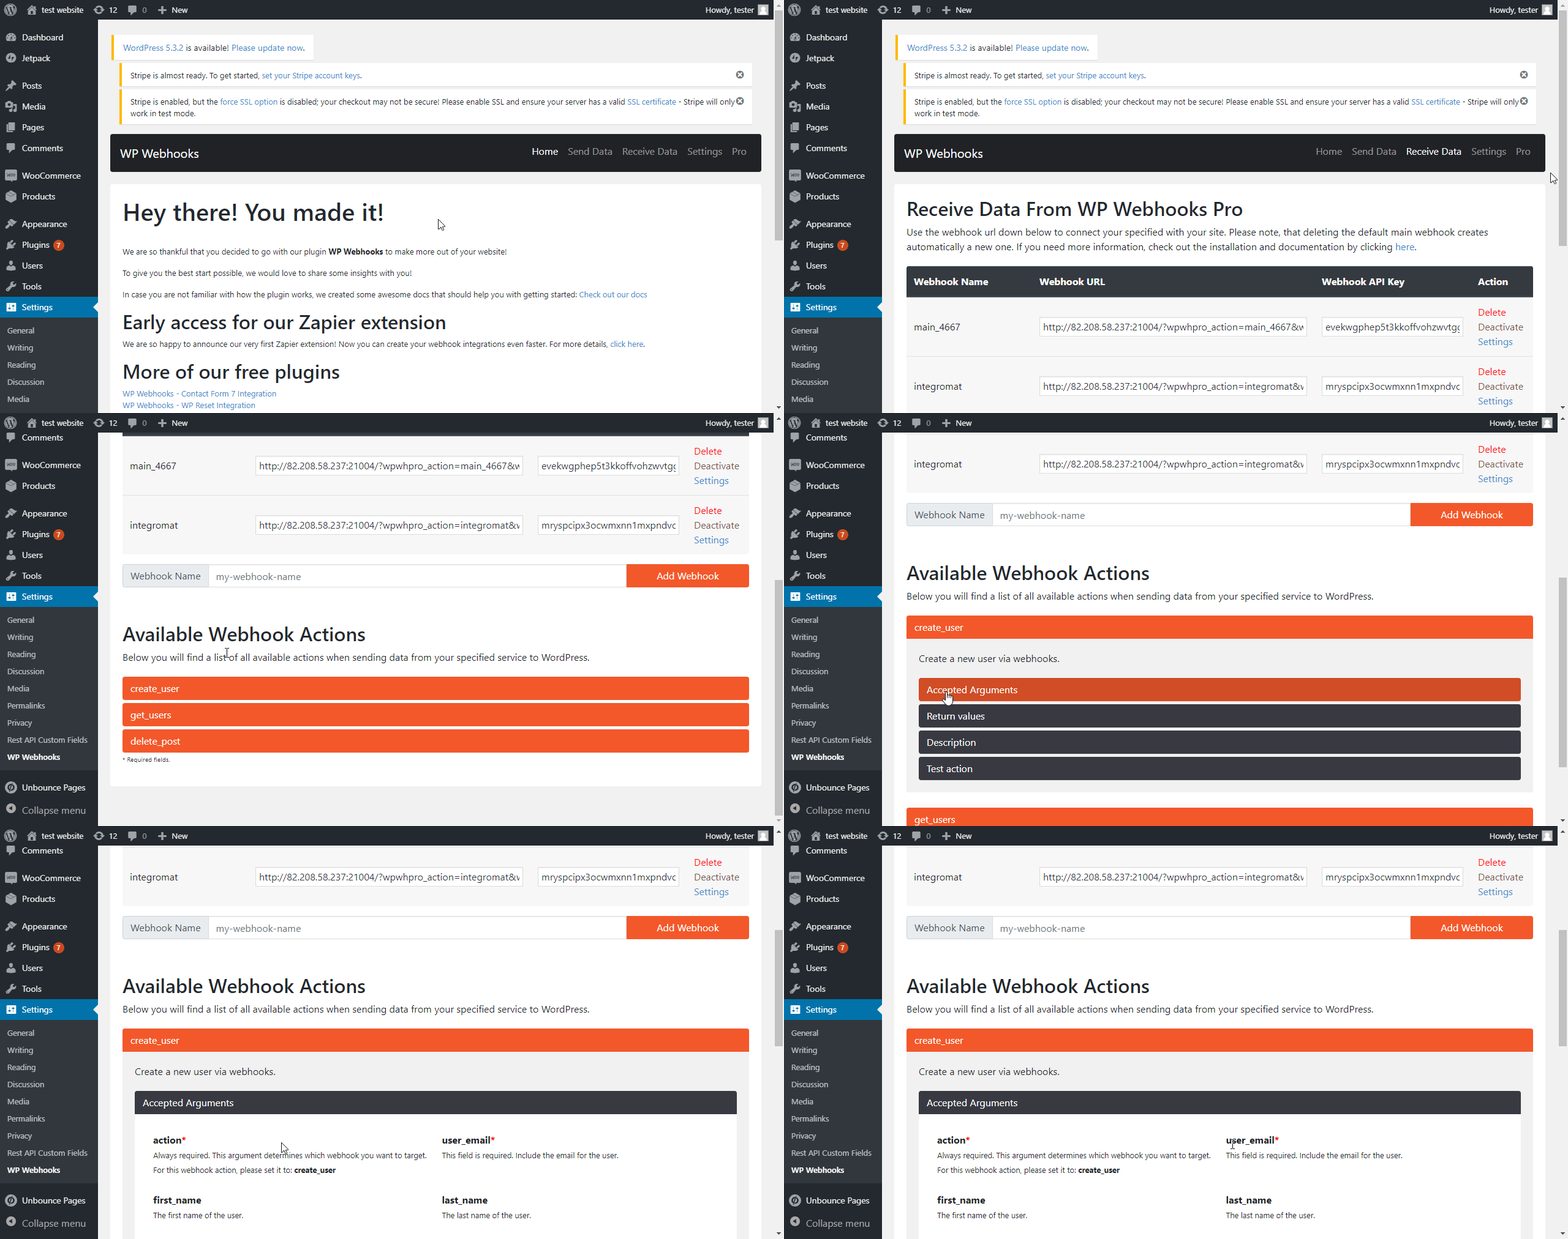
Go to Settings > WP Webhooks > Receive Data.
-
Find here all information needed to establish a connection – WebhookA webhook is a way for an app to send real-time information to a specific URL in response to certain events or triggers. URL, Webhook Name and Webhook API Key
-
Go to Boost.space Integrator and open the WB Webhooks module’s Create a connection dialog.
-
Enter the values that you found in step 3 to the respective fields and click the Continue button to establish the connection.
The connection has been established and you can proceed to set up the module.
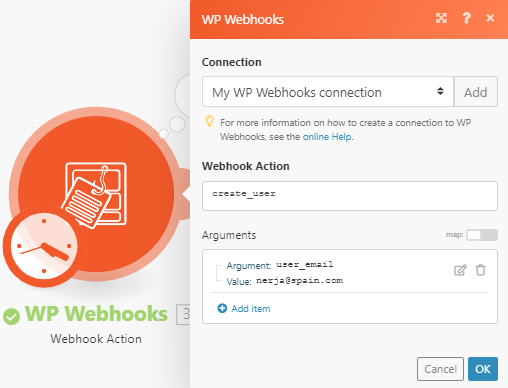
Use this module to send data to your WordPress.
|
Connection |
|
|
Webhook Action |
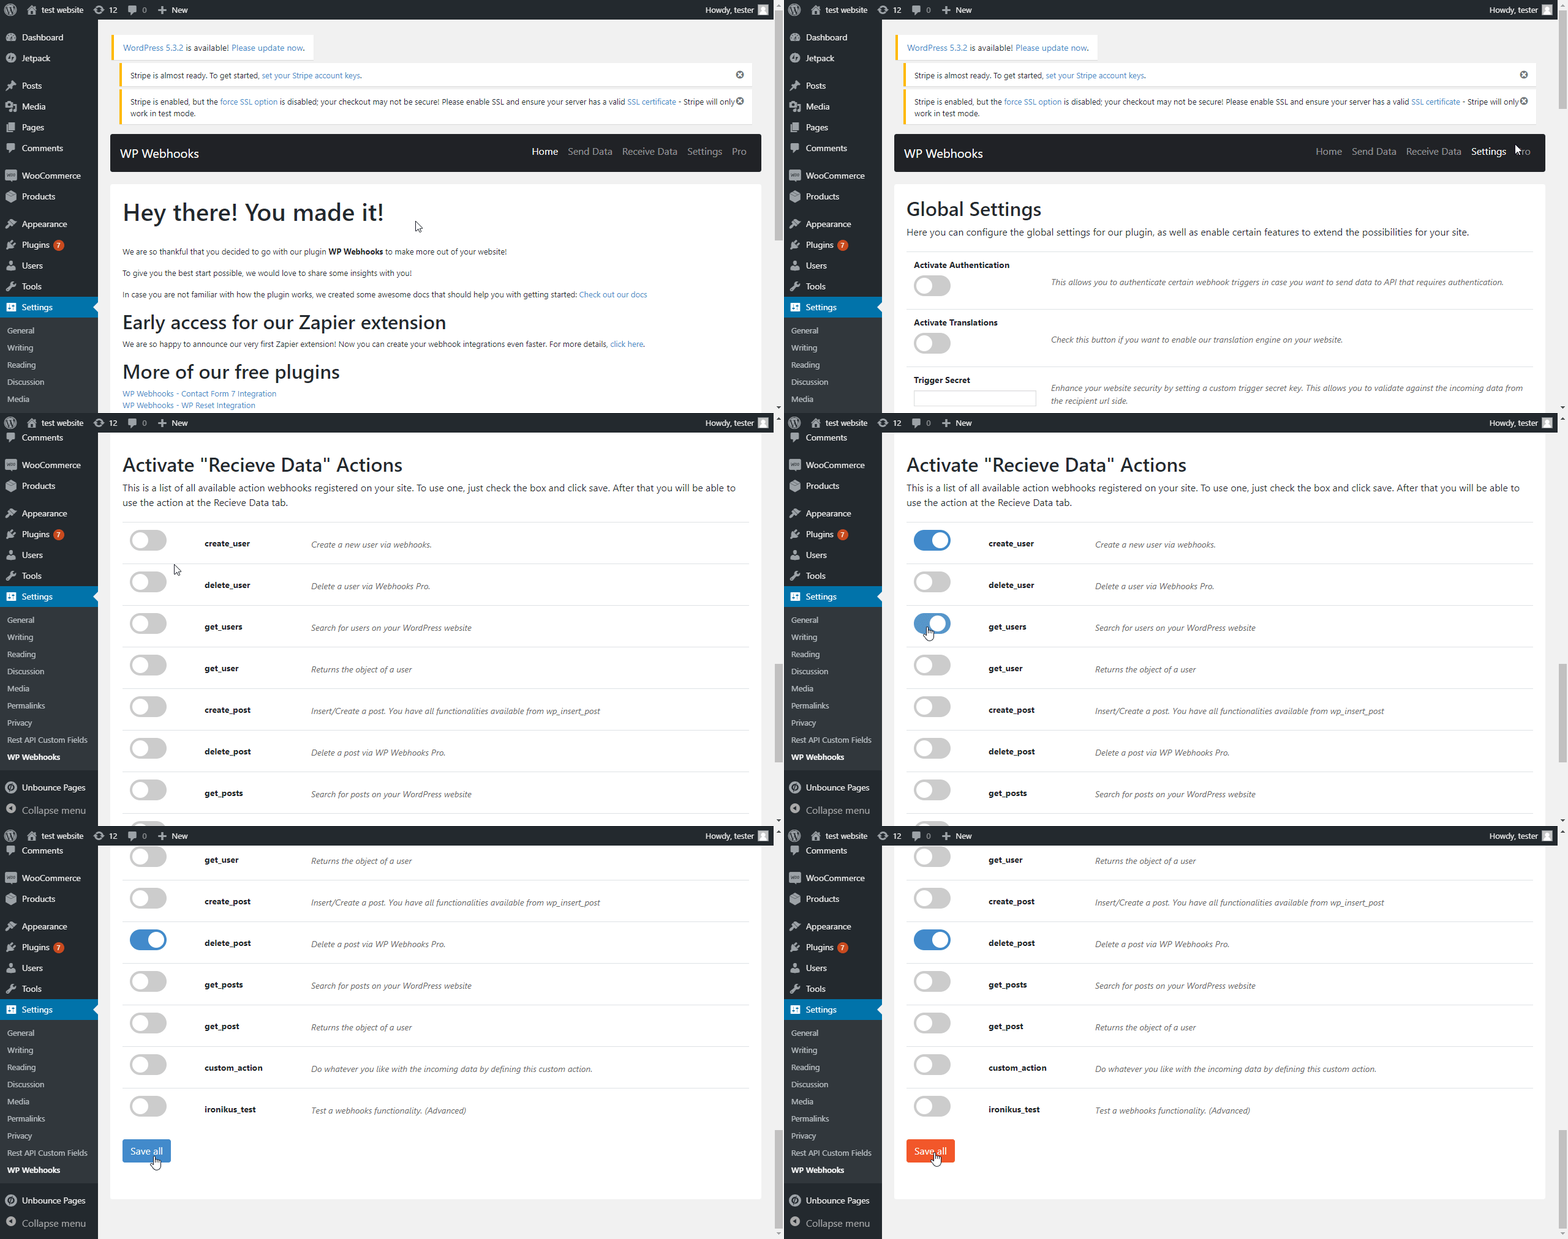
Enter the name of the action you want to perform using the module. You must activate desired actions first. It can be done under: Settings > WP Webhooks > Settings: |
|
Arguments |
Enter the argument and value. The list of arguments for each action can be found under: Settings > WP Webhooks > Receive Data > Available Webhook Actions |

