- Webhooks
- Creating app-specific webhooks
- Creating custom webhooks
- Inserting webhooks to scenarios
- Setting up webhook data structure
- Scheduling webhooks processing
- How Boost.space Integrator processes webhooks
- Parallel vs. sequential processing
- Processing scheduled webhooks
- Webhook queue details
- Webhook settings
- Error Handling
- Supported incoming data formats
- Query String
- Form Data
- Multipart
- JSON
- Webhook headers
- Responding to webhooks
- HTML Response example
- Redirect example
- Custom mailhook
- Example Of Use
- Webhook rate limit
- Troubleshooting Webhooks
- Missing items in the mapping panel
WebhooksA webhook is a way for an app to send real-time information to a specific URL in response to certain events or triggers. allow you to send data to Boost.spaceA platform that centralizes and synchronizes company data from internal and external sources, offering a suite of modules and addons for project management, CRM, data visualization, and more. Has many features to optimize your workflow! IntegratorPart of the Boost.space system, where you can create your connections and automate your processes. over HTTP. Webhooks create a URL that you can call from an external app or service, or from another Boost.space Integrator scenarioA specific connection between applications in which data can be transferred. Two types of scenarios: active/inactive.. Use webhooks to triggerThe initial event that starts a scenario. It can be an action, a scheduled time, or a custom event, and is essential to define at the beginning of each scenario. the execution of scenariosA specific connection between applications in which data can be transferred. Two types of scenarios: active/inactive..
Webhooks usually act as instant triggersThe initial event that starts a scenario. It can be an action, a scheduled time, or a custom event, and is essential to define at the beginning of each scenario.. Contrary to scheduled triggers, which periodically ask a given service for new data to be processed, webhooks execute the scenario immediately after the webhookA webhook is a way for an app to send real-time information to a specific URL in response to certain events or triggers. URL receives a request.
Boost.space Integrator supports the following types of webhooks:
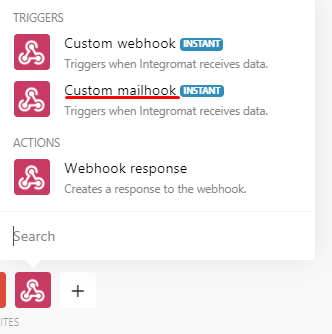
- App-specific webhooks listen for data coming out of a specific app, also called instant triggers.
- Custom webhooks allow you to create a URL to which you can send any data.
Many apps provide webhooks to execute scenarios whenever a certain change occurs in the app. These are called instant triggers. Instant triggers are marked with the labelIn Boost.space, a label is a tag that can be added to items within a module. It's a flexible tool used to categorize and organize data, making it easier to customize workflows and processes. “INSTANT” in the list of an app’s modulesa module is an application or tool designed to handle specific business functions, such as CRM, project management, or inventory. The system's modular architecture allows you to activate only the modules you need, enabling customization and scalability as your business requirements evolve.:
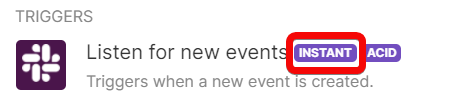
If an app does not provide webhooks, use polling triggers to periodically poll the service for new data.
To create a webhook, you must insert the Custom webhook modulea module is an application or tool designed to handle specific business functions, such as CRM, project management, or inventory. The system's modular architecture allows you to activate only the modules you need, enabling customization and scalability as your business requirements evolve. to a scenario.
![[Note]](https://docs.boost.space/wp-content/themes/bsdocs/docs-parser/HTML/css/image/note.png) |
Note |
|---|---|
| Each scenario must use its own webhook. You can not use one webhook in multiple scenarios. |
- Insert the Custom Webhook module from the Webhooks app.
- In the module’s settings, click Add.
- Set the webhook’s name and other settings, then click Save.
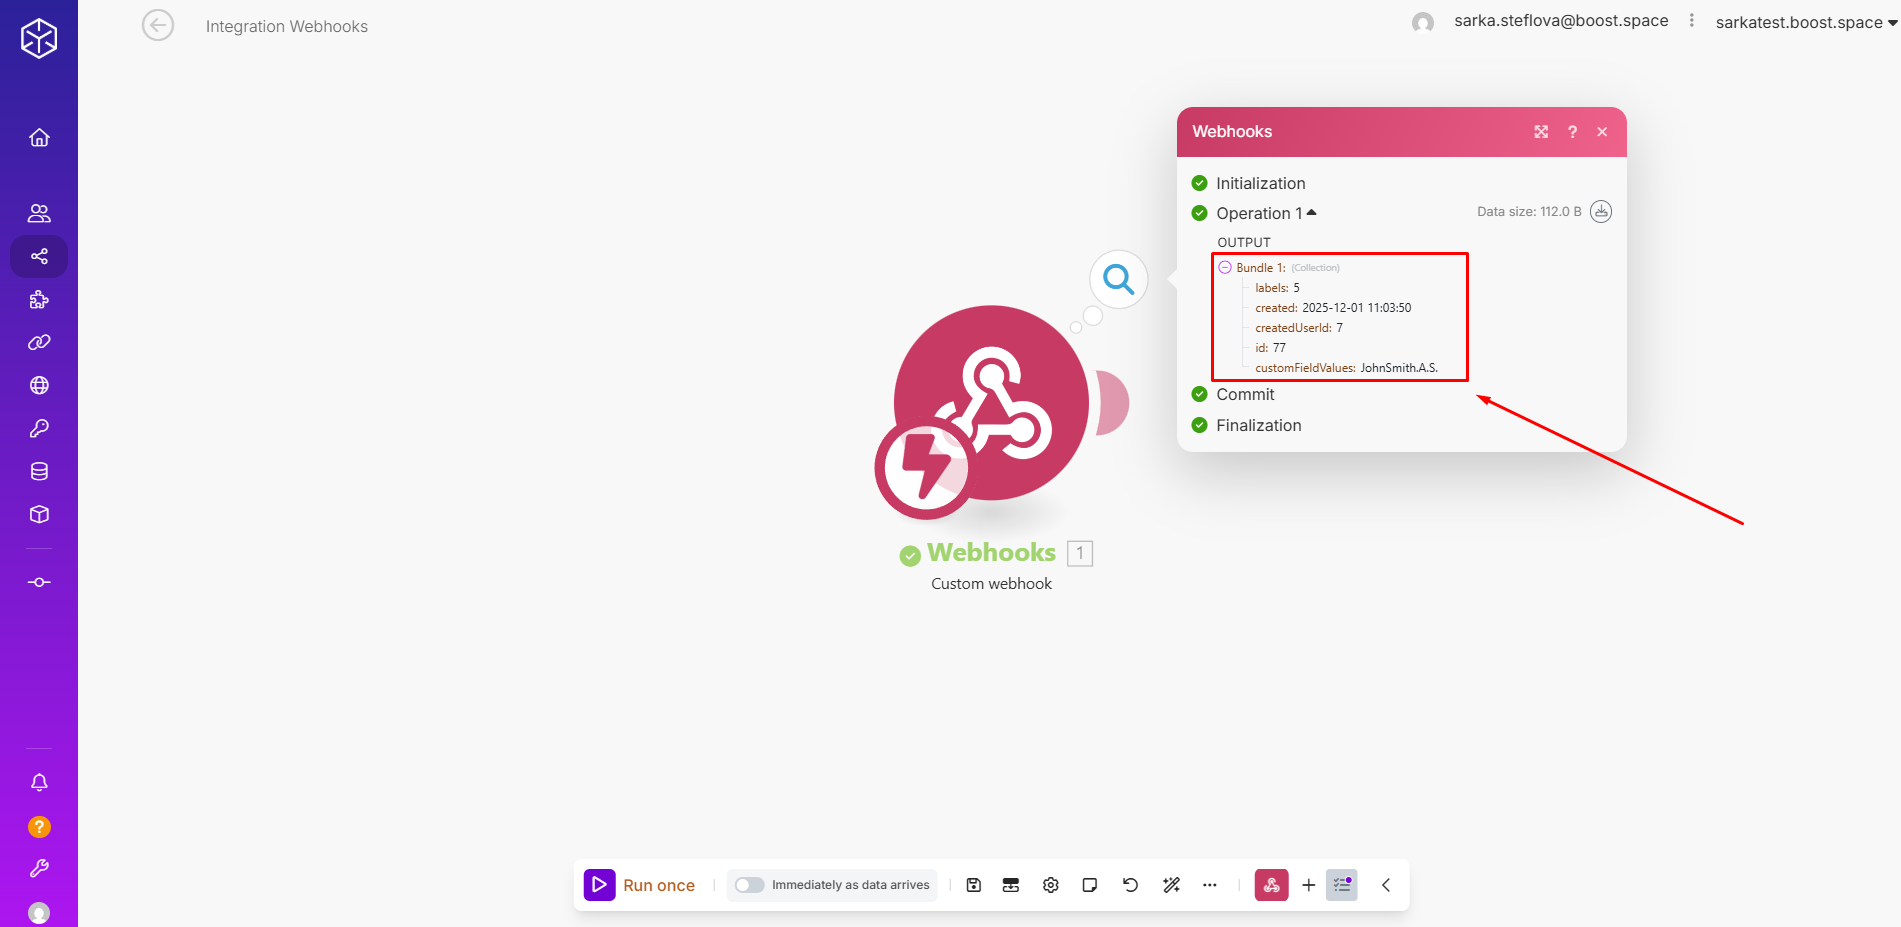
Boost.space Integrator generates a URL and starts listening for requests to this URL. Send a request to this URL to have Boost.space Integrator automatically determine the data structureWhen you create a data store, you need to create a data structure that formats your data store in Boost.space Integrator. Think of the data store as a spreadsheet and the data structure as the headers. The data structure defines the kind of data (i.e. text, numeric, etc.) that the data store records. You can view and manage your data... for this webhook. See setting up webhook data structure below for more details.
|
Note |
|---|---|
| You can access the webhook’s details and change the webhook’s settings in the Webhooks section in the left menu. |
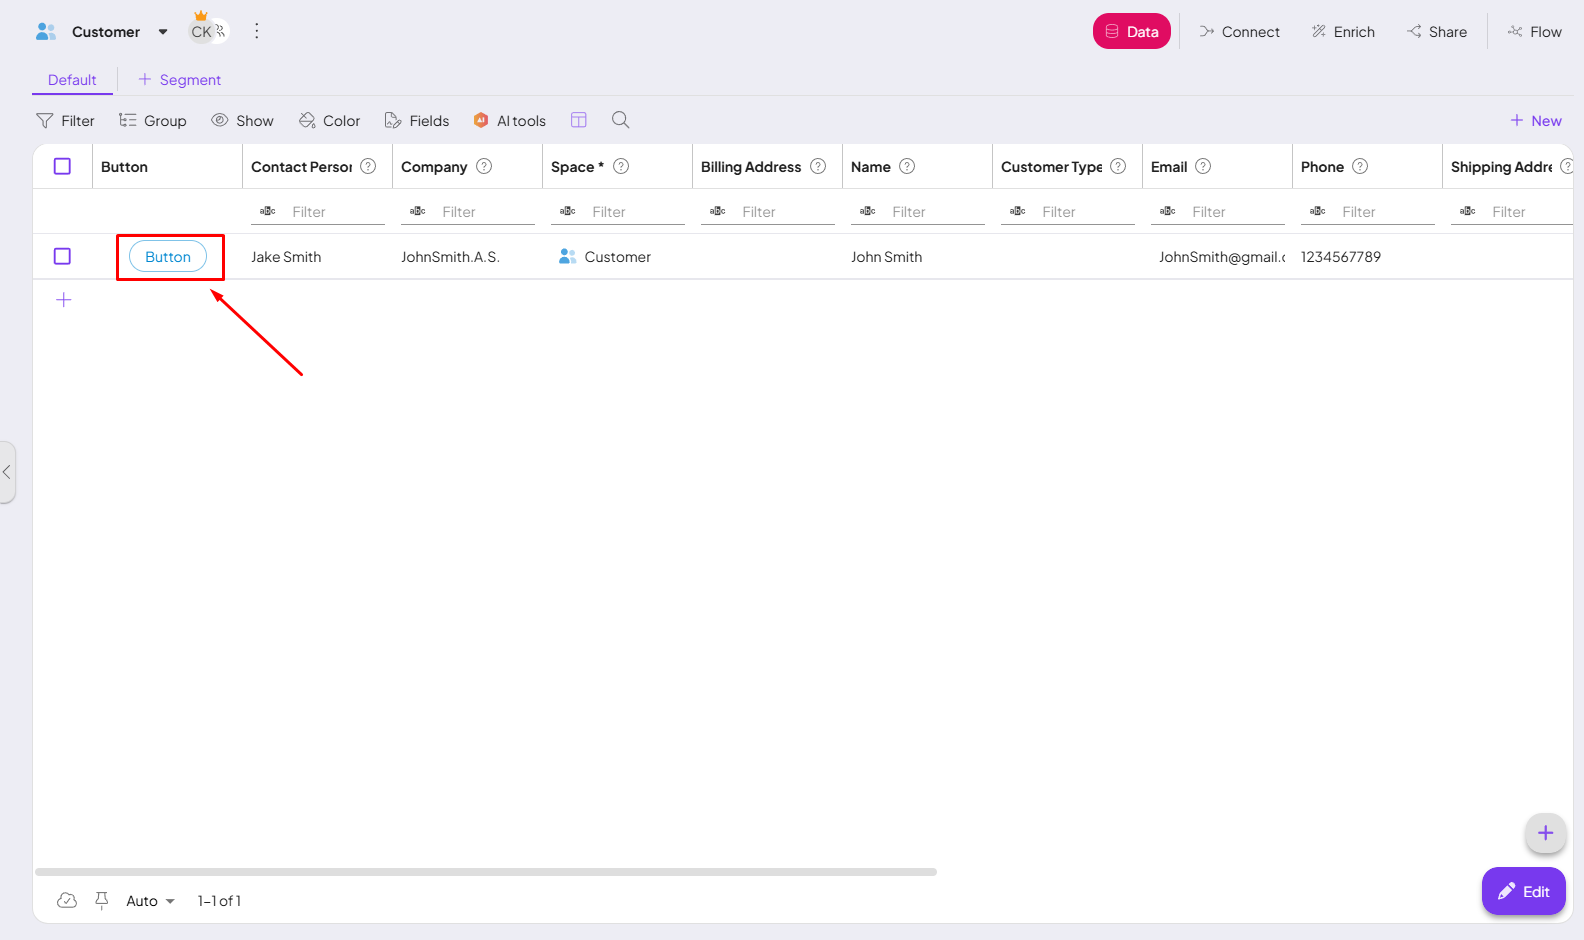
Button
The button triggers an action that sends selected data from the system to the scenario, where it can be further processed.
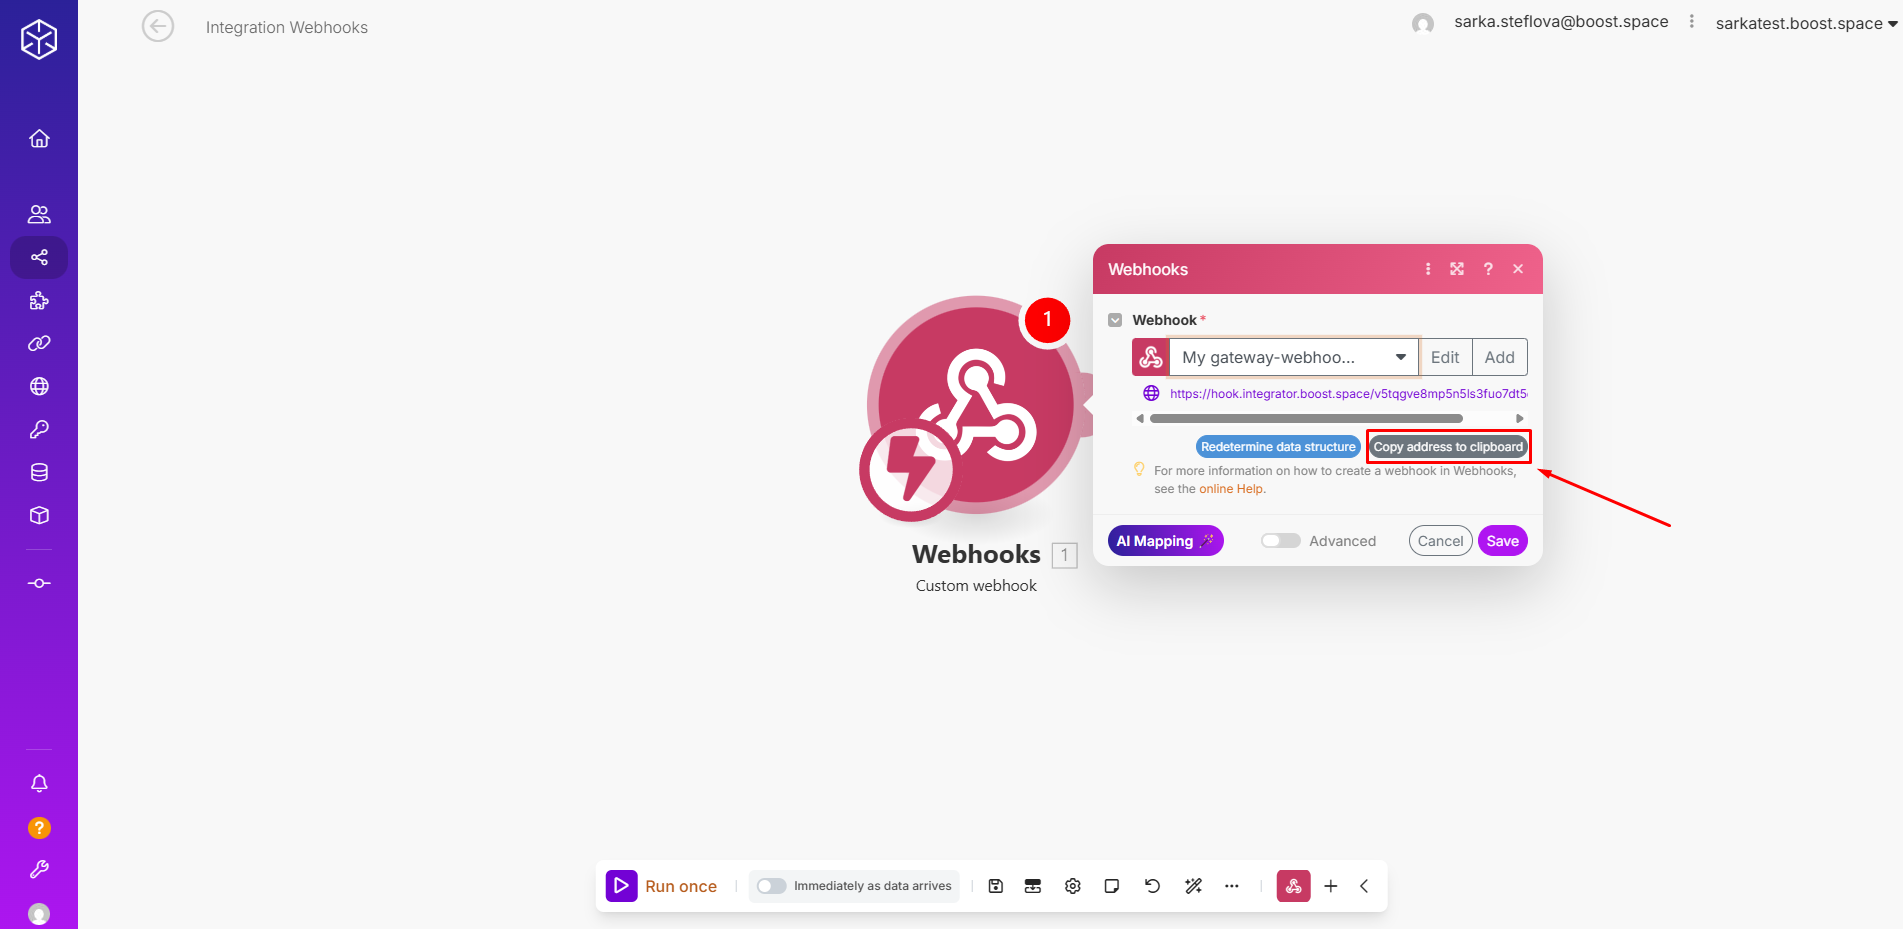
1- Open the Webhook module and click Copy address to clipboard.
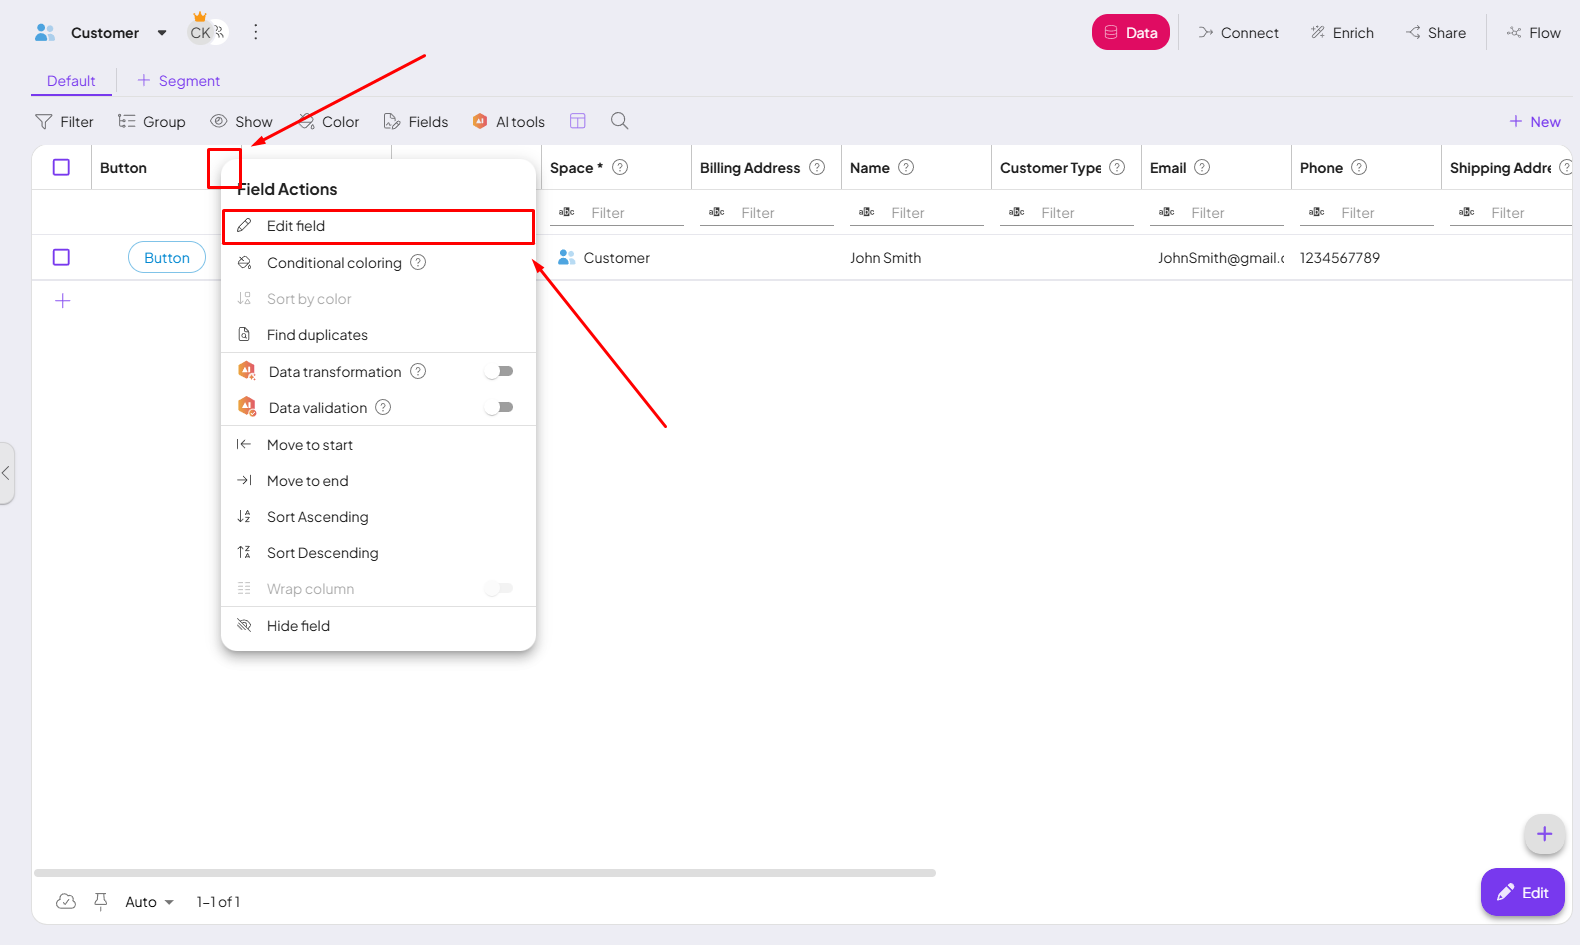
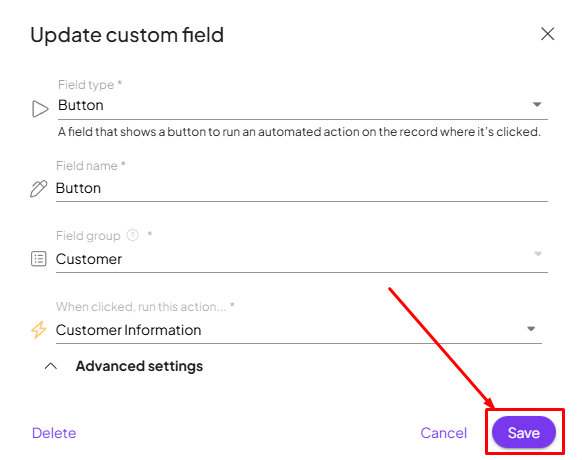
2- Go to your module where you want your button to be. In your module, click Edit field.
3- Add a Name for the field.
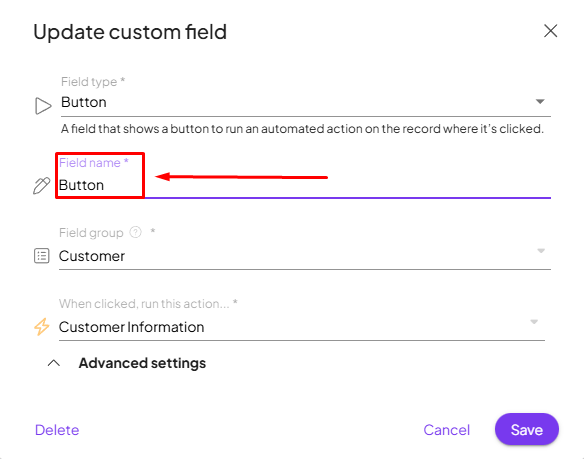
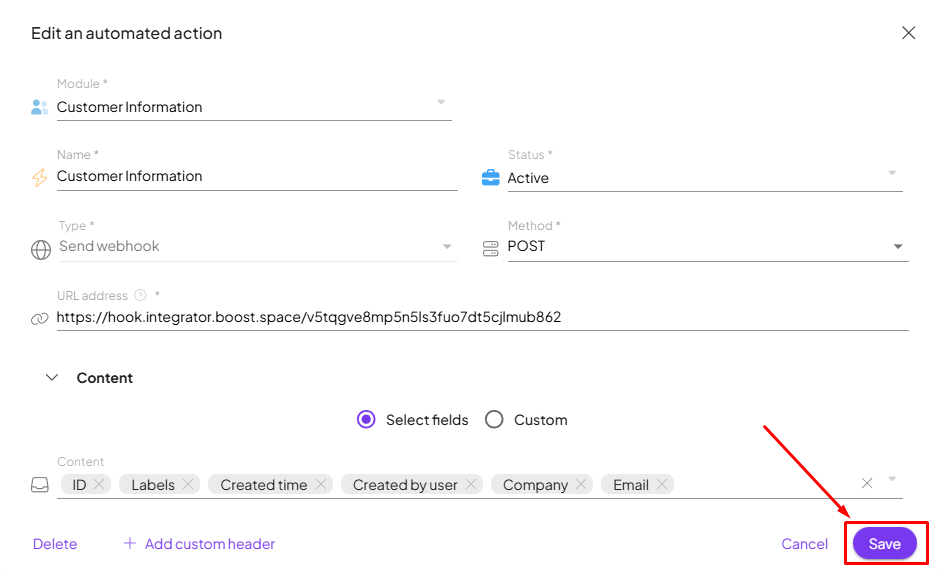
4- Now click on +New action and create the action you want this button to perform.
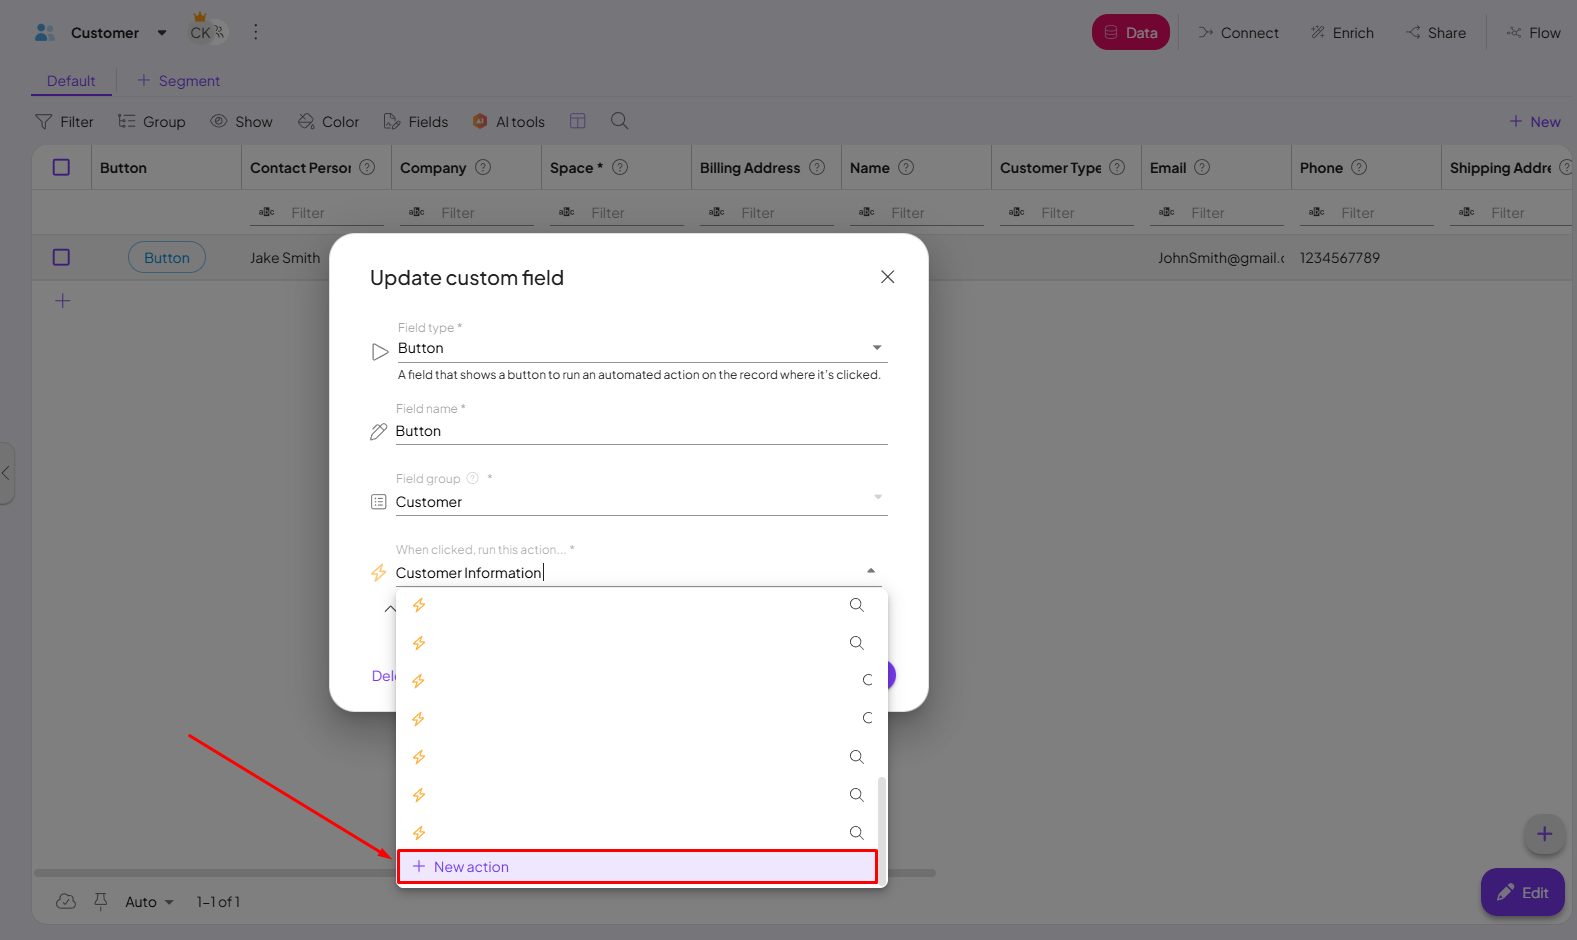
5- Name the action.
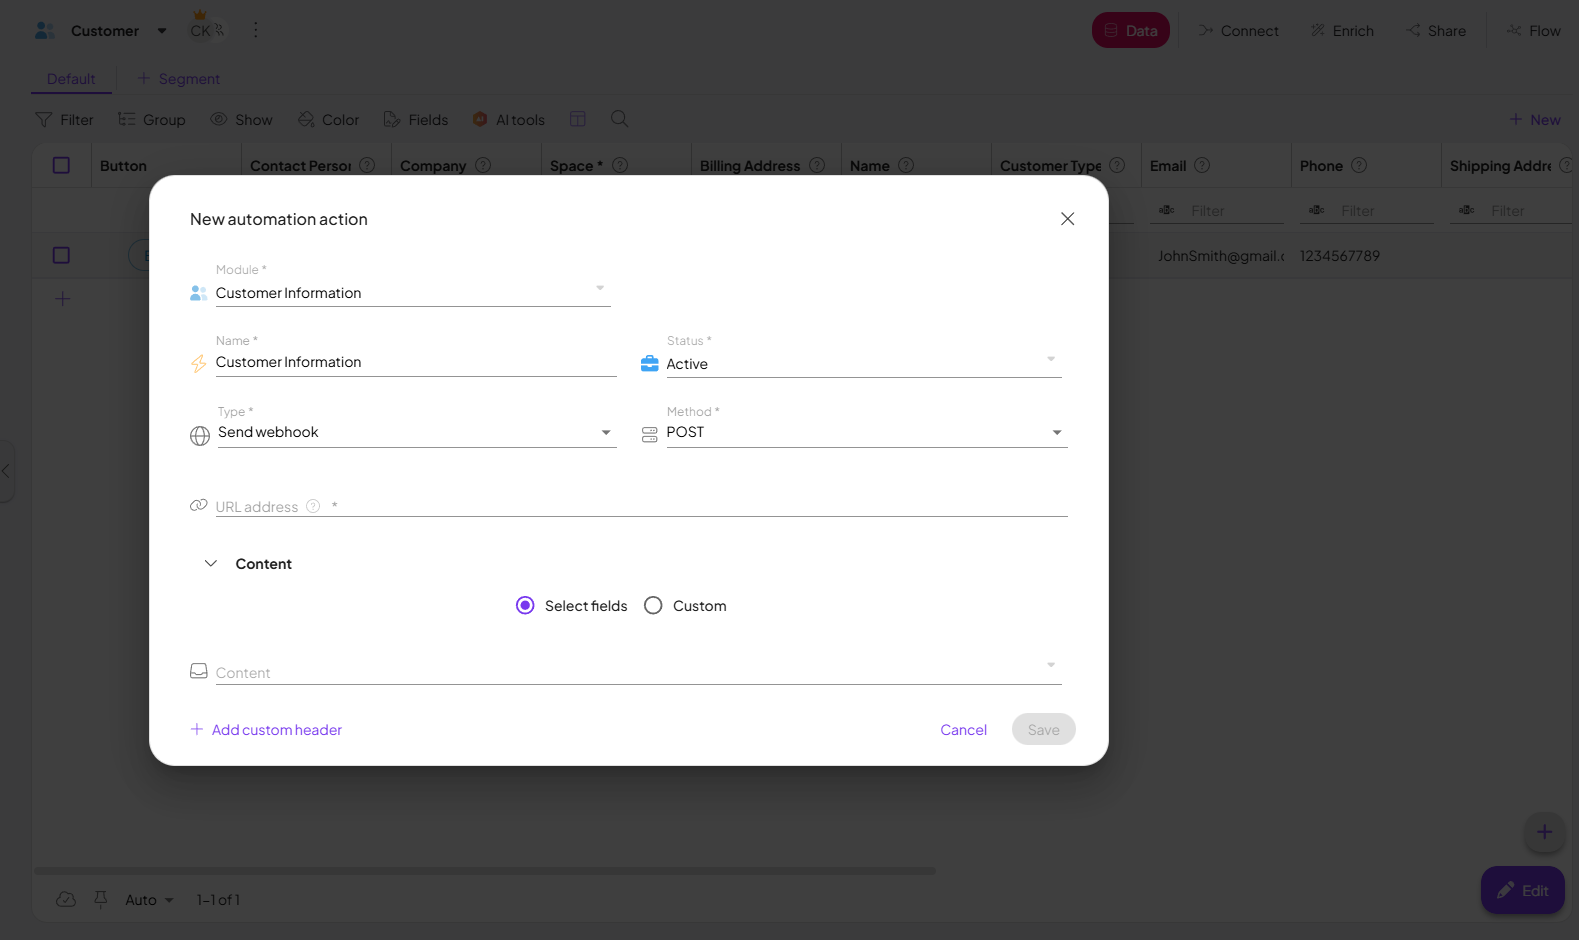
6- Paste the copied Webhook URL into the appropriate field.
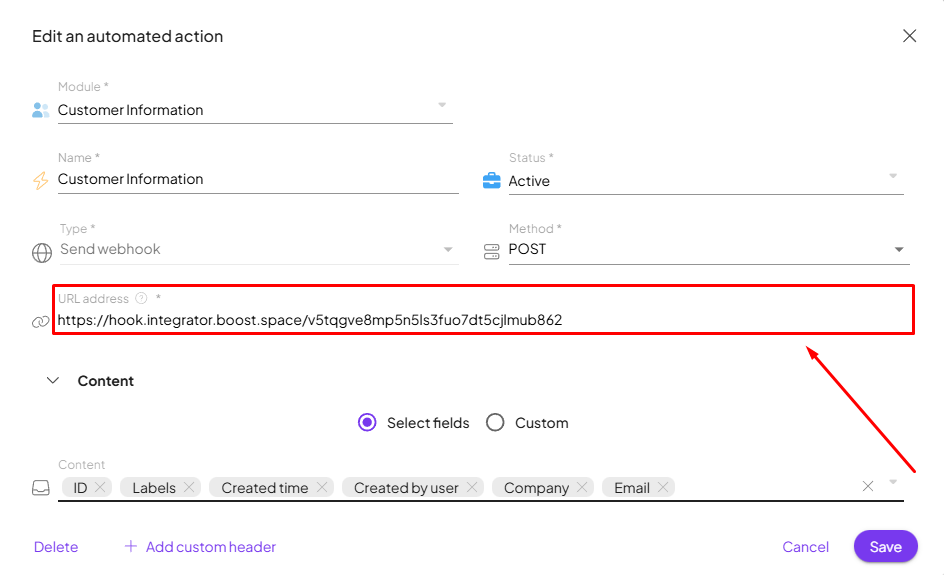
7- Select the information you want to retrieve from the recordIn Boost.space, a record is a single data entry within a module, like a row in a database. For example, a contact in the Contacts module or a task in the Tasks module. (for exampleall ID, LabelsIn Boost.space, a label is a tag that can be added to items within a module. It's a flexible tool used to categorize and organize data, making it easier to customize workflows and processes., Email etc.).
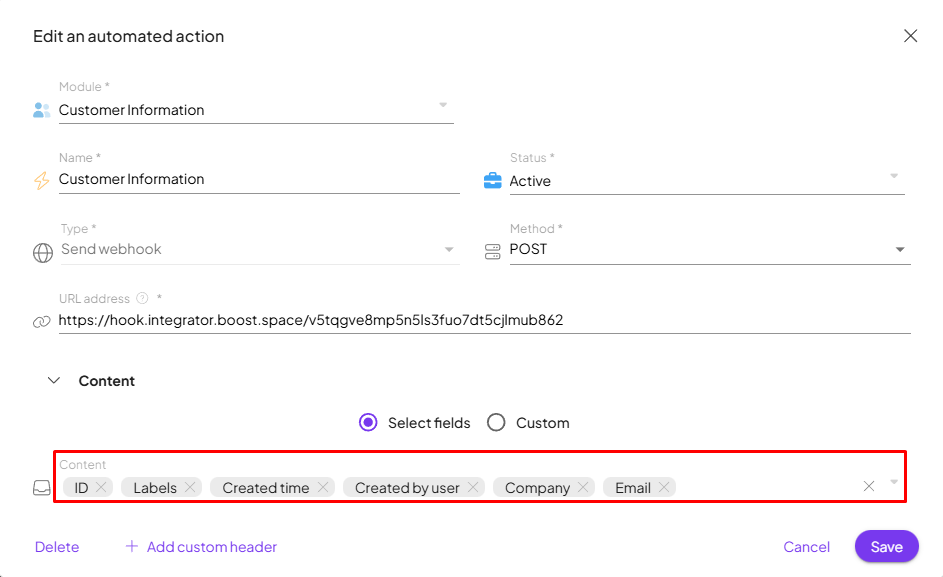
8- Save the configuration.
9- Go back to Integrator and Run the scenario.
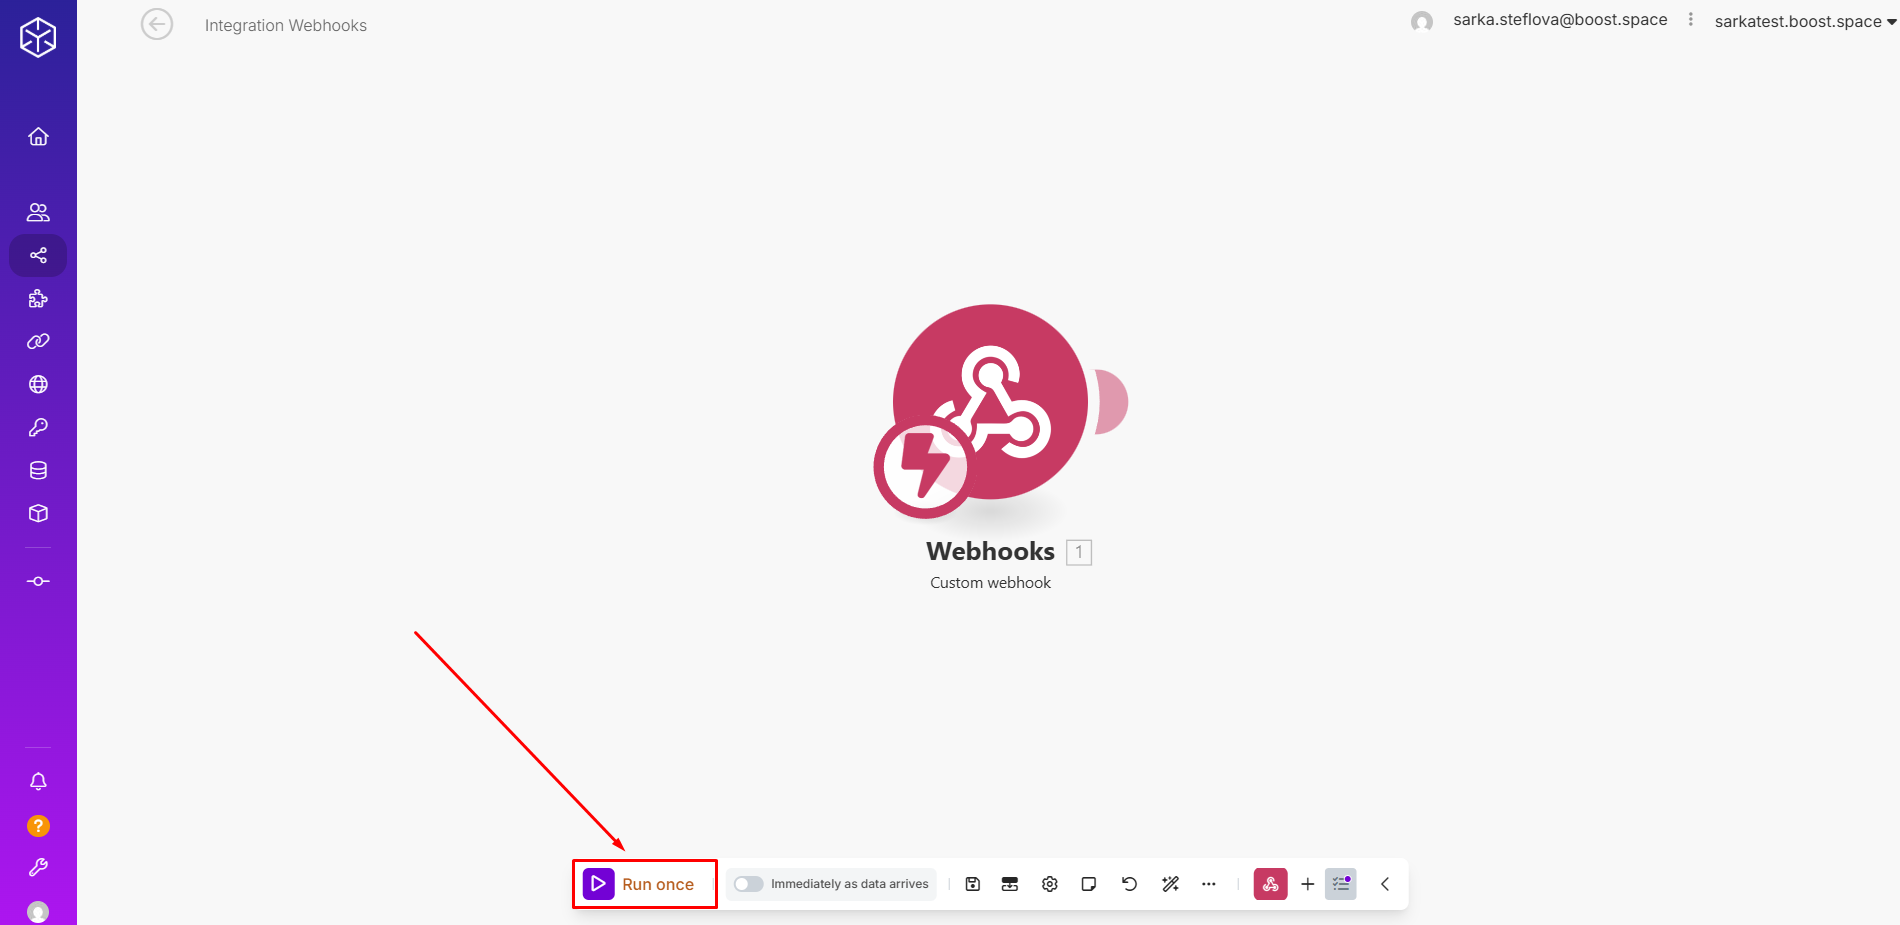
10- Finally, click the button in your system to trigger the scenario and send data to the webhook.
11- Once these steps are completed, the webhook will receive the data.
Optionally, you can let Boost.space Integrator know what data structure to expect in the webhook request payload. Boost.space Integrator can use data structuresWhen you create a data store, you need to create a data structure that formats your data store in Boost.space Integrator. Think of the data store as a spreadsheet and the data structure as the headers. The data structure defines the kind of data (i.e. text, numeric, etc.) that the data store records. You can view and manage your data... to validate the incoming data. If you do not set up a data structure, Boost.space Integrator will pass the incoming data to subsequent modules in your scenario without any validation.
To enable validating incoming data, set up the webhook’s data structure in one of the following ways:
- Create a new data structure manually in the Data structures section.
- Use an existing data structure.
You can also use the following methods to let Boost.space Integrator know what data structure to expect.
|
Note |
|---|---|
| Note that these methods do not enable data validation. The data structure set up in this way only helps with mappingMapping links the modules in your scenario. When you map an item, you connected the data retrieved by one module to another module to perform the desired action. For example, you can map the email address and subject lines from the Email > Watch emails module to Google Sheets > Add a row and create a spreadsheet of email addresses... the webhook data to subsequent modules in your scenario. |
- Create a data structure immediately after creating the webhook by calling the webhook URL with sample data in the request body.
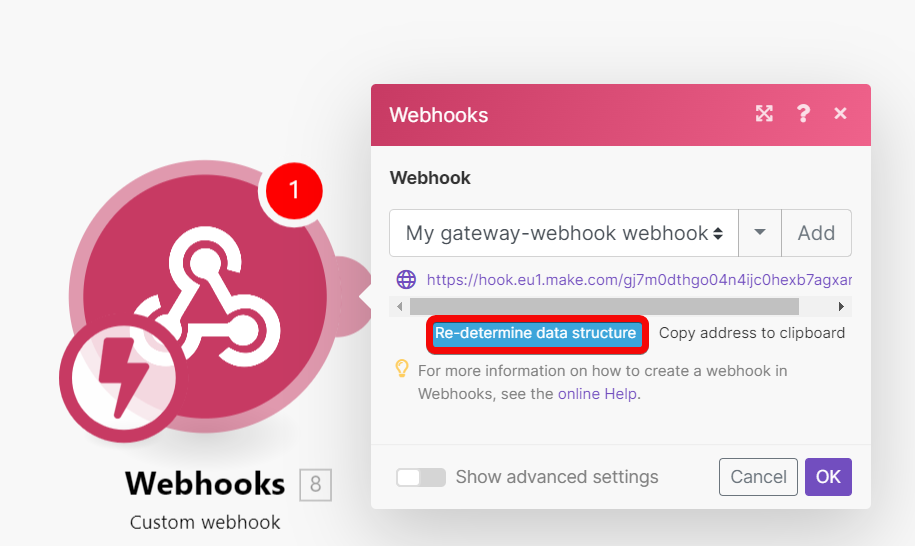
- Re-determine the data structure of an existing webhook going to the Webhook module settings, clicking Re-determine data structure, and calling the webhook URL with sample data in the request body.
If you call the webhook URL to automatically determine or re-determine the data structure, Boost.space Integrator does not create a reusable data structure in the Data structures section. The data structure determined in this way is stored internally with the particular webhook. In this case, Boost.space Integrator does not validate incoming data.
By default, when Boost.space Integrator receives data on a webhook, your scenario executes immediately. If you don’t want to run your scenario immediately after a webhook receives data, you can schedule your scenario to process all webhook requests periodically.
- Edit the scenario which is triggered by your webhook.
- Edit the scenario schedule settings.OREdit the schedule settings of the webhook module.
- Set up your desired schedule.
When a scheduled webhook receives data, Boost.space Integrator stores the data in the webhook’s queue. The whole queue is then processed every time your schedule criteria are met.
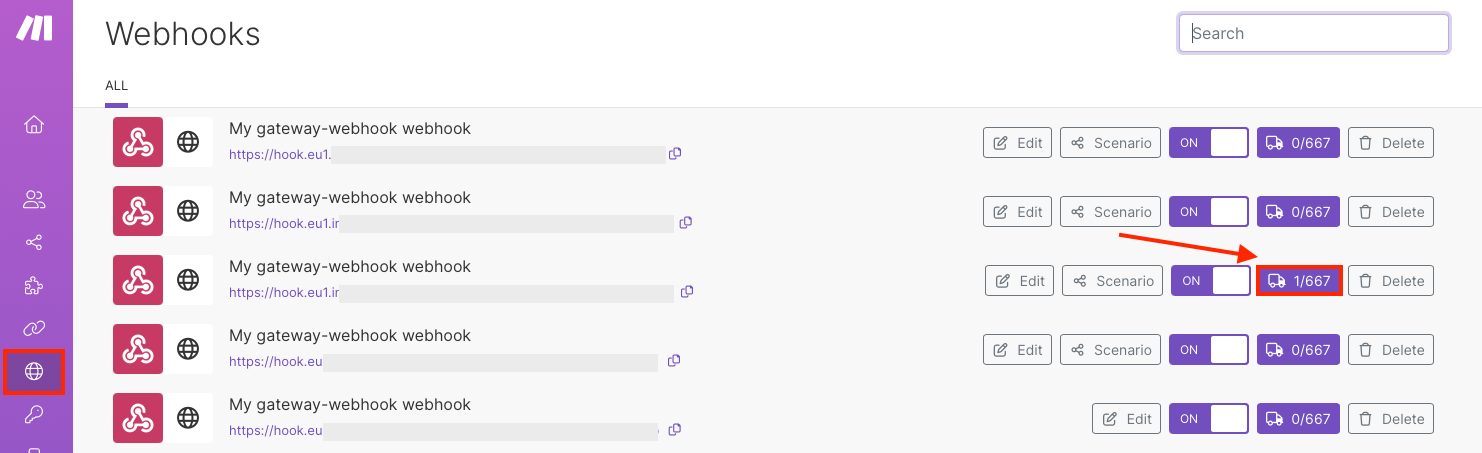
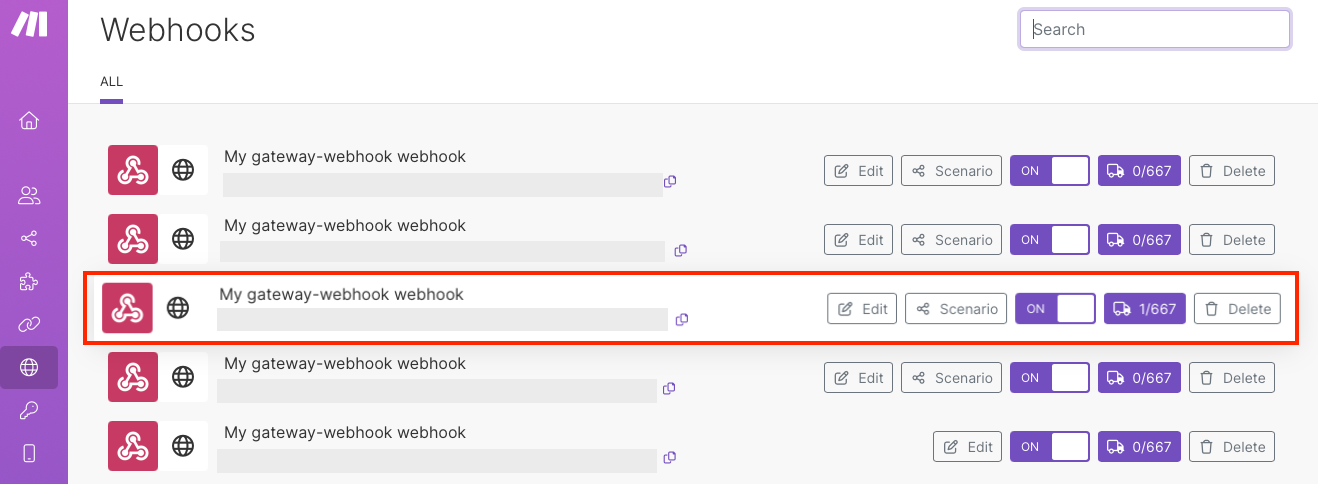
When a webhook receives a request, the system stores the request in the webhook’s queue. Each webhook has its own queue. Go to the Webhooks section in the left menu to view all webhooks and their queues.
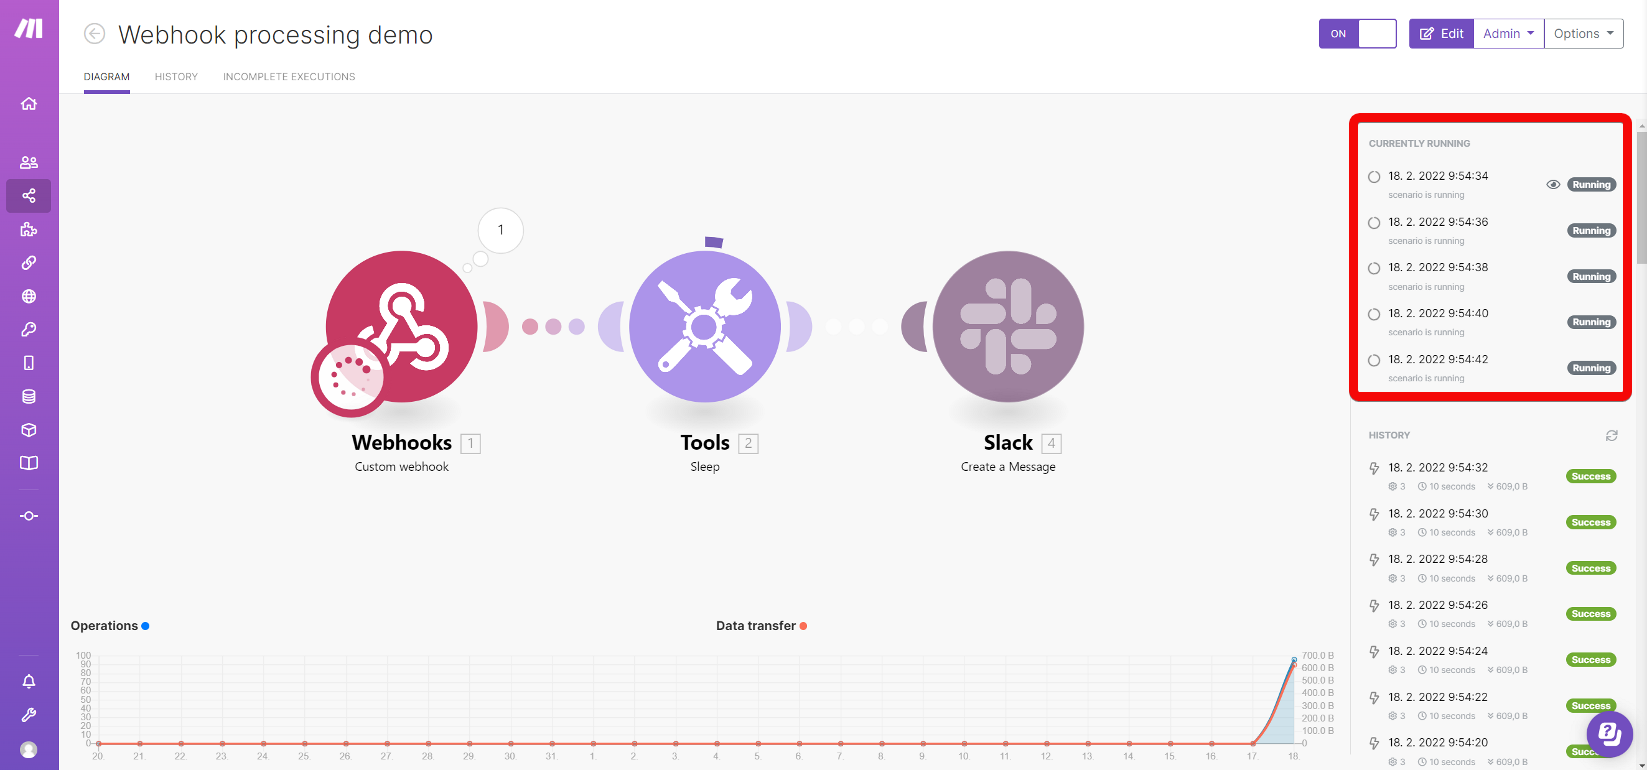
If you are using instant webhooks, Boost.space Integrator starts processing each request immediately as the request is received. By default, scenarios with instant webhooks are processed in parallel. Even if a previous scenario execution is still being processed, Boost.space Integrator does not wait for its processing to complete.
You can inspect all running executions in the scenario detail. Click an itemItems are rows in records (order/request/invoice/purchase...) in the list of running executions to view the graphical representation of that particular execution. The execution that is currently displayed is marked with an eye icon.
To turn off parallel processing, open the settings of your scenario and select Sequential processingUsing the Sequential processing options allows you to monitor and resolve errors in greater detail. If you enable sequential processing, Boost.space Integrator stops processing the task sequence until you resolve all incomplete executions. With sequential processing enabled, you can address all incomplete executions in the order in which they occurred. If you disable Sequential processing, the scenario continues to run.... With sequential processing enabled, Boost.space Integrator waits until the previous execution is complete before starting the next one. Also, use sequential processing when you need to process your webhook requests in the order that they came in.
If you are using scheduled webhooks, requests accumulate in the queue until the schedule criteria are met. When schedule criteria are met, Boost.space Integrator processes the queued requests based on the Maximum number of results that you set for the webhook.
For example, if your scenario is scheduled to run every hour and your Maximum number of results is set to the default value of 2, Boost.space Integrator processes two itemsItems are rows in records (order/request/invoice/purchase...) from the queue every hour. If your webhook queue is filling up with requests, increase the Maximum number of results or adjust the schedule to execute the scenario more often.
|
Note |
|---|---|
| Instant trigger modules have the Maximum number of cyclesA cycle is the operation and commit/rollback phases of scenario execution. A scenario may have one or more cycles (one is the default). parameter instead of the Maximum number of results.
Set the Maximum number of cycles in the instant trigger modules to get the same data processing behavior as is with webhooks and the Maximum number of results parameter. |
When data arrives to a webhook and the call is not processed instantly, Boost.space Integrator stores it in the webhook processing queue.
When the webhook queue is full, Boost.space Integrator rejects all incoming webhook data which is over the limit.
Incoming webhook data is always stored in the queue regardless of the data is confidential option settings. As soon as the data is processed in a scenario, it is permanently deleted.
To view the content of the queue, follow the steps below.
- Go to the Webhooks section in the left menu.

- Find the webhook whose queue you want to view.
- Click the specific webhook on the list to inspect its details.
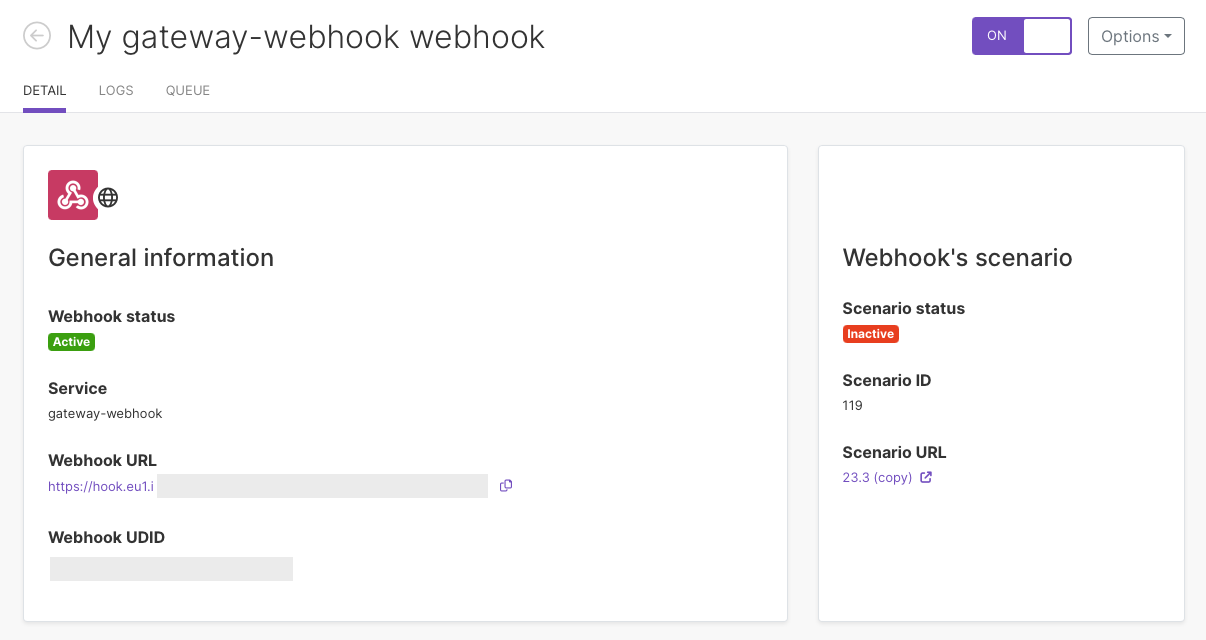
You can see:
- Webhook statusIn Boost.space, statuses are indicators assigned to records within modules to represent their current state or progress. They can be system-defined, such as "Active" or "Done," or custom-created to fit specific workflows. Statuses help track and manage tasks, projects, and processes efficiently.
- Webhook URL and webhook UDID (unique webhook identifier)
- Status of your scenario
- Scenario ID and scenario URL
- To see the webhook’s queue, click Queue.
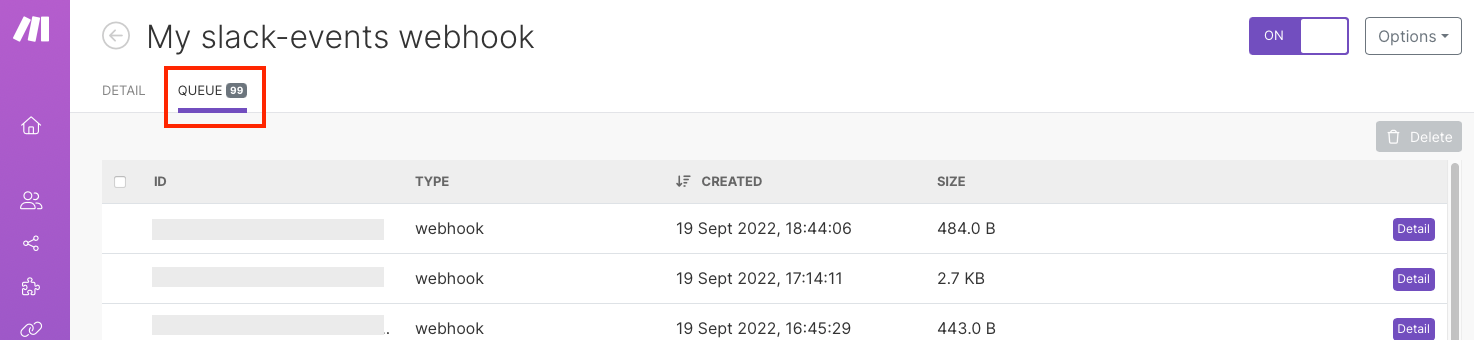
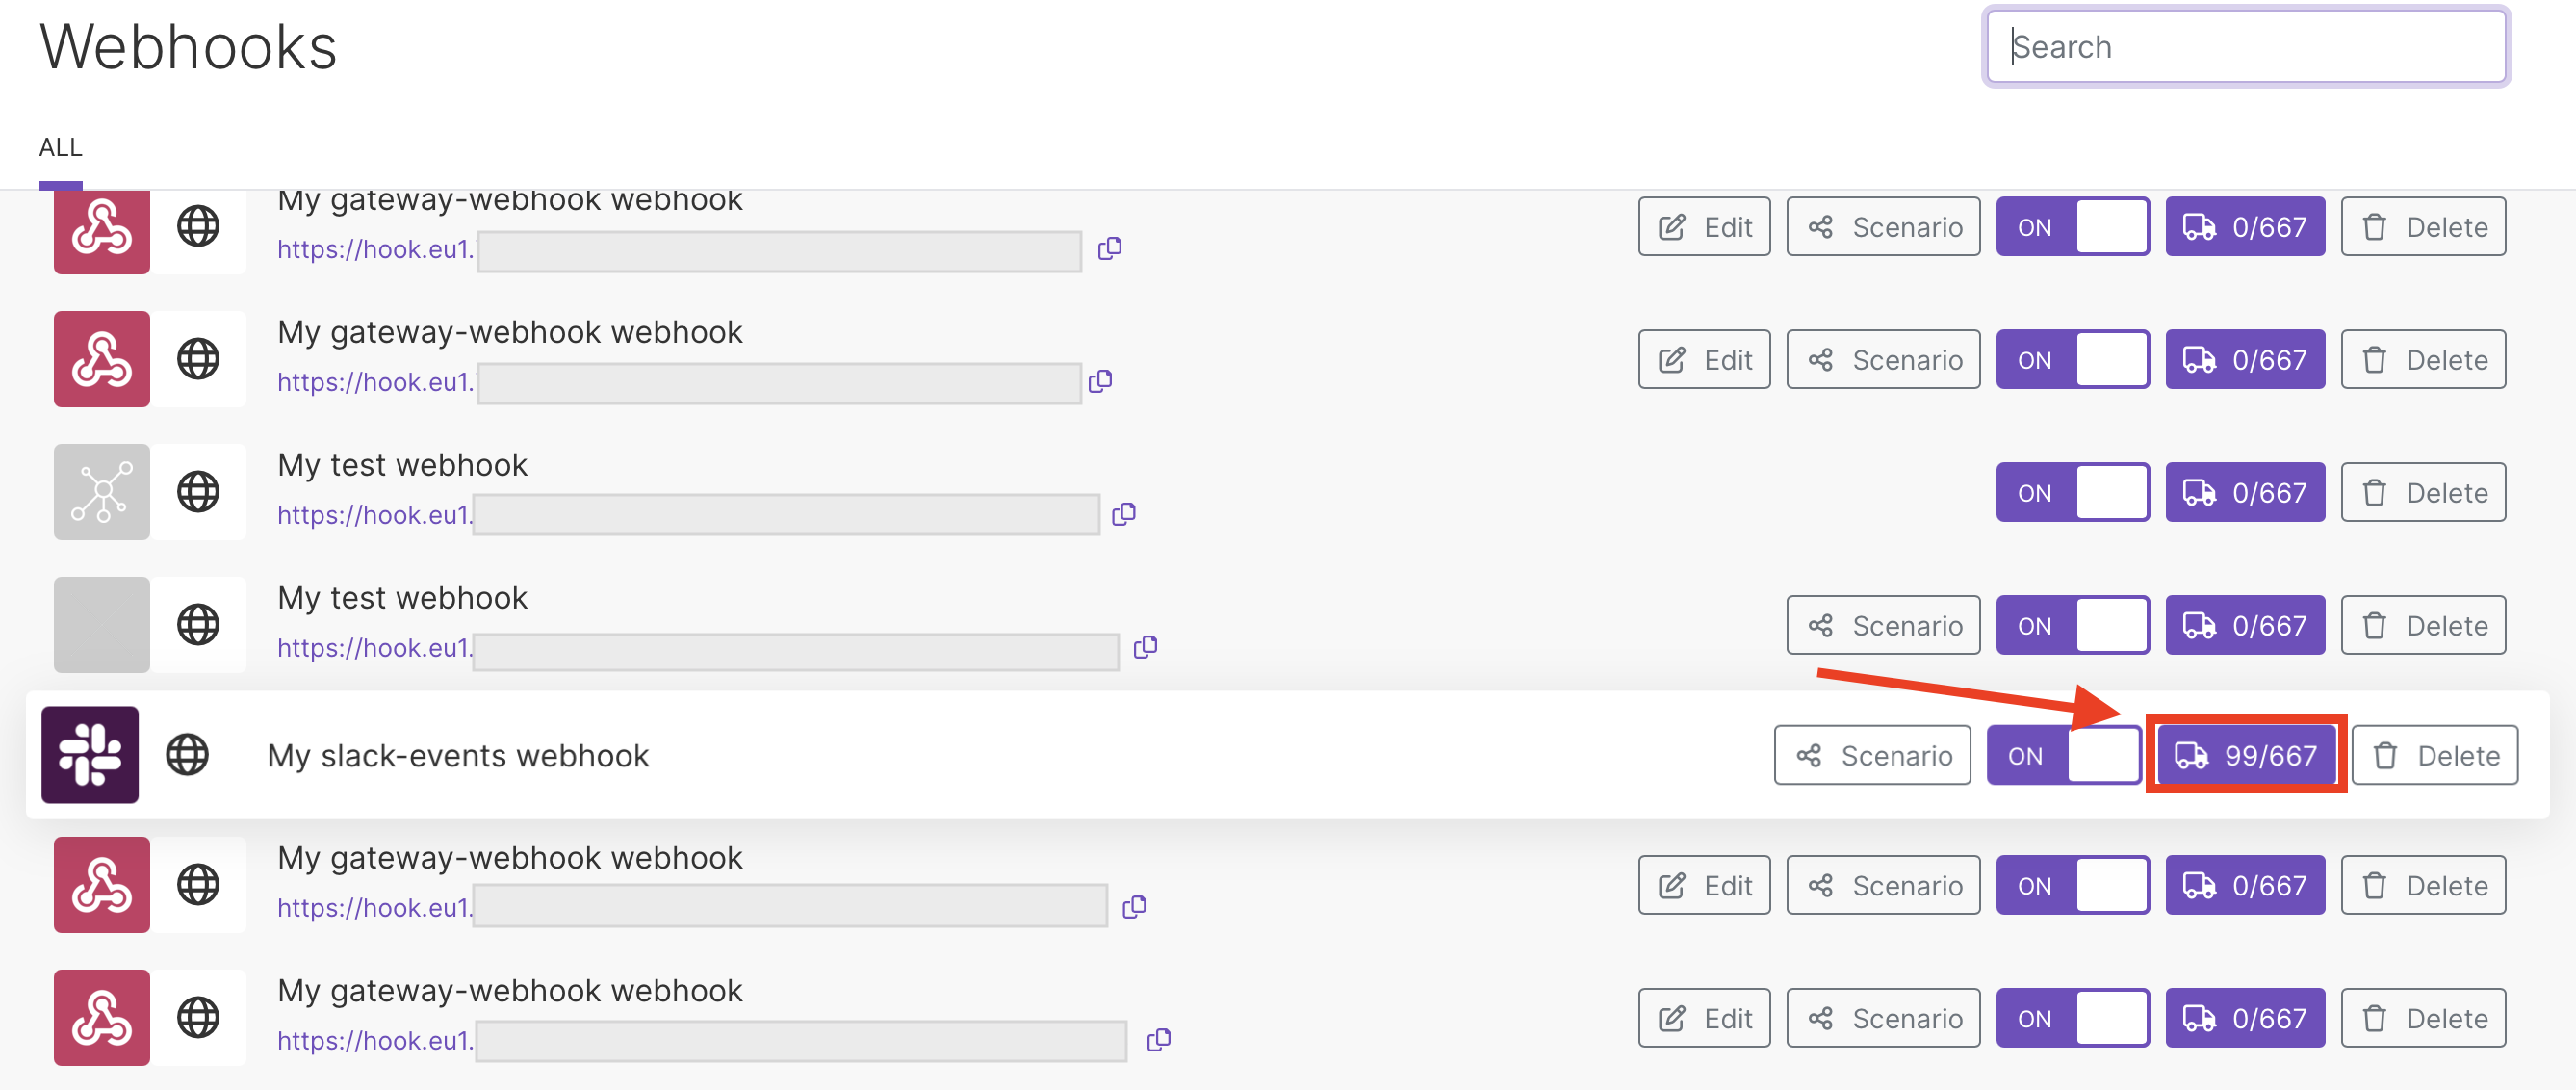
You can also click the button with the truck icon on the Webhooks page.
The webhook’s queue displays.
- Click Detail by the webhook you want to inspect.
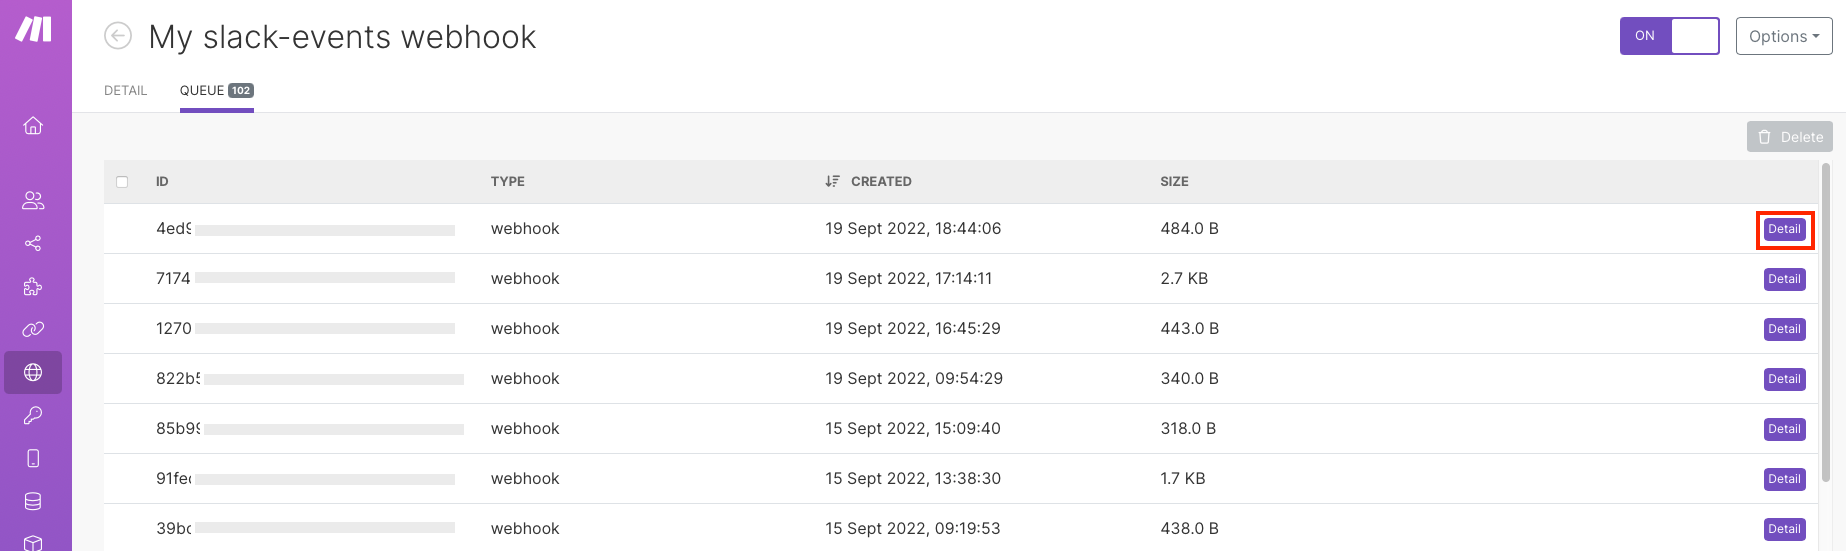
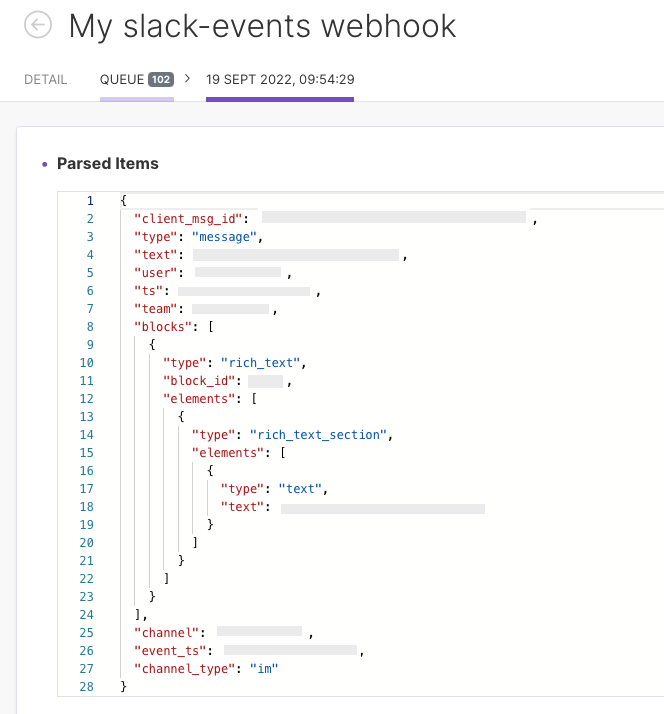
You can see the parsed items.
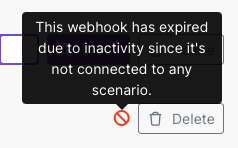
Make automatically deactivates webhooks that are not connected to any scenario for more than 5 days (120 hours). The hook return 410 Gone status code.
 |
- Go to the Webhooks section in the menu on the left.
- Click the button with the truck icon to see the webhook’s queue.
The webhook’s queue displays.
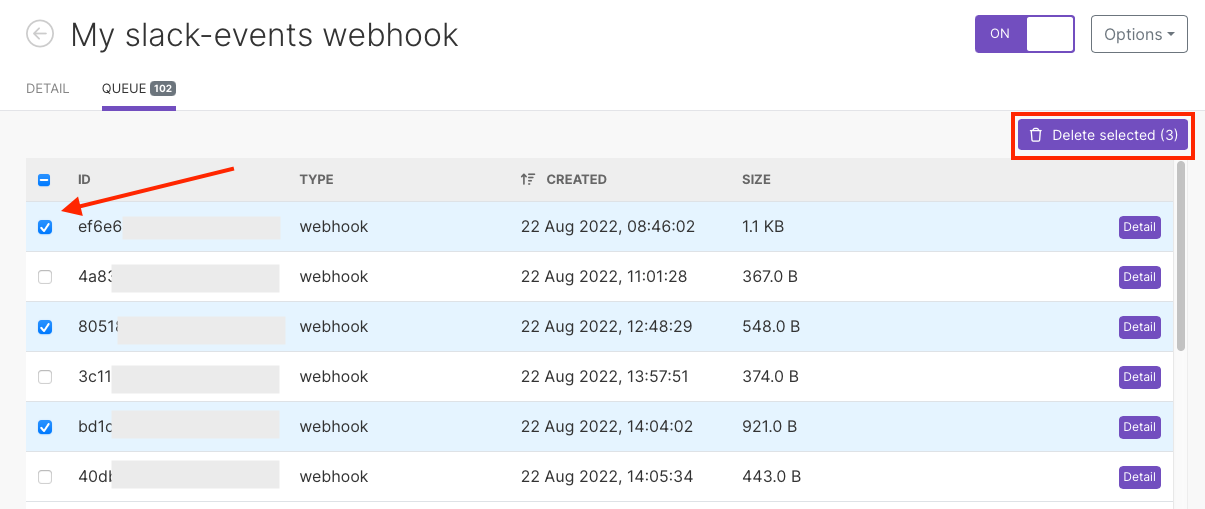
- Tick the box on the left in front of the entries you want to delete.
- Click Delete selected to delete the chosen webhook(s).
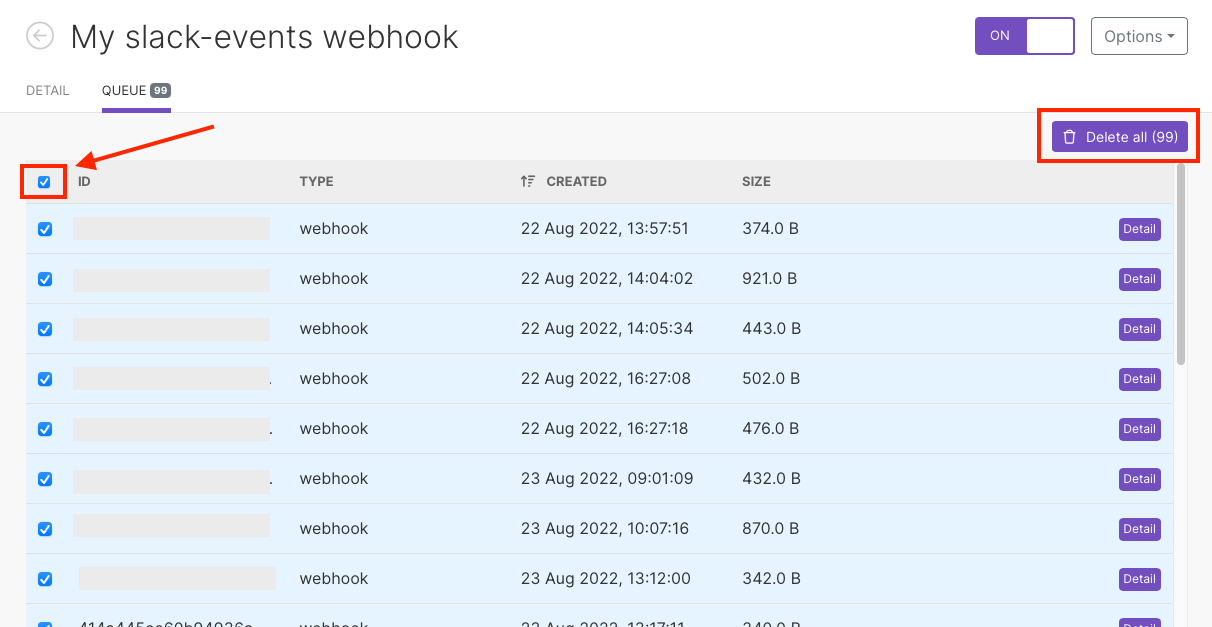
To delete all, tick the first box on the left and then Delete all.
Click OK to confirm.
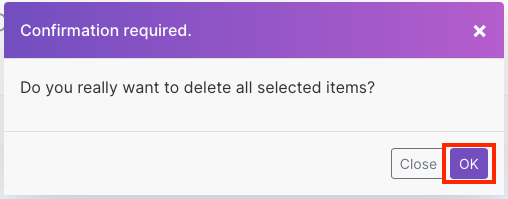
You have deleted the incoming webhook item(s) from the queue.
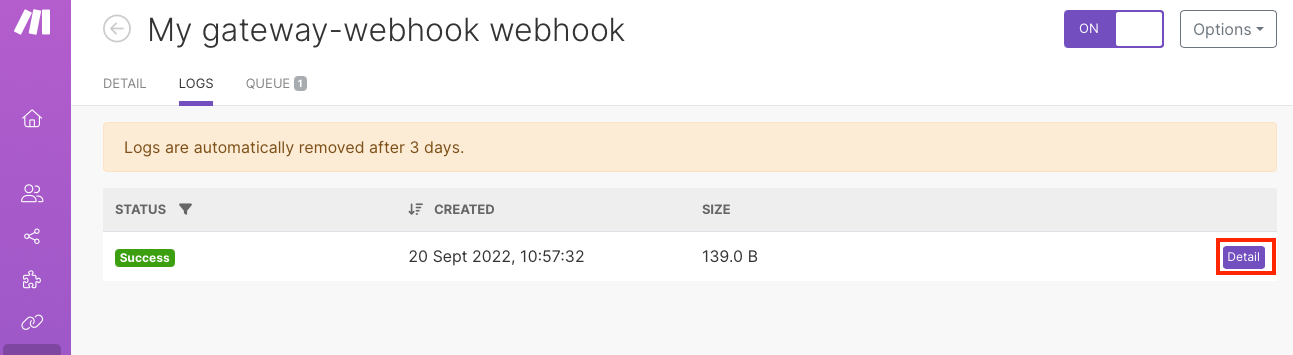
To view webhook logs, follow the steps below.
- Go to the Webhooks section in the menu on the left.
- Click the specific webhook on the list to inspect its details.
- Click Logs.
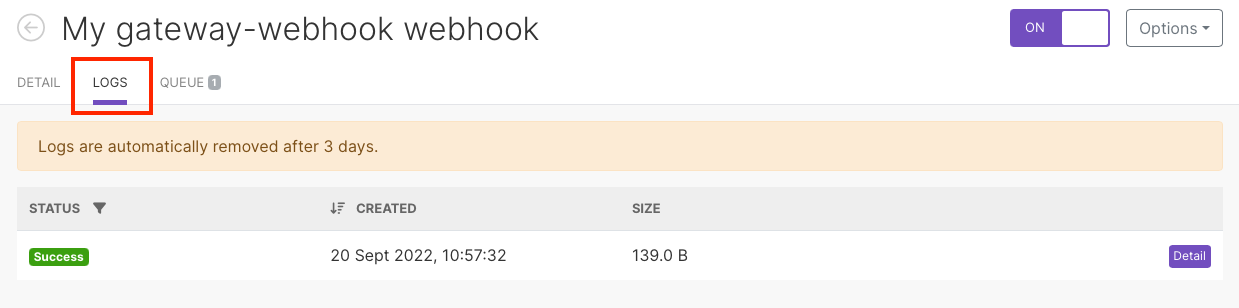
You can see:
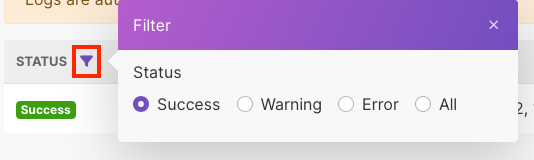
- Status of the webhook call (success, warning, errorService is unavailable due to a failure, a service responds with unexpected data or the validation of input data fails., or all)To filter the webhook logs by status, click the filter icon.
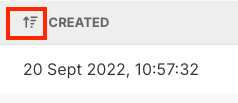
- Date and time of the incoming webhookTo sort the webhook log by date and time, click the arrow.
- Webhook execution log size
- Status of the webhook call (success, warning, errorService is unavailable due to a failure, a service responds with unexpected data or the validation of input data fails., or all)To filter the webhook logs by status, click the filter icon.
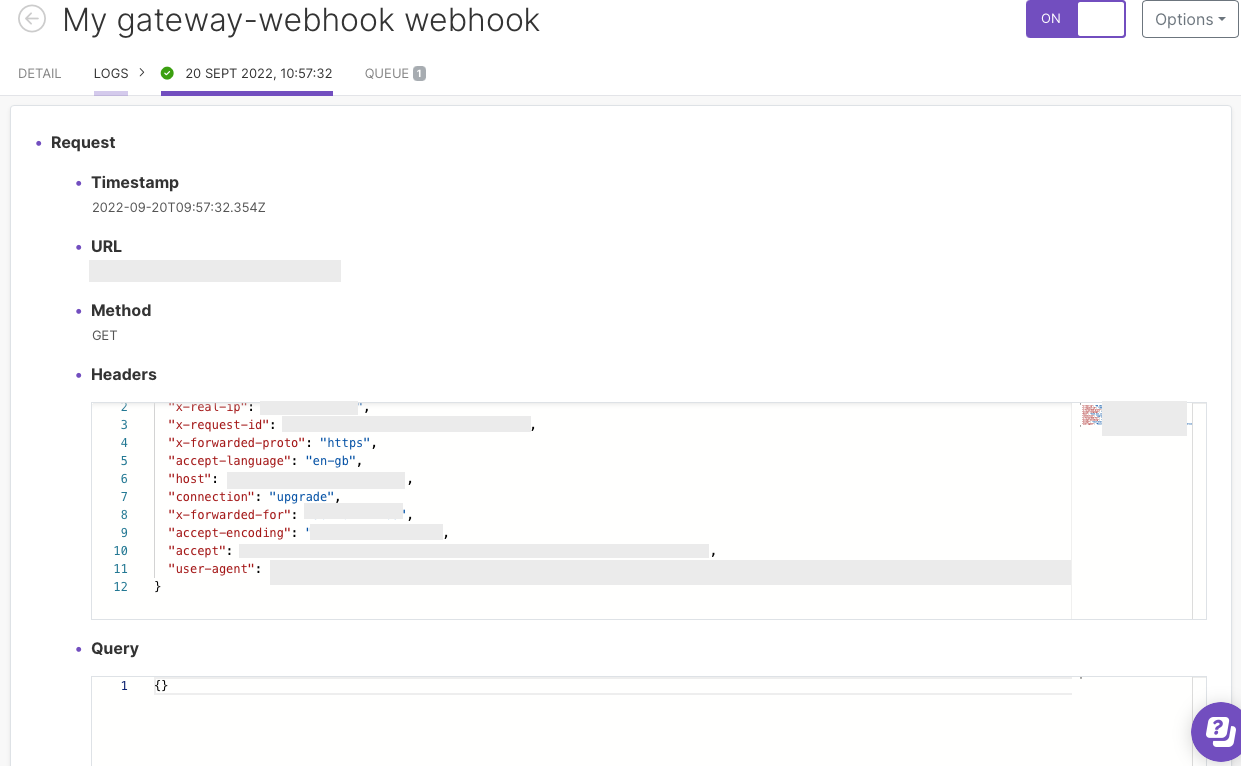
- To see the detail of the specific webhook log, click Detail.
You can see:
- Webhook request (timestamp, URL, method, headers, query, body)
- Webhook response (status, headers, body)
- Parsed itemsParsed items combine the query parameters and body of the webhook request in one bundleA bundle is a chunk of data and the basic unit for use with modules. A bundle consists of items, similar to how a bag may contain separate, individual items. .
To adjust a webhook’s settings, click Webhooks in the left menu and Edit a webhook.
| Setting | Description |
| IP restrictions | A whitelist of IP addresses delimited by comma. Only webhook requests that come from the specified IPs will be processed. Use CIDR notation to whitelist a subnet. Leave empty if you want to allow requests from all IPs. |
| Data structure | Select an existing data structure or create a new data structure for the webhook. Boost.space Integrator will use the data structure to validate the incoming data. Requests that don’t pass validation will be rejected with HTTP status code 400. |
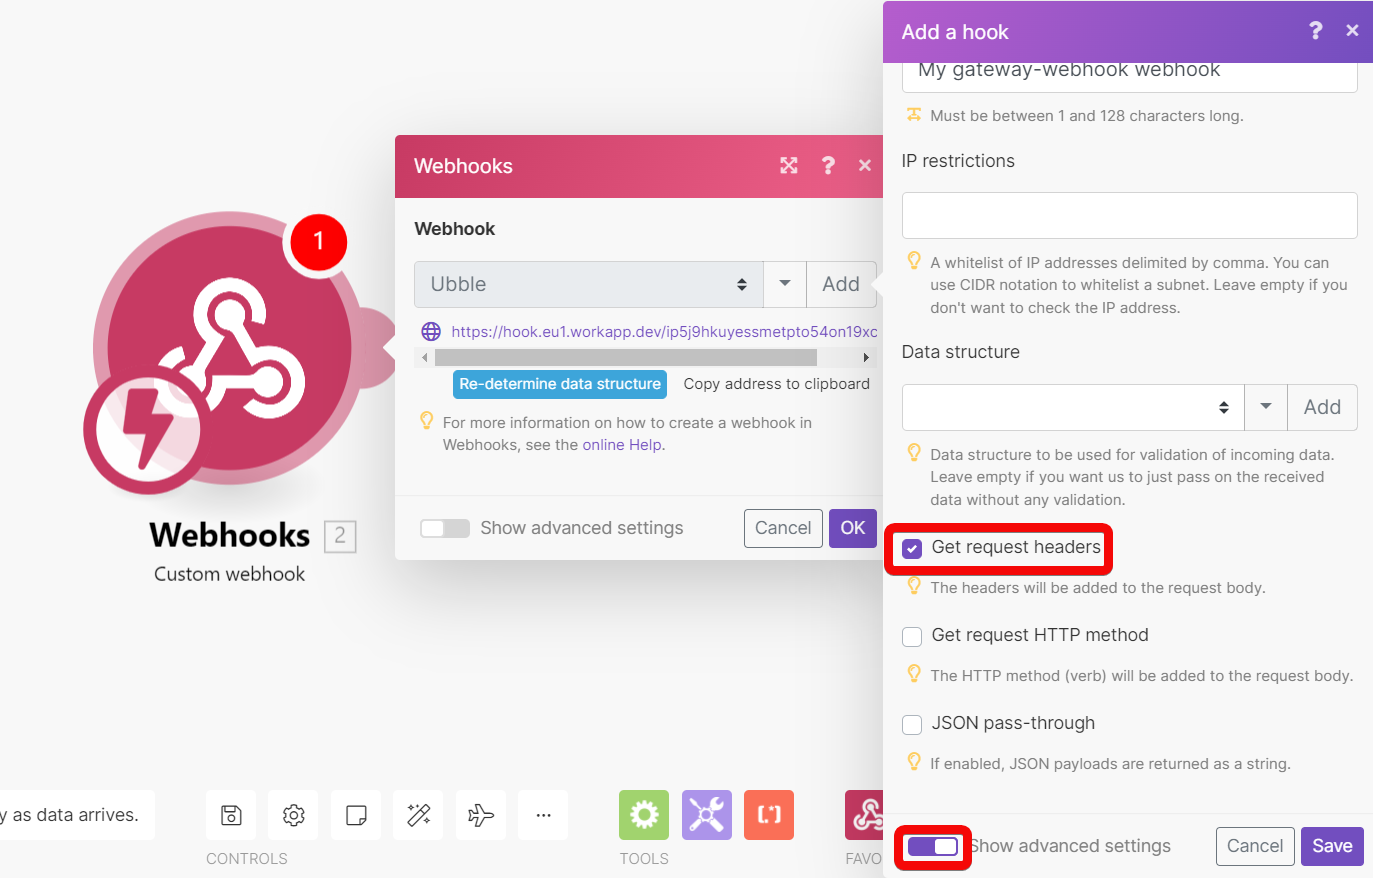
| Get request headers | Extracts headers data from the webhook request and makes the data available for mapping in the scenario. |
| Get request HTTP method | Extracts the HTTP method from the request and makes the method available for mapping in the scenario. |
| JSON pass-through | Passes JSON payloads to subsequent modules in the scenario as a text string, as opposed to breaking the payload down into mappable fields. |
When there is an error in your scenario with a webhook, the scenario:
- stops immediately – when the scenario is set to run Immediately.
- stops after 3 unsuccessful attempts (3 errorsService is unavailable due to a failure, a service responds with unexpected data or the validation of input data fails.) – when the scenario is set to run as scheduled.
If your scenario contains a Webhook response module, the error is sent to the Webhook response. The webhook response module is always executed last, unless you enable auto commitThe Auto commit option defines how Boost.space Integrator processes data transactions. Enabling Auto commit switches all operations to the commit phase. In the case of an error, data commits immediately and you cannot restore any lost data. in scenario settings.
Boost.space Integrator supports the following formats of incoming data:
- Query string
- Form data
- JSON
If a webhook receives data in both the query string and either form data or JSON data at the same time, the system combines the data into a single bundle. If the request contains duplicate data in different formats, the query string takes precedence and overwrites the data that was received in the other formats. We recommend you do not duplicate data in query strings, form data, and JSON.
GET https://hook.make.com/yourunique32characterslongstring?name=Boost.space Integrator&job=automate
POST https://hook.make.com/yourunique32characterslongstring Content-Type: application/x-www-form-urlencoded name=Integrobot&job=automate
POST https://hook.make.com/yourunique32characterslongstring Content-Type: multipart/form-data; boundary=---generatedboundary ---generatedboundary Content-Disposition: form-data; name="file"; filename="file.txt" Content-Type: text/plain Content of file.txt ---generatedboundary Content-Disposition: form-data; name="name"Boost.space Integrator ---generatedboundary
In order to receive files encoded with multipart/form-data, it is necessary to configure a data structure with a collection type field that contains the nested fields name, mime and data. The field name is a text type and contains the name of the uploaded file. The mime is a text type and contains a file in the [MIME] format. The field data is a buffer type and contains binary data for the file being transferred.
POST https://hook.make.com/yourunique32characterslongstring Content-Type: application/json {"name": "Integrobot", "job": "automate"}
To access the original JSON, open the webhook’s settings and enable the JSON pass-through option:

The maximum allowed webhook’s payload size (Content-Length) is 5 MB (5.242.880 bytes) regardless of the subscription tier.
To access the webhook’s headers, enable the Get request headers option in the webhook’s setup:
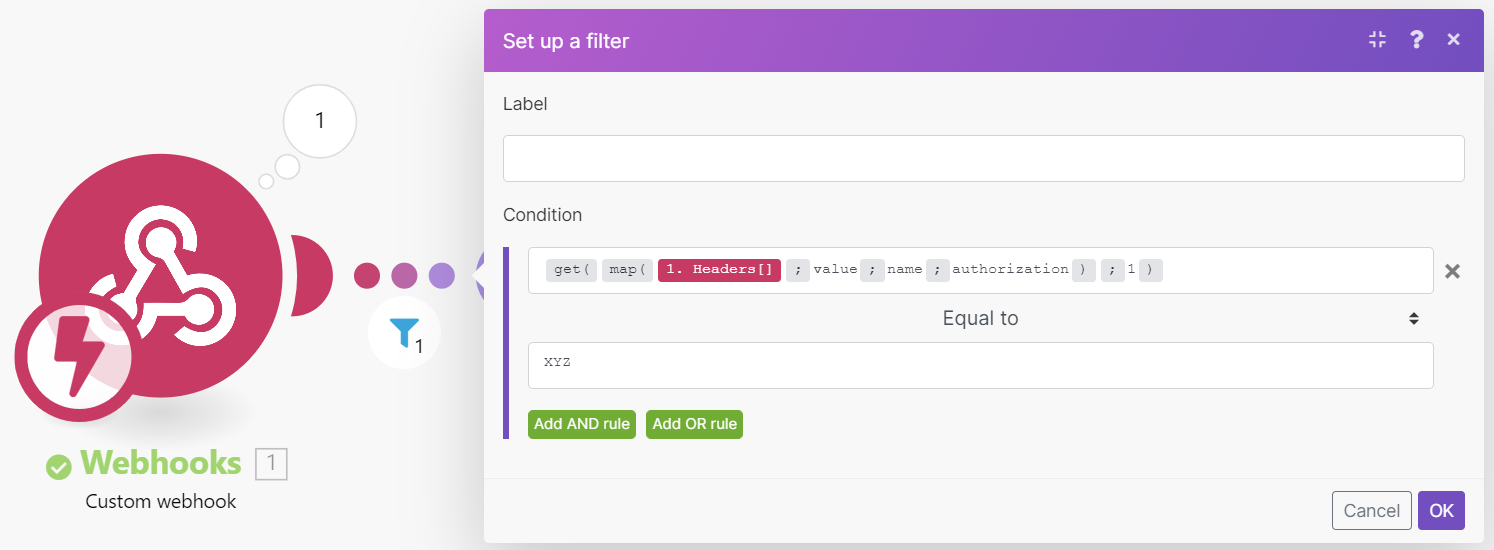
You can then extract a particular header value with the combination of map() & get() functionsFunctions you can use in Boost.space Integrator - create, update, delete, get, search.. The example below shows a formula that extracts the value of the authorization header from the Headers[] arrayWithin a bundle, data items of the same type are sometimes in an array. You can find an array by looking at the details of a bundle. Depending on the details of your scenario, you can map other modules to a specific item in an array or use iterators and aggregators to manipulate your data into other formats. When mapping,.... The formula is used in a filter that compares the extracted value with the given text to pass only webhooks if there is a match.
The default response to a webhook call contains just a simple text, “Accepted”. The response is returned to the webhook’s caller right away during the execution of the Custom Webhook module. You can easily test it like this:
- Place the Custom Webhook module in your scenario.
- Add a new webhook in the module’s configuration.
- Copy the webhook’s URL to your clipboard.
- Run the scenario – the Custom Webhook module should be waiting for the webhook call (see on the right)
- Open a new browser window, paste the copied URL in the address bar and press Enter.
- The Custom Webhook module will be triggered and the browser will display the following page:
These are default responses when the scenario does not contain the Webhook Response module:
| HTTP status code | Body | |
| Webhook accepted in the queue | 200 | Accepted |
| Webhook queue full | 400 | Queue is full. |
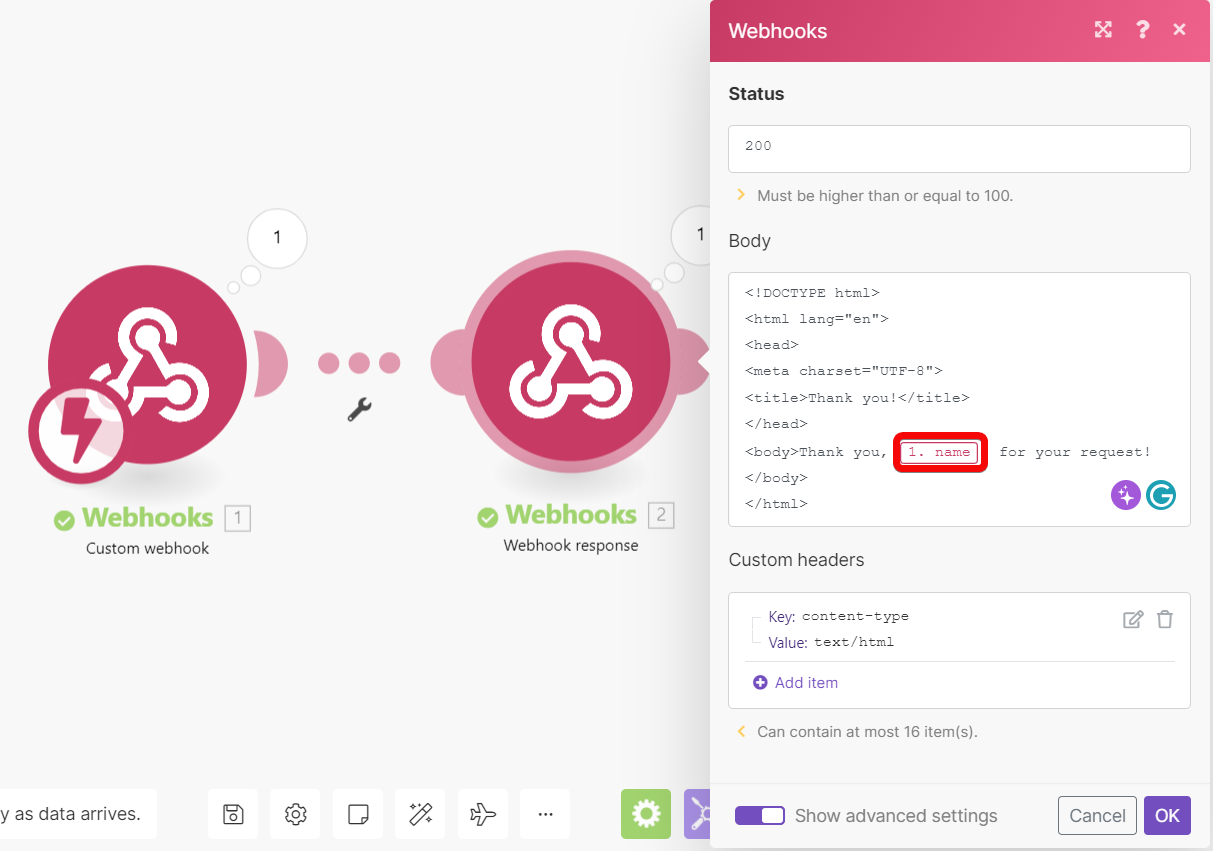
If you wish to customize the webhook’s response, employ the module Webhook Response. The configuration of the module contains two fields: Status and Body. The Status field should contain HTTP response status codes like 2xx for Success (e.g.200 for OK), 3xx for Redirection (e.g.307 for Temporary Redirect), 4xx for Client errors (e.g. 400 for Bad Request), etc. The Body field should contain anything that will be accepted by the webhook’s call. It can be a simple text, HTML, XML, JSON, etc. It is advisable to set the Content-Type header to the corresponding mime type: text/plain for plain text, text/html for HTML, application/json for JSON, application/xml for XML, etc.
These are additional default responses when the scenario does contain the Webhook Response module:
| HTTP status code | Body | |
| Scenario encounters an error | 500 | Scenario failed to complete. |
The timeout for sending a response is 40 seconds. If the response is not available within that period, Boost.space Integrator returns a ‘200 Accepted’ status.
Configure the Webhook Response module as follows:
| Status | 2xx success HTTP status code, e.g. 200 |
||||
| Body | HTML code, e.g.:
<!DOCTYPE html> <html lang="en"> <head> <meta charset="UTF-8"> <title>Thank you!</title> </head> <body>Thank you, {{1.name}}, for your request! </body> </html>
|
||||
| Custom headers |
|
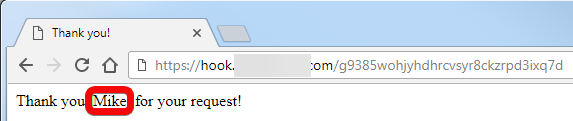
It will produce an HTML response that will be displayed like this in a web browser:
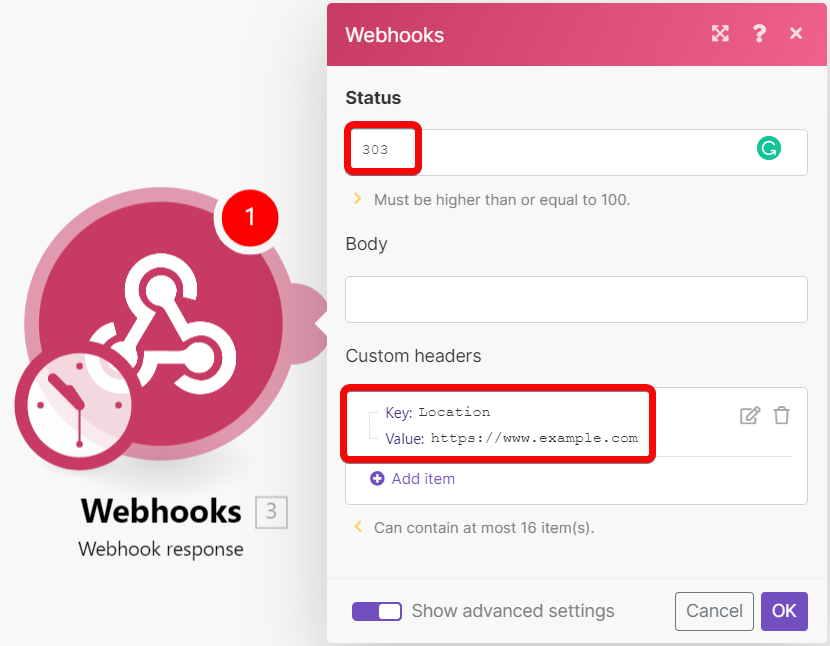
Configure the Webhook Response module as follows:
| Status | 3xx redirection HTTP status code, e.g. 303 |
||||
| Custom headers |
|
Mailhook is an instant trigger module that can be triggered by sending an email to the email address generated by this module.
|
Mailhook attachment size limit |
|---|---|
| The maximum size of an email, including its attachments, that you send to a mailhook is 25 MB. |
Mailhook will monitor your incoming emails without the need to have a scheduled run of the scenario.
- Add the Custom mailhook to your scenario (Webhooks > Custom mailhook).
- Generate a mailhook email address, and copy the address to the clipboard.
- Save and run the scenario.
- Open your email account settings, and configure forwarding. Use the email address generated by the Custom mailhook module in step 2 (above) as the forwarding address.
For Gmail:
- Click the cogwheel (
 ) in the top-right corner, and then click See all settings.
 - Open the Forwarding and POP/IMAP tab.
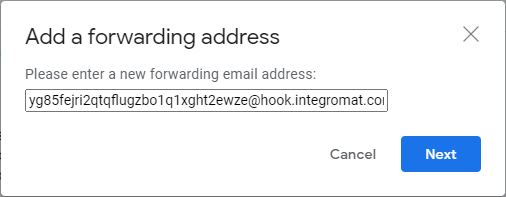
- Click the Add a forwarding address button.
- Enter the email address you have generated and copied in step 2 above, and click Next.
- After that, a popup window will appear. Click Proceed.
- A confirmation code has been sent to your mailhook. You can find this code in your scenario in the Custom mailhook module’s output under Bundle > Text
- Enter the verification code in forwarding settings in your Gmail account, and click Verify.
- Enable the forwarding, and save changes.


Add other desired modules to the scenario. Then save and activate the scenario
Now, every time a new email is received in your email account, the Custom mailhook module in your Boost.space Integrator scenario is triggered and receives the email message data.
![[Tip]](https://docs.boost.space/wp-content/themes/bsdocs/docs-parser/HTML/css/image/tip.png) |
Tip |
|---|---|
| The sender and various recipient addresses (To: CC: and BCC:) are resolved in the data structure of the incoming mail. Reply-To: can be found in the Header section. |
Boost.space Integrator can process up to 30 incoming webhook requests per second.
If you send more than 30 requests per second, the system returns an error with status code 429.
Missing items in the mapping panel
If some items are missing in the mapping panel in the setup of the modules following the Webhooks > Custom Webhook module, click the Webhooks > Custom Webhook module to open its setup and click Re-determine data structure:
 |
Then follow the steps described in the section Determine the webhook’s data structure.