The Woodpecker modules allow you to create, update, list, and delete the prospects in your Woodpecker account.
Prerequisites
-
A Woodpecker account
In order to use Woodpecker with Boost.space Integrator, it is necessary to have a Woodpecker account. You can create a Woodpecker account at woodpecker.co/signup.
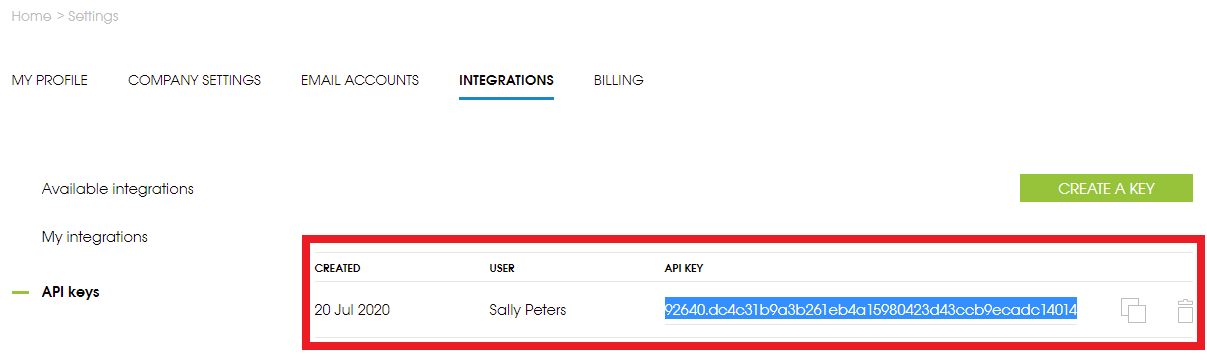
To connect your Woodpecker account to Boost.space Integrator you need to obtain the API Key from your Woodpecker account and insert it in the Create a connection dialog in the Boost.space Integrator module.
1. Login to your Woodpecker account.
2. Click Your Profile Icon > Settings > Integrations > API Keys > Create API Key.
3. Copy the API Key to your clipboard.
4. Go to Boost.space Integrator and open the Woodpecker module’s Create a connection dialog.
5. In the Connection name field, enter a name for the connection.
6. In the API Key field, enter the API key copied in step 3 and click Continue.
The connection has been established.
![[Note]](https://docs.boost.space/wp-content/themes/bsdocs/docs-parser/HTML/css/image/note.png) |
Note |
|---|---|
|
You do not have to add the webhooks in the Woodpecker as it is automatically done for you once you add and save an instant trigger module to your scenario. |
Triggers when a prospect replies or their status is manually changed to “Replied”.
|
Webhook Name |
Enter a name for the webhook. |
|
Connection |
Triggers when a prospect clicks on a link in your email.
|
Webhook Name |
Enter a name for the webhook. |
|
Connection |
Triggers when a prospect opens your email (for the first time).
|
Webhook Name |
Enter a name for the webhook. |
|
Connection |
Triggers when you get an auto-reply and you set a date to resume follow-ups.
|
Webhook Name |
Enter a name for the webhook. |
|
Connection |
Triggers when Woodpecker sends emails to a particular prospect.
|
Webhook Name |
Enter a name for the webhook. |
|
Connection |
Searches a specific user or lists them all.
|
Connection |
|
|
Limit |
Set the number of returned prospects Boost.space Integrator will return during one execution cycle. |
|
Prospect |
Select the prospect whose details you are searching for. |
|
Status |
Select the status of the prospect you are searching:
|
Creates an array of new prospects.
|
Connection |
|||||||||||||||||||||||||||||||
|
Prospects |
Add the prospect:
|
Updates an array of existing prospects by ID.
|
Connection |
|||||||||||||||||||||||||||||||
|
Prospect |
Select the prospect whose details you want to update. |
||||||||||||||||||||||||||||||
|
Prospects |
Add the prospect:
|
Deletes an existing prospect.
|
Connection |
|
|
Prospect |
Select the prospect you want to delete. |
Triggers when your email was bounced and a prospect is marked as “Bounced”.
|
Webhook Name |
Enter a name for the webhook. |
|
Connection |
Triggers when the prospect’s email address is marked as “Invalid”.
|
Webhook Name |
Enter a name for the webhook. |
|
Connection |
Triggers when a prospect is marked as “Interested”.
|
Webhook Name |
Enter a name for the webhook. |
|
Connection |
Triggers when a prospect is marked as “Maybe later”.
|
Webhook Name |
Enter a name for the webhook. |
|
Connection |
Triggers when a prospect is marked as “Not Interested”.
|
Webhook Name |
Enter a name for the webhook. |
|
Connection |
Triggers when an auto-reply is detected by Woodpecker or if you manually change a prospect’s status to “autoreplied”.
|
Webhook Name |
Enter a name for the webhook. |
|
Connection |
Triggers when a prospect unsubscribe or when it is marked as “Blacklisted”.
|
Webhook Name |
Enter a name for the webhook. |
|
Connection |
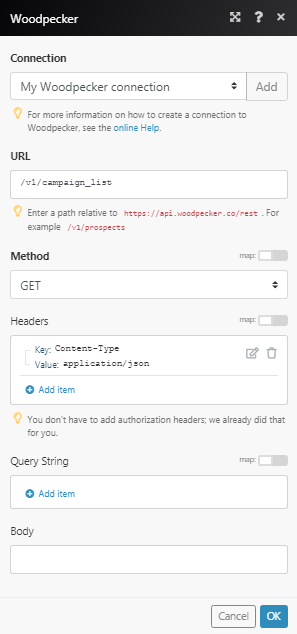
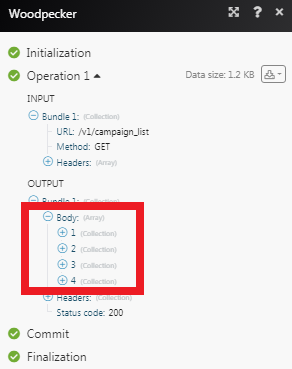
Performs an arbitrary authorized API call.
|
Connection |
|
|
URL |
Enter a path relative to For the list of available endpoints, refer to the Woodpecker API Documentation. |
|
Method |
Select the HTTP method you want to use: GET to retrieve information for an entry. POST to create a new entry. PUT to update/replace an existing entry. PATCH to make a partial entry update. DELETE to delete an entry. |
|
Headers |
Enter the desired request headers. You don’t have to add authorization headers; we already did that for you. |
|
Query String |
Enter the request query string. |
|
Body |
Enter the body content for your API call. |