With Yotpo – Loyalty modules in Boost.space Integrator, you can watch loyalty events, create or update a customer record, and retrieve a customer.
To get started with Yotpo – Loyalty, create an account at yotpo.com.
To connect Yotpo – Loyalty app, you need to obtain the GUID and API Key from your Yotpo – Loyalty account and insert them into your Boost.space Integrator scenario.
-
Log in to your Yotpo – Loyalty account.
-
Click Settings. Copy the GUID and API key to a safe place.
-
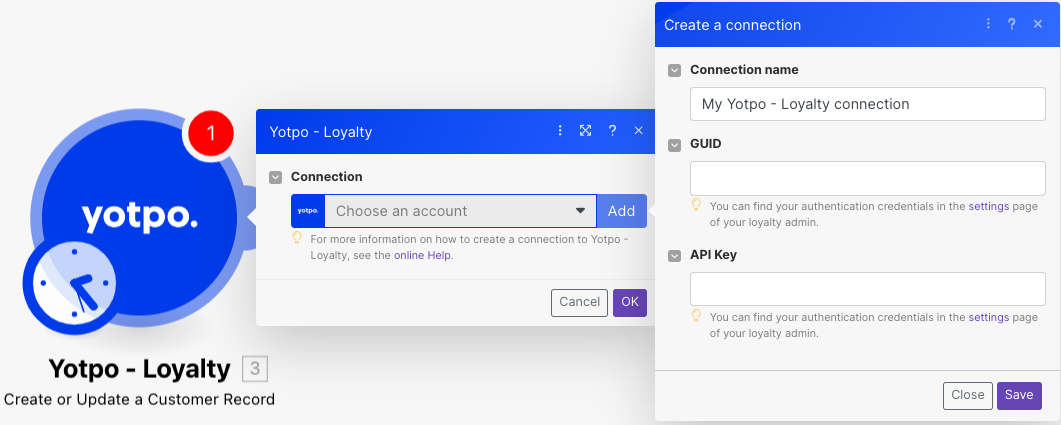
Log in to your Boost.space Integrator account, insert a Yopto-Loyalty module in your scenario, and click the Add button next to the Connection field.
-
Optional: In the Connection name field, enter a name for the connection.
-
In the GUID and API Key fields, enter the GUID and API Key copied in step 2, and click Save.
You have successfully established the connection. You can now edit your scenario and add more Yotpo – Loyalty modules. If your connection needs reauthorization at any point, follow the connection renewal steps here.
You can search and retrieve invoices using the following modules.
Triggers when a new event in loyalty API has occurred.
To setup webhooks, see the section, Setting up Yotpo – Loyalty Webhooks.
Creates or updates a customer record.
|
Connection |
||||
|
|
Enter the customer’s email address. |
|||
|
First Name |
Enter the customer’s first name. |
|||
|
Last Name |
Enter the customer’s last name. |
|||
|
Customer ID |
Enter the unique identifier of the customer in your system. This is required only if you are implementing a generic e-commerce integration. |
|||
|
Phone Number |
Enter the customer’s phone number in E.164 format, for example, |
|||
|
Country ISO Code |
Select the customer’s country ISO Code, only if you are unable to send the |
|||
|
Has Account |
Select whether the customer has an account with the platform. |
|||
|
Opted In |
Select whether the customer should be opted into the loyalty program. If null will rely on the account settings of opt-in. |
|||
|
Pos Account ID |
Enter the point of sale unique account identifier. |
|||
|
Tags |
Enter a list of tags separated by tags the customer belongs to.
|
|||
|
Opted in at |
Enter the date and time when the customer has opted into the loyalty program. |
Retrieves an existing customer.
|
Connection |
|
|
Customer Email |
Enter the customer’s email address. |
|
Customer ID |
Enter the unique identifier of the customer in your system. This is required only if you are implementing a generic e-commerce integration. |
|
Pos Account ID |
Enter the point of sale unique account identifier. |
|
Phone Number |
Enter the customer’s phone number in E.164 format, for example, |
|
Country ISO Code |
Select the customer’s country ISO Code only if unable to enter the |
|
With Referral Code |
Select whether to retrieve information about the customer’s referral code. |
|
With History |
Select whether to retrieve information about the customer’s point earning and redemption history. |
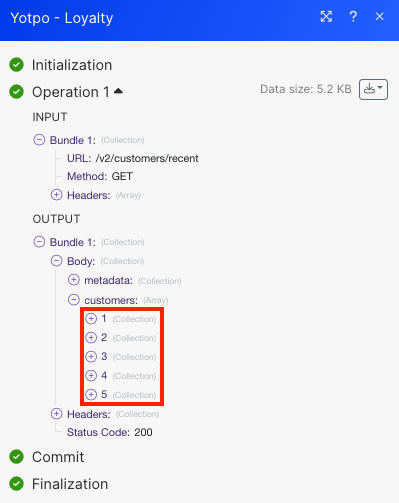
You can call APIs using the following module.
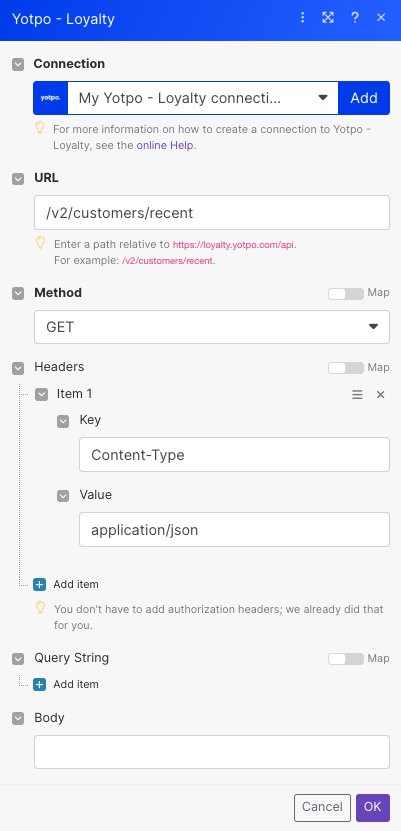
Performs an arbitrary authorized API call.
![[Note]](https://docs.boost.space/wp-content/themes/bsdocs/docs-parser/HTML/css/image/note.png) |
Note |
|---|---|
|
For the list of available endpoints, refer to the Yotpo – Loyalty API documentation. |
|
Connection |
|
|
URL |
Enter a path relative to |
|
Method |
GET to retrieve information for an entry. POST to create a new entry. PUT to update/replace an existing entry. PATCH to make a partial entry update. DELETE to delete an entry. |
|
Headers |
Enter the desired request headers. You don’t have to add authorization headers; we already did that for you. |
|
Query String |
Enter the request query string. |
|
Body |
Enter the body content for your API call. |
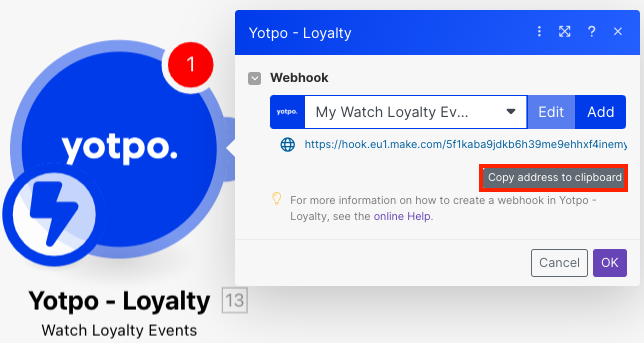
This app makes use of webhooks to instantly trigger a scenario when an event occurs. Follow the steps below to set them up.
-
Open the Watch Loyalty Events module, create a connection, click Save, ad copy the URL address to your clipboard, click OK and save the trigger.
-
Log in to your Yotpo – Loyallty account.
-
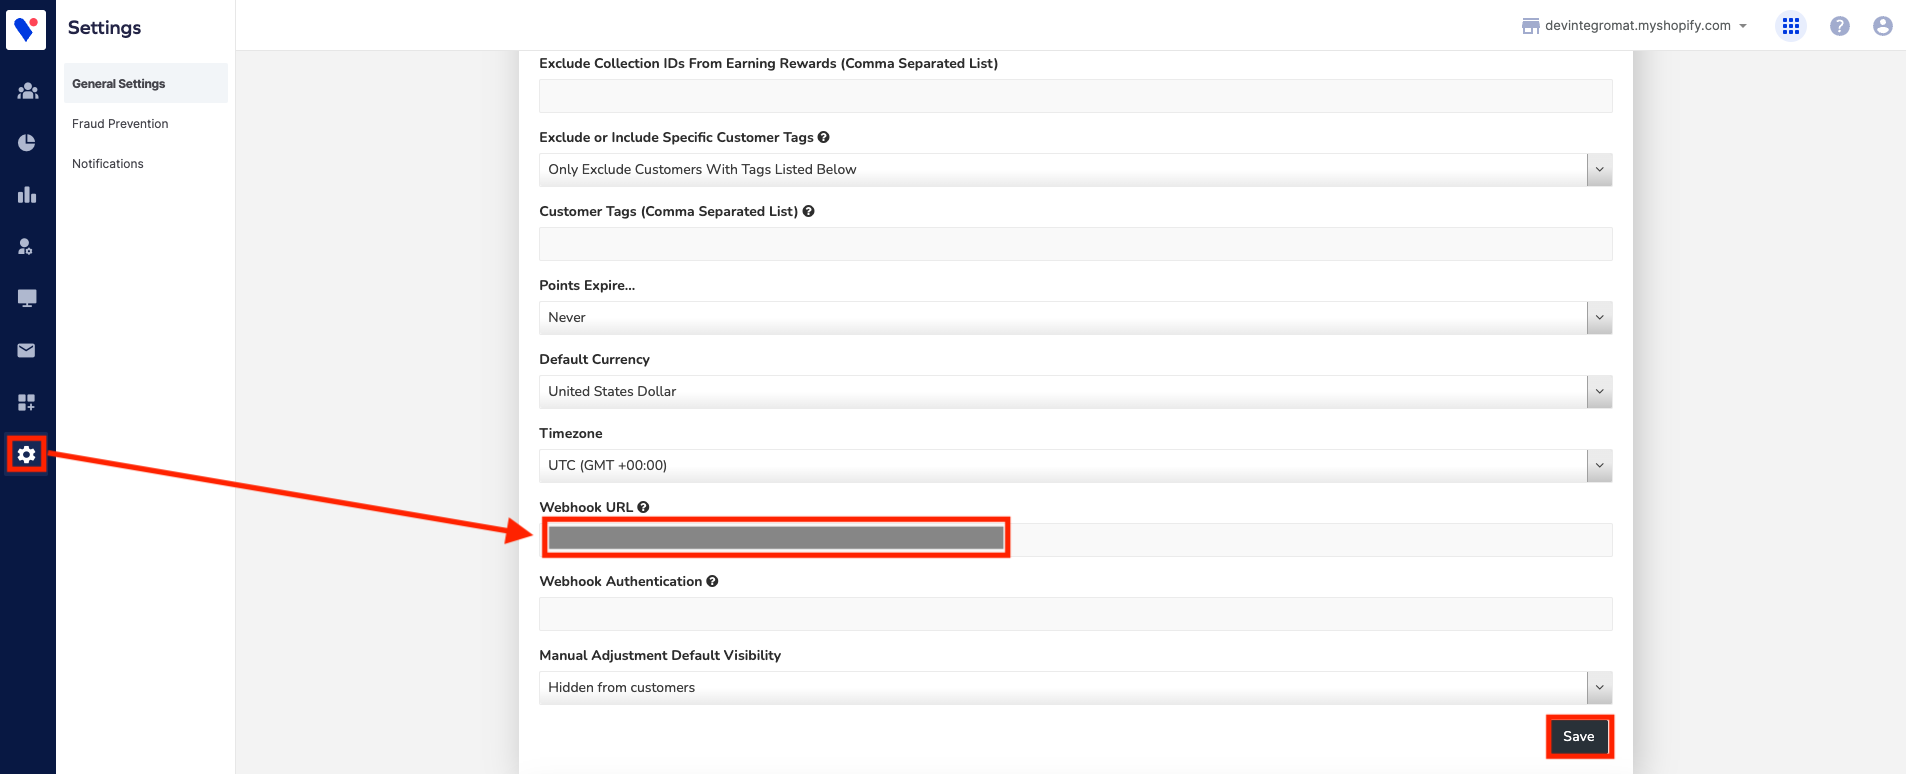
Click Settings and navigate to the Webhook URL.
-
Enter the Webhook URL copied in step 1 and click Save.
You have successfully added the webhooks.

