- LinkedIn Lead Forms
- Establish the connection with LinkedIn Lead Forms in Boost.space Integrator
- Build LinkedIn Lead Forms Scenarios
- LinkedIn Lead Forms Use Case
- Automated Lead Integration and Management from LinkedIn to Google Sheets
- Step 1: Create your connection and configure the LinkedIn Lead Forms module
- Step 2: Prepare your Google spreadsheet and configure the Google Sheets - Search Rows module
- Step 3: Split the flow with a router and configure the first route using the Google Sheets - Add a Row module
- Step 4: Configure the second route using the Google Sheets - Update a Row module
- Step 5: Test the scenario
With LinkedIn Lead Form modules in Boost.space Integrator, you can manage the forms and responses in your LinkedIn Lead Forms account.
To use the LinkedIn Lead Forms modules, you must have a LinkedIn account with access to the Campaign Manager. You can create an account at linkedin.com.
Refer to the LinkedIn Lead Forms API documentation for a list of available endpoints.
To establish the connection in Boost.space Integrator
- Log in to your Boost.space Integrator account, add a LinkedIn Lead Forms module to your scenario, and click Create a connection.
Note: If you add a module with an
instanttag, click Create a webhook, then Create a connection. - Optional: In the Connection name field, enter a name for the connection.
- Optional: Switch on the Show advanced settings toggle and enter your custom app client credentials. For more information, refer to the LinkedIn Help documentation.
If requested, use the following Redirect URI when creating your custom app:
https://integrator.boost.space/oauth/cb/linkedin-openid - Click Save.
- If prompted, authenticate your account and confirm access.
You have successfully established the connection. You can now edit your scenario and add more LinkedIn Lead Forms modules. If your connection requires reauthorization at any point, follow the connection renewal steps here.
After connecting the app, you can perform the following actions:
Triggers
- Watch Form Responses (an instant trigger)
Scopes: r_ads, r_marketing_leadgen_automation, rw_organization_admin, r_events
- Watch Form Responses (a polling trigger)
Scopes: r_ads, r_marketing_leadgen_automation, rw_organization_admin, r_events
![[Note]](https://docs.boost.space/wp-content/themes/bsdocs/docs-parser/HTML/css/image/note.png) |
Note |
|---|---|
This app uses webhooks to trigger a scenario when an event occurs instantly. All webhook modules have an instant tag next to their name.
When you create a LinkedIn Lead Forms webhook in Boost.space Integrator, it is attached automatically and requires no additional set up. |
Actions
- Create a Lead Form
Scopes: rw_ads, r_ads, r_ads_leadgen_automation
- Get a Lead Form
Scopes: r_ads, r_marketing_leadgen_automation, rw_organization_admin
- Get a Lead Form Response
Scopes: r_ads, r_marketing_leadgen_automation, rw_organization_admin
- Update a Lead Form Status
Scopes: rw_ads, r_ads, r_ads_leadgen_automation
Searches
- List Lead Forms
Scopes: r_ads, r_marketing_leadgen_automation, rw_organization_admin
LinkedIn Lead Forms allows you to collect leads directly from your ads on the LinkedIn platform. By connecting your LinkedIn account to Boost.space Integrator, you can automate your lead processing, giving you the opportunity to manage the flow of leads efficiently and effortlessly.
In this use case, we will highlight an example of how you can funnel your leads into a spreadsheet from which you can manage and update the information, and then connect to over 180 Boost.space Integrator marketing apps to suit your needs.
With the help of this guide, you will create a scenario that connects LinkedIn Lead Forms to a Google spreadsheet, making it easy to manage and update lead information.
To get started, you will need:
- A LinkedIn account with access to the Campaign Manager.
- A new campaign configured that includes at least one ad and a form.
- A Google account.
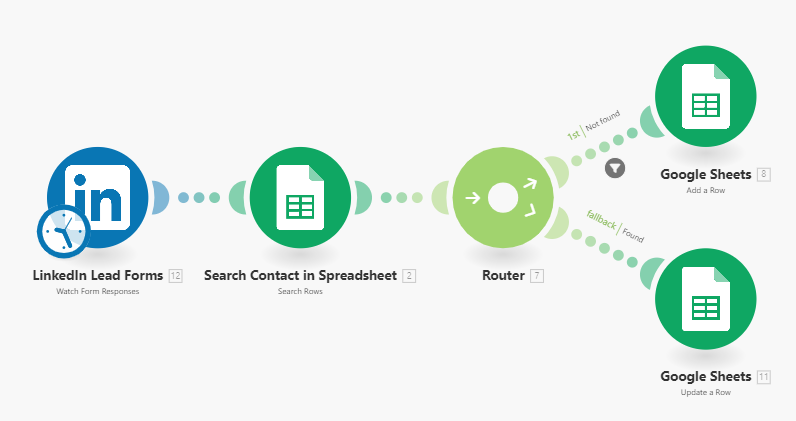
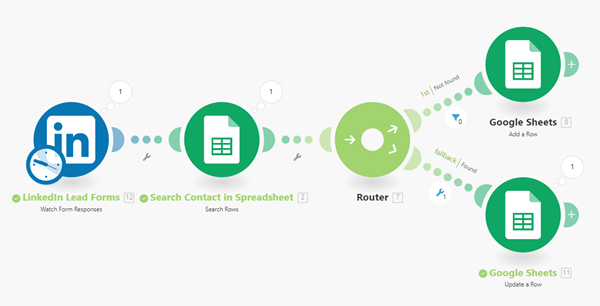
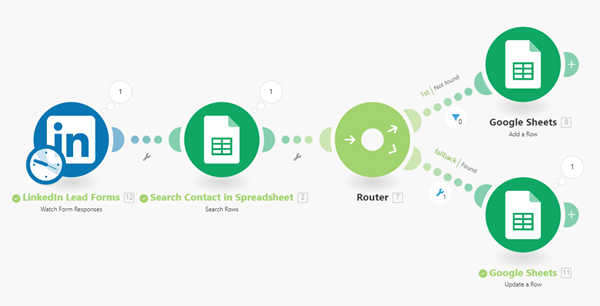
Your final scenario will look like this:
Let’s take a look at all the elements and modules used in our scenario .
- LinkedIn Lead Forms – Watch Form Responses: This is where it all begins. A prospective customer, or lead, fills out a LinkedIn form to show interest in your products or services.
- Google Sheets – Search Contact in Spreadsheet: Next, all these leads are automatically stored in a Google spreadsheet. This helps us keep track of them and decide what to do next.
- Router – Check for new or existing leads: The router checks to see if the lead is new or if we already have them in our spreadsheet. It uses a unique identifier like an email address to do this.
- Google Sheets – Add Lead in Spreadsheet: If the lead is new, we add all their information into the spreadsheet as a brand-new row.
- Google Sheets – Update Lead Information: If the lead is already in our spreadsheet, we update their existing row with any new info they’ve provided, like which new campaign they’re interested in.
Now that you have an overview of the whole process, let’s get started!
We will walk through the following steps to build the scenario:
- Create your connection and configure the LinkedIn Lead Forms module
- Prepare your Google spreadsheet and configure the Google Sheets – Search Rows module
- Split the flow with a router and configure the first route using the Google Sheets – Add a Row module
- Configure the second route using the Google Sheets – Update a Row module
- Test the scenario
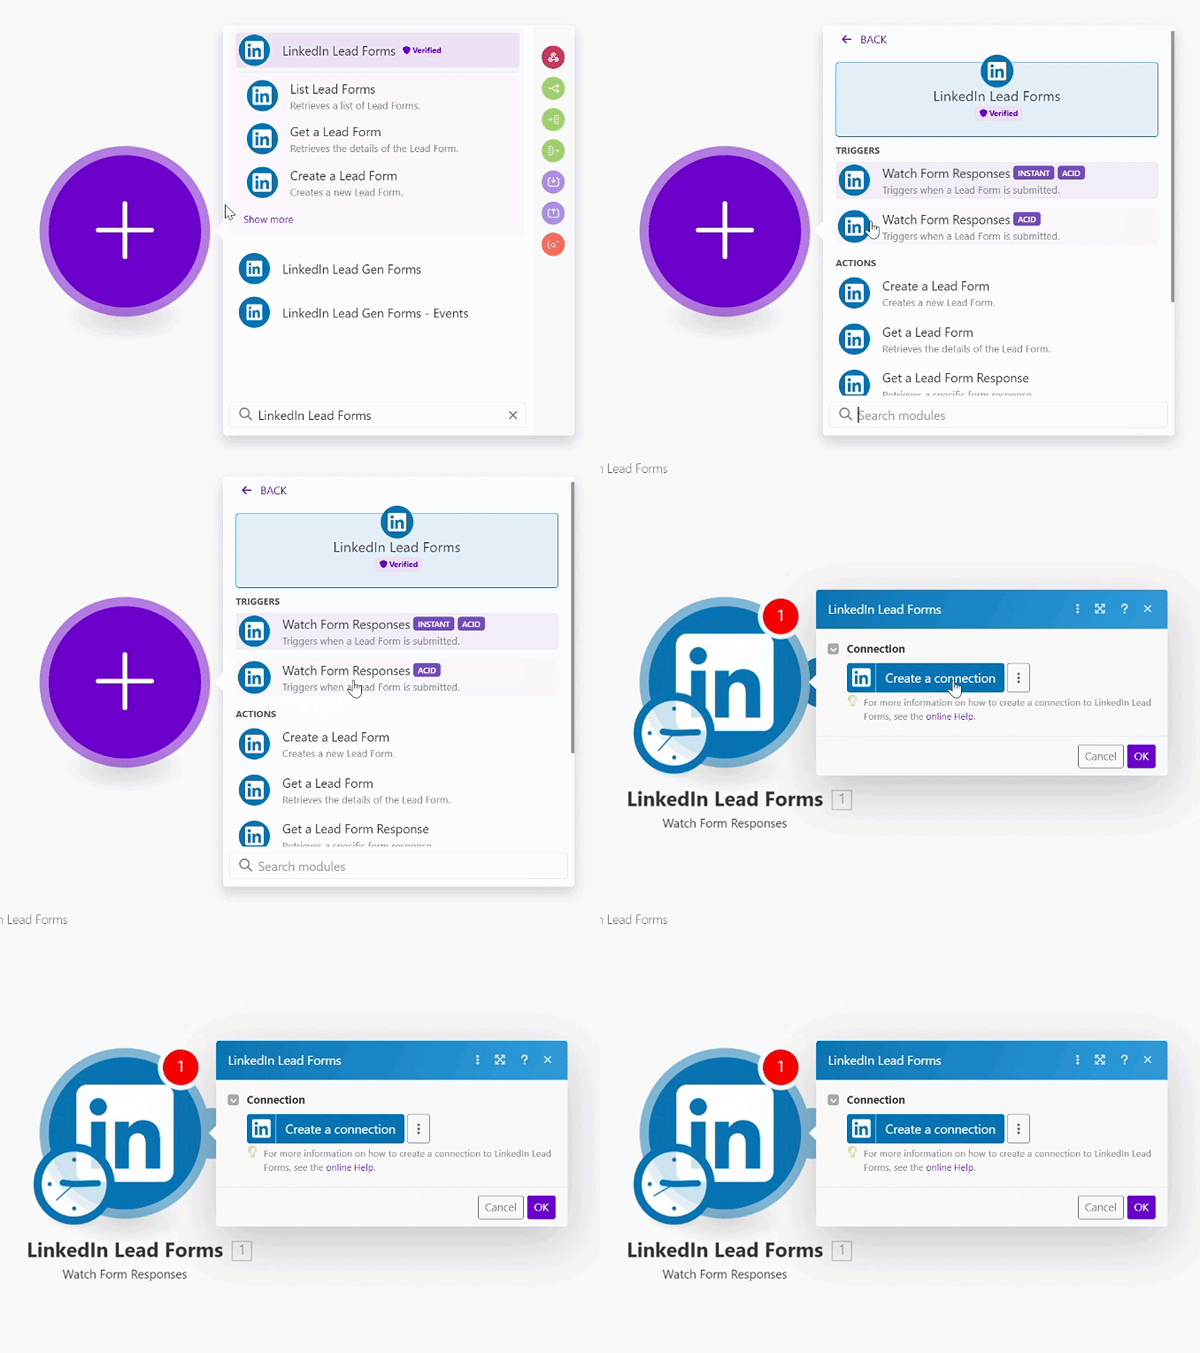
a. Log in to your Boost.space Integrator account and click + Create a new scenario in the top-right corner to go to the scenario builder.
b. Click the + button, type LinkedIn Lead Forms in the search box, and choose the second response module, Watch Form Responses (ACID).
c. If you have not configured any connection, click Add and Create a new connection, following the steps in Establish the connection with LinkedIn Lead Forms in Boost.space Integrator above.
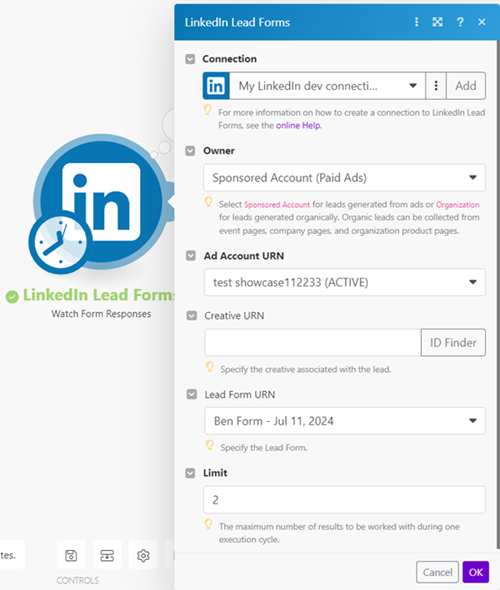
d. Select the Ad Account URN you used for your campaign.
e. Select the Lead Form URN you want to monitor for new submissions.
f. Click OK.
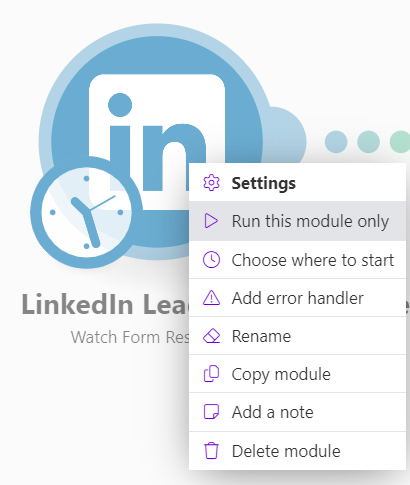
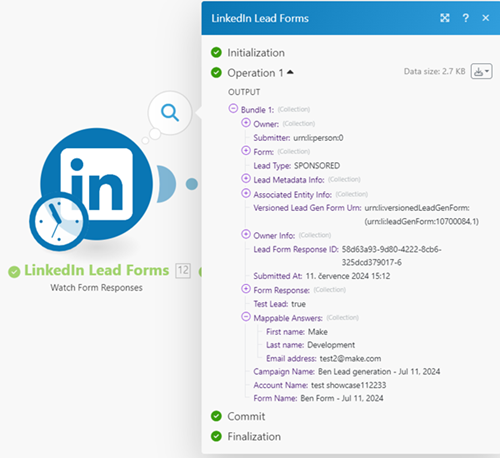
g. Test the module. To do so, fill in your LinkedIn form with test data, then return to your scenario, right click the module, and select Run this module only.
You will see the result of the submission in the module log.
Now, let’s add a Google Sheets – Search Rows module.
You will need a new spreadsheet configured to store information about your leads.
a. Create a new Google spreadsheet called LinkedIn Leads.
b. Add the following titles to the first row: date of submission, first name, last name, email, campaign names.
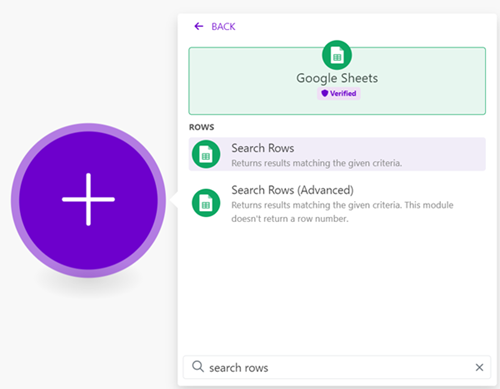
c. In your scenario, click on the + button to the right of the LinkedIn module you created, type Google Sheets in the search box, and choose the Search Rows module.
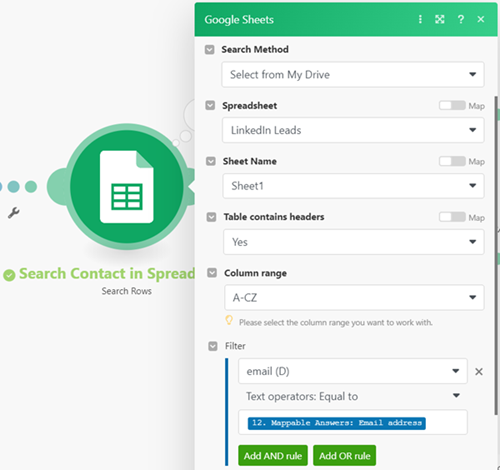
d. In the Spreadsheet field, select LinkedIn Leads, the new spreadsheet you just created.
e. In the Sheet Name field, select Sheet1.
f. For the Filter, select email and for the value choose Equal to and drag & drop the email address field from the previous module.
g. Click OK.
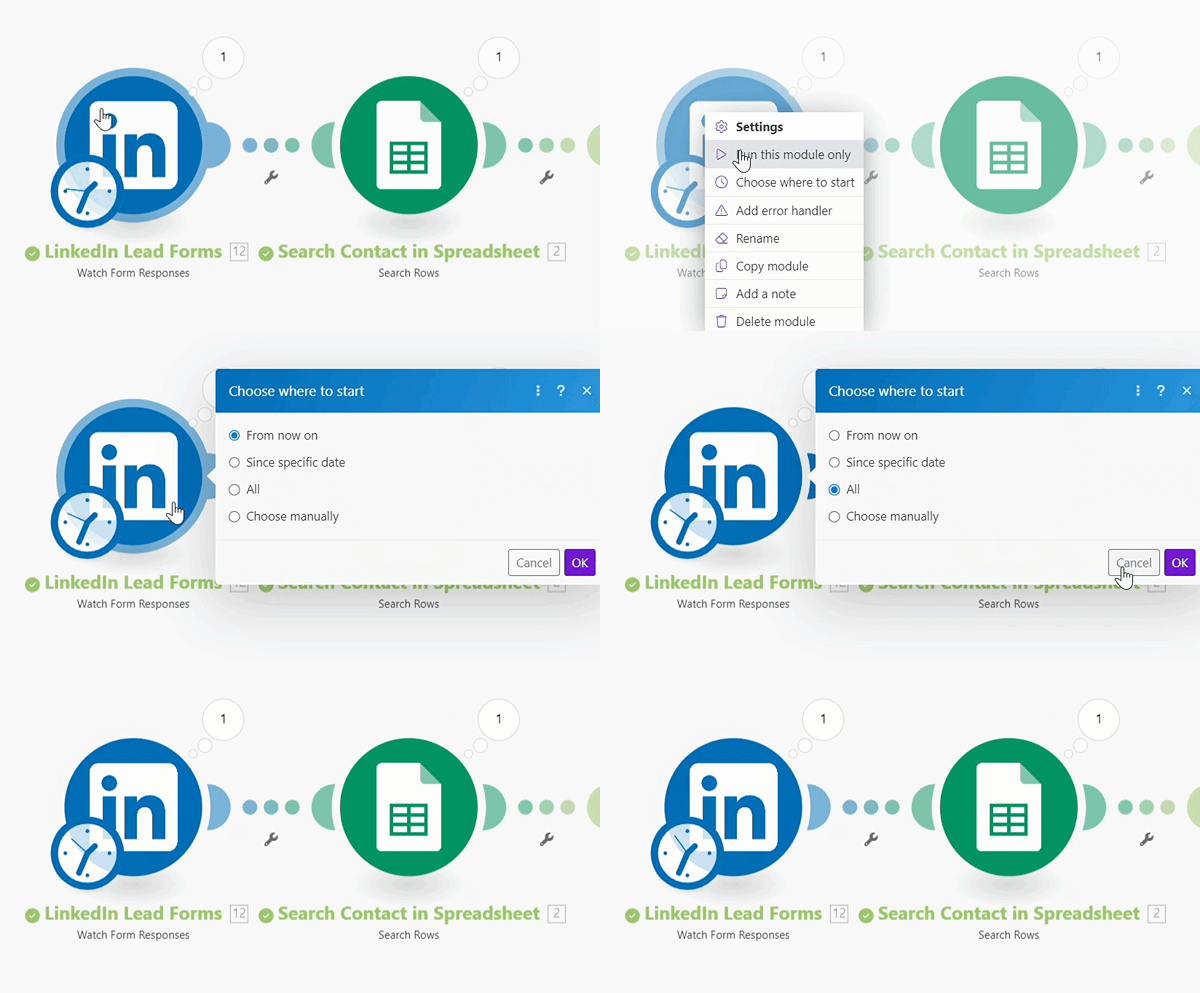
h. Test the scenario . To do so, you need to first reset the LinkedIn Lead Forms – Watch Form Responses module. This is necessary because the module searches for new form responses.
Right-click the LinkedIn module, select Choose where to start, select All, then click OK.
Now, run the full scenario by clicking on the Run Once button in the bottom-left corner. You will see that both modules are executed.
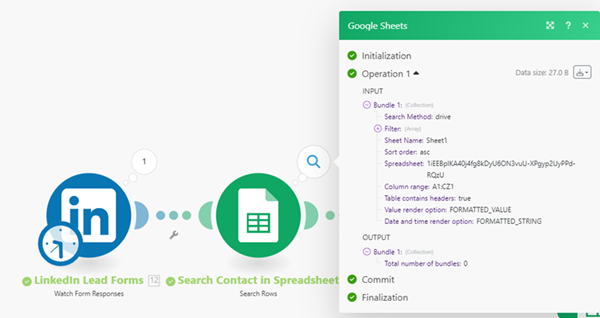
If you select the pop-up at the top right of the Google Sheets – Search Rows module, you will see “Total number of bundles: 0”, which means that the contact hasn’t been found. This is the expected behavior since the spreadsheet is empty.
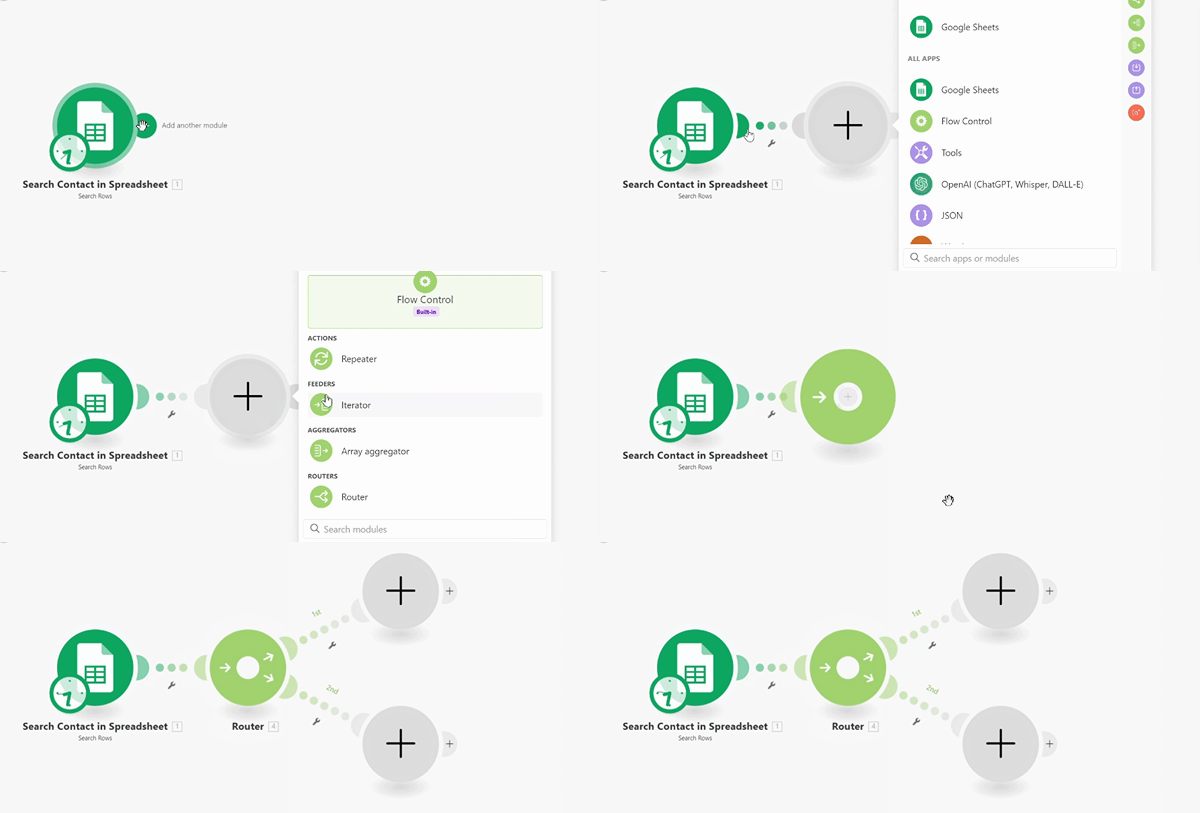
Now, we want to split the scenario into 2 routes. The first route will be used to add the new lead into the spreadsheet if it doesn’t already exist in the document. The second route will be used to update the row of an existing lead in the spreadsheet.
a. Hover on the right side of the Google Sheets – Search Rows module and click on the + button. Select Flow Control, then Router.
Now, we want to add a module to create a new lead in the Google spreadsheet if it doesn’t already exist.
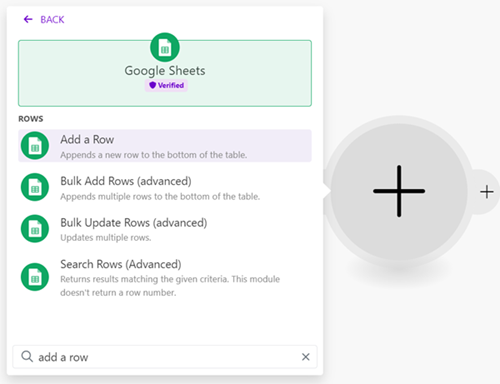
b. Click on the + that appears on the gray empty module in the top right of the scenario, select Google Sheets, and then select the Add a Row module.
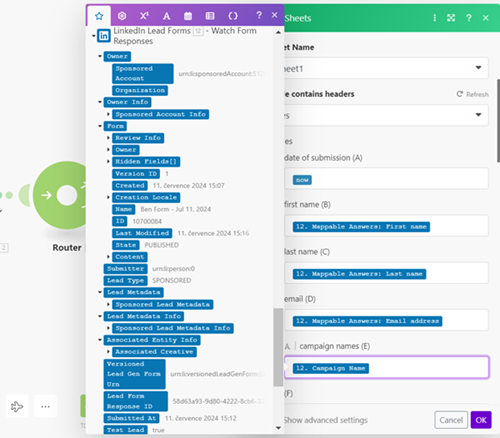
c. Configure the module, selecting the spreadsheet name and the sheet name you want to work with, and then dragging & dropping the fields into the relevant columns.
The following image shows you how to map the fields from LinkedIn to the columns in your spreadsheet. Note that we also use the now Boost.space Integrator variable. This is the current date.
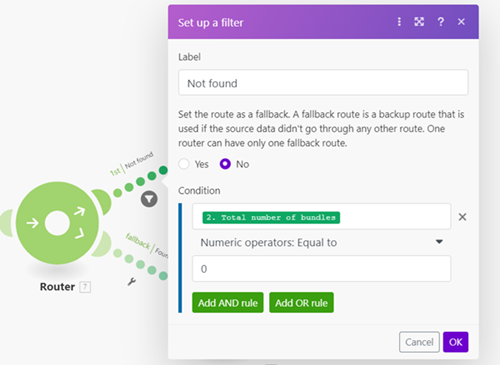
Let’s set up the Filter to tell the scenario that we want to use this route only if the lead was not found in the Google Sheets – Search Rows module.
d. Click the tool icon that appears between the Router and the Google Sheets – Search Rows module, then select Set up a filter.
e. Enter a description in the Label field.
f. For the Condition field, drag & drop the Total number of bundles from the Google Sheets – Search Rows module. Then for the related Operator, select Numeric operators: Equal to, type 0, and click OK.
We have now configured the filter to go to the Google Sheets – Add a Row module only if the Google Sheets – Search Rows module didn’t return any result (0 bundles).
Now, let’s set up the other route. We want it to update the row in the spreadsheet if the lead was found.
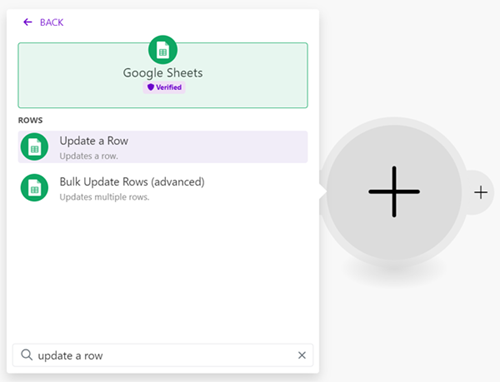
a. Click the + that appears on the gray empty module in the bottom right of the scenario, select Google Sheets, and then select the Update a Rowmodule.
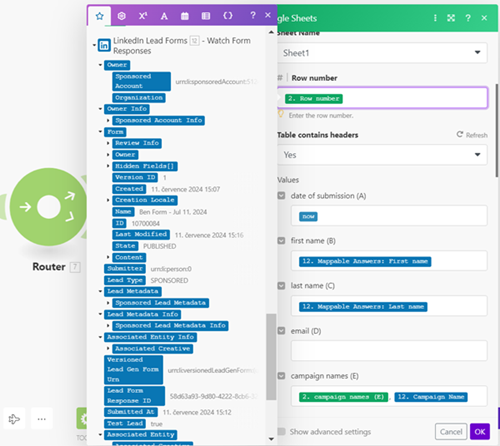
b. Configure the module, selecting the spreadsheet name and the sheet name you want to update, and then dragging & dropping the fields into the relevant columns.
Note the following:
- We have to tell what Row number we want to update. This information comes from the Google Sheets – Search Rows module.
- We don’t need to map the Email of the lead, since we already have that information. We only map the fields that may need an update.
- For the campaign names column, we want to keep the list of campaigns the lead had already subscribed to, and add the new one. That’s why we have to map the campaign names coming from the Google Sheets – Search Rows module, and then add the new one from the LinkedIn Lead Forms – Watch Form Responses module.
The last step is to add a new Filter to let the scenario know that we go to the Update a Row module only if we found a lead in the spreadsheet.
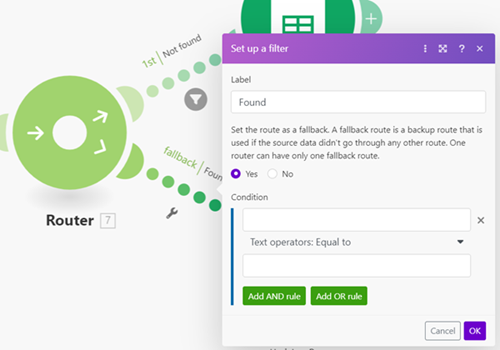
One simple way to do this is to configure the Filter to be a Fallback. This means that we will execute the Google Sheets – Update a Row module only if we didn’t go through the first route in the scenario .
c. Click the tool icon that appears between the Router and the Google Sheets – Update a Row module, then select Set up a filter.
d. Enter a description for the Label field.
e. Select Yes for the Fallback option, and click OK.
The scenario is ready!
Let’s test it.
Reset the LinkedIn Lead Forms – Watch Form Responses module (as previously done in step 2 above) and click Run once to run the full scenario .
Since it’s the first time you are adding the lead into the spreadsheet, your scenario will go to the top module (Google Sheets – Add a Row).
Your spreadsheet will now have a new row with all the information coming from your LinkedIn form.
Reset the LinkedIn Lead Forms – Watch Form Responses module again, and run the scenario. You will now see that the scenario executed the lower route (Google Sheets – Update a Row).
The spreadsheet will now have the campaign name listed twice.
In this tutorial, we are testing with the same data twice; that’s why we have the same campaign name listed again. Of course, if you use the scenario on real campaigns, the names will be different since your leads will submit forms from different campaigns.
