Introducing AppflowsComplex pre-made workflow that combines one or many automation scenarios and optionaly database structure.: Your Gateway to Customizable, Task-Specific Solutions
The main highlight of our system is the introduction of Appflows, which are like mini apps or templates that solve specific area (tasks, products, invoices…). We offer a wide range of Appflows available in our Marketplace, where every partner can create their own custom Appflow or submit an existing one. Additionally, for those who are less technically inclined or prefer not to handle the creation themselves, our team and developers on the MarketplaceMarketplace is a space where users can purchase Appflows, explore our partners, and learn how to become a partner themselves. can build a tailored AppflowComplex pre-made workflow that combines one or many automation scenarios and optionaly database structure. for you. Each Appflow is designed to address specific needs, such as managing contacts, invoices, products, tasks, and more.
Video
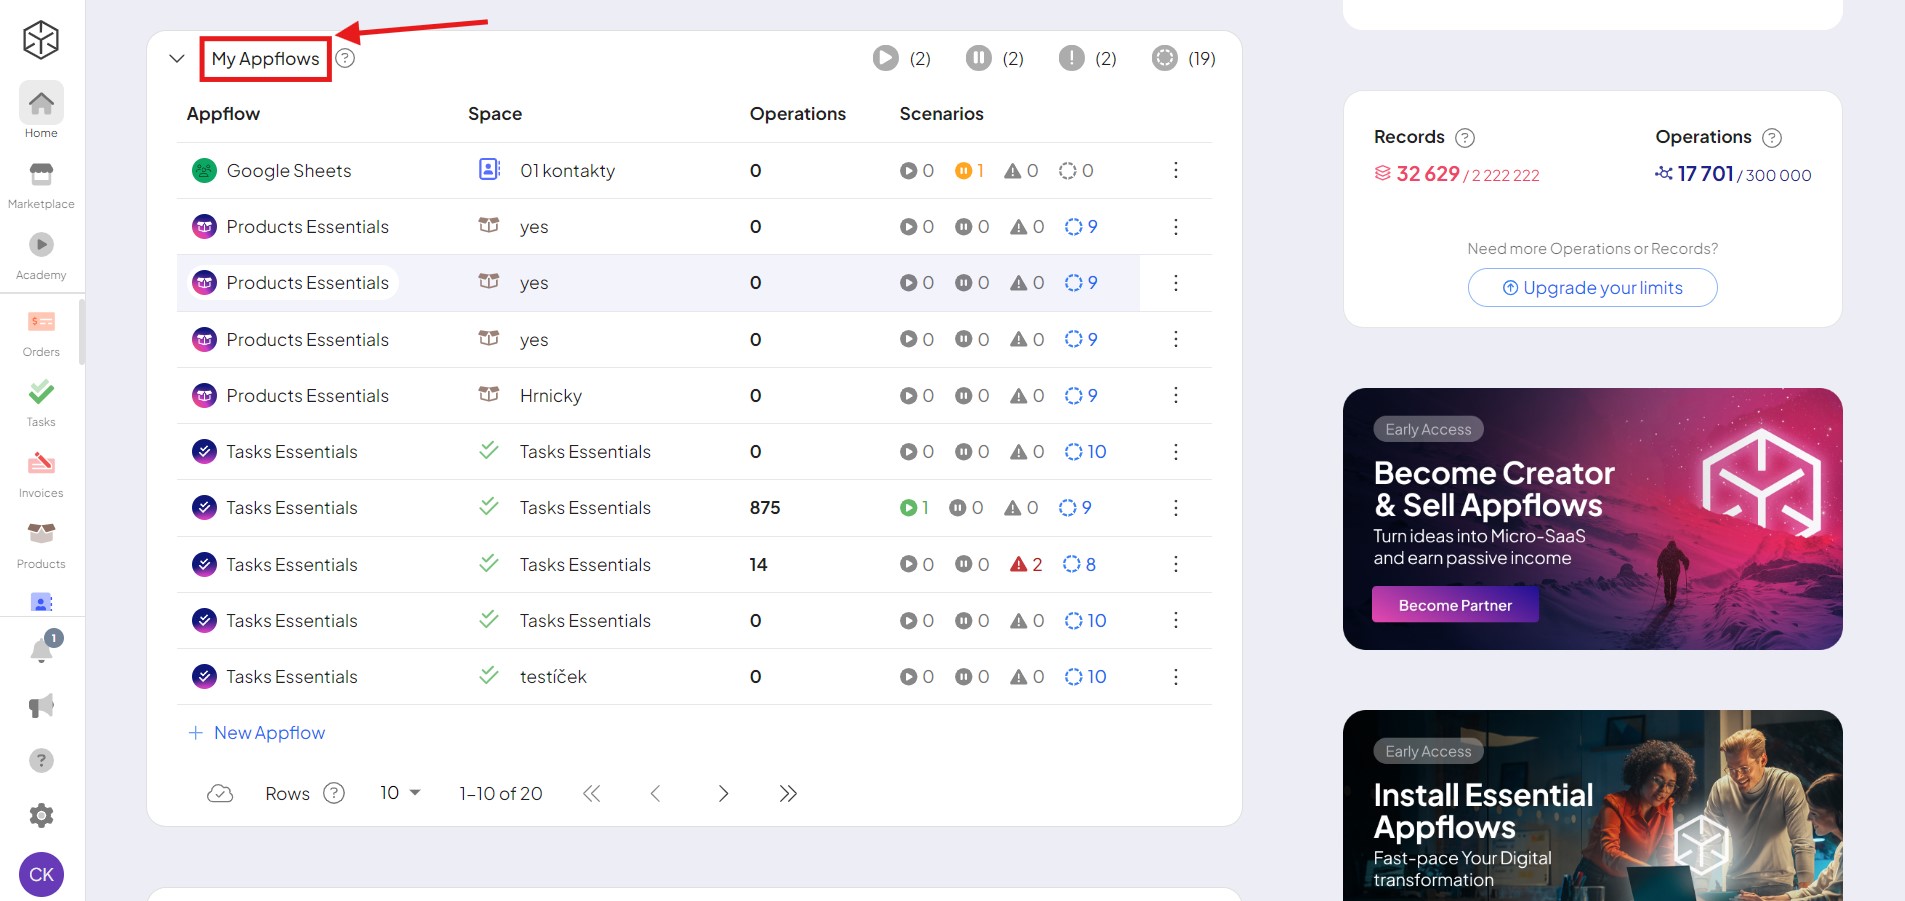
You may notice the new Appflows environment right on your desktop. Here, you can manage your Appflows with ease.
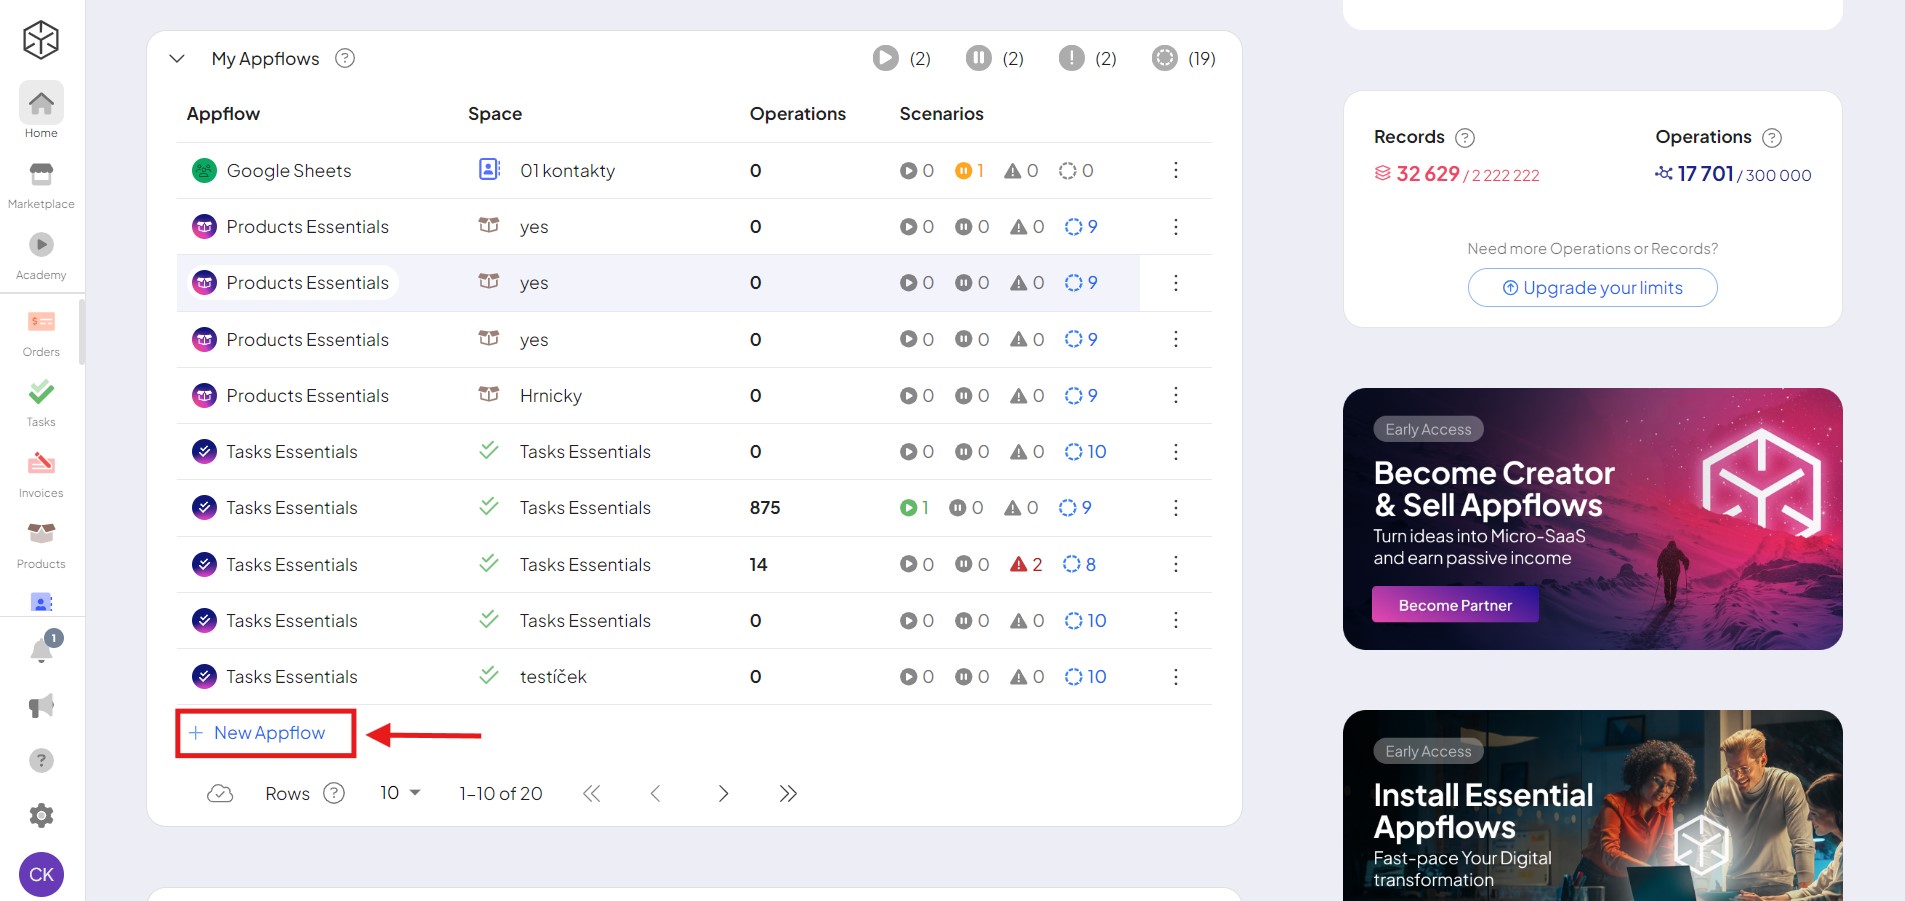
To add a new Appflow, simply click the “New Appflow” button.
The system will redirect you to our Marketplace. Most of these Appflows require a subscription. Choose your desired Appflow by clicking on it.

You will then see detailed information about the selected Appflow. Click “Install” to proceed. Besides Appflows, you’ll also need a sufficient number of operations. You can choose from various tiers that we offer. For more information see our pricing page.
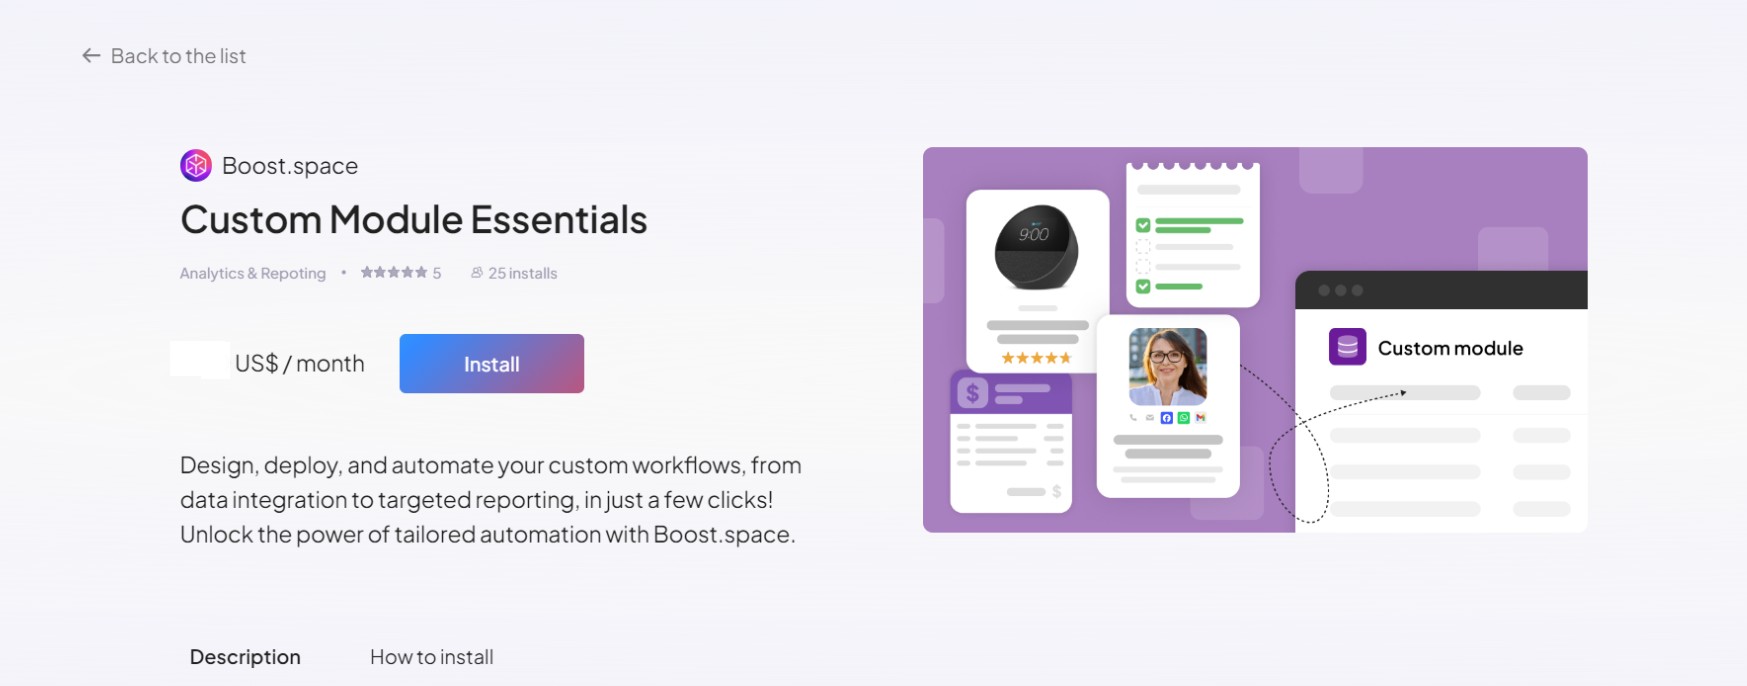
You will then see detailed information about the selected Appflow. Click “Install” to proceed. Besides Appflows, you’ll also need a sufficient number of operations. You can choose from various tiers that we offer. For more information see our pricing page.

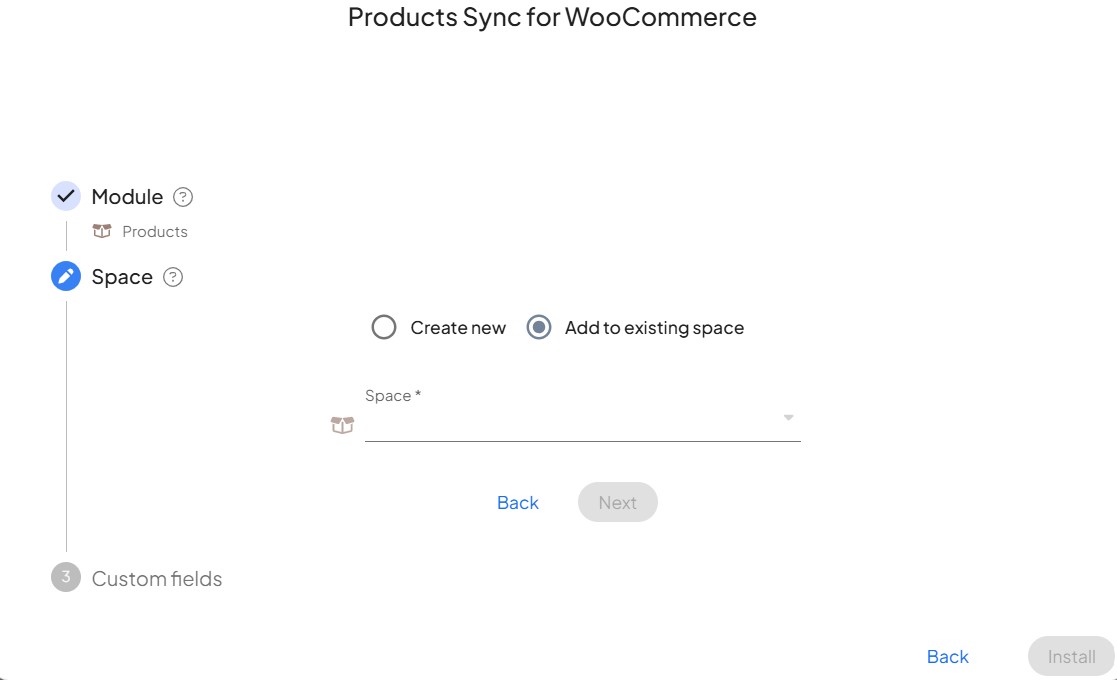
Select the Space where you want the Appflow installed.
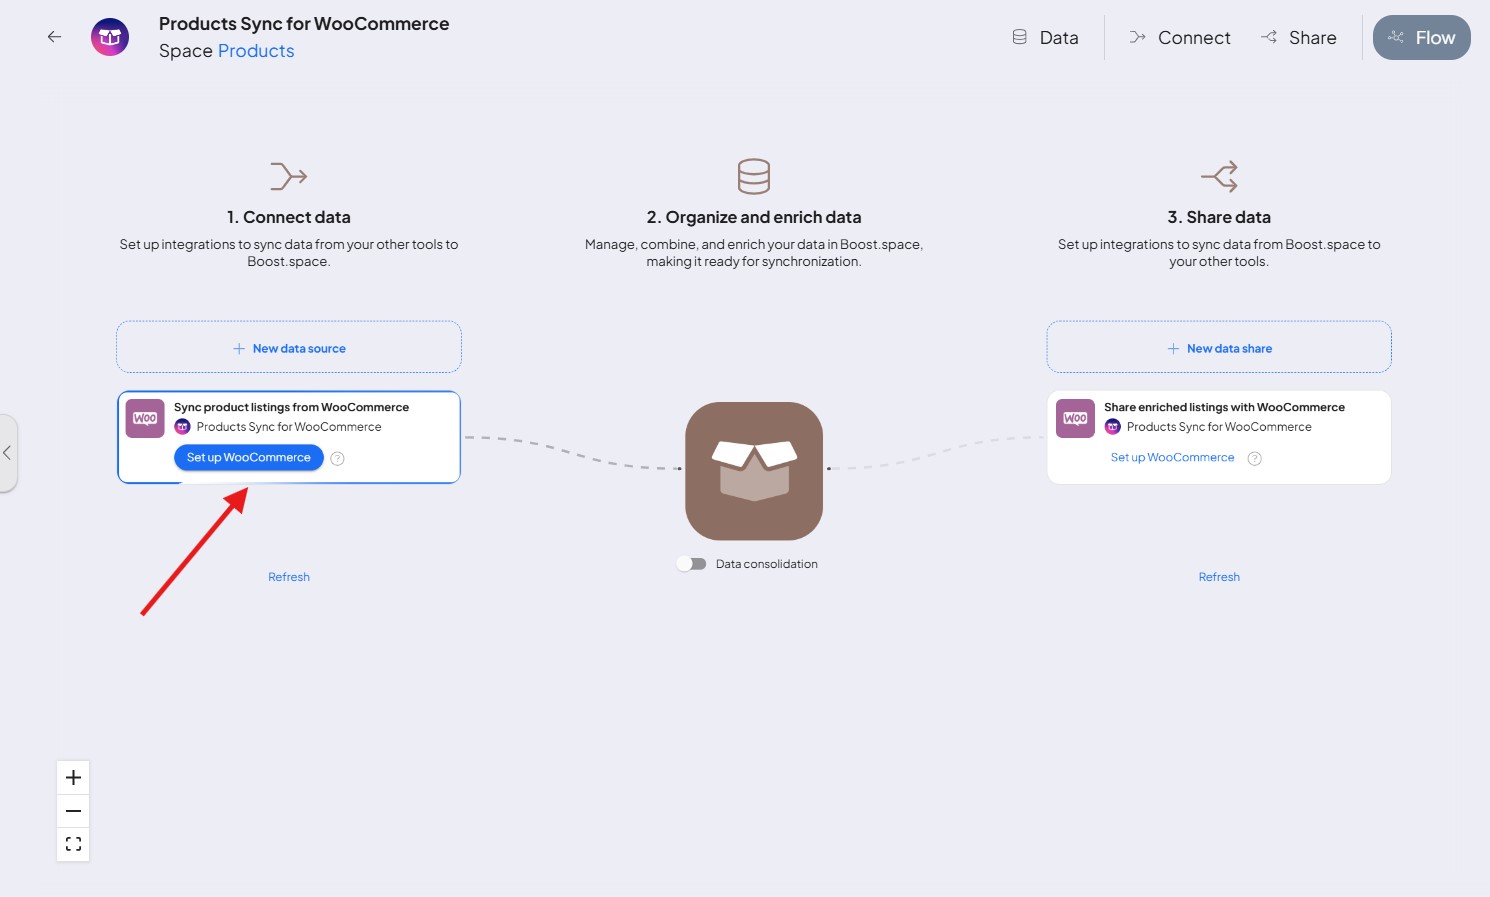
You will be redirected back to configure your Appflow. The example Appflow contains two steps for successful configuration (see tiles under the “New data source” button). In the first step Set up your tool.
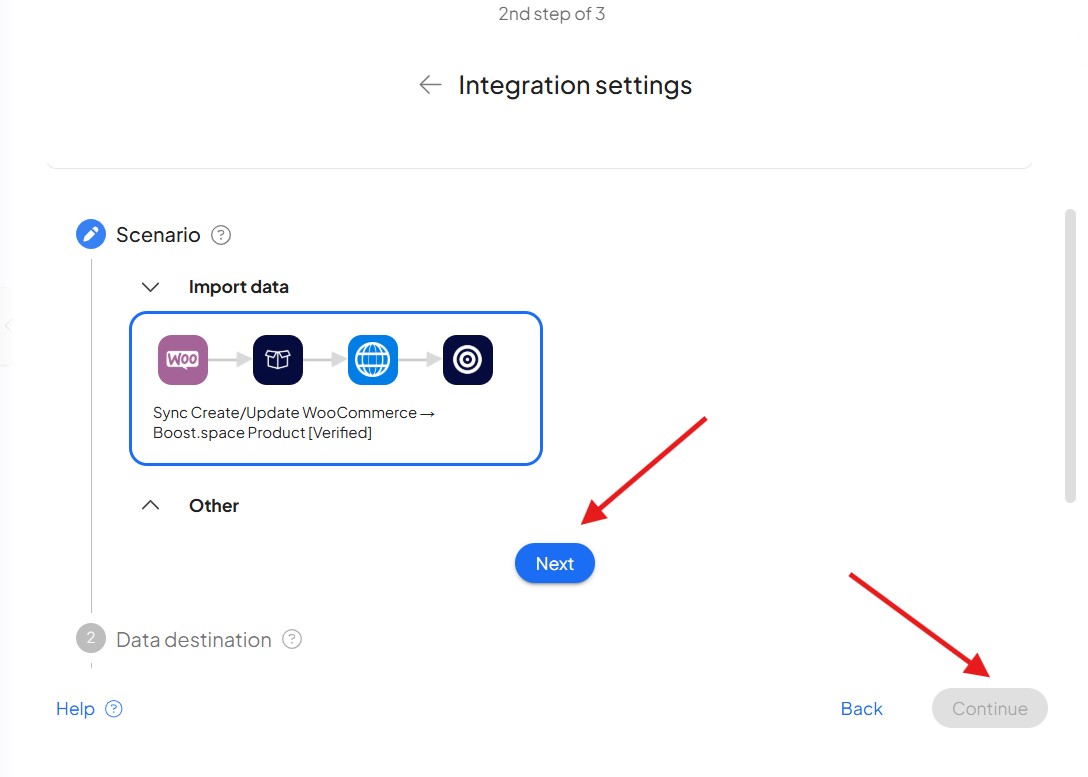
In the following step, you can see the prepared template. Simply click on next and then continue. You will be redirected to your Integrator.
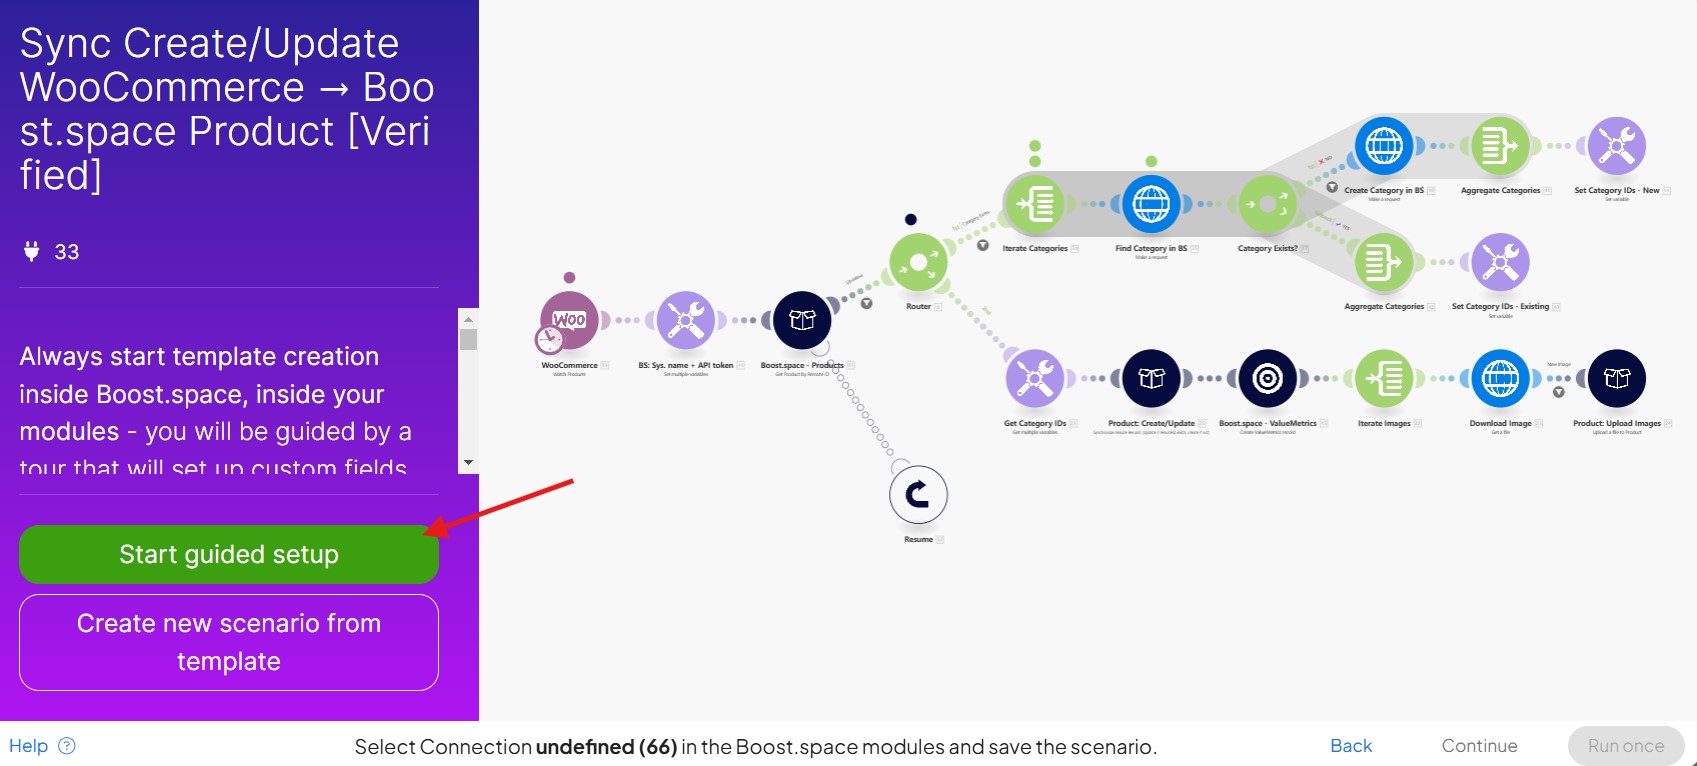
Next, you’ll be prompted to map your Integration. For easy set up, click on Start guided setup and complete your mapping. Then, your template will be ready!
If you are facing any issues or you need any further explanation, please let us know at [email protected]