Understanding Module Mapping
Modulea module is an application or tool designed to handle specific business functions, such as CRM, project management, or inventory. The system's modular architecture allows you to activate only the modules you need, enabling customization and scalability as your business requirements evolve. mappingMapping links the modules in your scenario. When you map an item, you connected the data retrieved by one module to another module to perform the desired action. For example, you can map the email address and subject lines from the Email > Watch emails module to Google Sheets > Add a row and create a spreadsheet of email addresses... in a scenarioA specific connection between applications in which data can be transferred. Two types of scenarios: active/inactive. involves connecting data between various modulesa module is an application or tool designed to handle specific business functions, such as CRM, project management, or inventory. The system's modular architecture allows you to activate only the modules you need, enabling customization and scalability as your business requirements evolve. (applications) within your scenario. This process ensures data is transferred from one module to another, achieving the desired automation.
Detailed Guide to Module Mapping
1. Identifying Input and Output Data
a) Selecting Applications
First, choose the applications you will be working with and determine what data your module will receive (input data) and what data it will provide to other modules (output data).
b) Sources of Input Data
Input data can come from previous modules in the scenario, external sources, or userCan use the system on a limited basis based on the rights assigned by the admin. input.
2. Defining Mapping Fields
a) Identifying Fields
In the module you want to map, identify the fields that will be mapped (e.g., name, email, phone number).
b) Determining Data Sources
For each field, specify the source from which the data will originate (i.e., from which module or data point the data will come).
3. Using the Mapping Editor/ AI Mapping
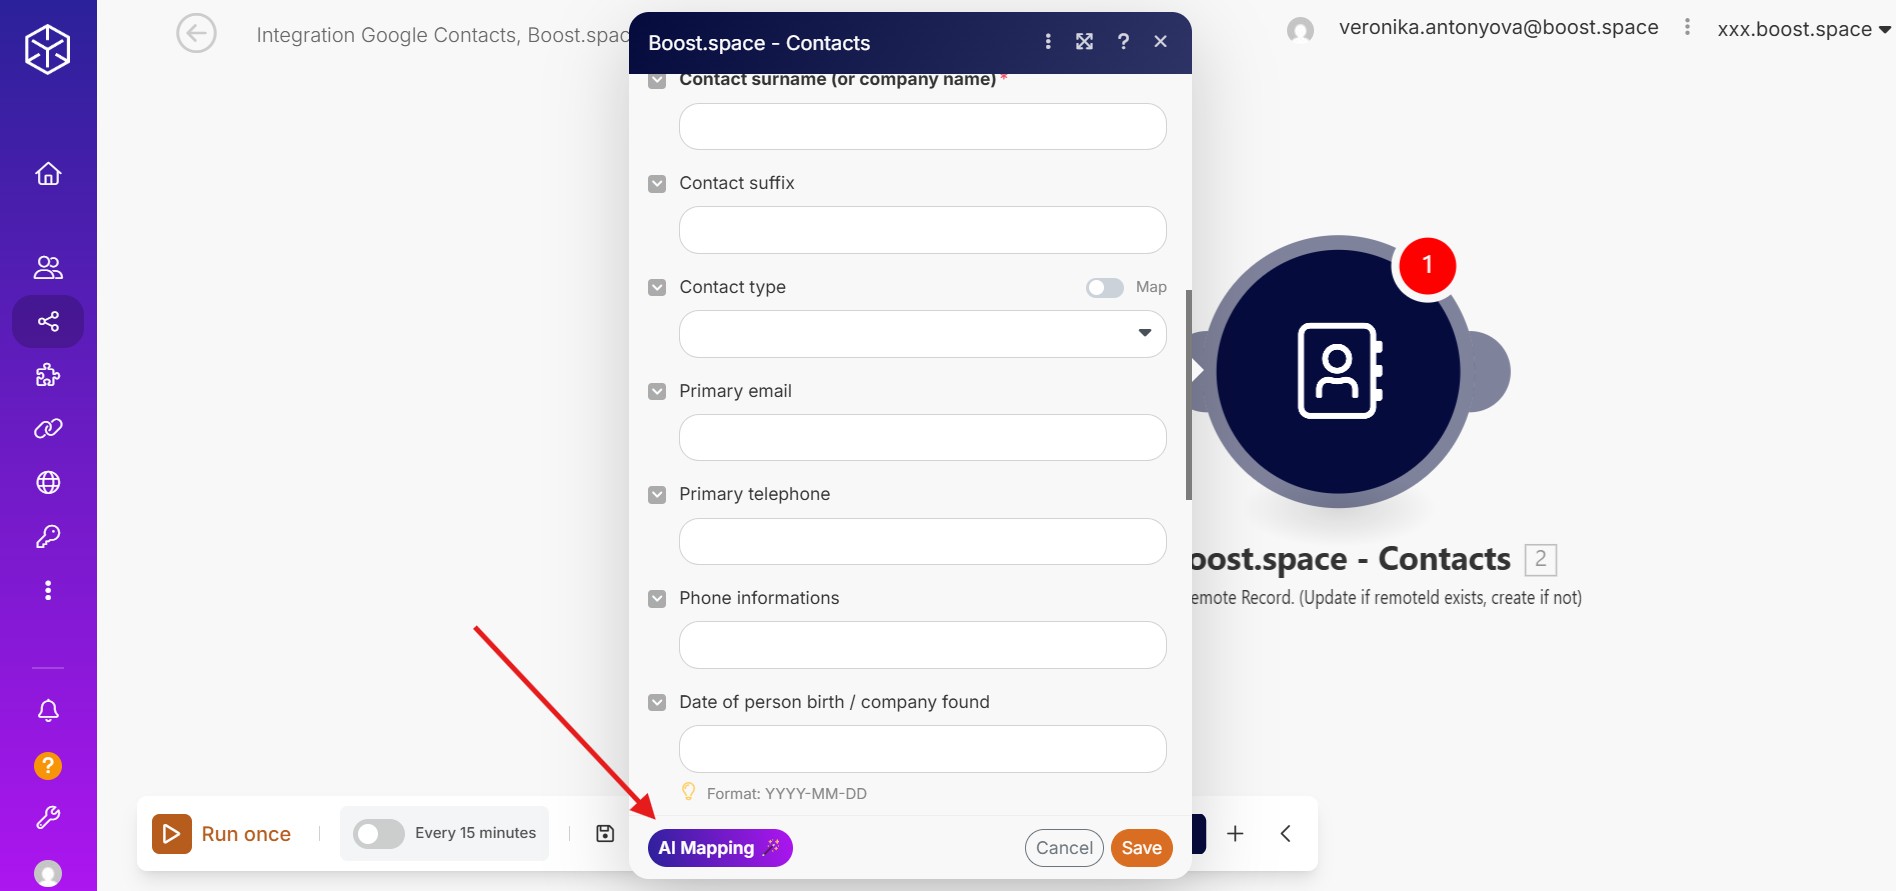
Choose between using AI Mapping – a feature that suggests accurate matches based on field names and context, which you can review and adjust – or proceed with manual mapping by following the steps below. AI Mapping helps speed up the mapping process and reduces the risk of incorrect field connections during integration setup. Although it automates much of the initial configuration, you remain in full control. If a suggested field doesn’t fit your needs, you can easily adjust it by manually selecting a different source. This allows for both flexibility and precision, making AI Mapping useful for all types of usersCan use the system on a limited basis based on the rights assigned by the admin. — from beginners to technical experts. Mapping suggestions are displayed directly within the Mapping Editor, allowing you to quickly review and confirm them before continuing. If you prefer to set everything up yourself, you can skip AI Mapping entirely and configure the mappings manually.

a) Configuring the Module
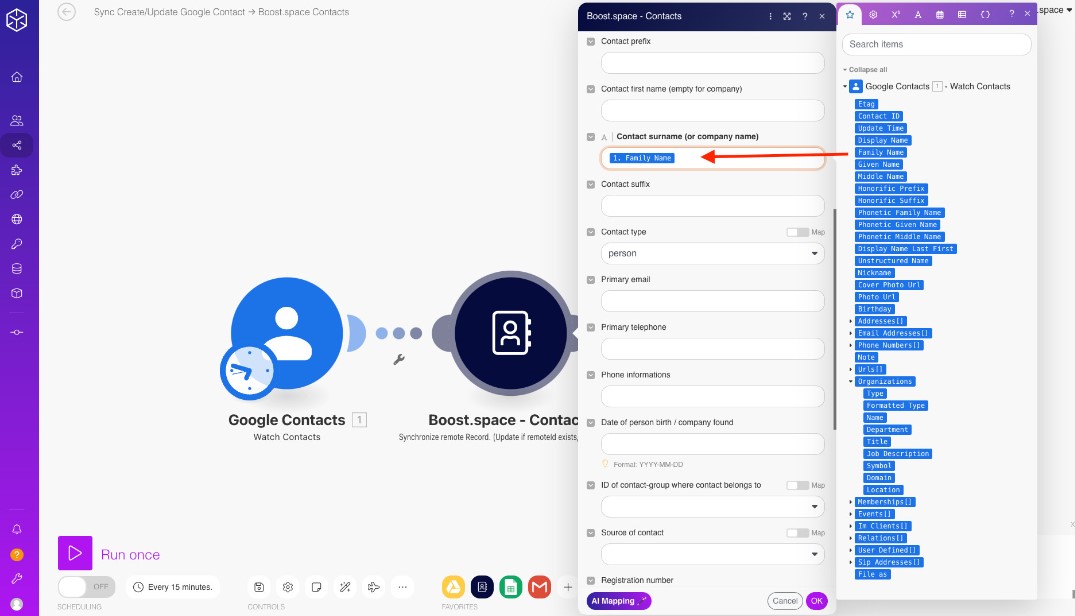
Open the module you want to configure in the scenario.
b) Accessing the Mapping Editor
Use the mapping editor to view the list of available input data.
c) Dragging and Dropping Data
Drag the required data into the appropriate fields. For instance, if you want to map the “Name” field from one module to another, simply drag the “Name” data point into the corresponding field in the target module.

4. Modifying Data Before Mapping (Optional)
a) Data Modification and Transformation
If you need to modify or transform data before mapping it, use the functions available in the mapping editor (e.g., text formatting, mathematical operationsOperations are tasks in integration scenarios, similar to "operations" in Make.com. Each action, like reading or updating a record, counts as one operation. They’re essential for data syncing between apps and reset monthly. Going over the limit pauses syncing until you add more or upgrade your plan., conditions).
b) Example FunctionsFunctions you can use in Boost.space Integrator - create, update, delete, get, search.
You can use functions like CONCAT() to combine two text fields or IF() to perform conditional logic. Detailed instructions on using these functions can be found here.

5. Validation and Testing
a) Test Run
After setting up the mapping, perform a test run of the scenario to verify that data is correctly transferred between modules.
b) Check Output Data
Review the output data of each module to ensure that it is correctly mapped and that no data is missing or incorrectly placed.

6. Debugging and Adjustments
a) Addressing ErrorsService is unavailable due to a failure, a service responds with unexpected data or the validation of input data fails.
If errors or discrepancies occur, return to the mapping editor and adjust the settings as needed.
b) Adding Debugging Modules
Consider adding additional modules for debugging, such as logging or notification modules, to help monitor the data flow.
c) Using ErrorService is unavailable due to a failure, a service responds with unexpected data or the validation of input data fails. Handlers
Incorporate special error handlers to catch and manage any errors that arise. More information on error handling can be found here.