The Pushover modules allow you to send messages and interact with the Pushover API.
Prerequisites
In order to use Pushover with Boost.space Integrator, you must have a Pushover account. If you do not have one, you can create one at pushover.net.
To connect your Pushover account to Boost.space Integrator, you need your User Key and an API Token.
-
Log in to your Pushover account.
-
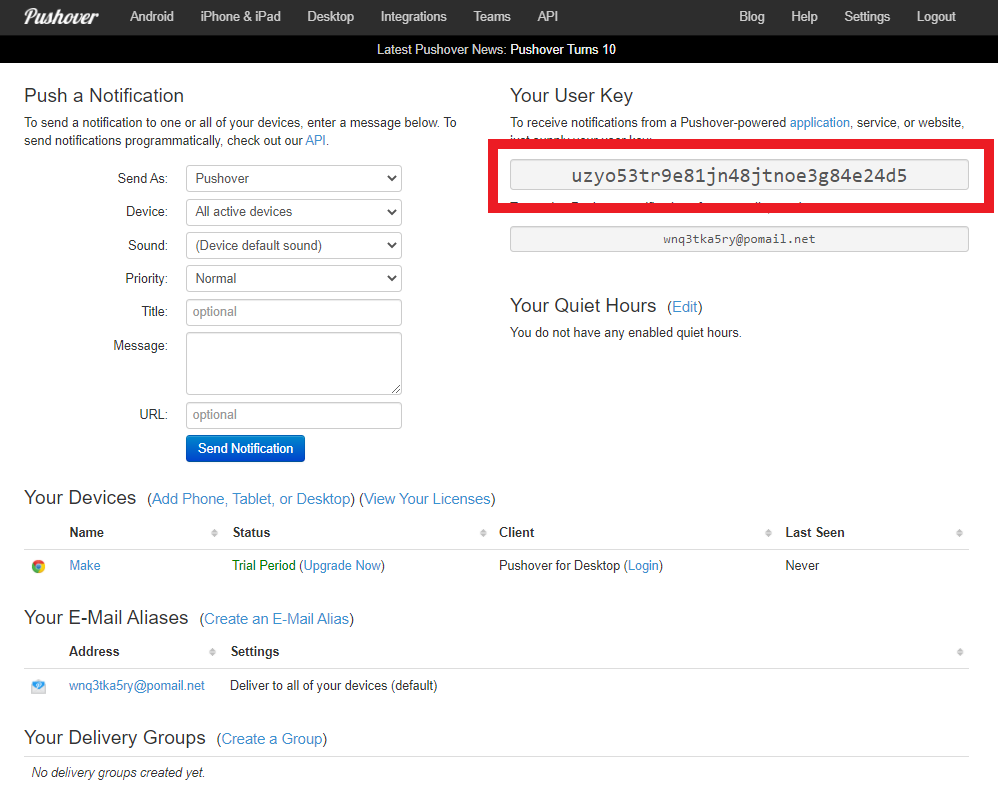
You can find your User Key on the homepage.
-
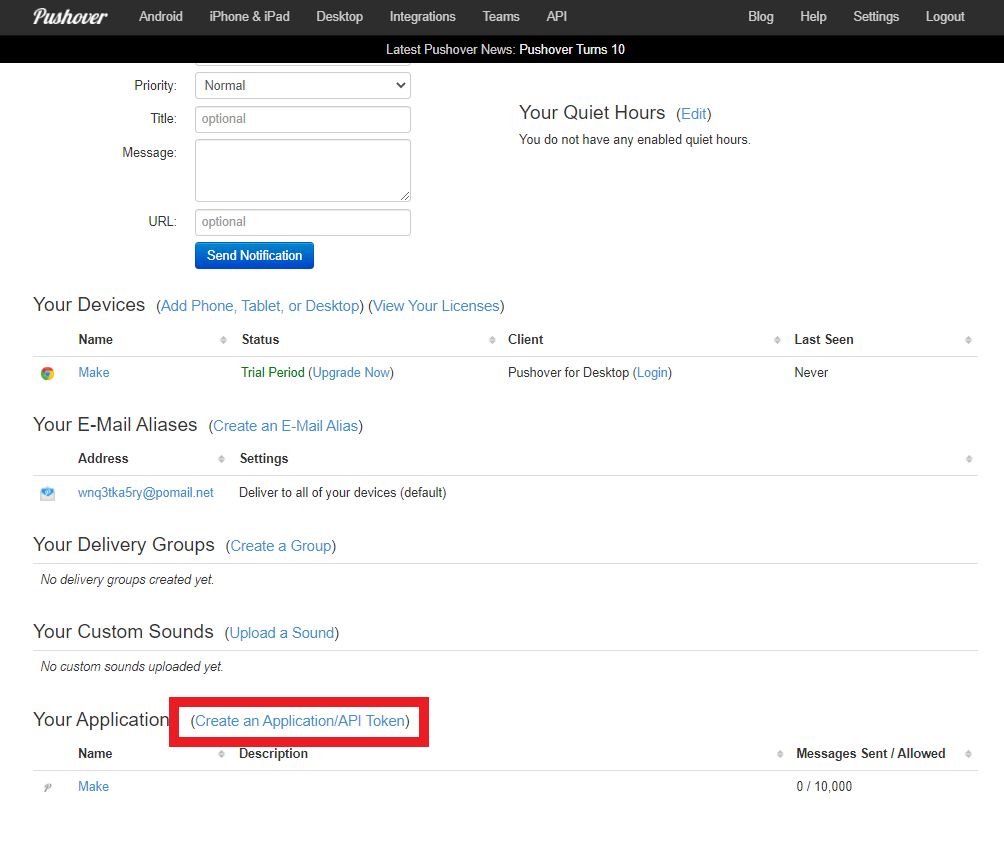
To obtain an API Token, you must register an application. Scroll to the bottom of the page and click Create an Application/API Token.
-
Configure the application how you’d like. Click Create Application.
-
Go to your newly created application to find the API Token.
-
In Boost.space Integrator, choose the Pushover module you want to use. Next to Connection, click Add.
-
Enter your User Key and API Token in the respective fields.
-
Click Save.
You have established the connection.
Sends the written message to your pushover devices.
|
Connection |
||||
|
Message |
Enter the body of your message. Messages are currently limited to 1024 characters. |
|||
|
Title |
Enter the title of your message. The title is currently limited to 250 characters.
|
|||
|
HTML |
Select whether to format your message with HTML tags. If |
|||
|
Monospace |
Select whether to enable monospace messages. May not be used if |
|||
|
Device |
Choose the name of one of your devices to send just to that device, instead of all devices. |
|||
|
URL |
Enter a supplementary URL to show with your message. |
|||
|
URL Title |
Enter a title for the URL specified as the |
|||
|
Timestamp |
Enter a timestamp to show to the message receiver. See the list of supported date and time parameters.
|
|||
|
Priority |
Select the priority of your message and how the message is presented to the receiver.
|
|||
|
Sound |
Select the sound to play when receiving notifications, rather than the standard Pushover tone. You can sample the full list o available sounds here. |
|||
|
File |
Choose whether to add any attachments to your message. |
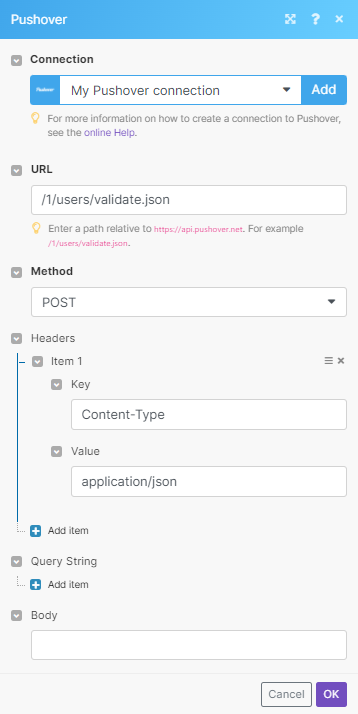
Performs an arbitrary authorized API call.
|
Connection |
||||
|
URL |
Enter a path relative to
|
|||
|
Method |
Select the HTTP method you want to use: GET to retrieve information for an entry. POST to create a new entry. PUT to update/replace an existing entry. PATCH to make a partial entry update. DELETE to delete an entry. |
|||
|
Headers |
Enter the desired request headers. You don’t have to add authorization headers; we already did that for you. |
|||
|
Query String |
Enter the request query string. |
|||
|
Body |
Enter the body content for your API call. |

![[Note]](https://docs.boost.space/wp-content/themes/bsdocs/docs-parser/HTML/css/image/note.png)


