The Facebook Custom Audiences modules enable you to create a custom audience and add emails or users to the custom audience in your Facebook Ad account.
Prerequisites
- A Facebook account
- Ad account in your Facebook Business Manager
- Agreed Custom Audience terms
In order to use Facebook Offline Conversions with Boost.space Integrator, it is necessary to have a Facebook account and a Facebook Business Manager account.
You can find out how to create your own connection in the guide below. This guide is for Lead Ads, but the setup works the same way for this application.
Ensure that you create a connection with the same profile you are logged into on Facebook. If you are making a connection with another account, it won’t work for you and you will see this error:

Creates a custom audience.
![[Note]](https://docs.boost.space/wp-content/themes/bsdocs/docs-parser/HTML/css/image/note.png) |
Note |
|---|---|
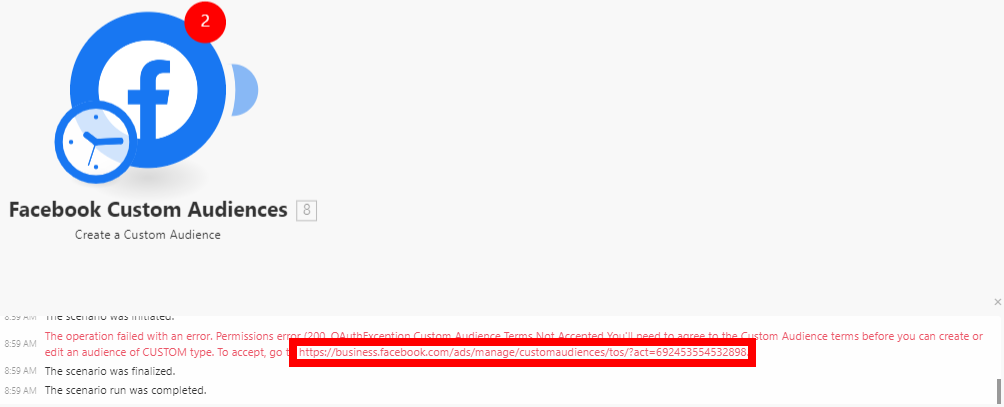
| If the following error is returned, you must go to the URL provided and accept the Custom Audiences Terms. |
| Connection | Establish a connection to your Facebook account. |
| Business Manager | Select the Business Manager that contains the ad account you want to use. |
| Ad Account | Select the ad account where you want to create a custom audience. |
| Name | Enter a name for the new custom audience. |
| Description | Enter the description of the custom audience. |
Adds users with multiple details to the custom audience.
![[Note]](https://docs.boost.space/wp-content/themes/bsdocs/docs-parser/HTML/css/image/note.png) |
Note |
|---|---|
| You can add an unlimited number of records to an audience, but there is a maximum of 10,000 at a time. It may take up to 1 hour before Facebook adds users to an audience. |
You can create a lookalike audience using the following module.
Populates a seed audience. You need to populate the new audience with supported identifiers and the schema key lookalike value.
Failed to Add/Update a Custom Audience – Error “2650”
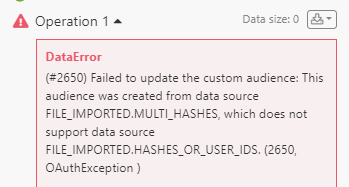
Issues:While adding users using the Add Emails/Users to a Custom Audience module, it returns the following error:
- Error “2650”
- Failed to Update Custom Audience
- (#2650) Failed to update the custom audience: This audience was created from data source FILE_IMPORTED.MULTI_HASHES, which does not support data source FILE_IMPORTED.HASHES_OR_USER_IDS. (2650, OAuthException )

Reason:Facebook Custom Audiences won’t let Boost.space Integrator add emails or users unless the Custom Audience were created by Boost.space Integrator. This error indicates that the selected Custom Audience wasn’t created by Boost.space Integrator, but by another platform or via manual upload.
Solution:
- Create a custom audience from Boost.space Integrator using Create Custom Audience or other modules using a scenario.
- Now go back to your previous scenario, and add your member to that newly created custom audience.
If you continue to receive this response, you may need to accept Facebook Custom Audience Terms and Condition in each of your ad accounts. You can follow the steps below.
Facebook Ad Account:
1. Open your Facebook’s Custom Audiences Terms.
2. Select your Ad Account under the Account dropdown.
3. Click Accept.
4. Open your Facebook’s Business Tools Terms.
5. Select your Ad Account under the Account dropdown.
6. Click Accept.
Business Manager Account:
1. Find your ad account ID. Check this guide, as Facebook provides instructions on how to locate the account ID.
2. Once you copy the ID, add it to the end of the following URL after the equal sign, and open it in your browser: https://business.facebook.com/ads/manage/customaudiences/tos/?act=
3. Click Accept.
4. Repeat steps 1-3 for any other ad accounts.
