Note: To access this feature, you’ll need AI Credits.
We are excited to introduce a new AI functionFunctions you can use in Boost.space Integrator - create, update, delete, get, search.: Data Validation. This feature has been designed to help you validate your data effectively within the Boost.space systemA platform that centralizes and synchronizes company data from internal and external sources, offering a suite of modules and addons for project management, CRM, data visualization, and more. Has many features to optimize your workflow!. In this article, we will guide you on how to use this tool.
What is Data Validation?
Data Validation is a process that ensures the data entered into the system meets specific criteria, thus maintaining data quality. By implementing this feature, you can check for accuracy, consistency, and completeness, reducing the likelihood of errorsService is unavailable due to a failure, a service responds with unexpected data or the validation of input data fails. in your applications.
Video
How to Use Data Validation
Using the Data Validation feature is straightforward. Here’s a step-by-step guide to help you get started:
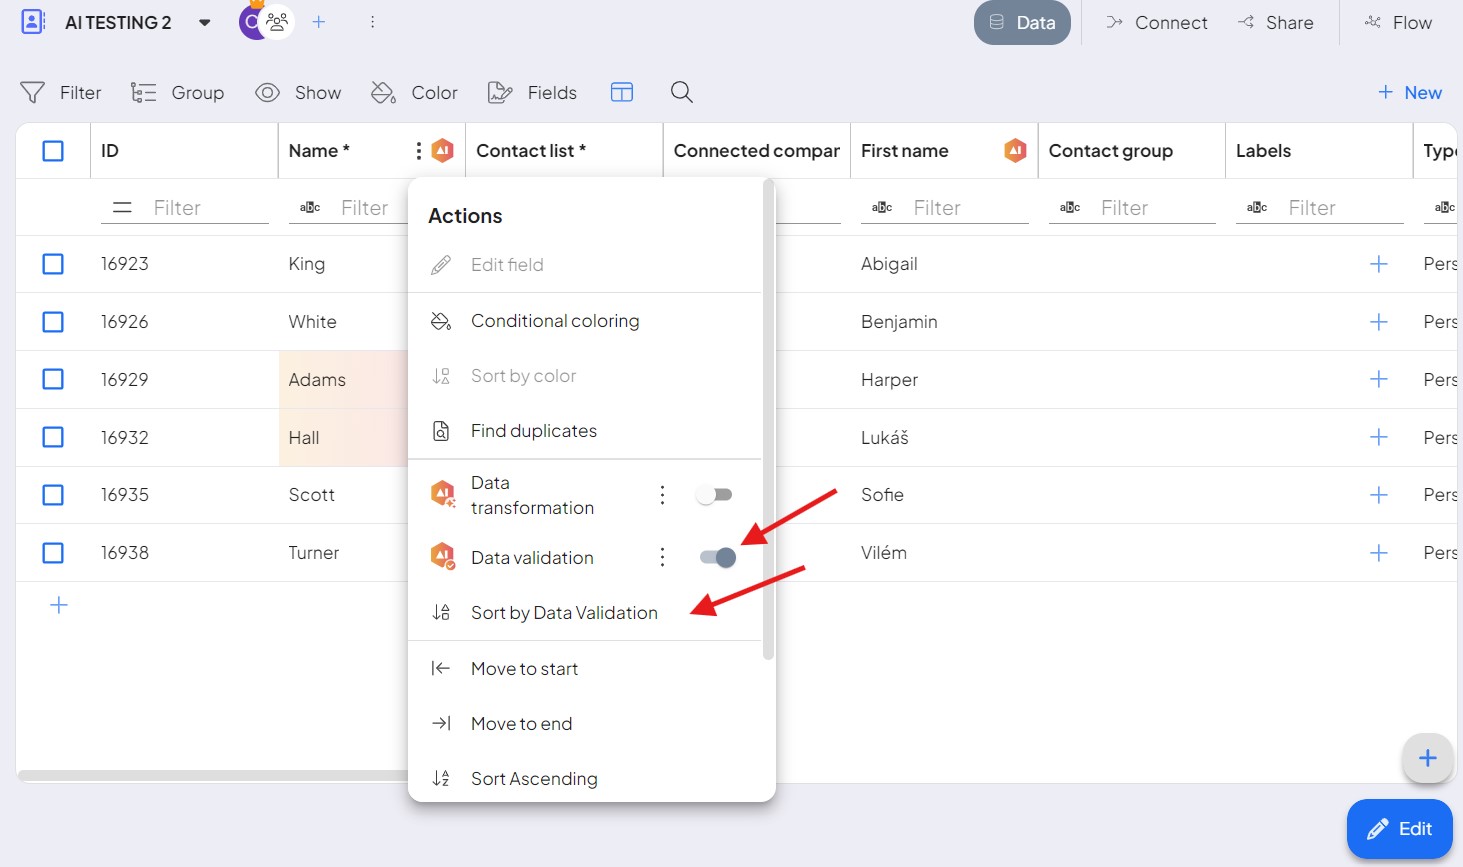
- Open the SpaceIn Boost.space, a space is a subunit within a module that helps organize and categorize data, ensuring clarity even with large volumes. For example, within the Contacts module, you might have spaces like "Client Database" or "Supplier Database." Access to each space is restricted to users who have created it or have been granted access. where you would like to use Data Validation. Next, select the column in which you want to apply it and click on the three dots. A menu will expand; from there, select Data Validation.

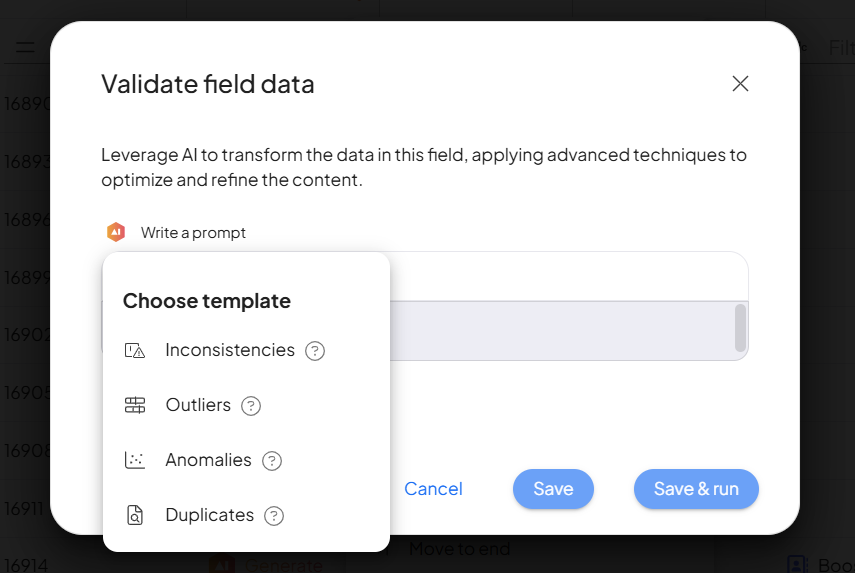
- Let’s define how your Data Validation will be carried out. You can either choose from our pre-made templates or create your own custom validation. For example, you might enter a command like, “Filter all names that contain an “A”. Once you’ve made your selection, simply click “Save and Run”.

- Your template for Data Validation has been saved. Now, it’s time to activate it. You can also select the option “Sort by Data Validation” so that the data matching the validation criteria will appear first in the table.

- Now, you can see the results. Your data have been validated. Congratulation!
If you encounter any issues along the way, please let us know at support@boost.spaceA platform that centralizes and synchronizes company data from internal and external sources, offering a suite of modules and addons for project management, CRM, data visualization, and more. Has many features to optimize your workflow!.