Sync OUT data out of Boost.space: Products
This article will guide you step by step through the process of exporting product data from Boost.spaceA platform that centralizes and synchronizes company data from internal and external sources, offering a suite of modules and addons for project management, CRM, data visualization, and more. Has many features to optimize your workflow!. The purpose is to help you set up an automated workflow that keeps your product information in sync with other tools—so it’s always accurate and available for reporting, collaboration, or further analysis.
We’ll be working within the Products moduleOne of the modules of the Boost.space system. In this module, you can easily manage your business products., which acts as the central repository for all your product details.
In this walkthrough, we’ll demonstrate how to connect to Google Sheets as the target destination. However, if you’re using a different tool, the general method stays the same—you’ll just need to configure the connectionUnique, active service acces point to a network. There are different types of connections (API key, Oauth…). to suit your specific platform.
Here are two ways to sync out from Boost.space to Google Sheets.
AI generated scenario
First is using an AI generated scenarioA specific connection between applications in which data can be transferred. Two types of scenarios: active/inactive.. Check out our step-by-step guide below.
Custom Scenario creation
This scenario may not suit everyone, so there is an option to create a custom scenario. Check out our step-by-step guide below.
1. Prepare Your Google Sheet
Start by creating a new spreadsheet in Google Sheets. This is where your Boost.space product data will be sent. You can name the sheet and create the structure in a way that matches the data you expect to import.
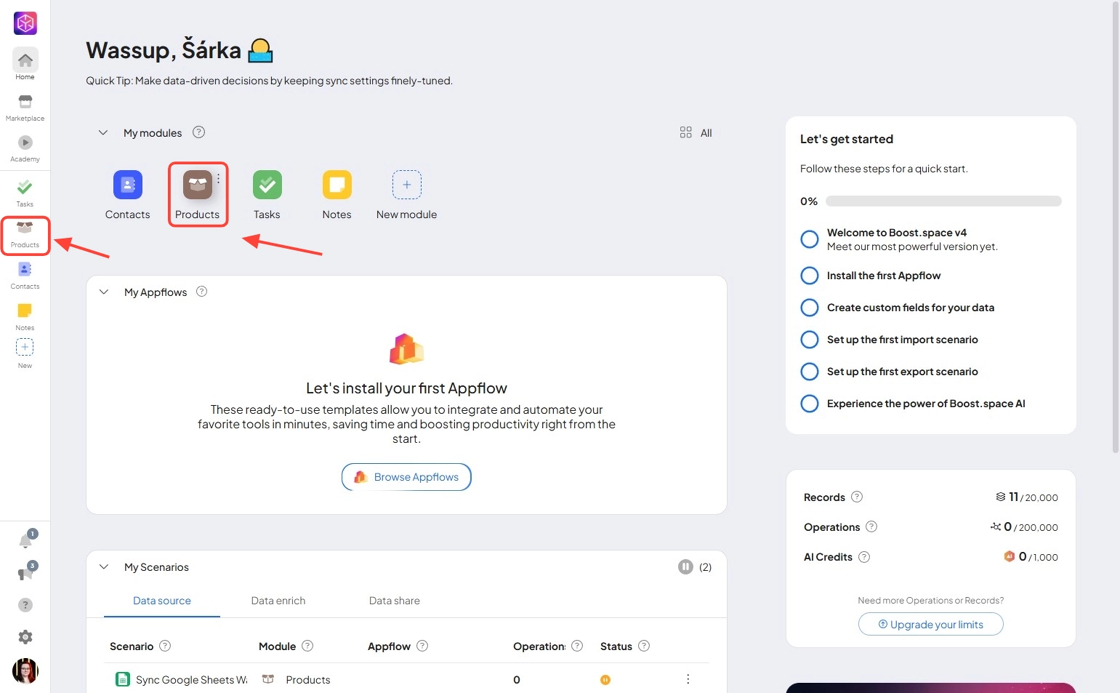
2. Navigate to Product Modulea module is an application or tool designed to handle specific business functions, such as CRM, project management, or inventory. The system's modular architecture allows you to activate only the modules you need, enabling customization and scalability as your business requirements evolve. in your system.
In your system, click on Products Module to open the Products module.
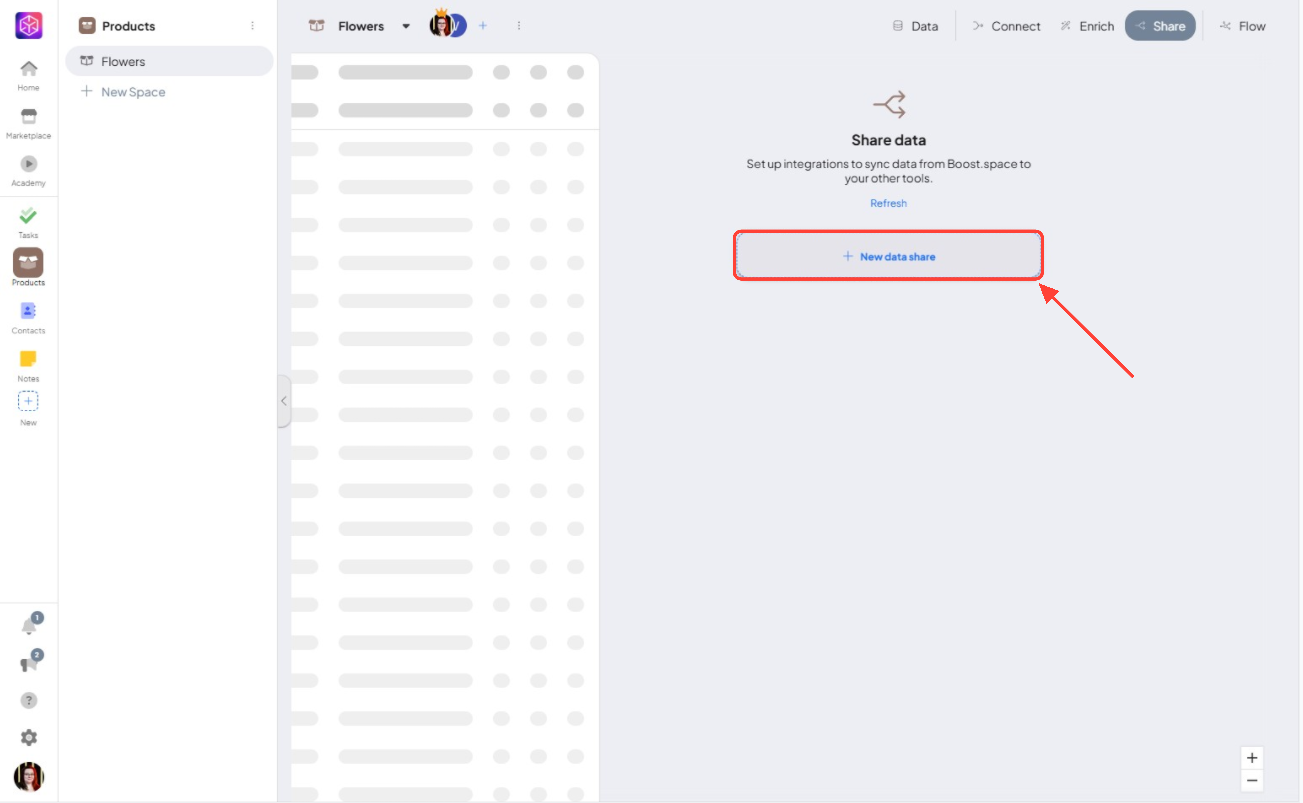
3. Create a Data Share in Boost.space
Go to your Products module in Boost.space and set up a new data share. This lets Boost.space know which data you want to make available for export, and it gives you full control over what’s being shared.

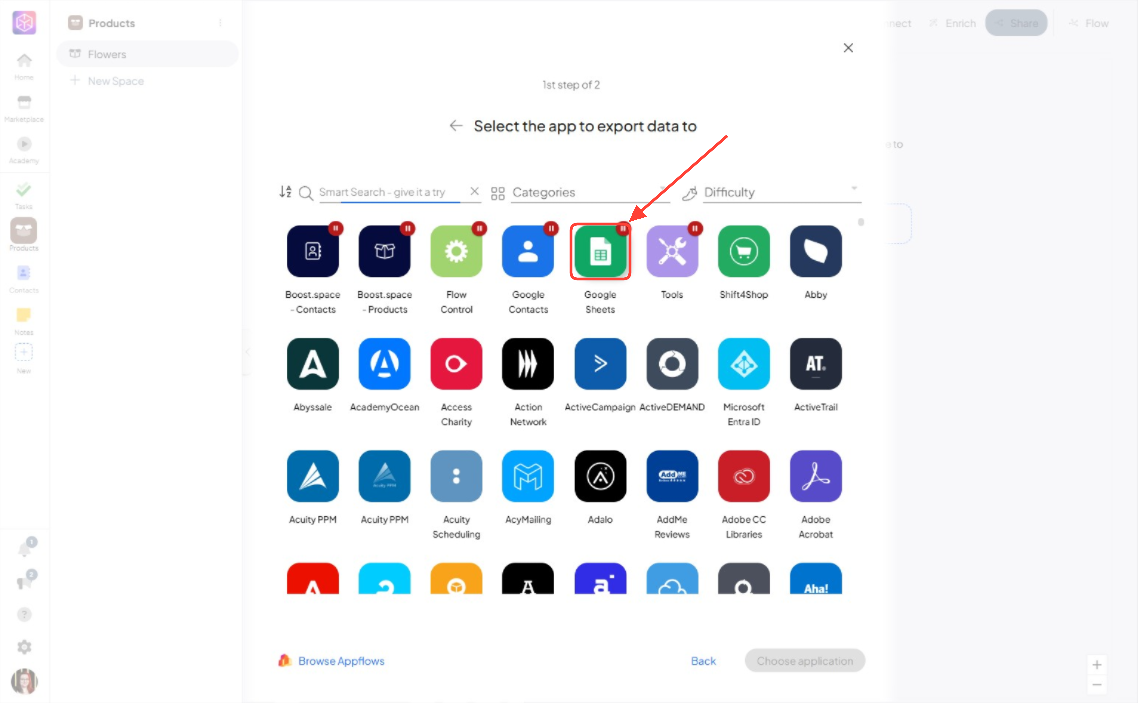
Now, find the “Google Sheets” Module.
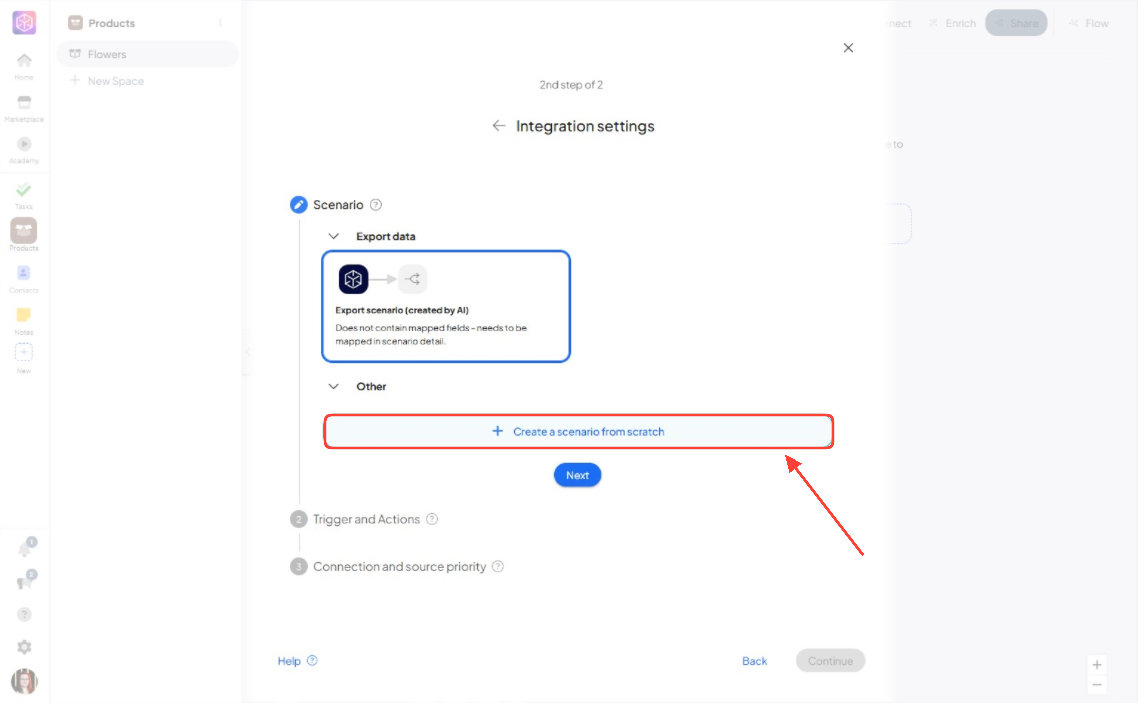
4. Create scenario from scratch.
5. Set Up a Scenario in the IntegratorPart of the Boost.space system, where you can create your connections and automate your processes.
Now you’ll head into the Integrator to set up the automation:
- Create a new scenario.
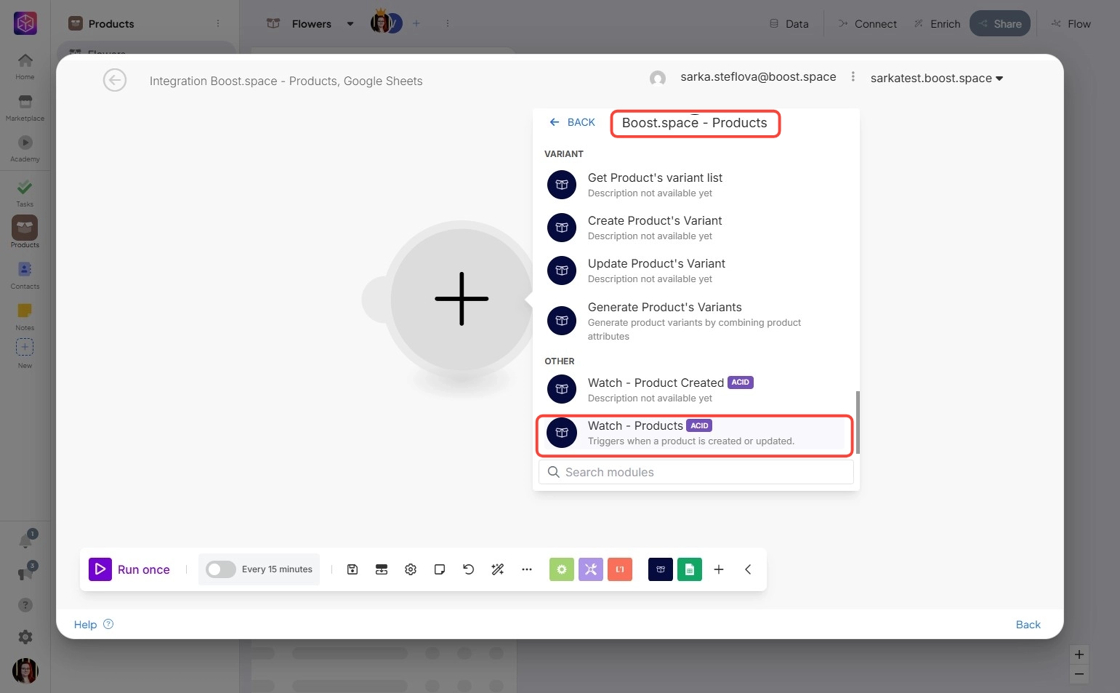
- Start by finding the module “Boost.space – Products”.
- Choose the “Watch – Products” action. This will allow the scenario to monitor your products and send updates to Google Sheets.
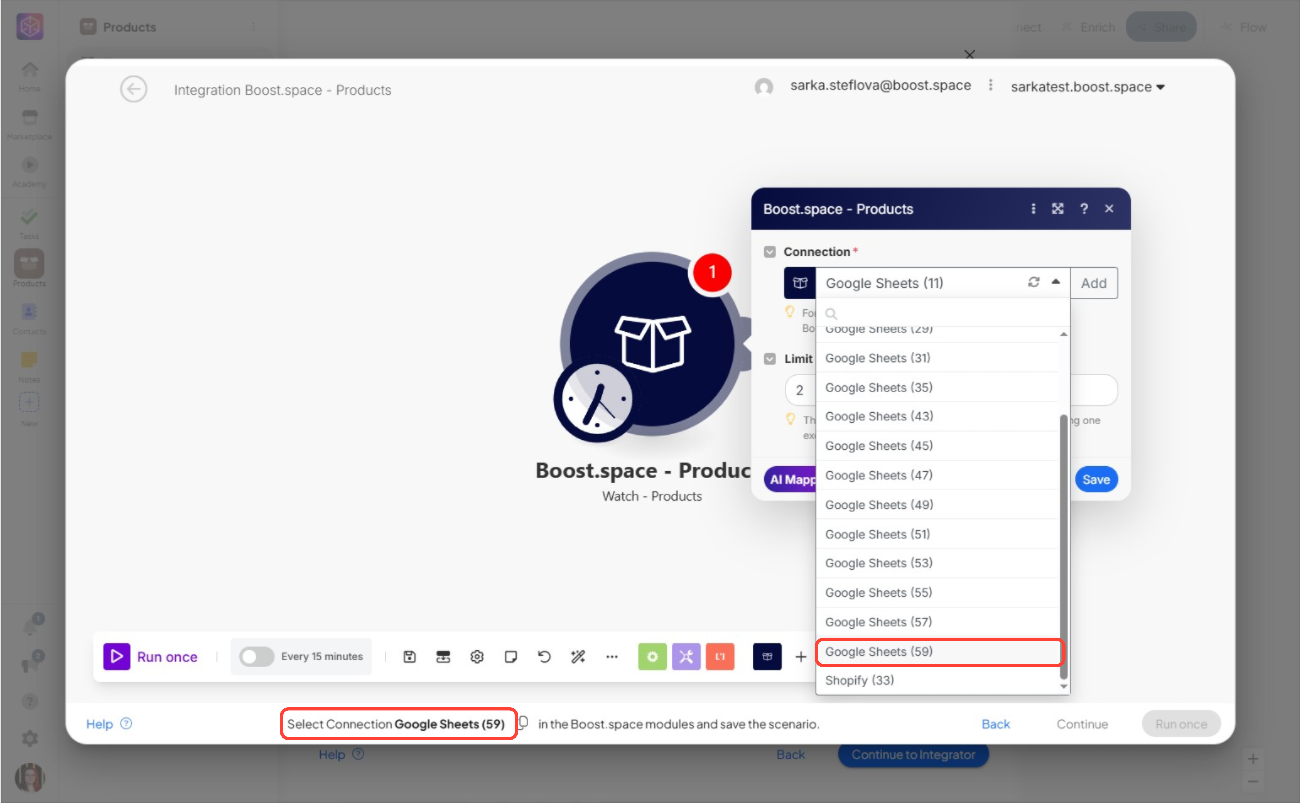
Select the right connection to your Boost.space workspace.
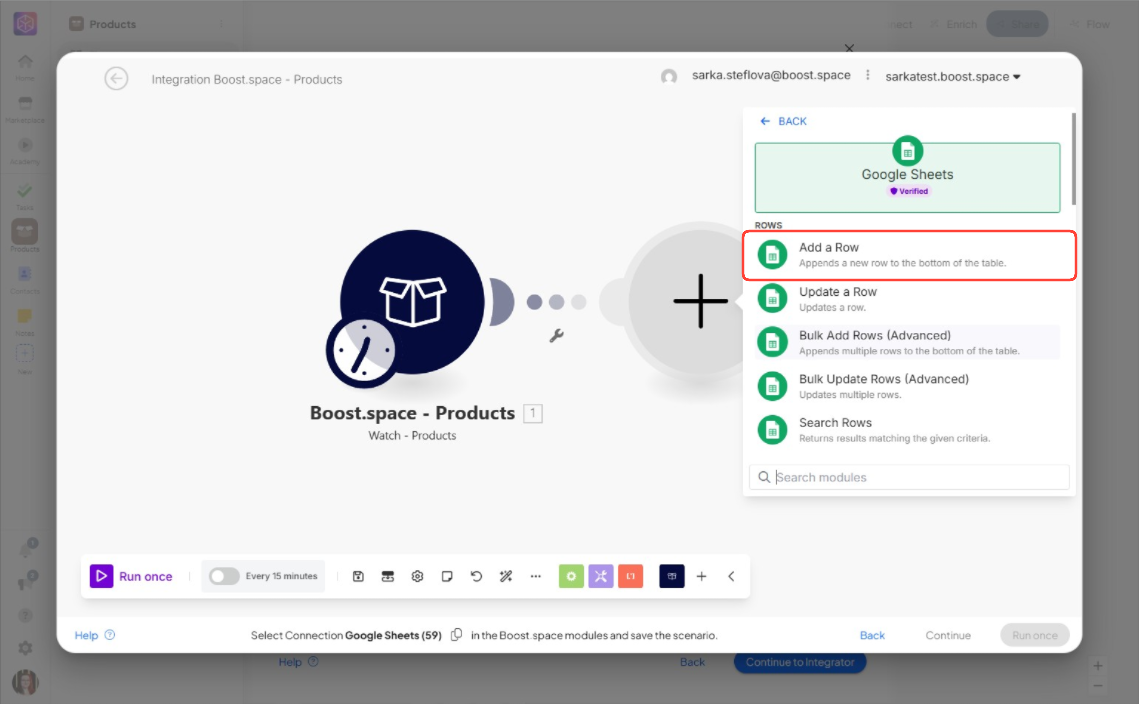
Then, add the “Google Sheets” module “Add a row”.
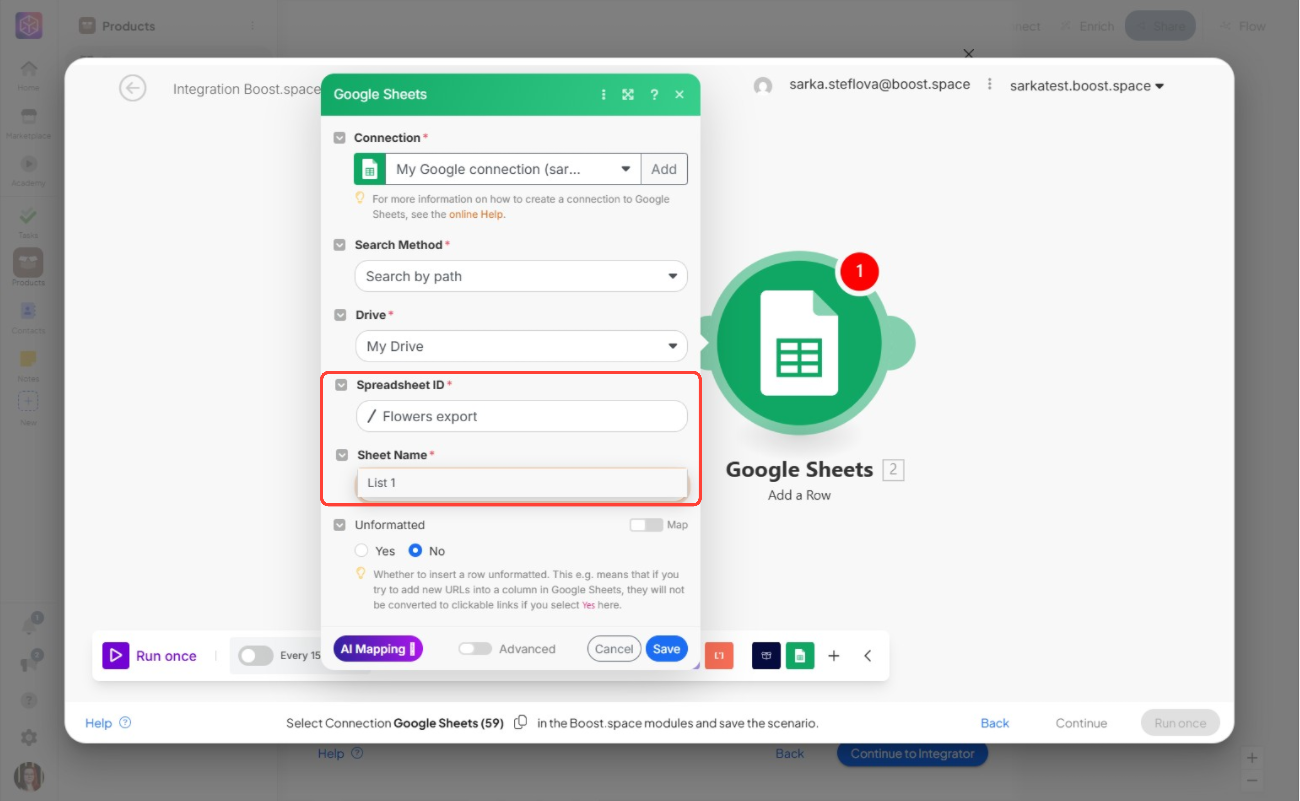
Make a connection to your Google account, and then select the correct:
-
- Spreadsheet ID (the sheet you created earlier)
- Sheet Name (the tab where the data should appear)
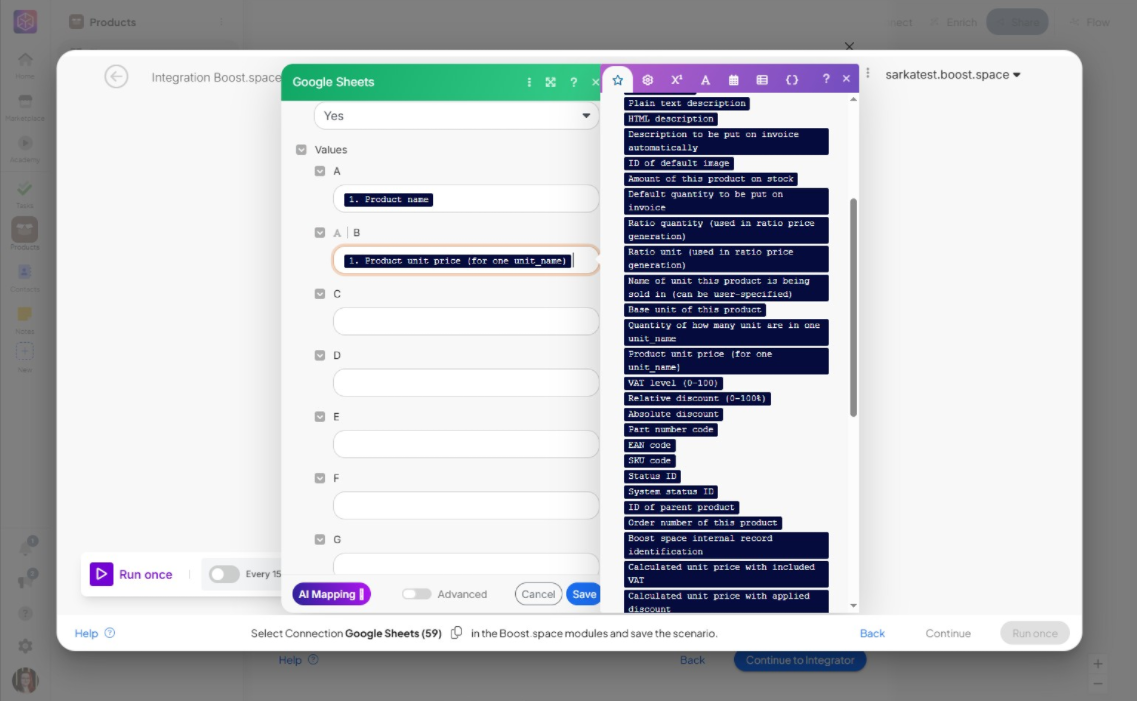
After this, map the fields from Boost.space that you want to see in your Google Sheet—like “Product Name”, “Price” and so on.
6. Save and Watch the Sync in Action
Once everything is mapped correctly, save the scenario. It will now run and populate your Google Sheet with the selected data from Boost.space.
From here, your spreadsheet will stay in sync with Boost.space, making it easier than ever to work with your product data outside the platform.
Conclusion
You’ve now set up a continuous sync that sends your product data from Boost.space to your chosen external system. While our walkthrough featured Google Sheets, the same process works with any other platform where you want your product data to go—whether it’s for sharing, analysis, or further automation. Now that the data is leaving Boost.space automatically, you can use it wherever it’s needed—without exporting manually or dealing with delays. If adjustments are needed down the line—like switching to a different destination sheet or modifying field mappings—you can update your setup with ease, without starting from scratch.
If you encounter any problems during the process, please contact us at [email protected].