Active with remarks |
---|
This application needs additional settings. Please follow the documentation below to create your connectionUnique, active service acces point to a network. There are different types of connections (API key, Oauth…).. |
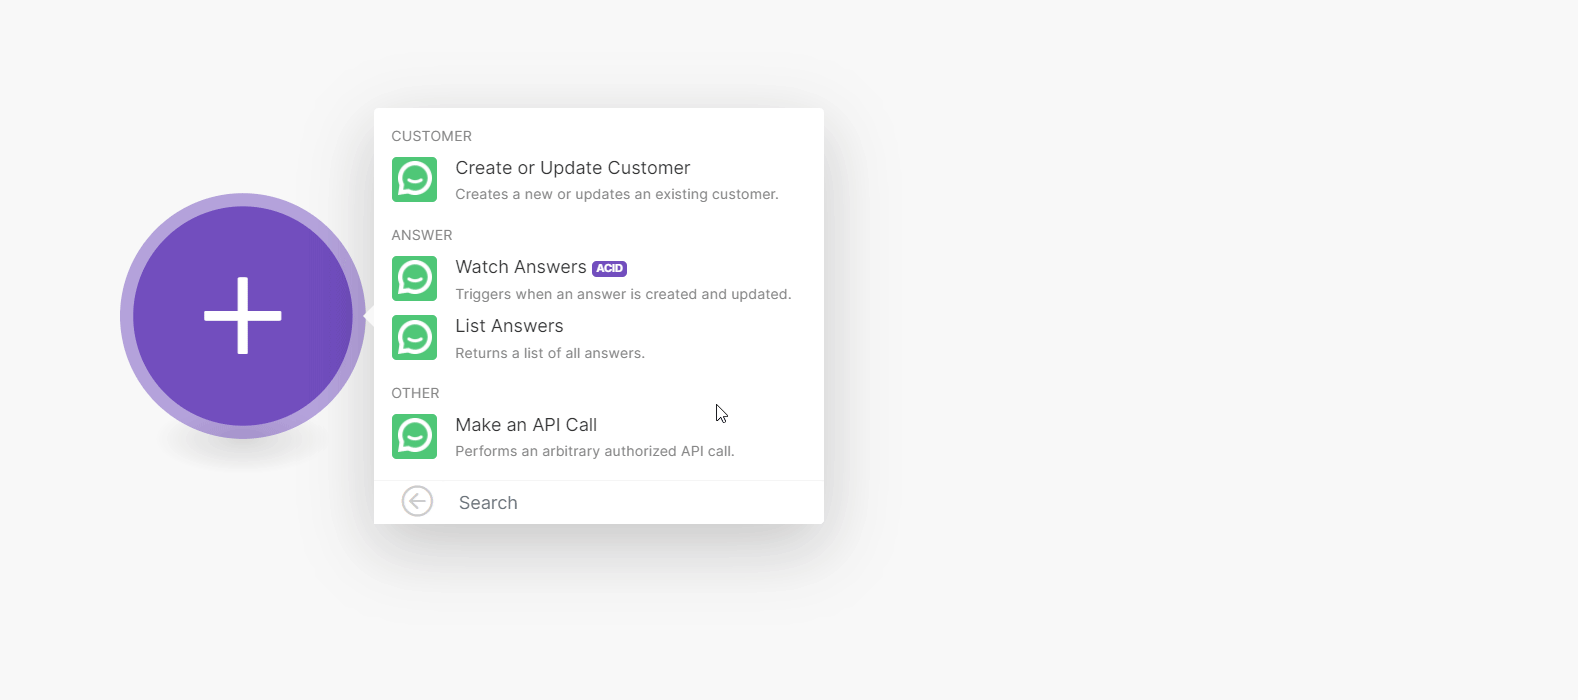
With the Simplesat modules in Boost.space IntegratorPart of the Boost.space system, where you can create your connections and automate your processes. you can:
- create or update a customer
- watch and list answers
To get started with Simplesat, create an account at Simplesat.
![]() |
Note |
---|---|
The module dialog fields that are displayed in bold (in the Boost.space IntegratorPart of the Boost.space system, where you can create your connections and automate your processes. scenarioA specific connection between applications in which data can be transferred. Two types of scenarios: active/inactive., not in this documentation article) are mandatory! |
Connecting Simplesat to Boost.space IntegratorPart of the Boost.space system, where you can create your connections and automate your processes.
To connect your Simplesat account to Boost.space IntegratorPart of the Boost.space system, where you can create your connections and automate your processes. you need to obtain the API Key from your Simplesat account and insert it in the Create a connectionUnique, active service acces point to a network. There are different types of connections (API key, Oauth…). dialog in the Boost.space IntegratorPart of the Boost.space system, where you can create your connections and automate your processes. module.
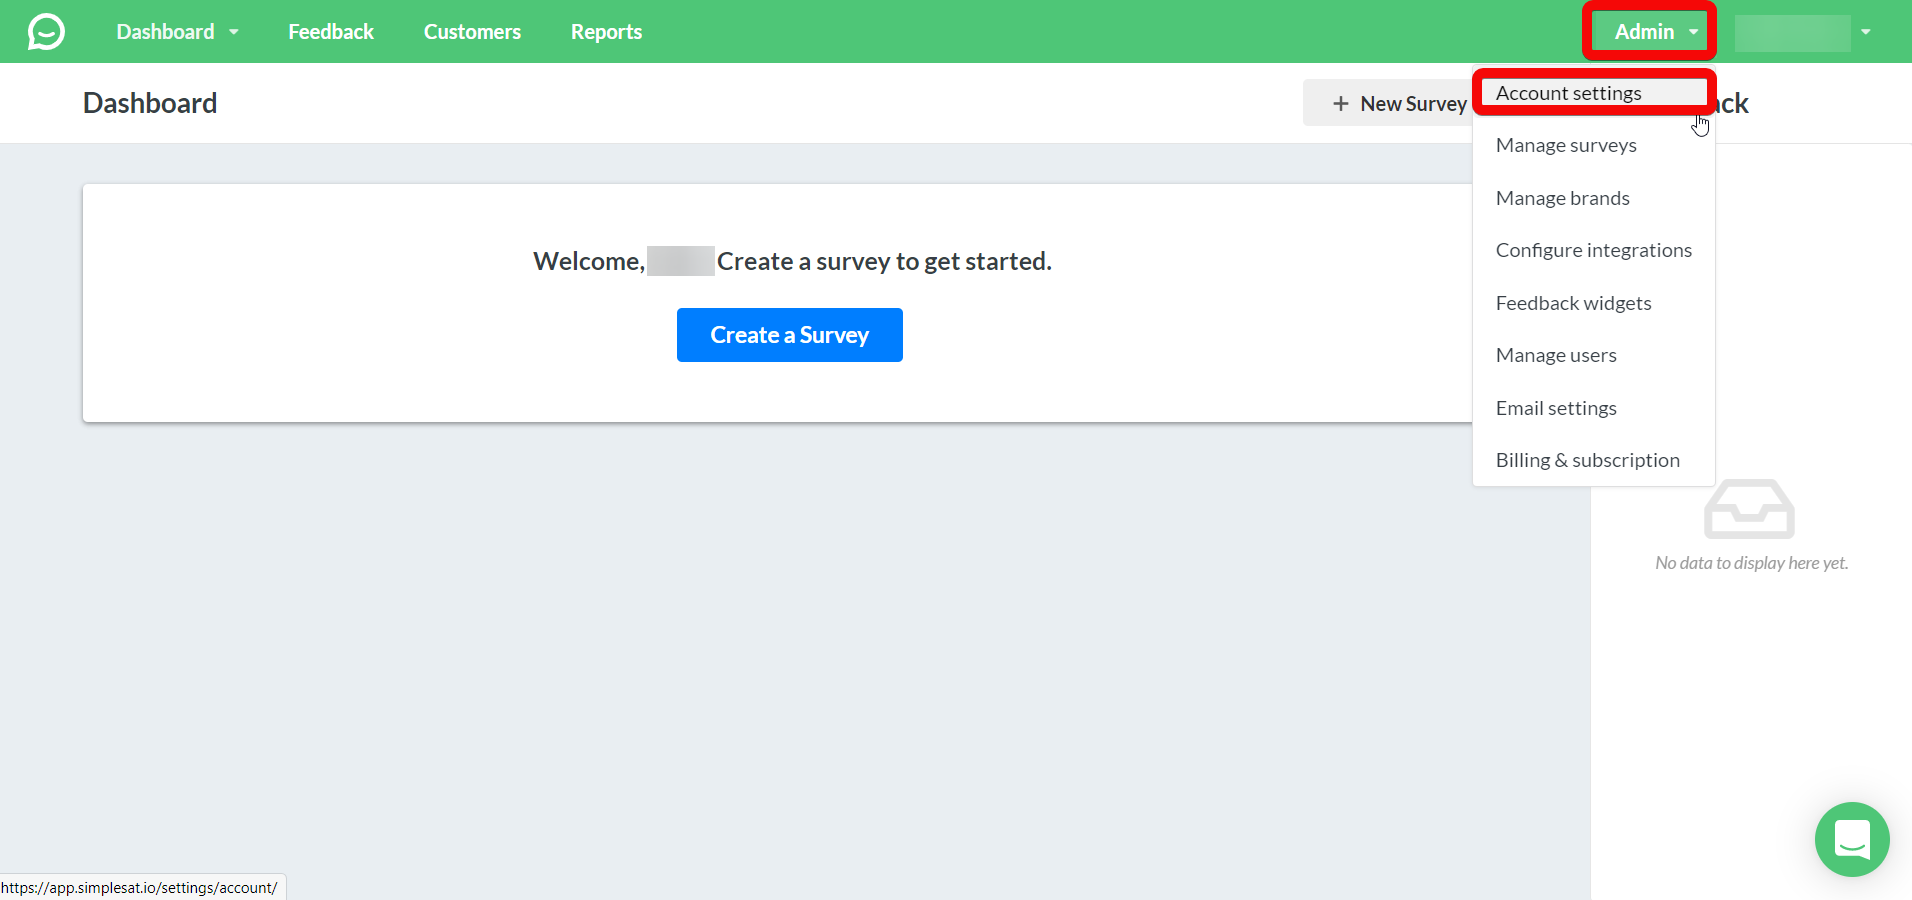
- Log in to your Simplesat account.
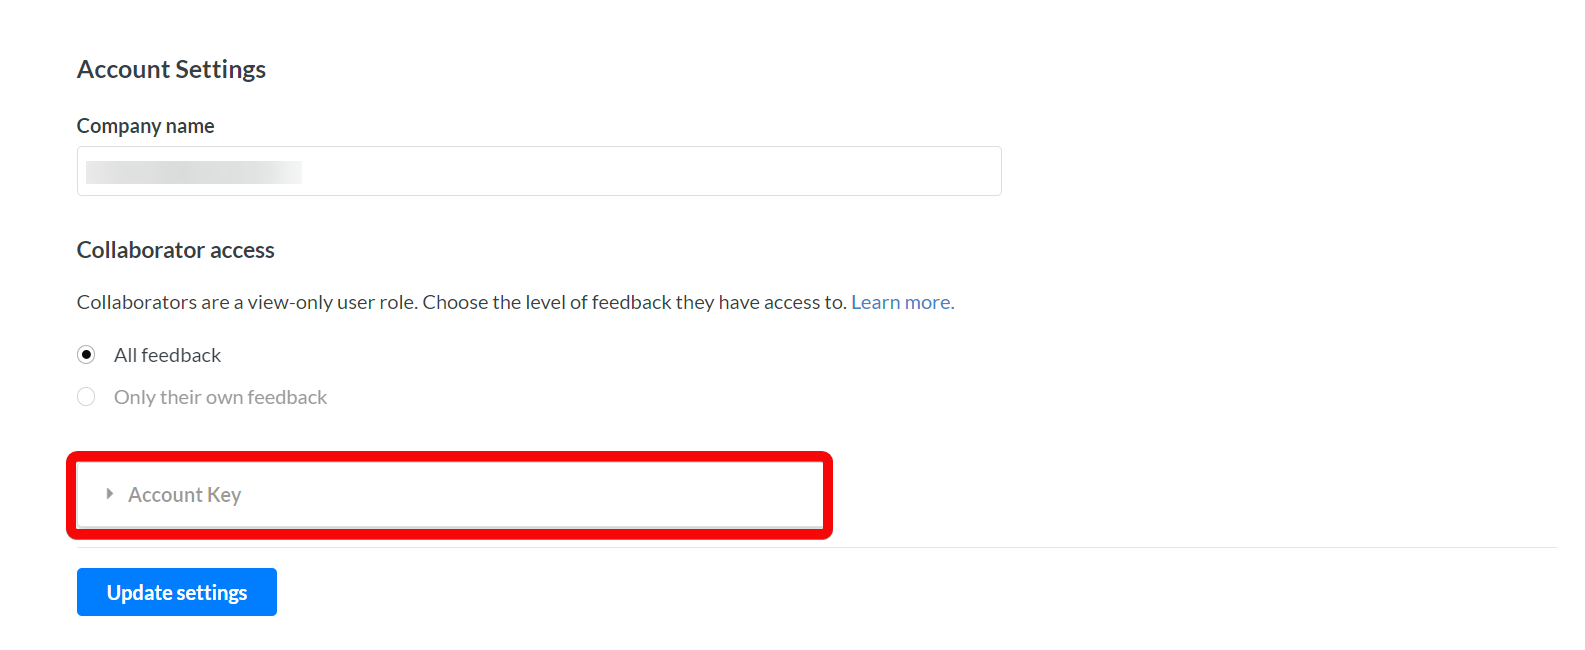
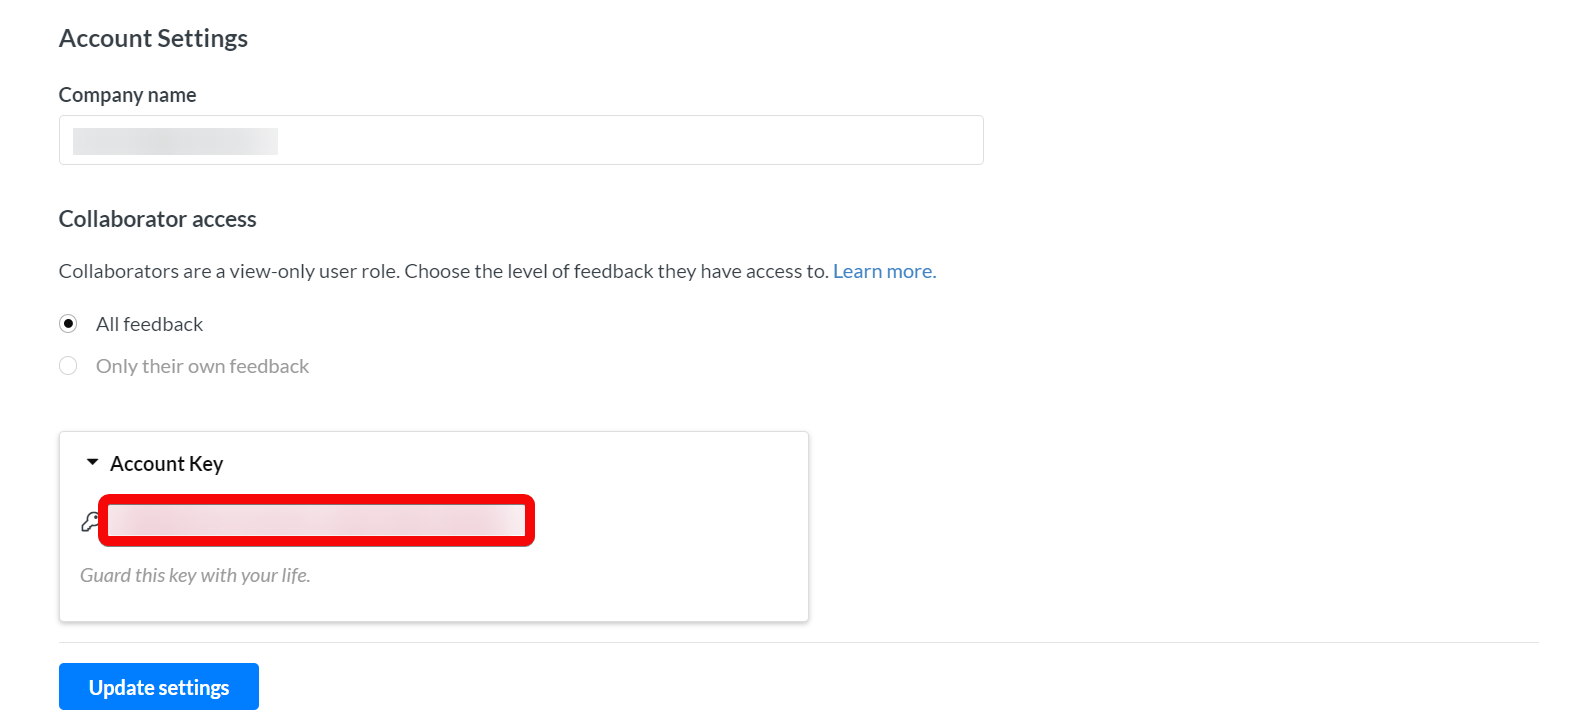
- Click Admin > Account Settings.
- Copy the Account Key to the clipboard.
- Log in to your Boost.space IntegratorPart of the Boost.space system, where you can create your connections and automate your processes. account, add a module from the Simplesat app into an Boost.space IntegratorPart of the Boost.space system, where you can create your connections and automate your processes. scenarioA specific connection between applications in which data can be transferred. Two types of scenarios: active/inactive..
- Click Add next to the ConnectionUnique, active service acces point to a network. There are different types of connections (API key, Oauth…). field.
- In the ConnectionUnique, active service acces point to a network. There are different types of connections (API key, Oauth…). name field, enter a name for the connectionUnique, active service acces point to a network. There are different types of connections (API key, Oauth…)..
- In the API Key field, enter the details copied in step 3 and click Continue.
You have successfully connected Simplesat app with Boost.space IntegratorPart of the Boost.space system, where you can create your connections and automate your processes. and can now create scenariosA specific connection between applications in which data can be transferred. Two types of scenarios: active/inactive..
You can create or update the customers.
Creates a new or updates an existing customer.
ConnectionUnique, active service acces point to a network. There are different types of connections (API key, Oauth…). |
Establish a connection to your Simplesat account. | ||||||
Enter (map) the customer’s email address. | |||||||
Name |
Enter (map) the customer’s name. | ||||||
Company Name |
Enter (map) the customer’s company name. | ||||||
Custom Attributes |
You can include multiple custom attributes with each customer record to use as rules for your audience. For example, person type, company status, and user role.
Simplesat checks whether the custom attribute exists:
|
You can create and run the following answer modules.
TriggersEvery scenario has a trigger, an event that starts your scenario. A scenario must have a trigger. There can only be one trigger for each scenario. When you create a new scenario, the first module you choose is your trigger for that scenario. Create a trigger by clicking on the empty module of a newly created scenario or moving the... when an answer is created and updated.
ConnectionUnique, active service acces point to a network. There are different types of connections (API key, Oauth…). |
Establish a connection to your Simplesat account. |
Limit |
Set the maximum number of answers Boost.space IntegratorPart of the Boost.space system, where you can create your connections and automate your processes. will return during one execution cycleA cycle is the operation and commit/rollback phases of scenario execution. A scenario may have one or more cycles (one is the default).. The default value is 2. |
Returns a list of all answers.
ConnectionUnique, active service acces point to a network. There are different types of connections (API key, Oauth…). |
Establish a connection to your Simplesat account. |
Limit |
Set the maximum number of answers Boost.space IntegratorPart of the Boost.space system, where you can create your connections and automate your processes. will return during one execution cycleA cycle is the operation and commit/rollback phases of scenario execution. A scenario may have one or more cycles (one is the default).. The default value is 2. |
You can call APIs using the Make an API Call module.
Performs an arbitrary authorized API call.
ConnectionUnique, active service acces point to a network. There are different types of connections (API key, Oauth…). |
Establish a connection to your Simplesat account. | |||
URL |
Enter a path relative to https://api.simplesat.io/api. For example: /answers.
|
|||
Method |
Select the HTTP method you want to use:
to retrieve information for an entry.
to create a new entry.
to update/replace an existing entry.
to make a partial entry update.
to delete an entry. |
|||
Headers |
Enter the desired request headers. You don’t need to add authorization headers; we’ve already added those for you. | |||
Query String |
Enter the request query string. | |||
Body |
Enter the body content for your API call. |
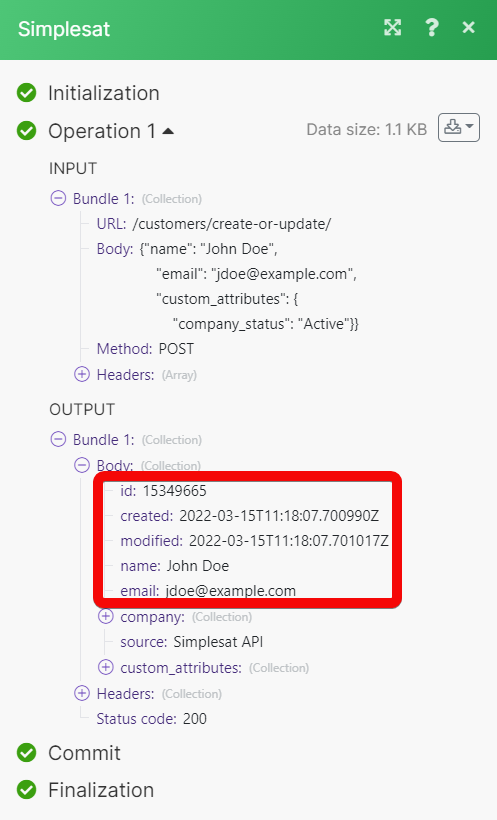
The following API call creates or updates the customer in your Simplesat account:
URL:
/customers/create-or-update/
Method:
POST
Headers:
Key: X-Simplesat-Token
Value: {{your access token}}
The result can be found in the module’s Output under Bundle > Body.
In our example, a new customer is created with the specified details: