To triggerThe initial event that starts a scenario. It can be an action, a scheduled time, or a custom event, and is essential to define at the beginning of each scenario. an instant trigger (Custom webhook module) in your scenarioA specific connection between applications in which data can be transferred. Two types of scenarios: active/inactive. when an event occurs in a web service that is not currently implemented (and supports sending webhooksA webhook is a way for an app to send real-time information to a specific URL in response to certain events or triggers.) as an app in Boost.space IntegratorPart of the Boost.space system, where you can create your connections and automate your processes., follow these steps:
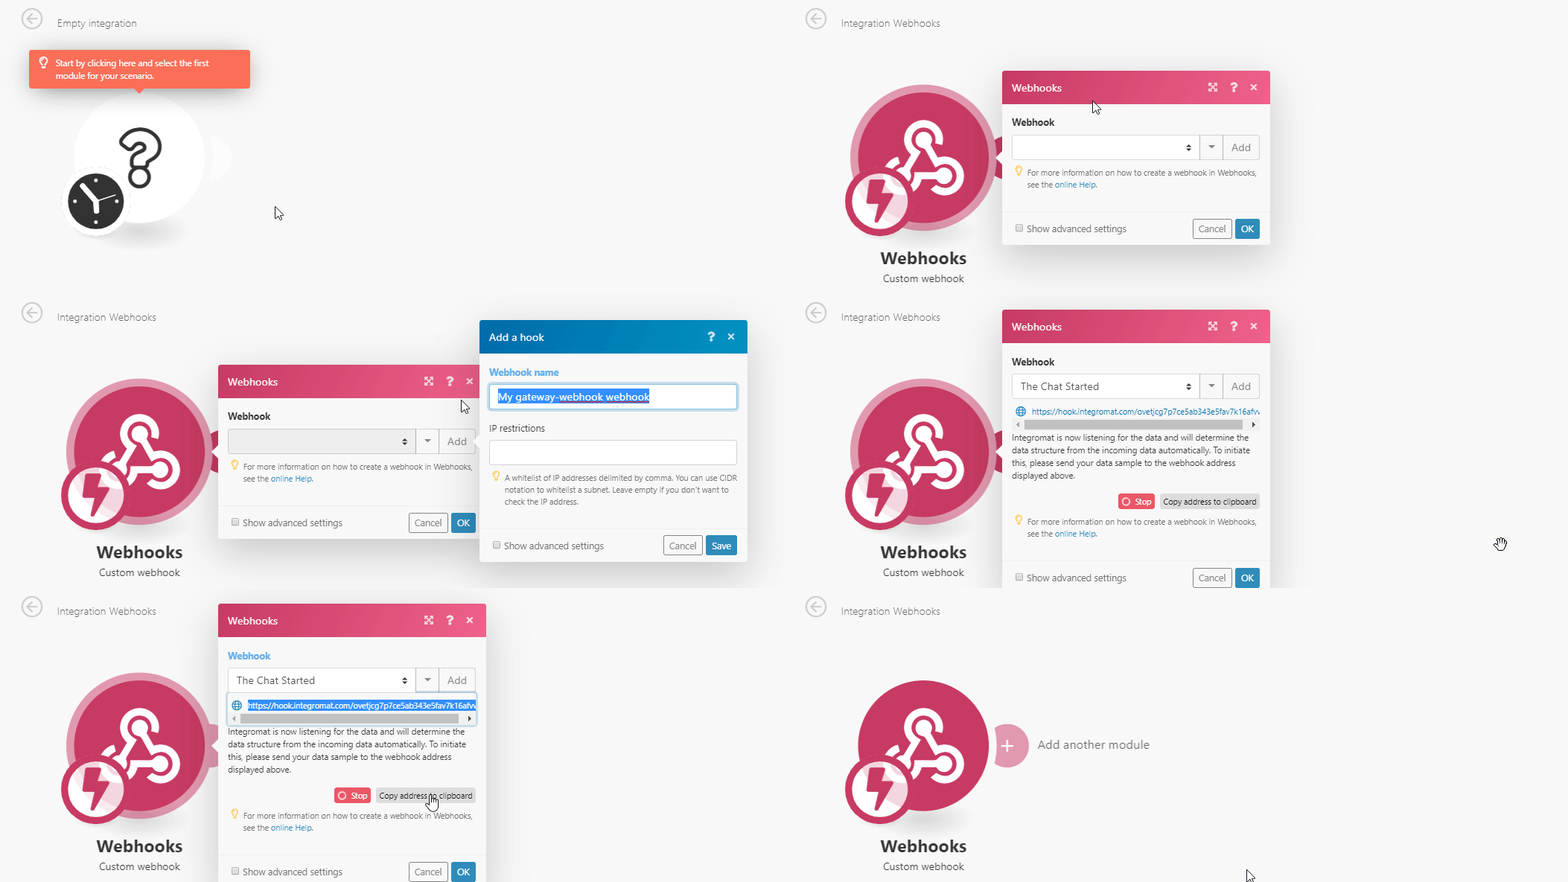
- Add the Webhooks > Custom webhook module to your scenario
- Create the webhookA webhook is a way for an app to send real-time information to a specific URL in response to certain events or triggers. in the desired web service
- Specify events that trigger the Custom webhook module in your Boost.space Integrator scenario
- Run the scenario and waiting until the event that triggersThe initial event that starts a scenario. It can be an action, a scheduled time, or a custom event, and is essential to define at the beginning of each scenario. the module occurs
- Add the Webhooks > Custom webhook module to your scenario.
- Set the webhook name, if needed.
- Copy the provided address to the clipboard.

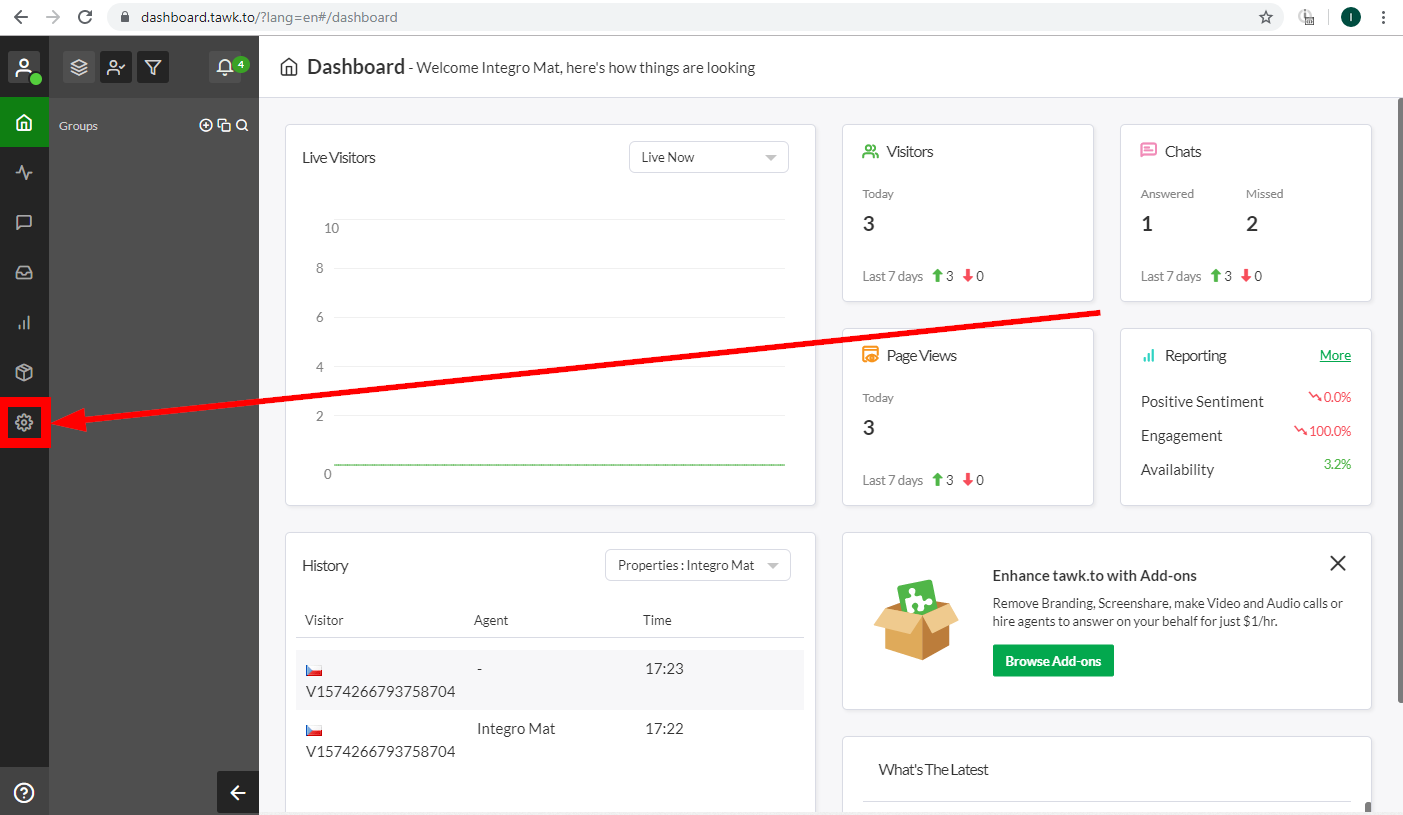
- Log in to the web service account.
- Click on the cog-wheel in the menu on the left to open the settings.

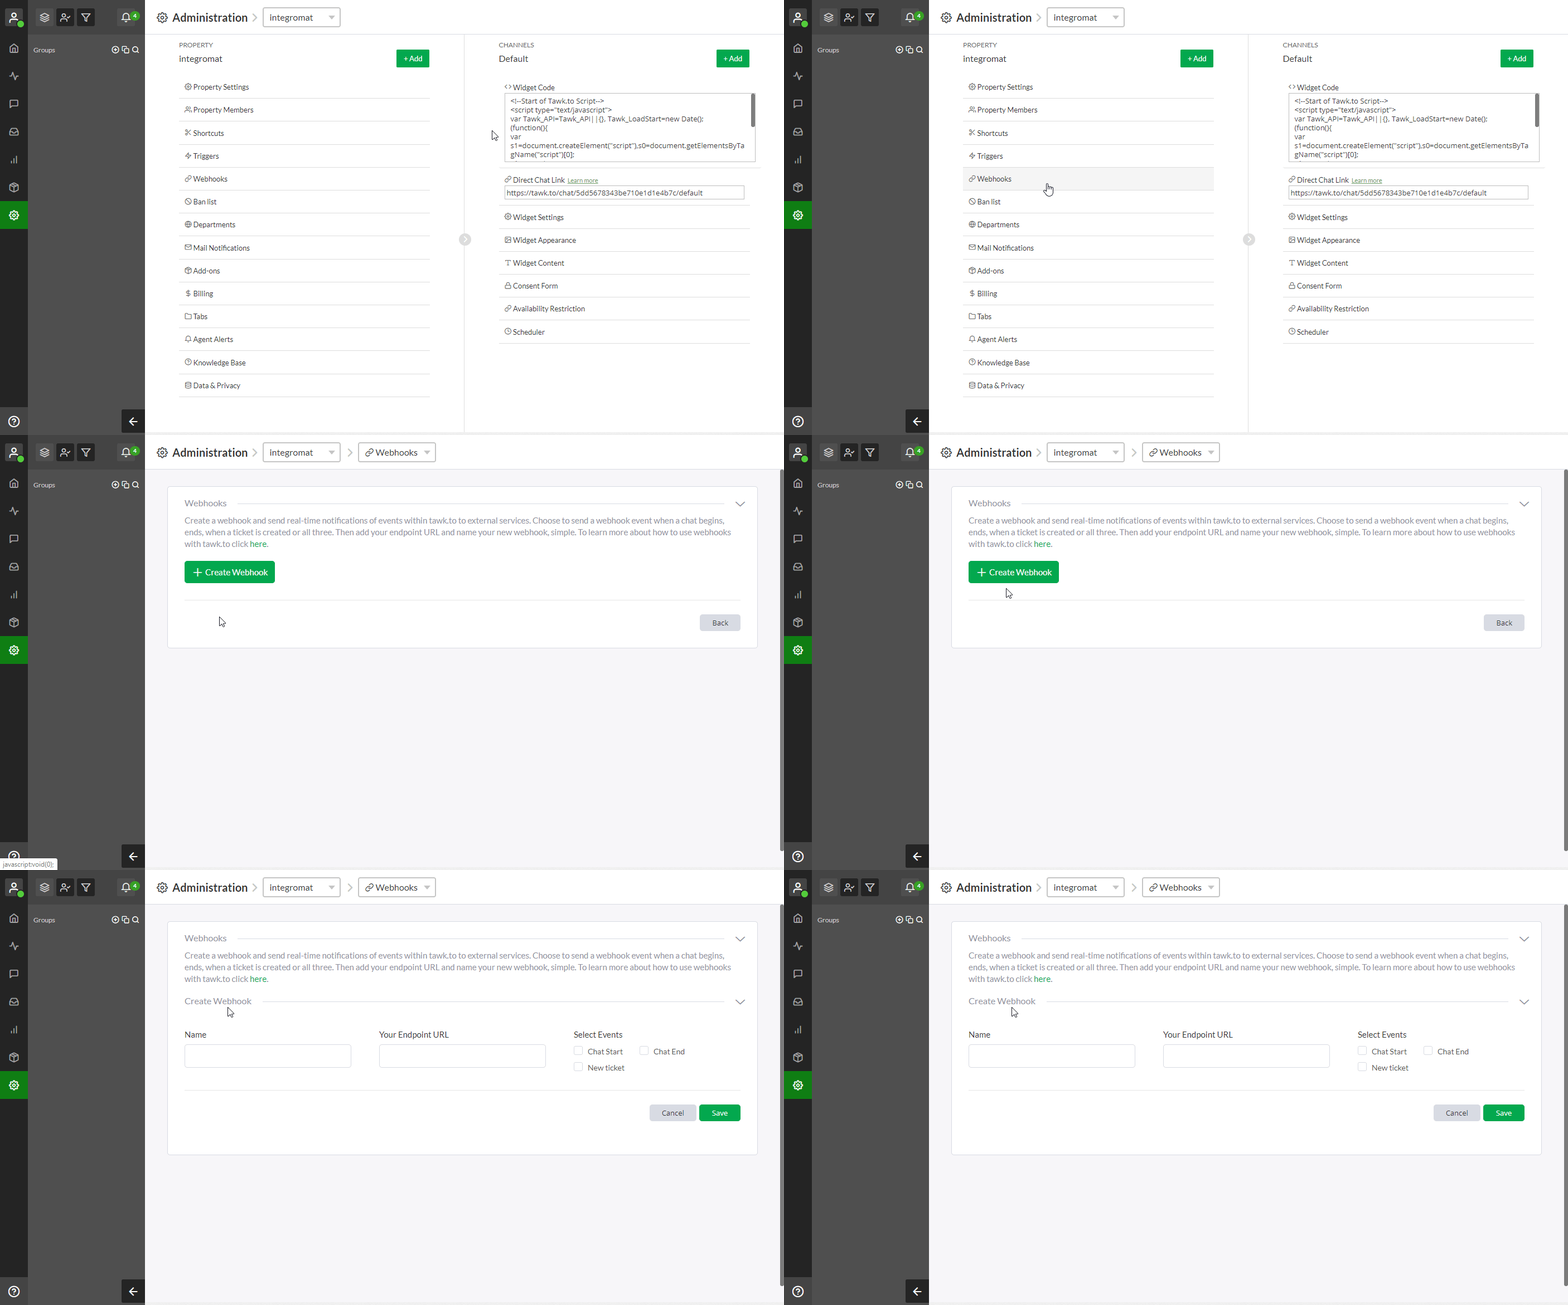
- Open the Webhooks settings and click the green Create Webhook button.

- Enter the name for the webhook.
- Enter the address you have copied to your clipboard in step 3 in the Adding the Instant Trigger (webhook) to Your Scenario section above.
- Select the event that will trigger the webhook.
Now, run your Boost.space Integrator scenario with the Webhooks > Custom webhook module. The module (and scenario) is triggered when the specified event in the web service occurs.
