Creating custom fields in Boost.space
Custom fields allow you to store additional information for your modules and add-ons. Those fields can be created only by the admin. Although anyone can connect them to a specific space. You can create your custom fields in the system settings. In this article, you will learn how you can create a custom field in the warehouse’s addon. We have also prepared a variety of custom fields for you. The advantage of these premade fields is that they are already mapped, making them easier to use in various scenarios.
Video guide
Visual explanation – Creation + Usage
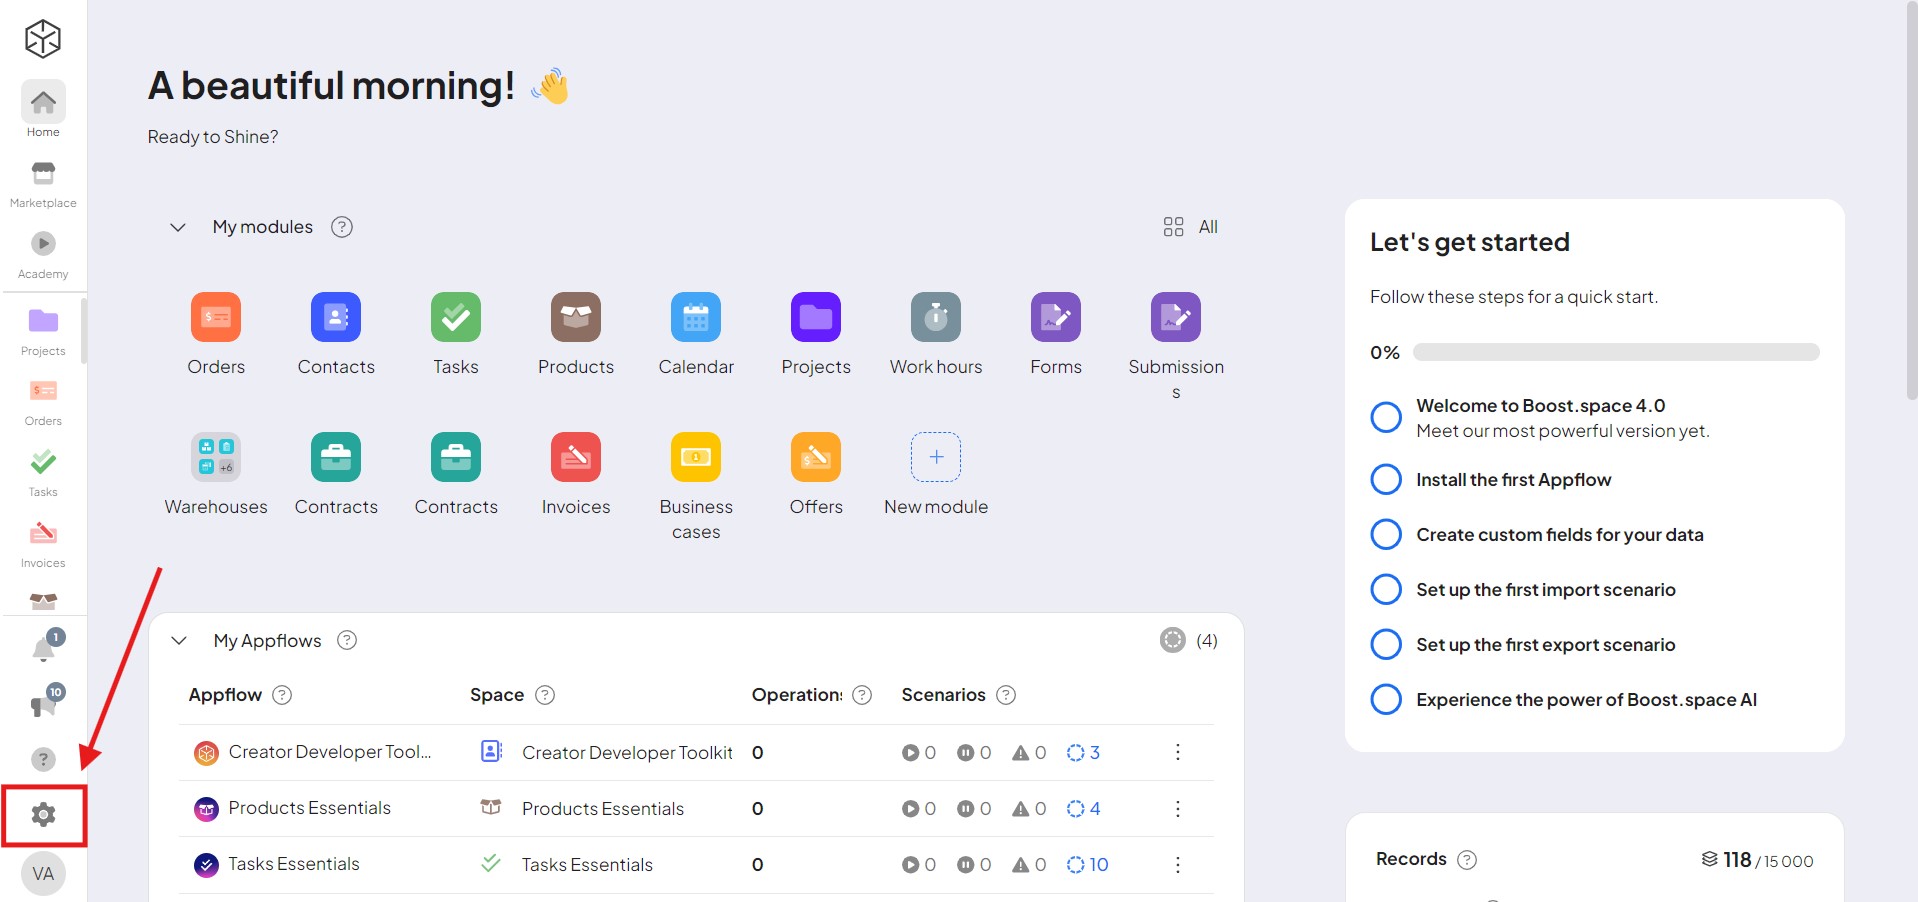
1. On your home screen, click System Settings in the bottom left corner.
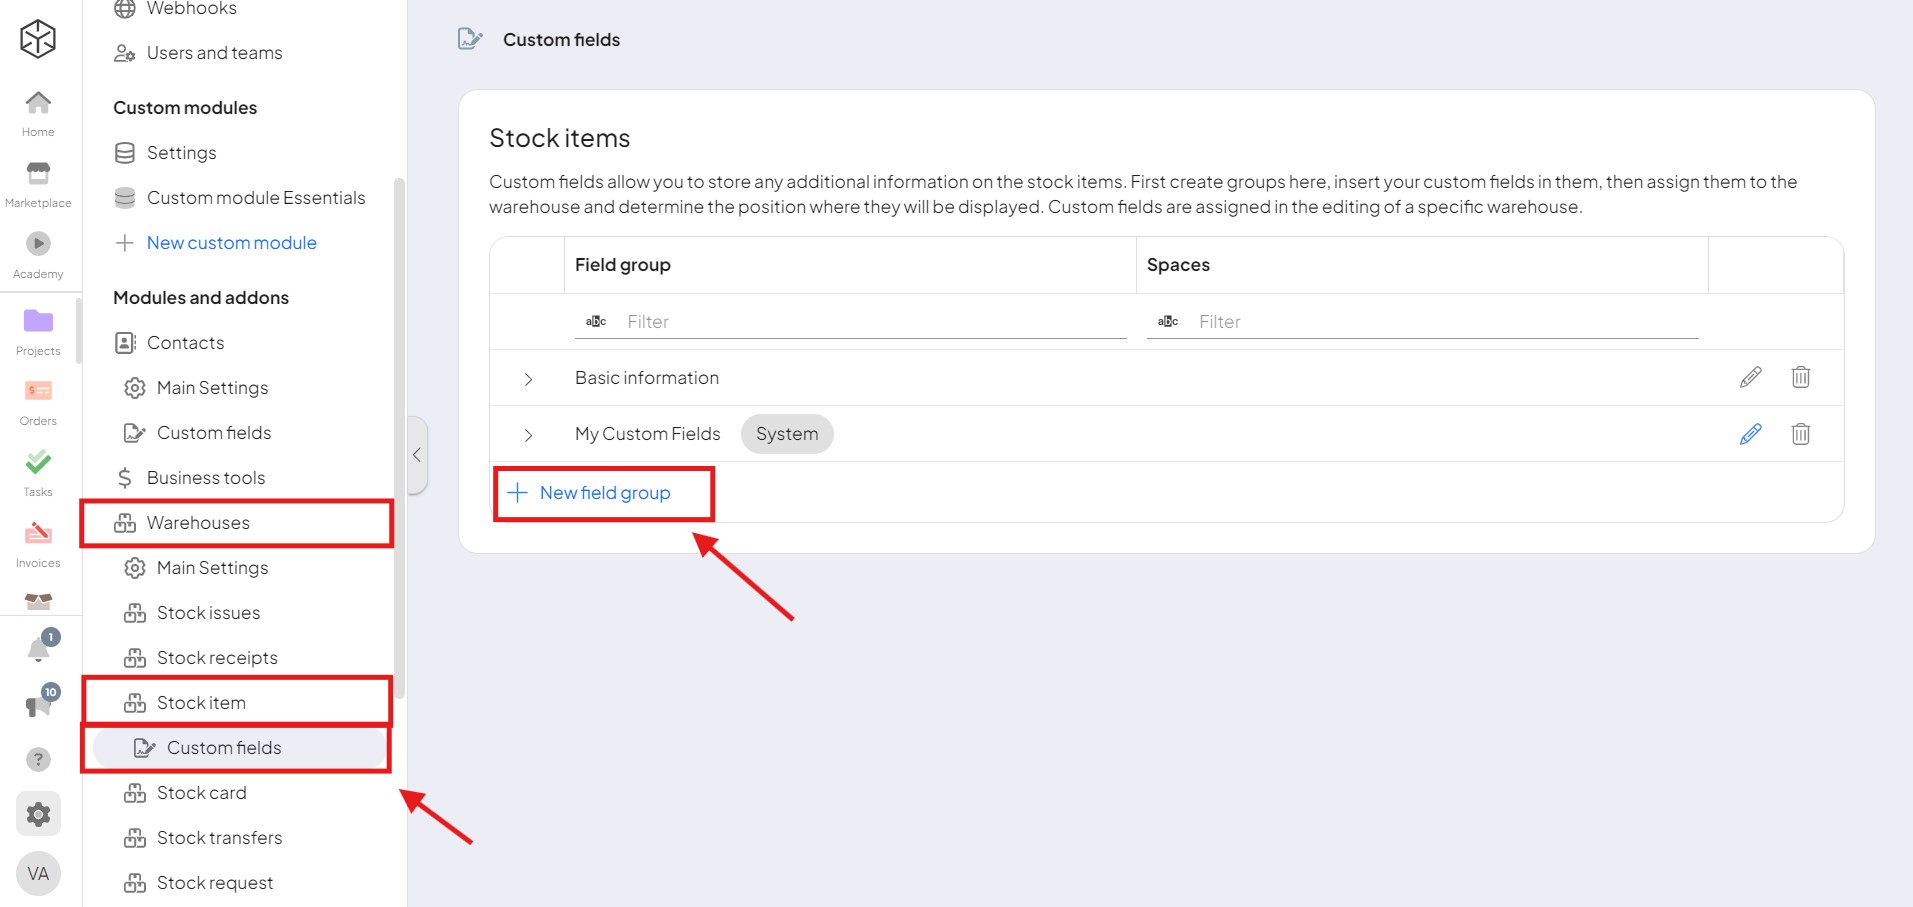
2. Select Warehouses in the navigation bar on the left side and then click on Custom Fields and click New field group.
Note: Every custom field needs to belong to the field group!
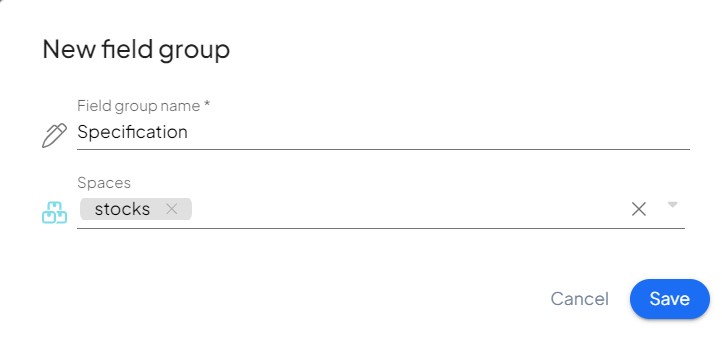
3. Name your new group you can choose a space and then click on save.
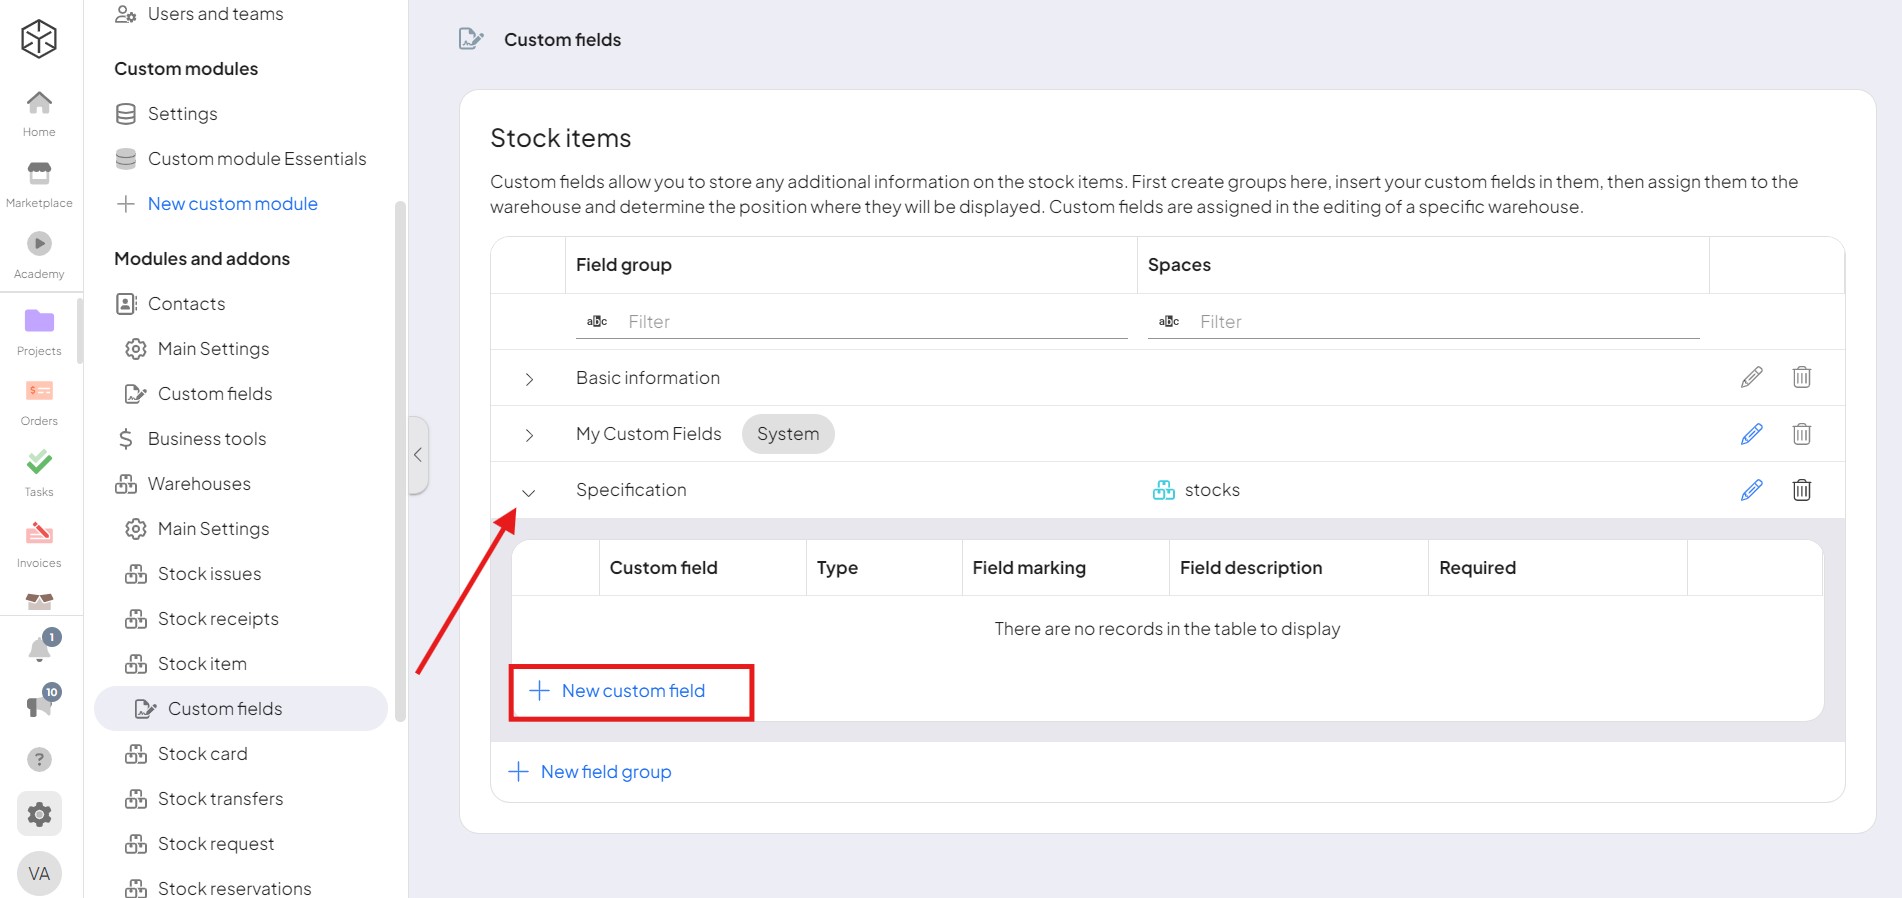
4. When the group is created, click on the arrow next to its name, then click on New custom field button.
5. Name the custom field and select the value to be displayed (text, number, date and time, etc.). In the advanced setting, you can make this field required – your choice! Then click on save.
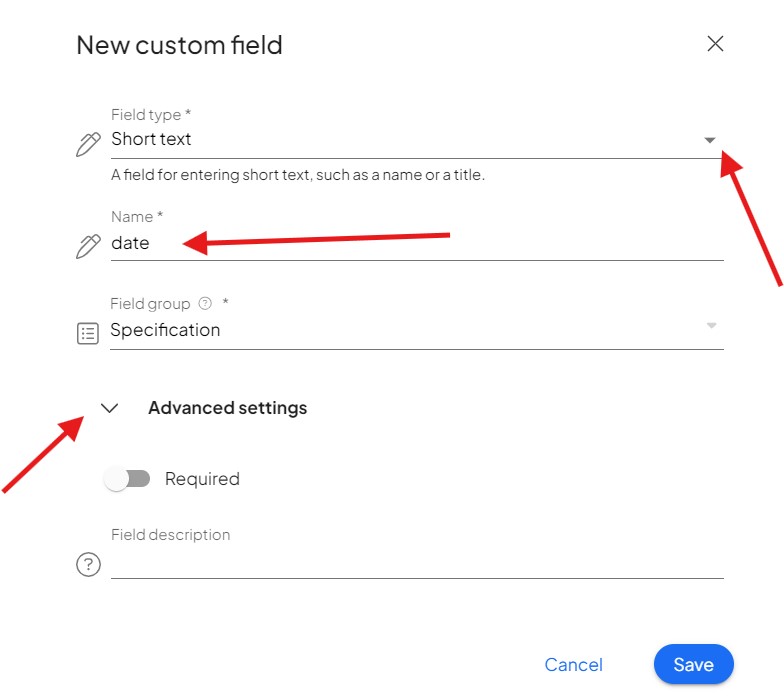
You have now created your new custom field.
Updating Custom Fields
Users can fully manage custom fields and update them by modifying their associated field groups and managing their availability across different spaces. Each custom field can be added to or removed from specific spaces based on the user’s configuration needs, ensuring precise control over data structures.
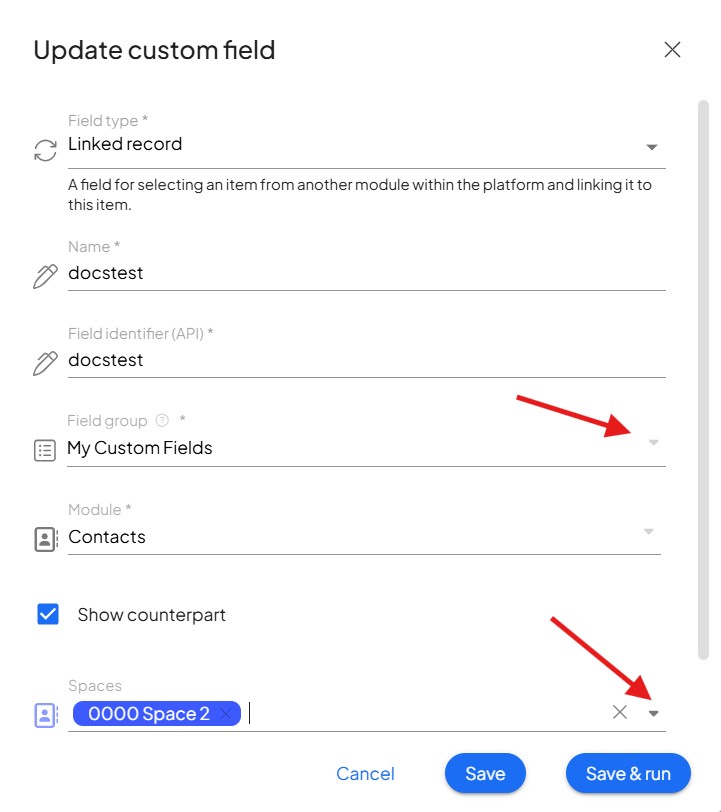
Practical use of custom fields (in the Warehouses addon addon)
💡 NOTE – to import stock items you need to have existing stock cards . The name of the card must match the table (step 3).
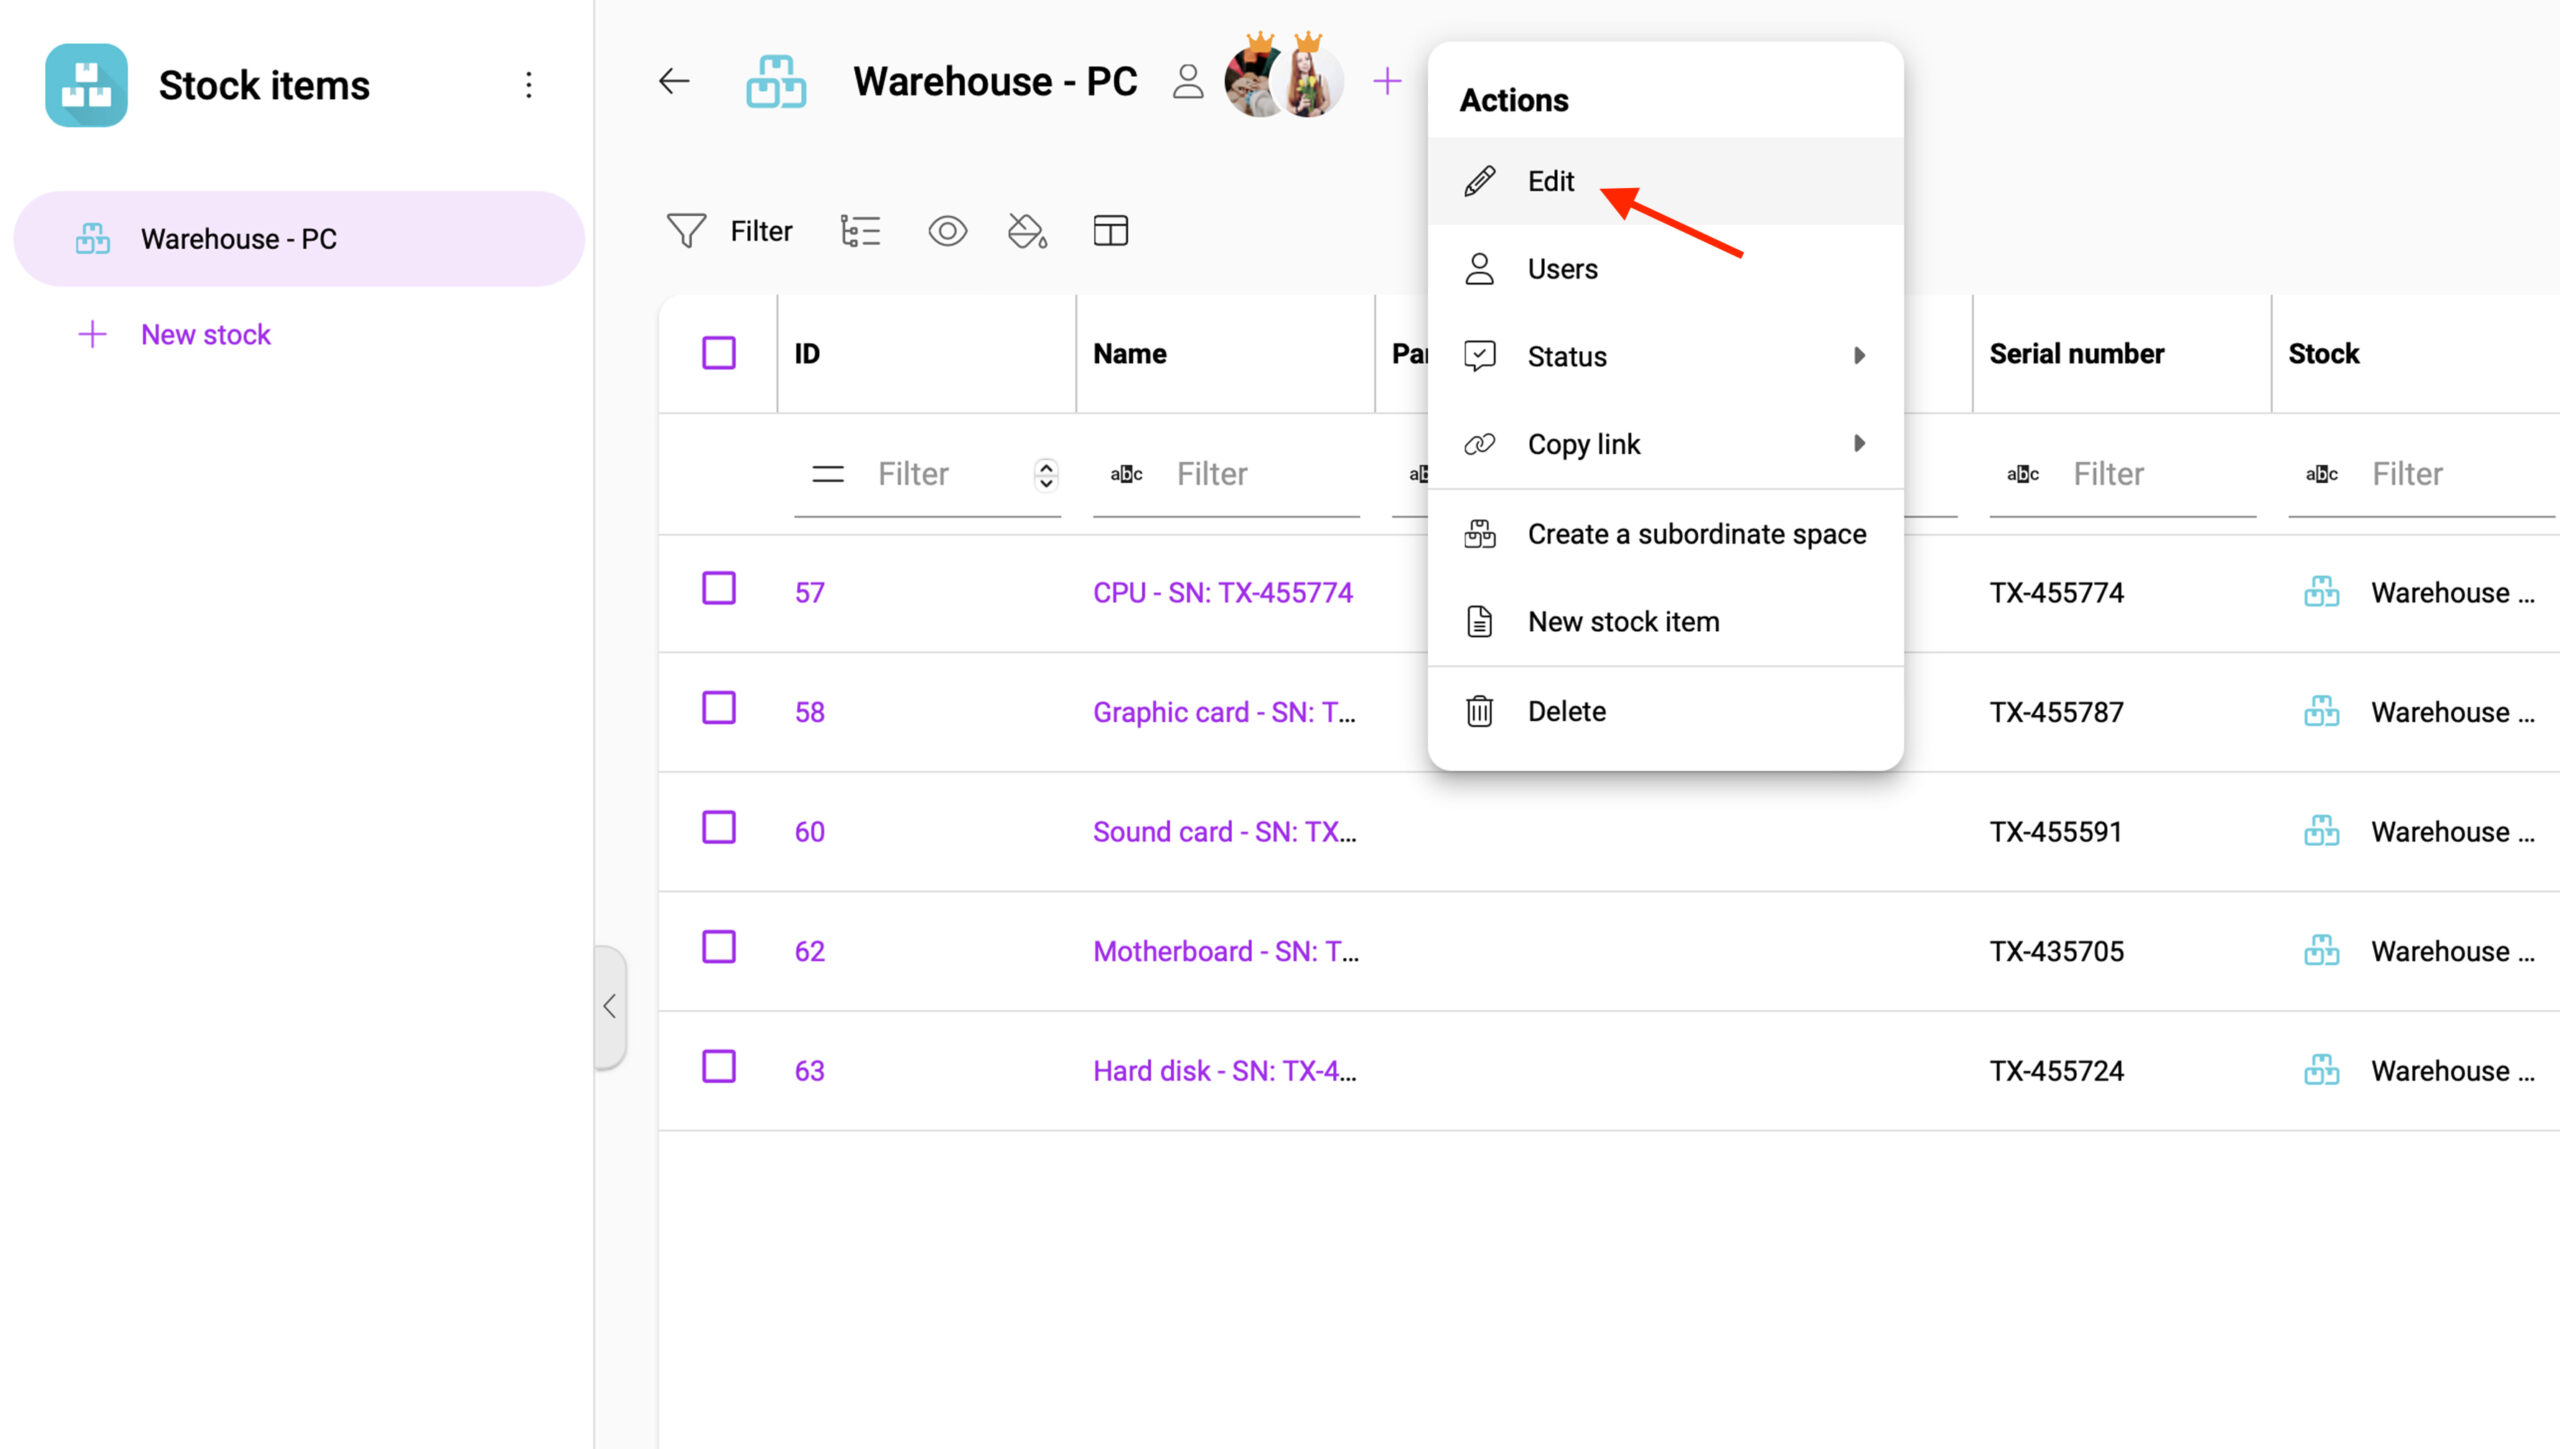
1. Open the Stock items addon, select space and click on the three dots icon (= action) in the top middle. Then click on Edit.
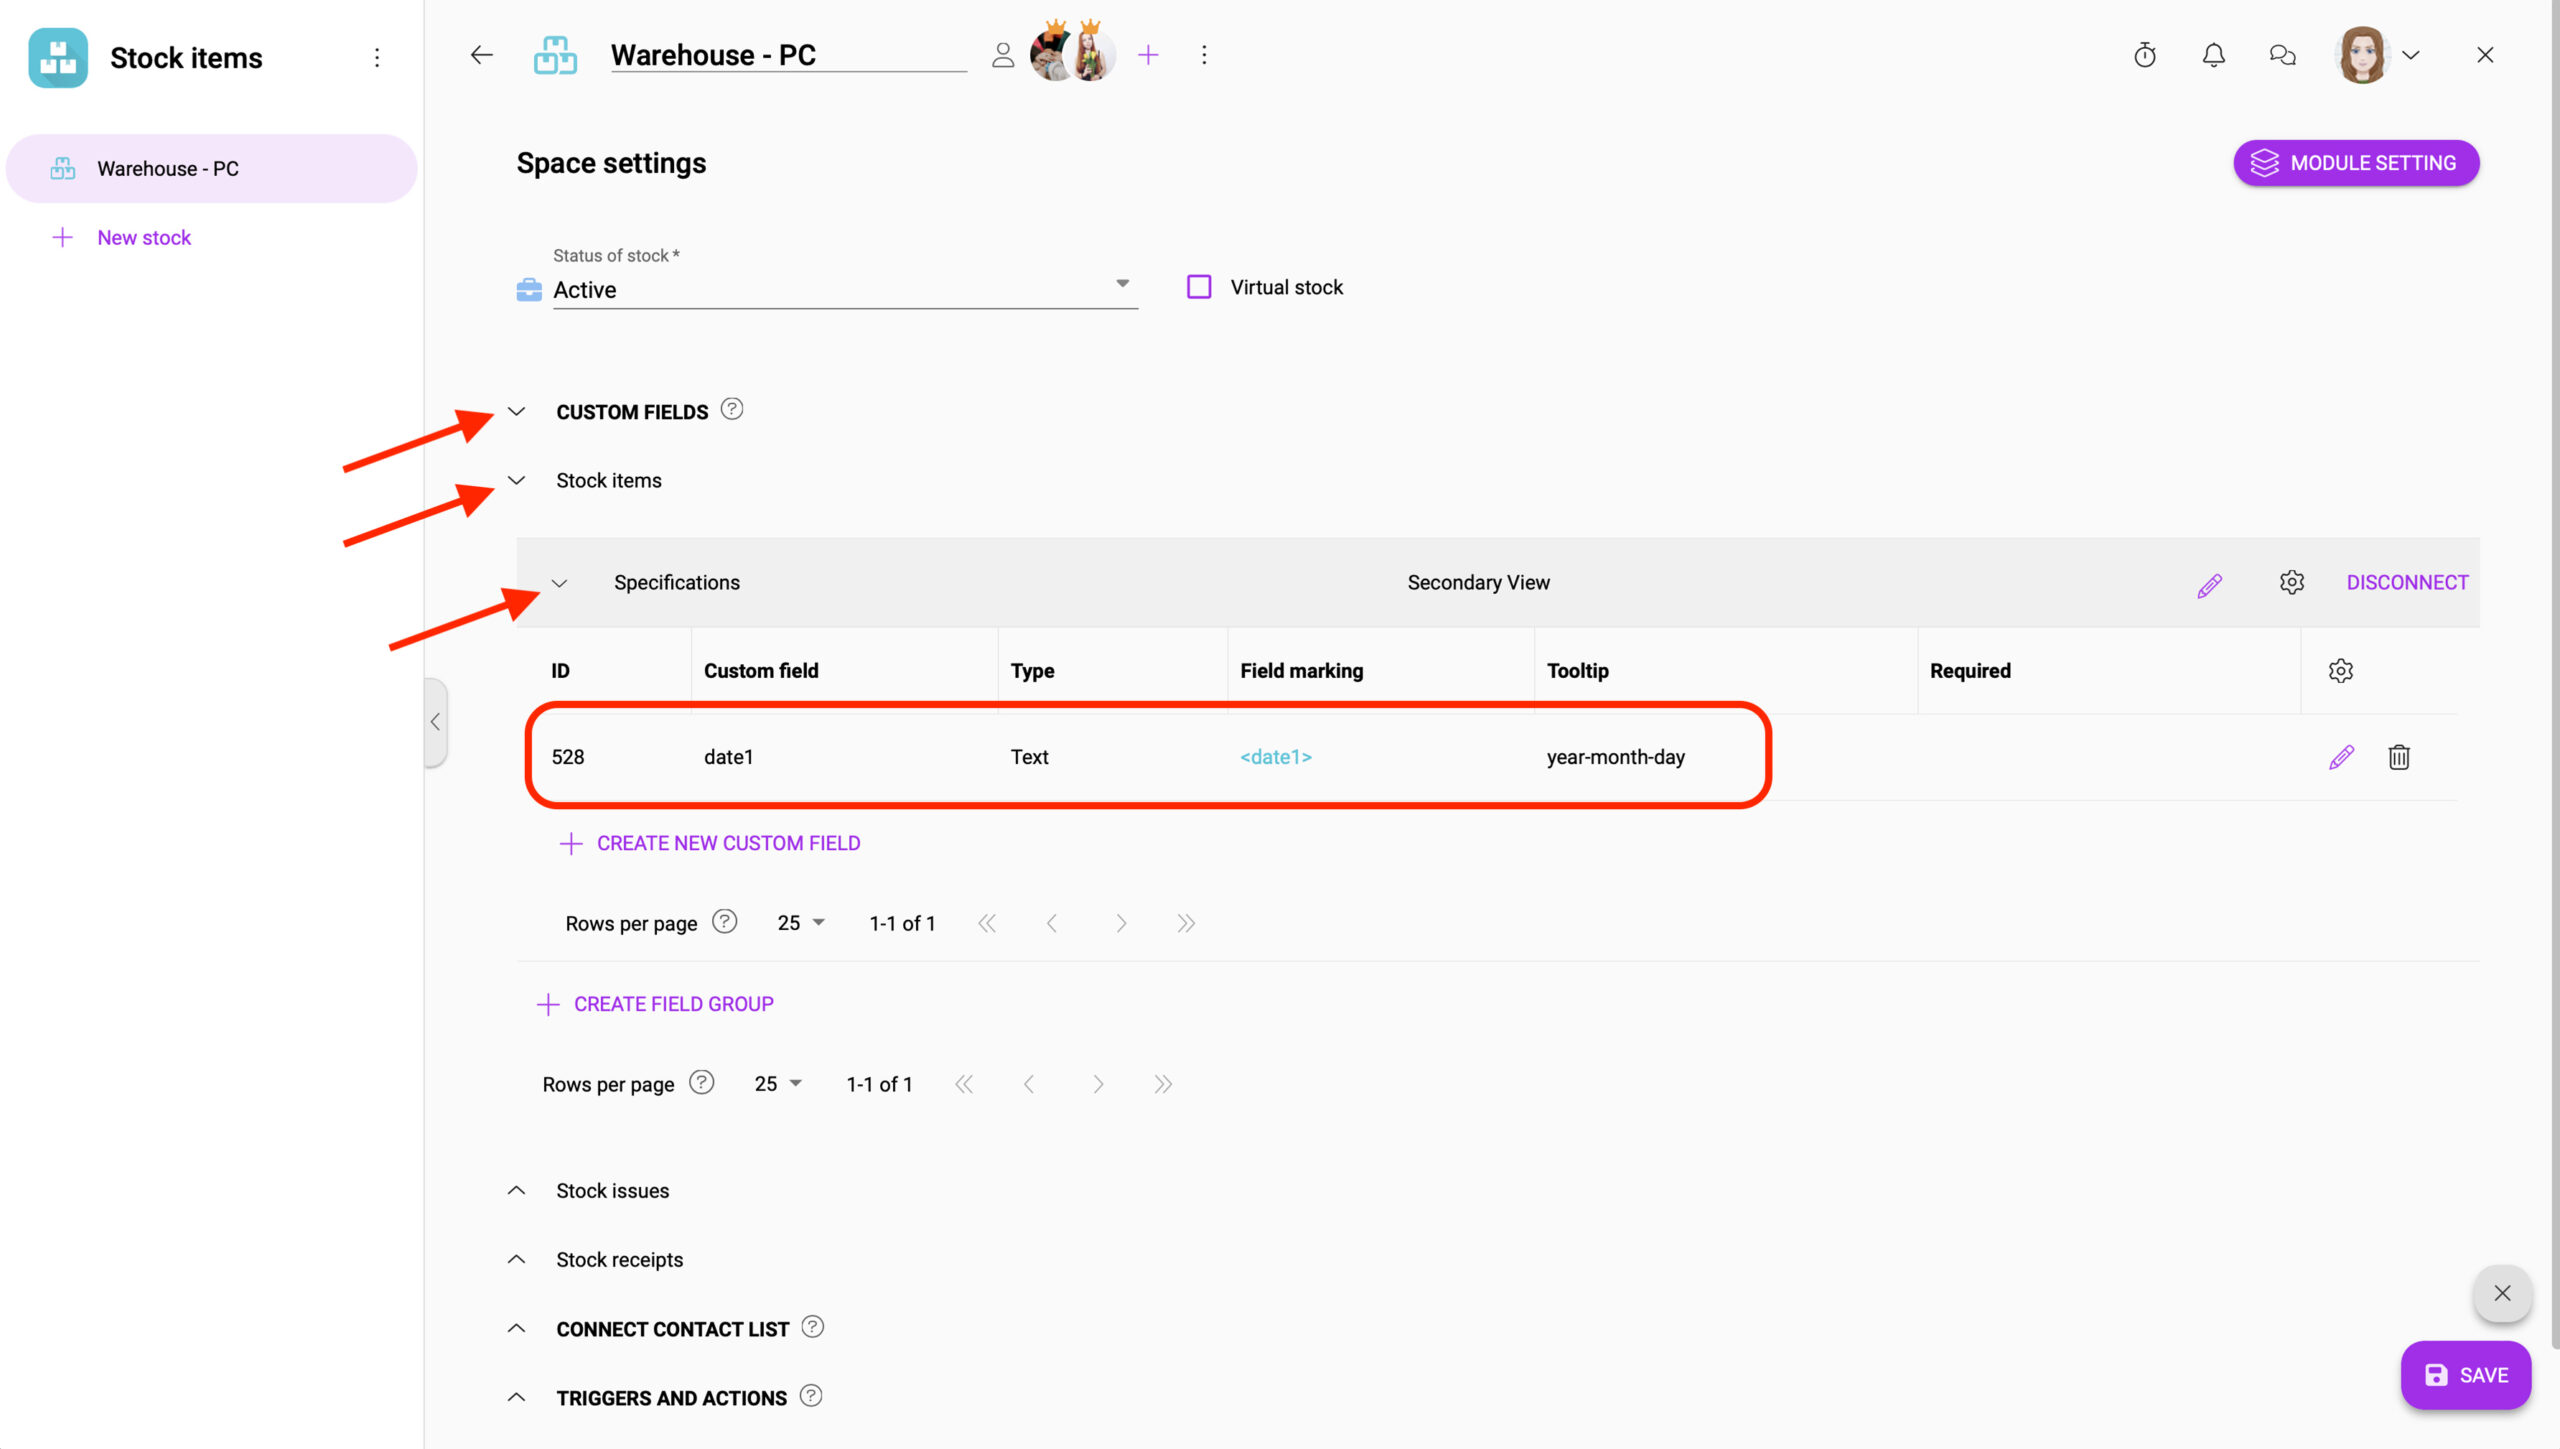
2. The options will open. Click on Custom Fields, then click on Stock items and then your field group. Here you can see new Custom field. Also here you can edit and add new groups and fields.
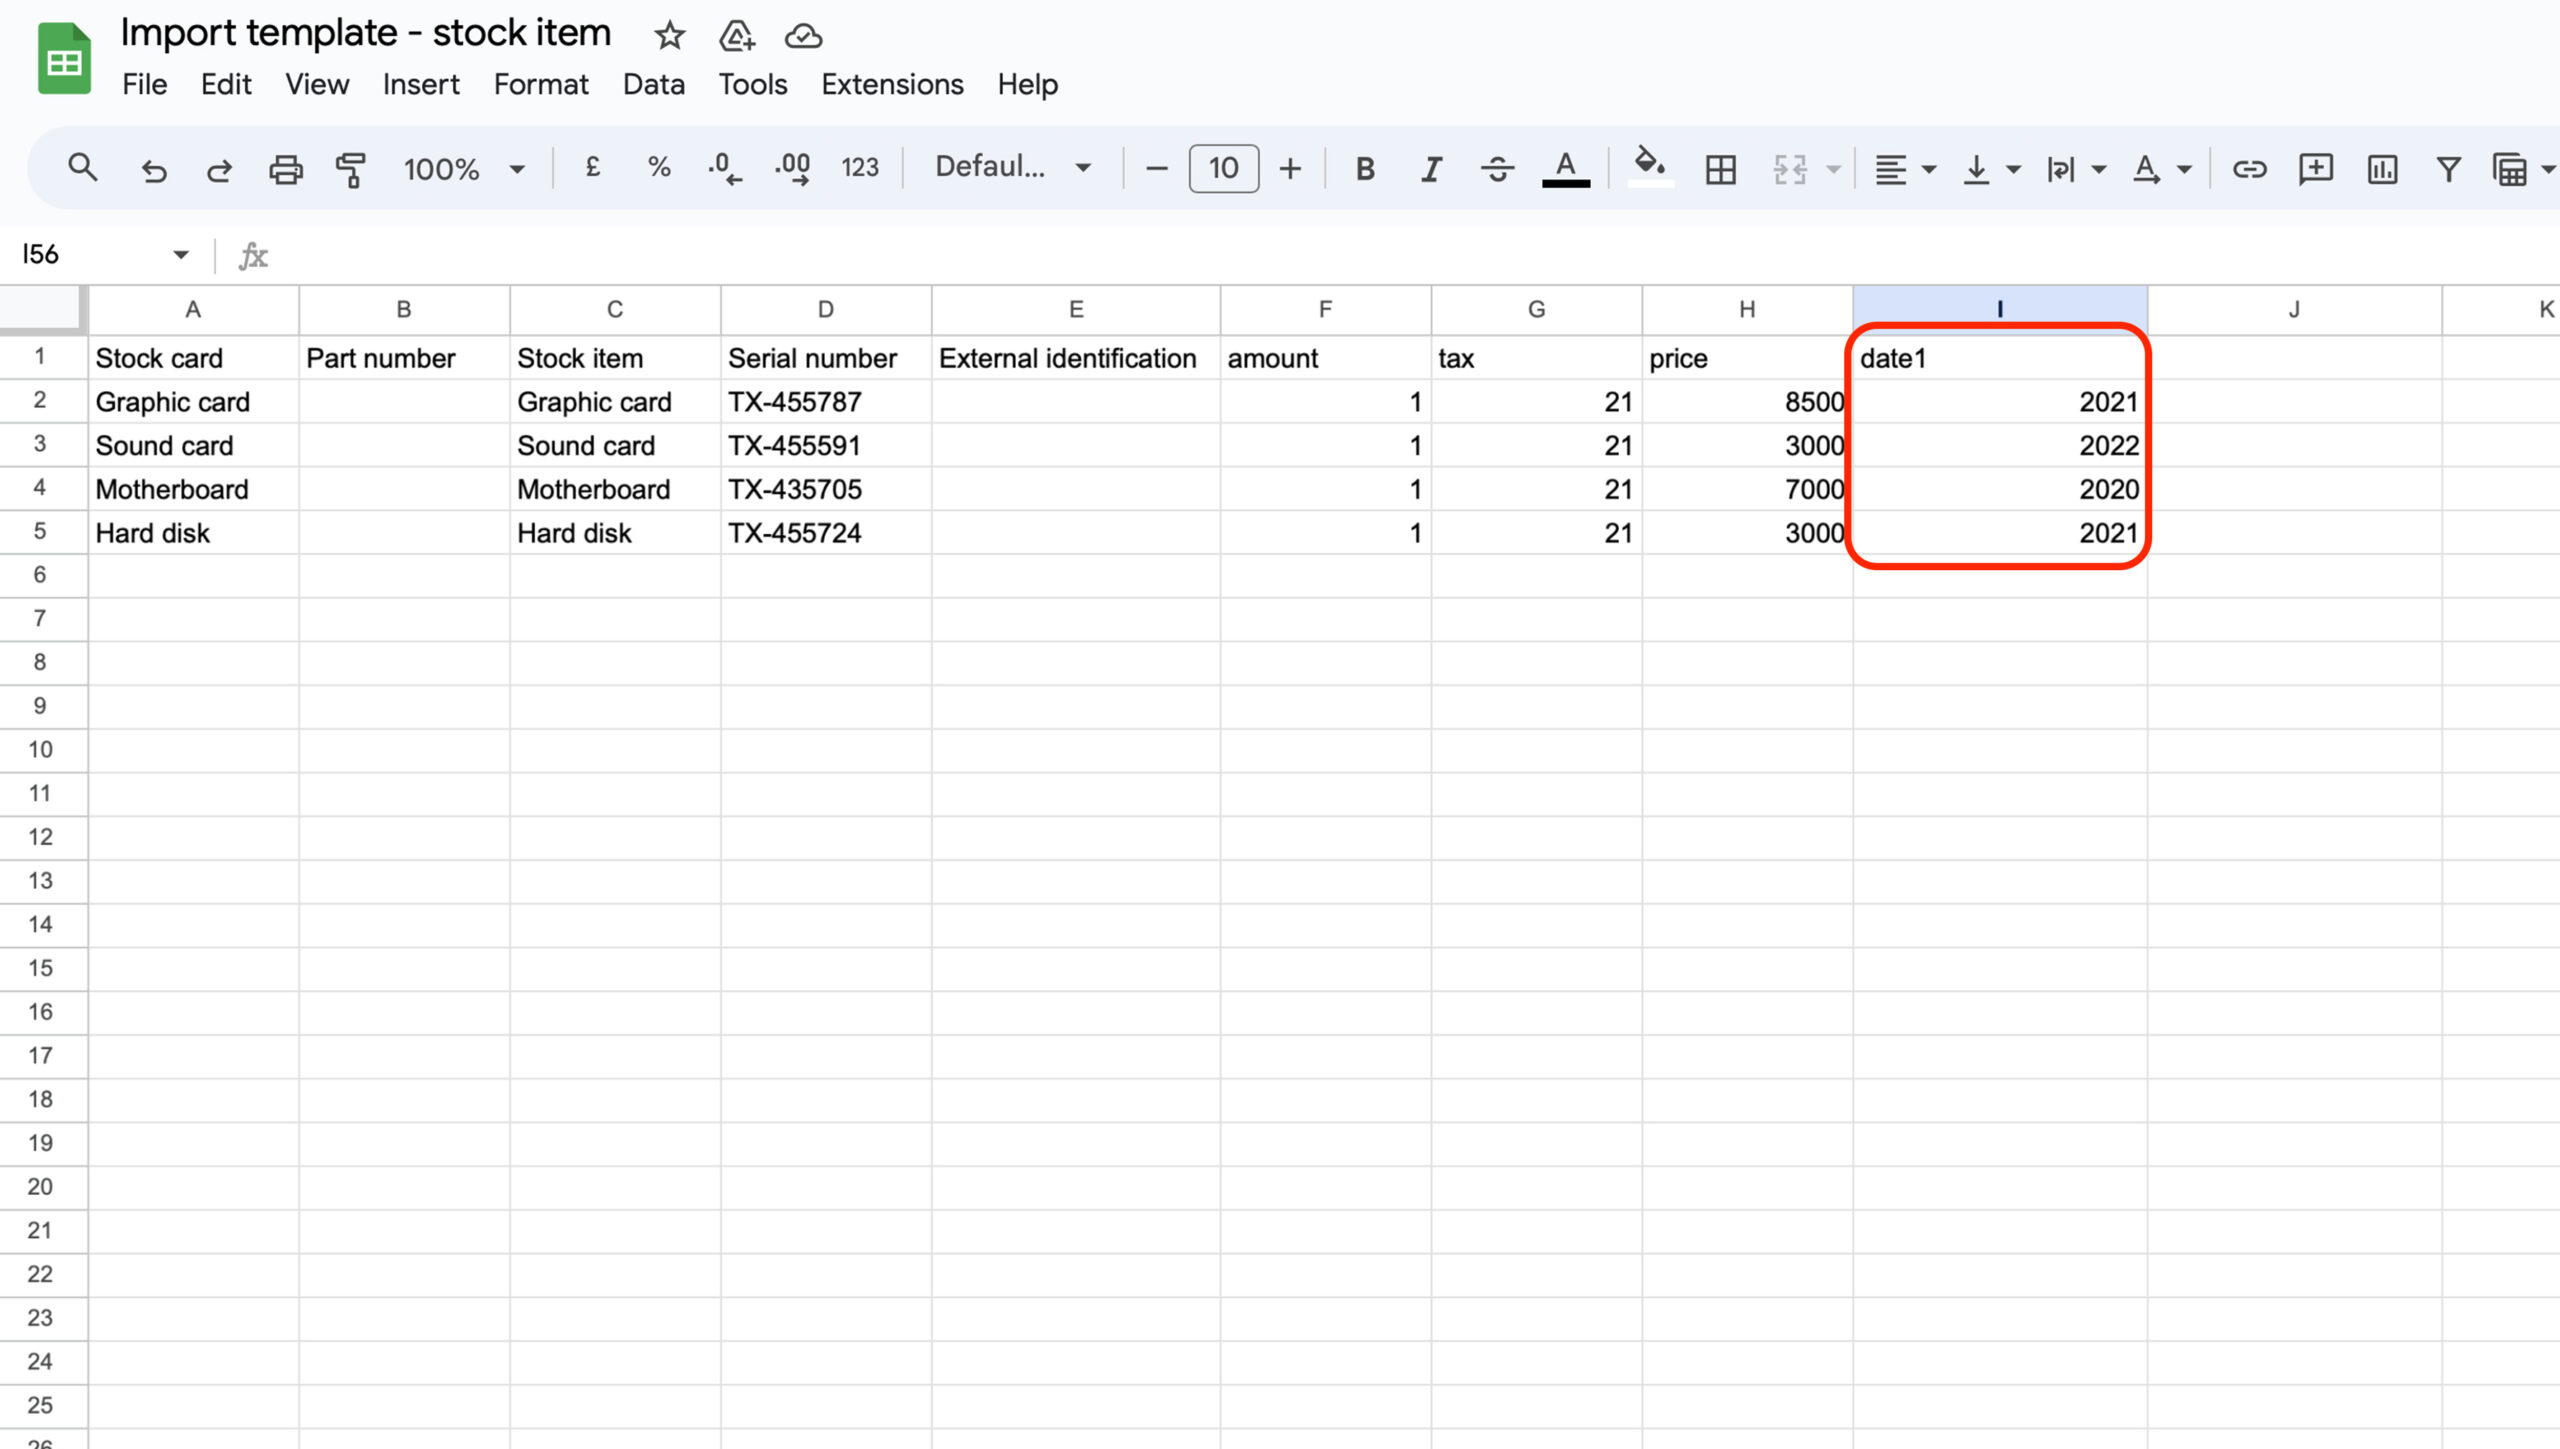
3. Create a spreadsheet (e.g. Excel, Google Sheets,…) and create 8 fields – exactly in this order: stock card, part number, stock item, serial number, external identification, amount, tax, and price. These fields are mandatory. Your custom fields must be entered AFTER these mandatory fields. Their order is arbitrary.
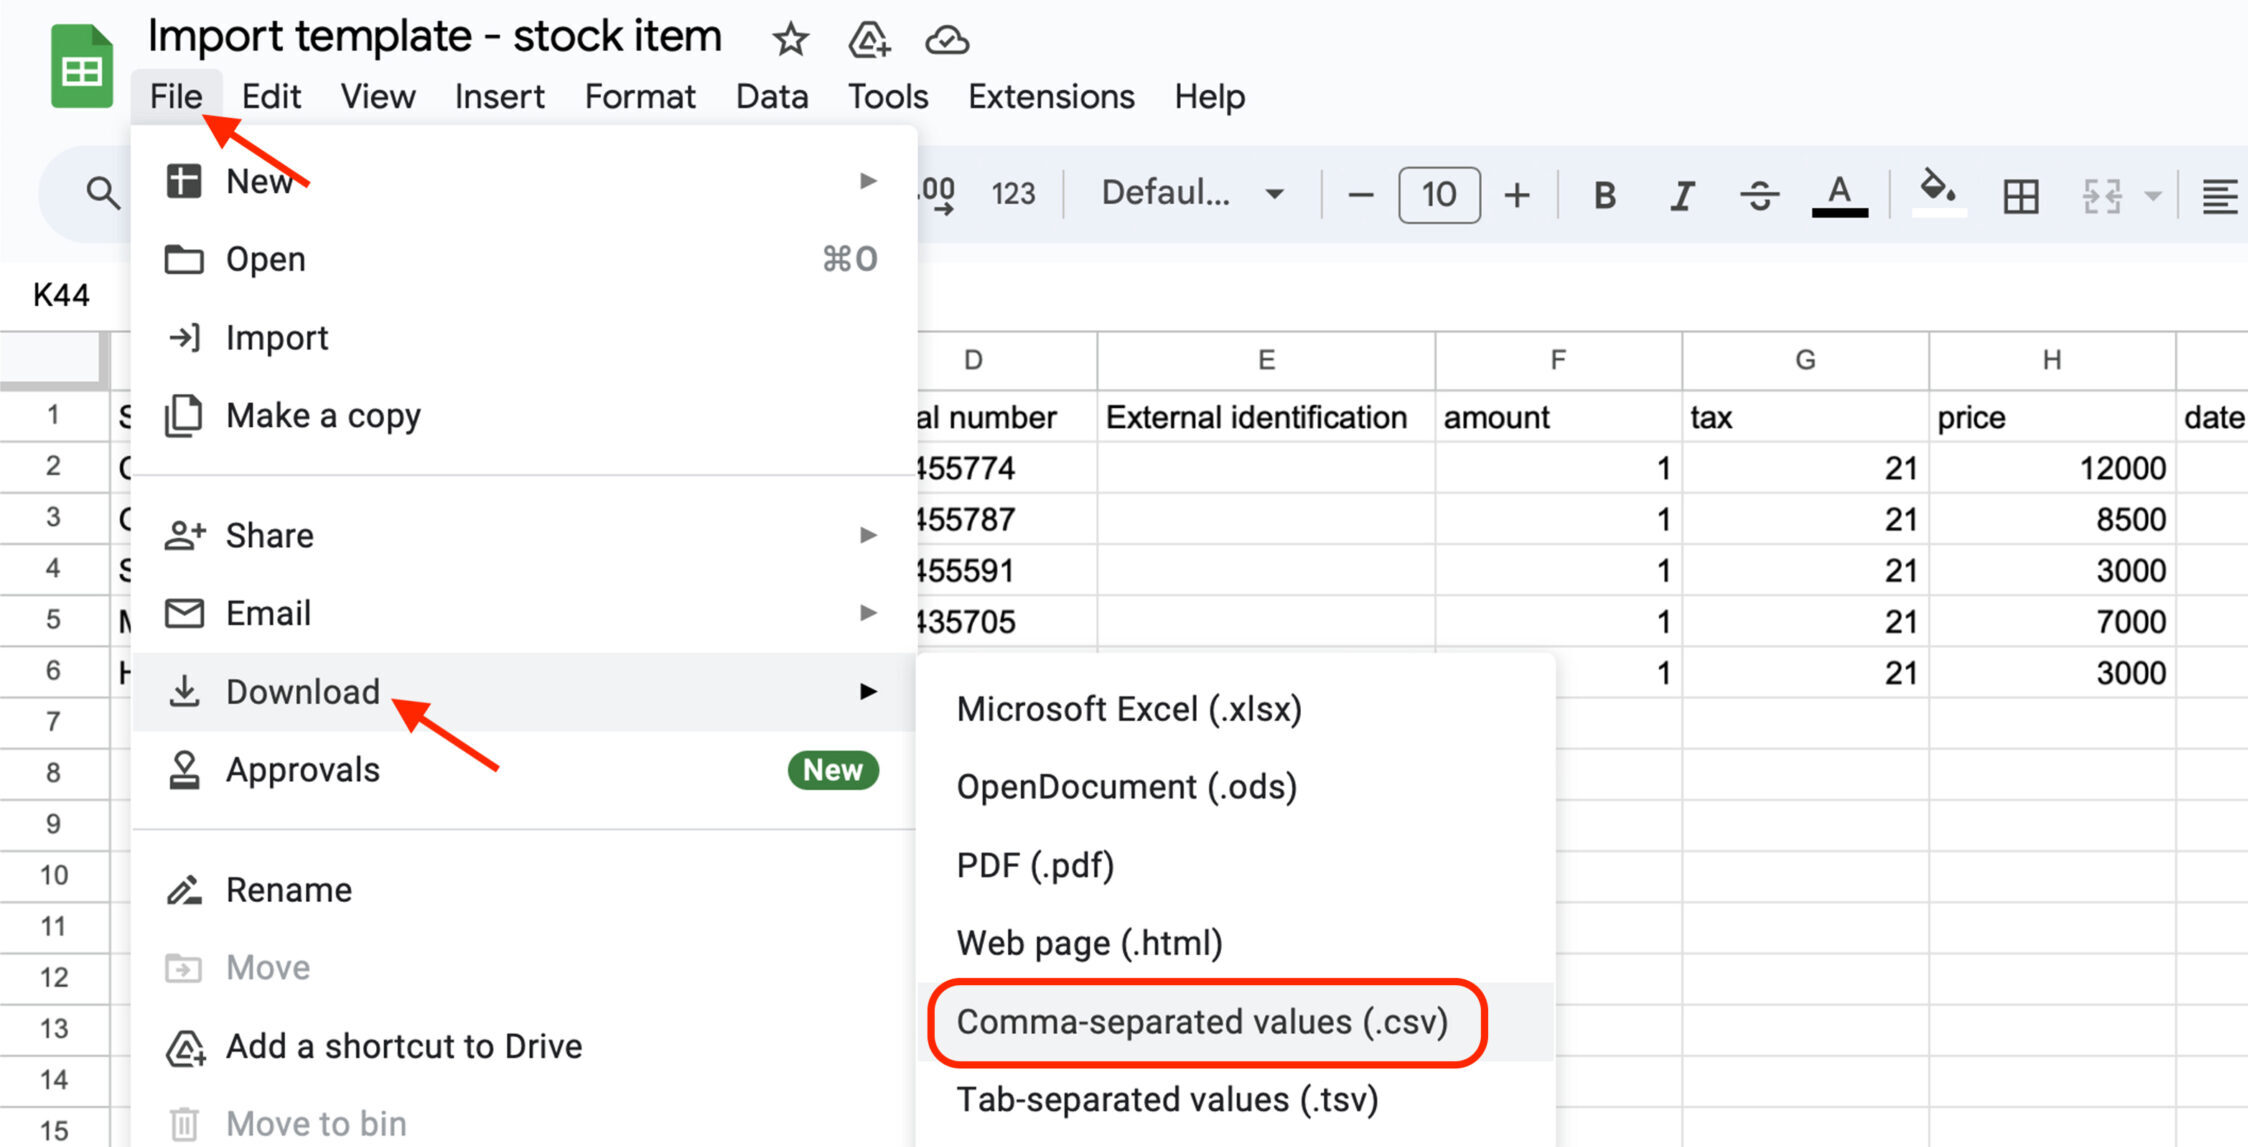
4. Then you need to save the document. Click on file and download, from dropdown choose the format .csv.
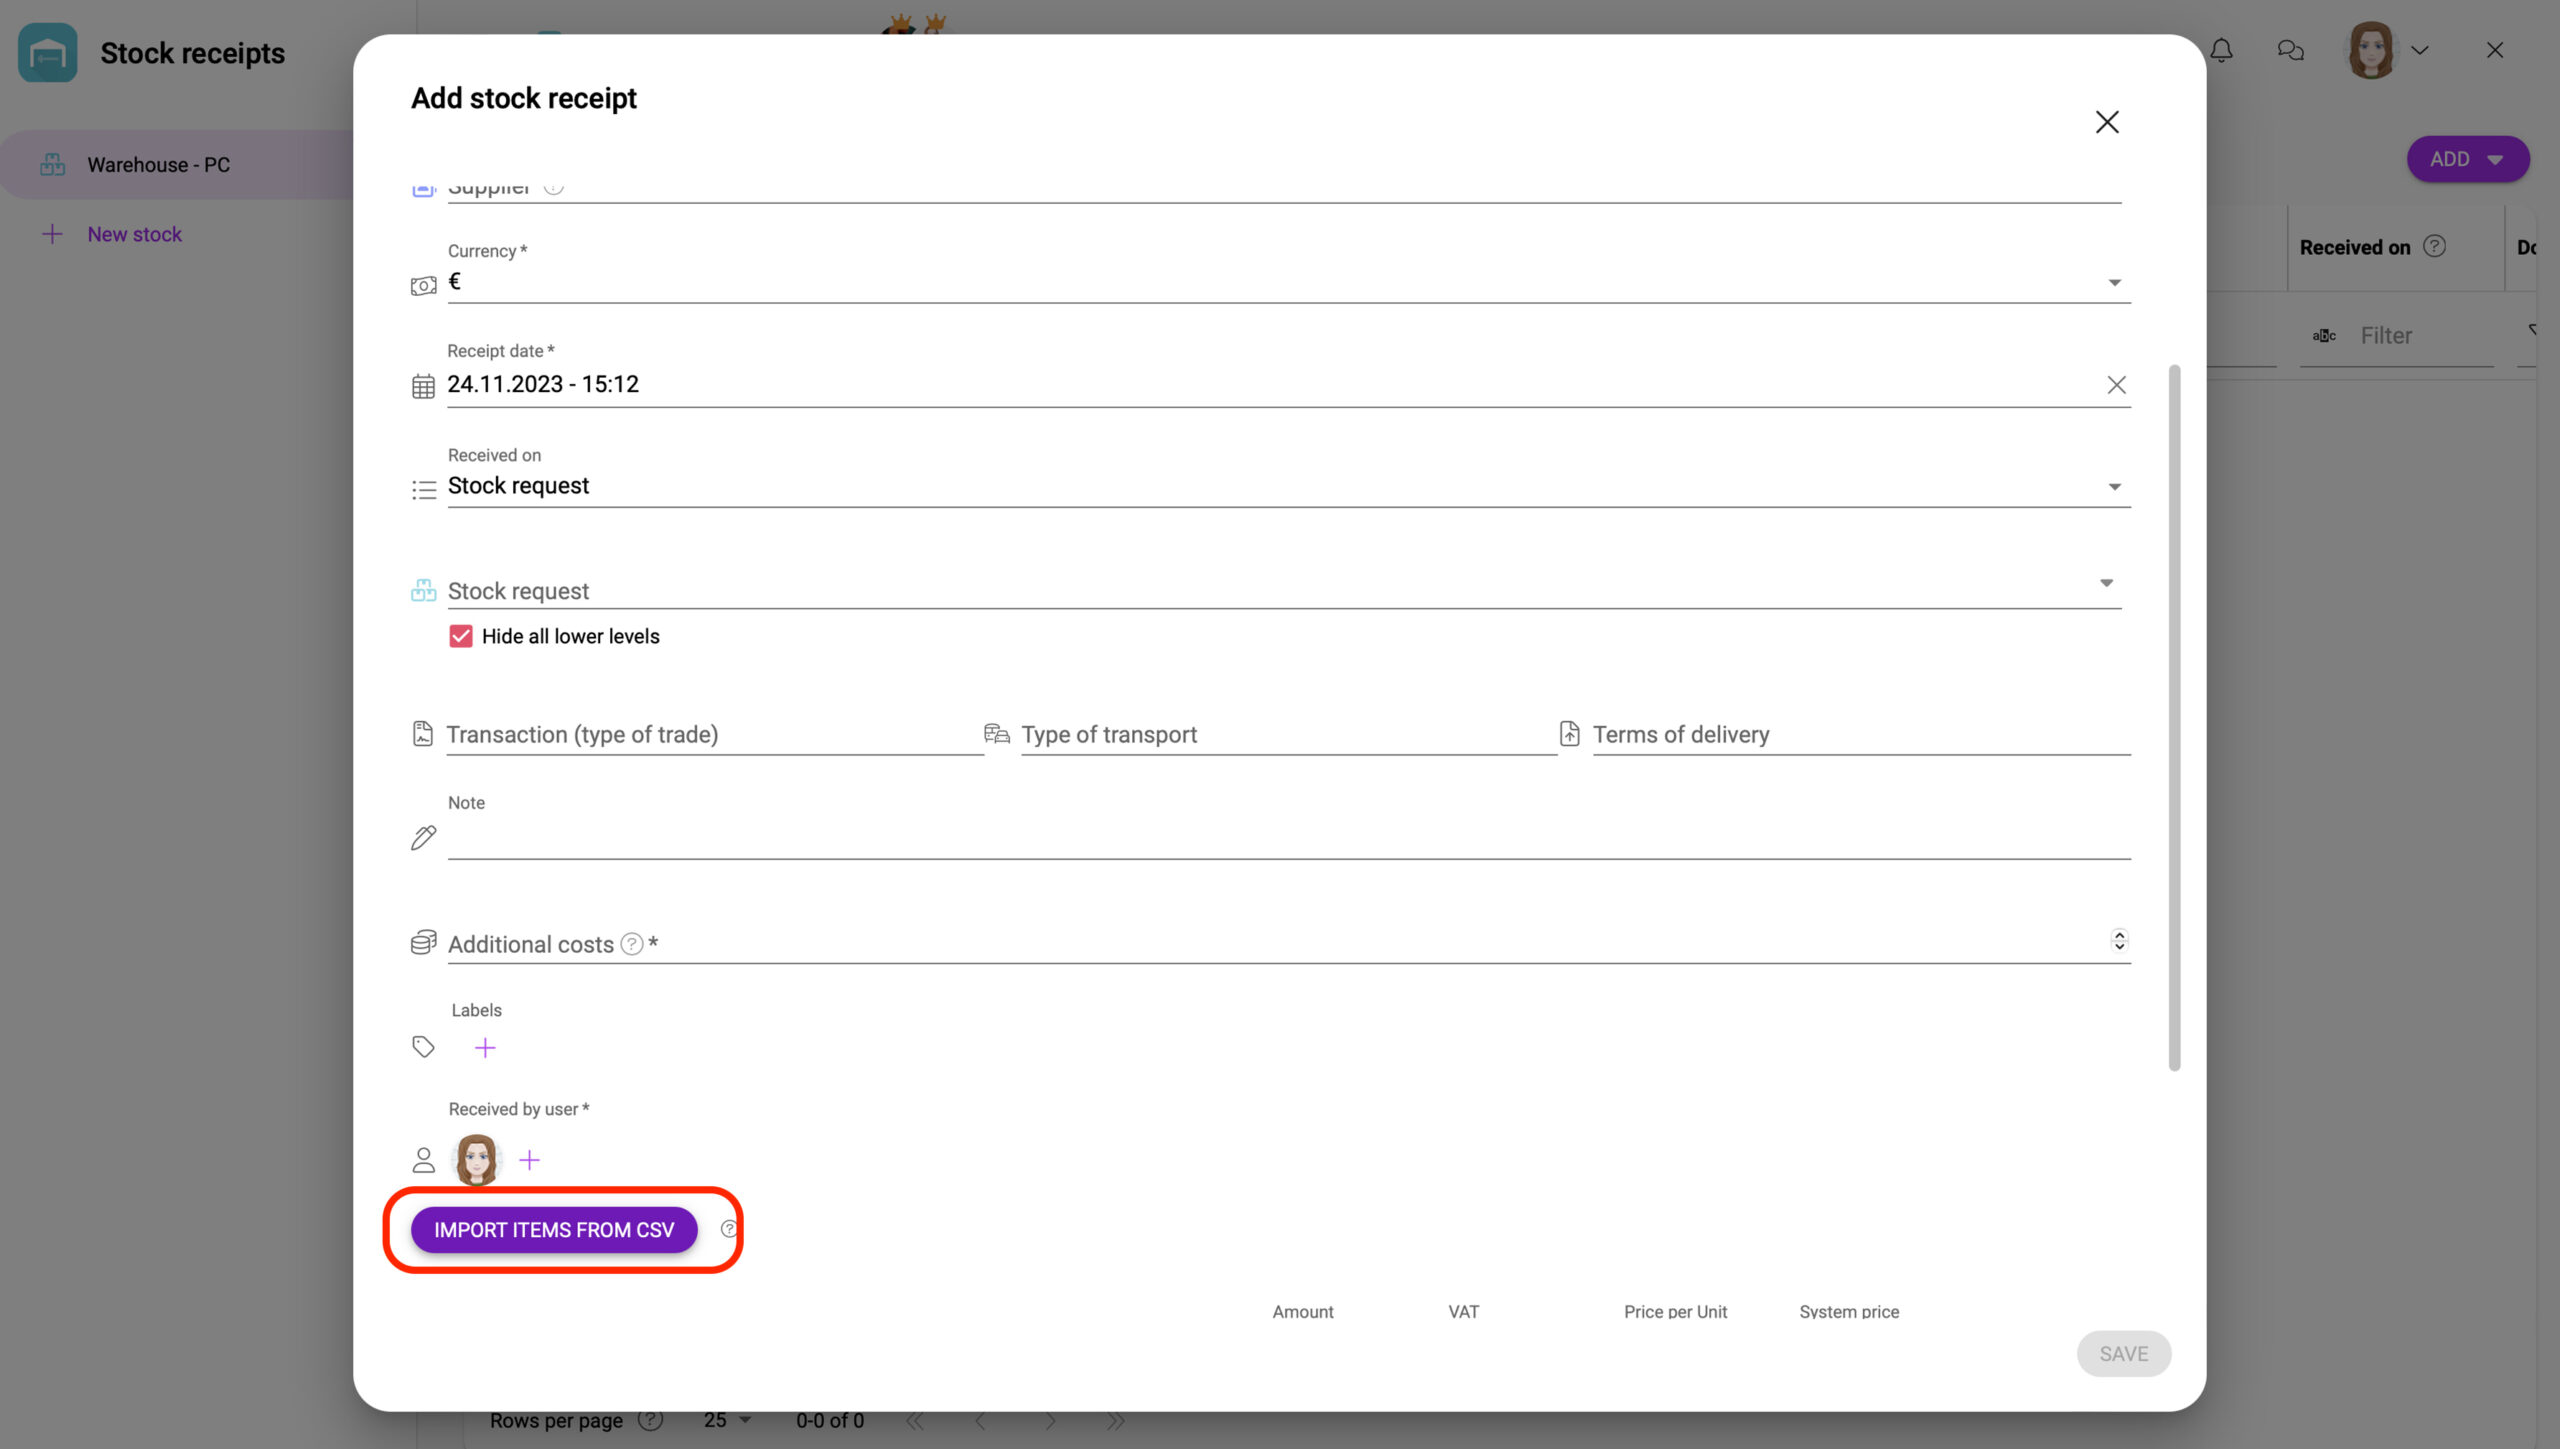
5. In the Stock receipts addon, click Create new stock receipt. Fill in the necessary information and upload your .csv file.
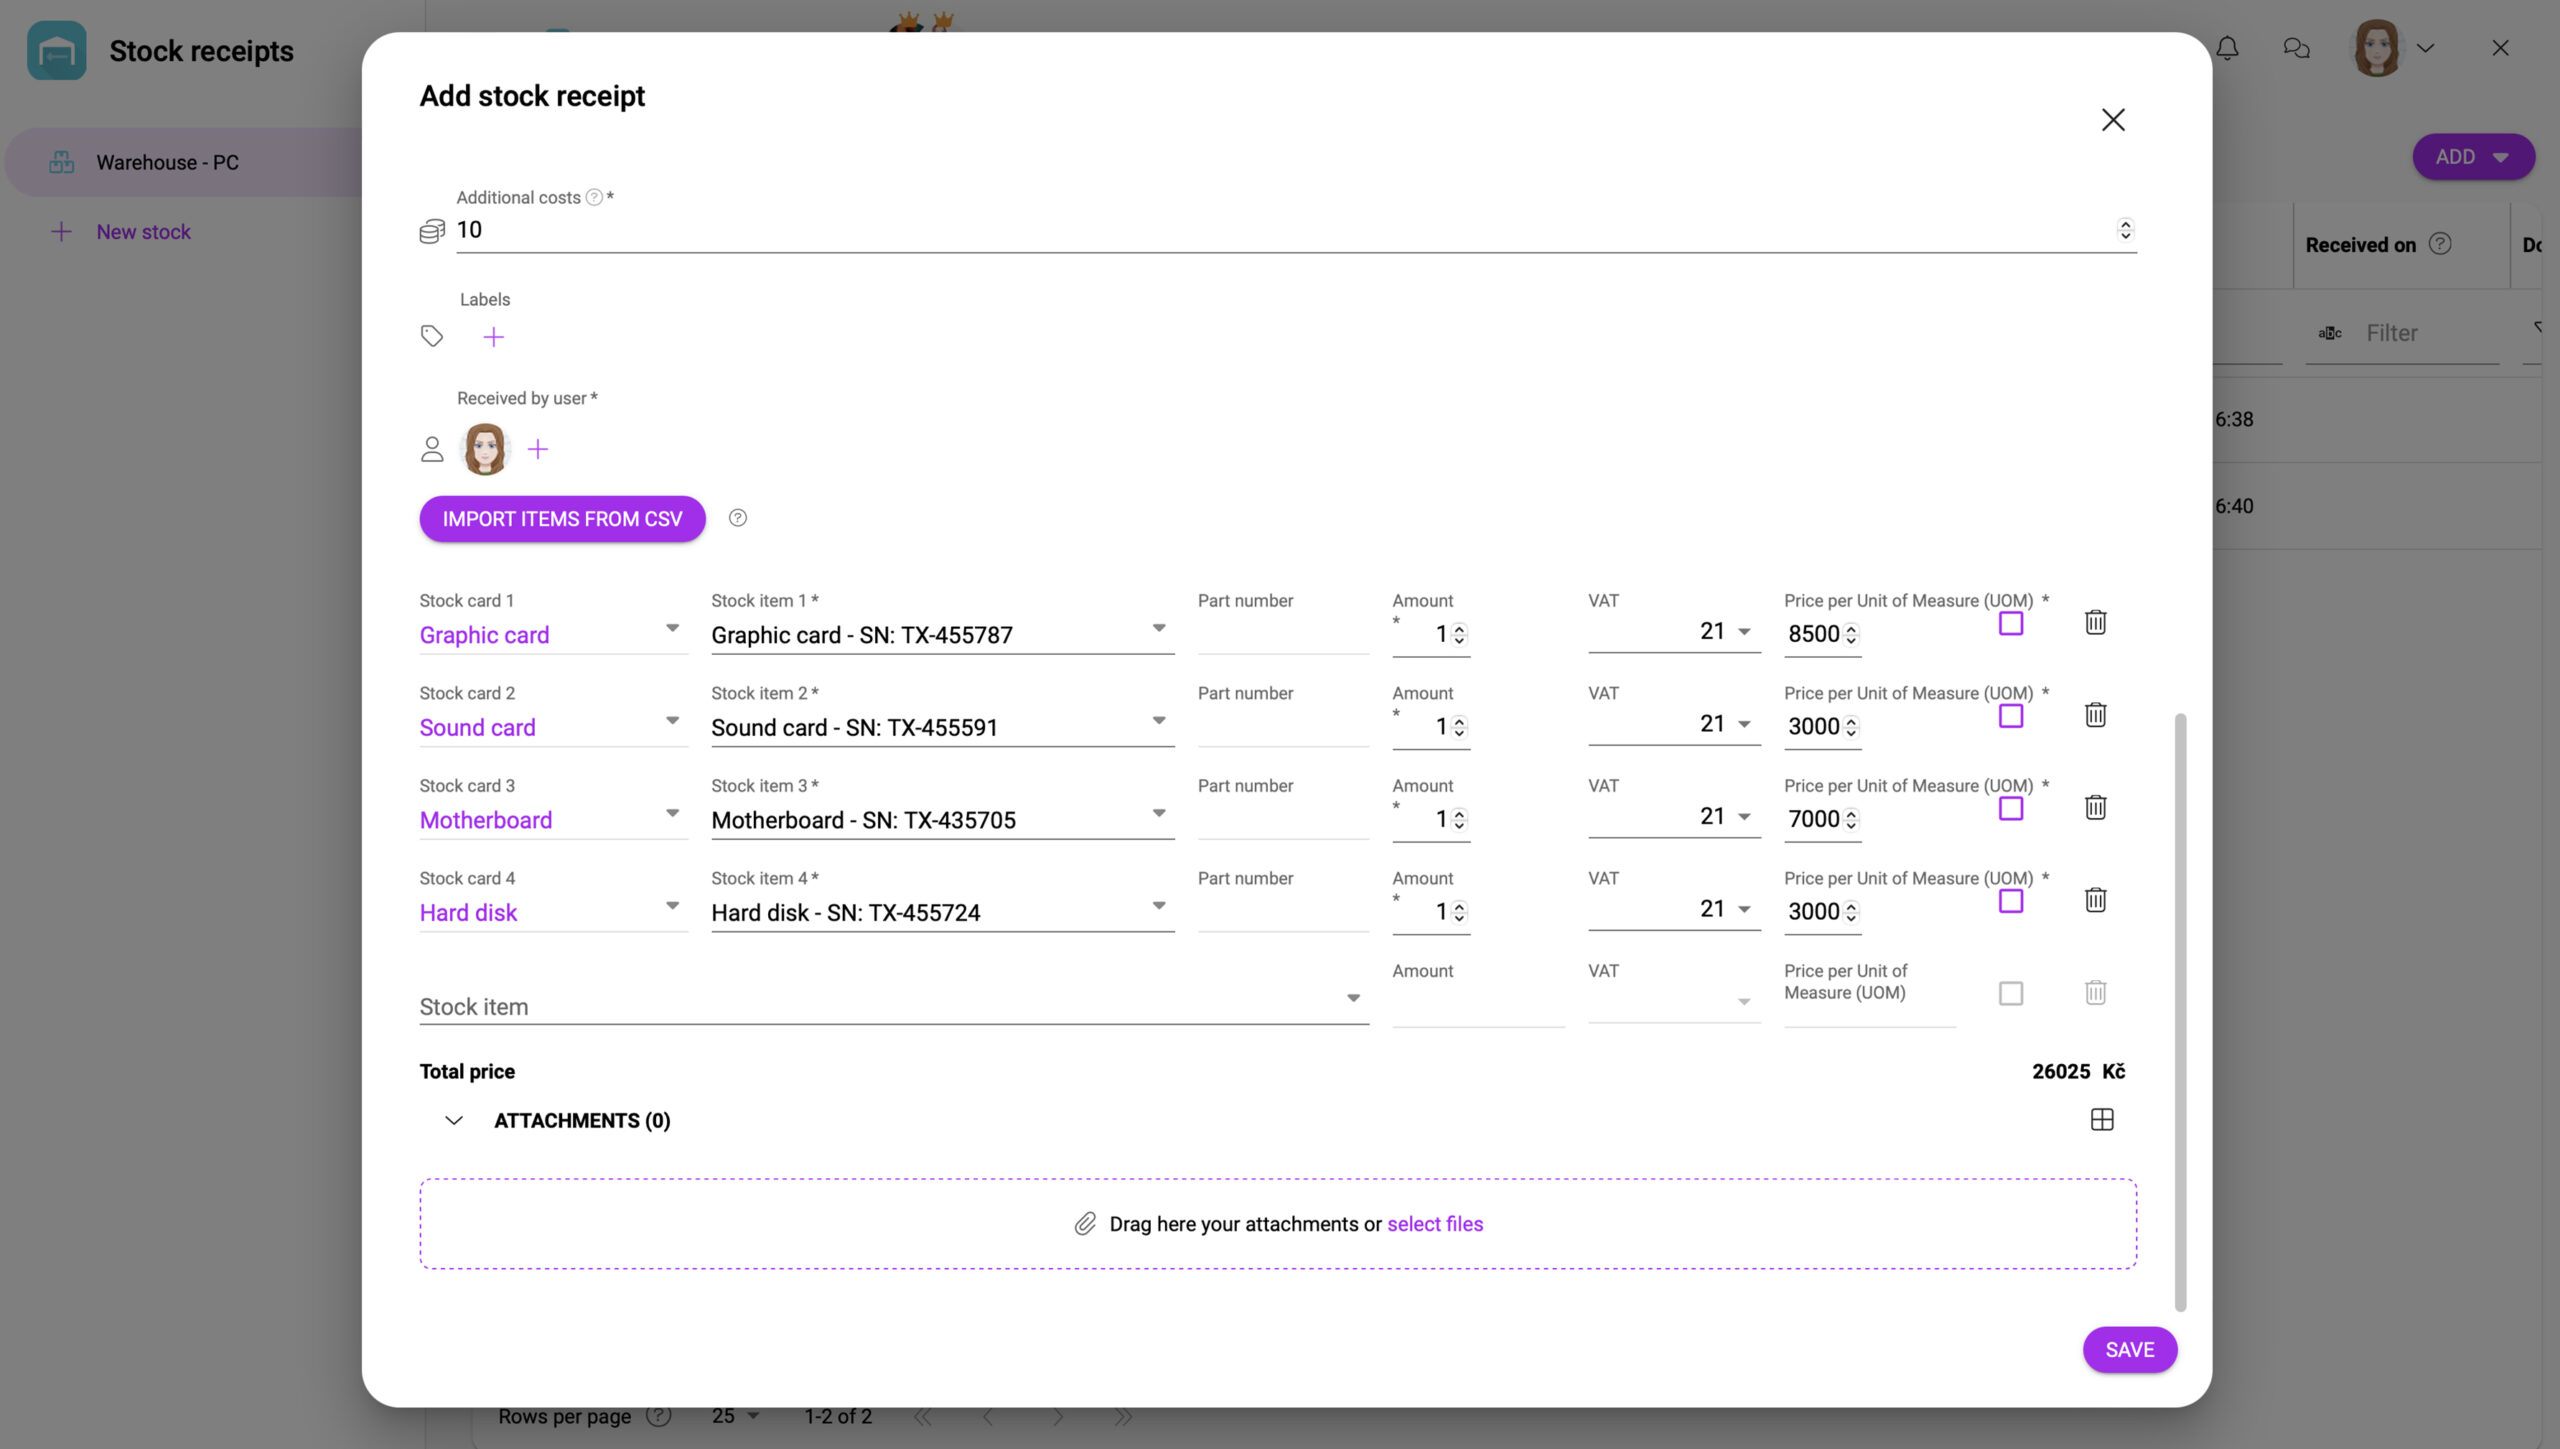
6. Once created, you can see the new records in the stock items addon.
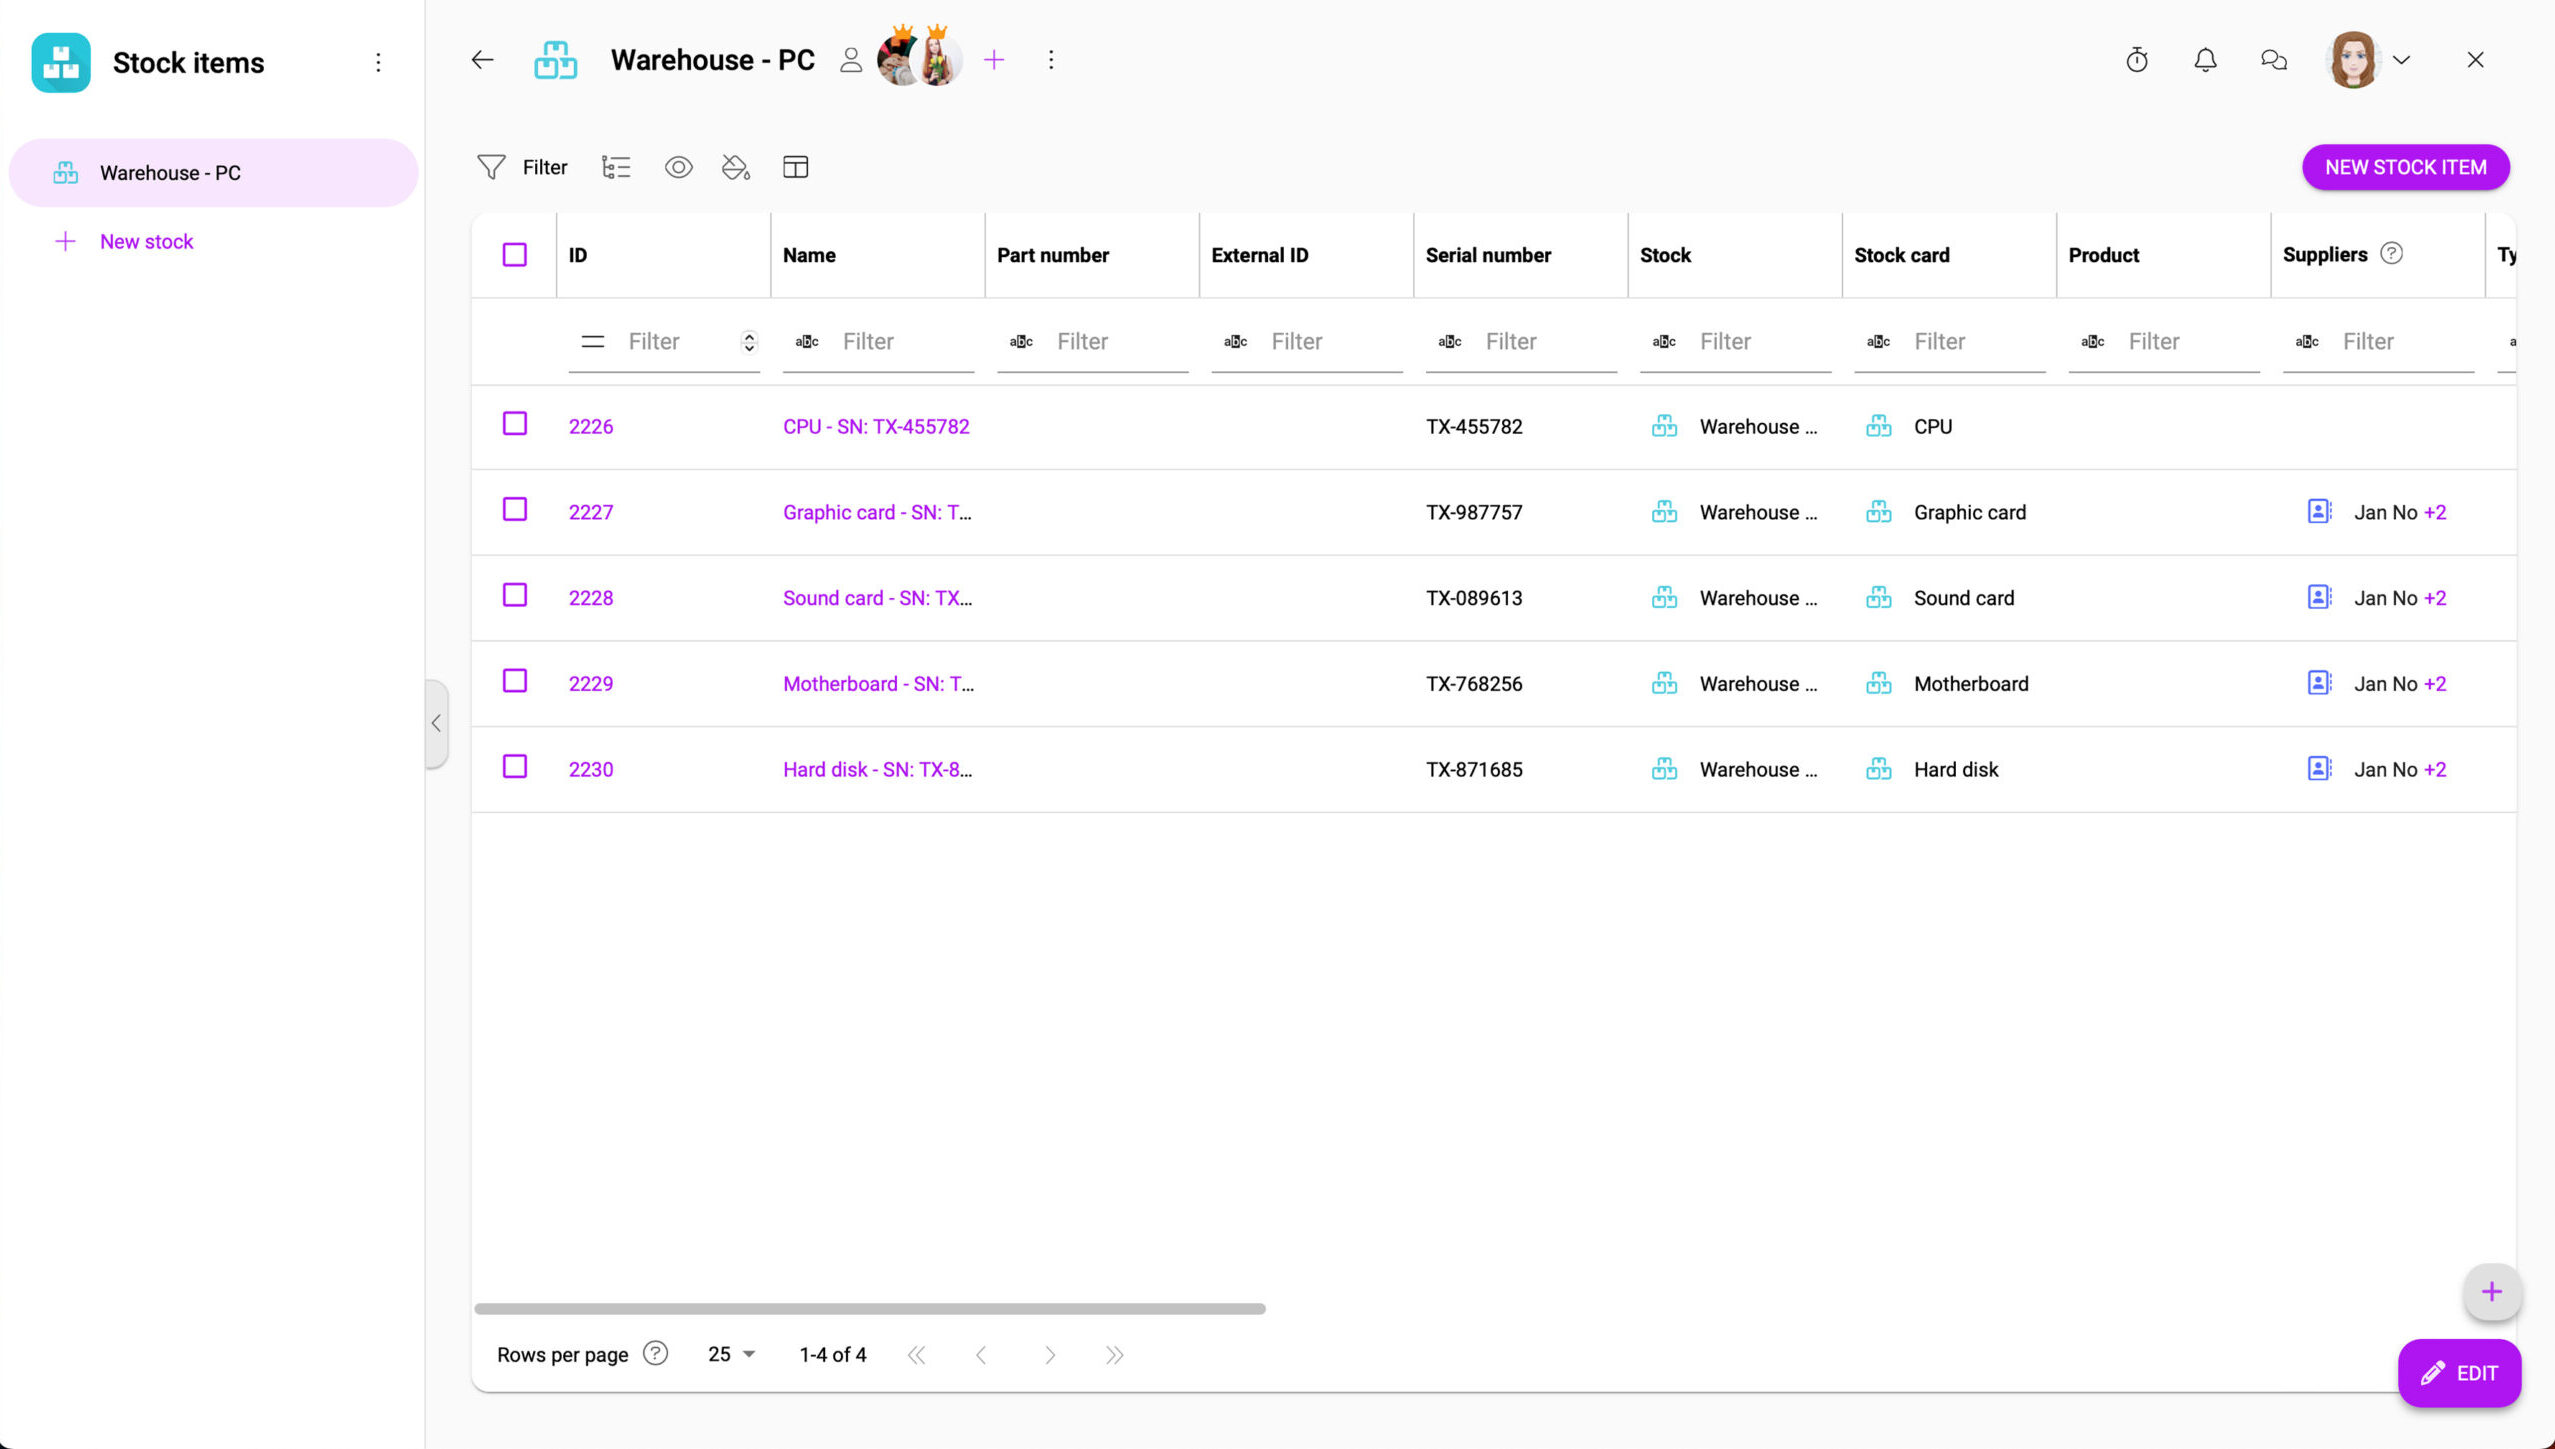
7. After clicking on each records, click on the Detail information. Here you will see your own field.
If you encounter any problems during creation, please do not hesitate to contact us.
