Remote MCP Server: Connecting AI to Your Live Business Data
1. Overview
The Remote MCP (Model Context Protocol) Server enables AI assistants to securely interact with your Boost.space systemA platform that centralizes and synchronizes company data from internal and external sources, offering a suite of modules and addons for project management, CRM, data visualization, and more. Has many features to optimize your workflow!.
MCP is an open protocol designed to provide Large Language Models (LLMs) with structured, real-time access to external systems. Instead of relying solely on static prompts, AI tools connected via MCP can:
- Retrieve live system data
- Operate within defined permission scopes
- Execute predefined automation scenariosA specific connection between applications in which data can be transferred. Two types of scenarios: active/inactive.
- Work with structured and standardized business recordsIn Boost.space, a record is a single data entry within a module, like a row in a database. For example, a contact in the Contacts module or a task in the Tasks module.
The Remote MCP Server runs entirely on Boost.spaceA platform that centralizes and synchronizes company data from internal and external sources, offering a suite of modules and addons for project management, CRM, data visualization, and more. Has many features to optimize your workflow! infrastructure. No hosting, local installation, or server management is required.
How MCP Establishes Context
Large language models have limited context windows and cannot load an entire business system into a single prompt.
MCP solves this limitation by creating a structured context layer between the AI and your system.
When connected via OAuth:
- The AI retrieves only relevant records.
- Data is accessed in real time.
- OperationsOperations are tasks in integration scenarios, similar to "operations" in Make.com. Each action, like reading or updating a record, counts as one operation. They’re essential for data syncing between apps and reset monthly. Going over the limit pauses syncing until you add more or upgrade your plan. are performed within controlled permissions.
- No database exports or manual data transfers are required.
This ensures the AI works with computed results based on real system data rather than generating assumptions.
2. Authorizing AI Access via OAuth
OAuth is the recommended and standard connectionUnique, active service acces point to a network. There are different types of connections (API key, Oauth…). method.
General Connection Flow
1. Open Boost.space.
2. Navigate to Profile Settings → API / MCP Tokens → MCP TokenA secure code used to authenticate and authorize access to API endpoints, enabling users to connect with third-party applications..
3. Copy your dedicated MCP system URL.
4. Complete the connection process in your selected AI client.
Step-by-step connection guides are available in the article Common MCP Clients.
3. Enabling Scenario Execution
In addition to accessing system data, the Remote MCP Server allows AI tools to triggerThe initial event that starts a scenario. It can be an action, a scheduled time, or a custom event, and is essential to define at the beginning of each scenario. automation scenarios built inside your Boost.space environment.
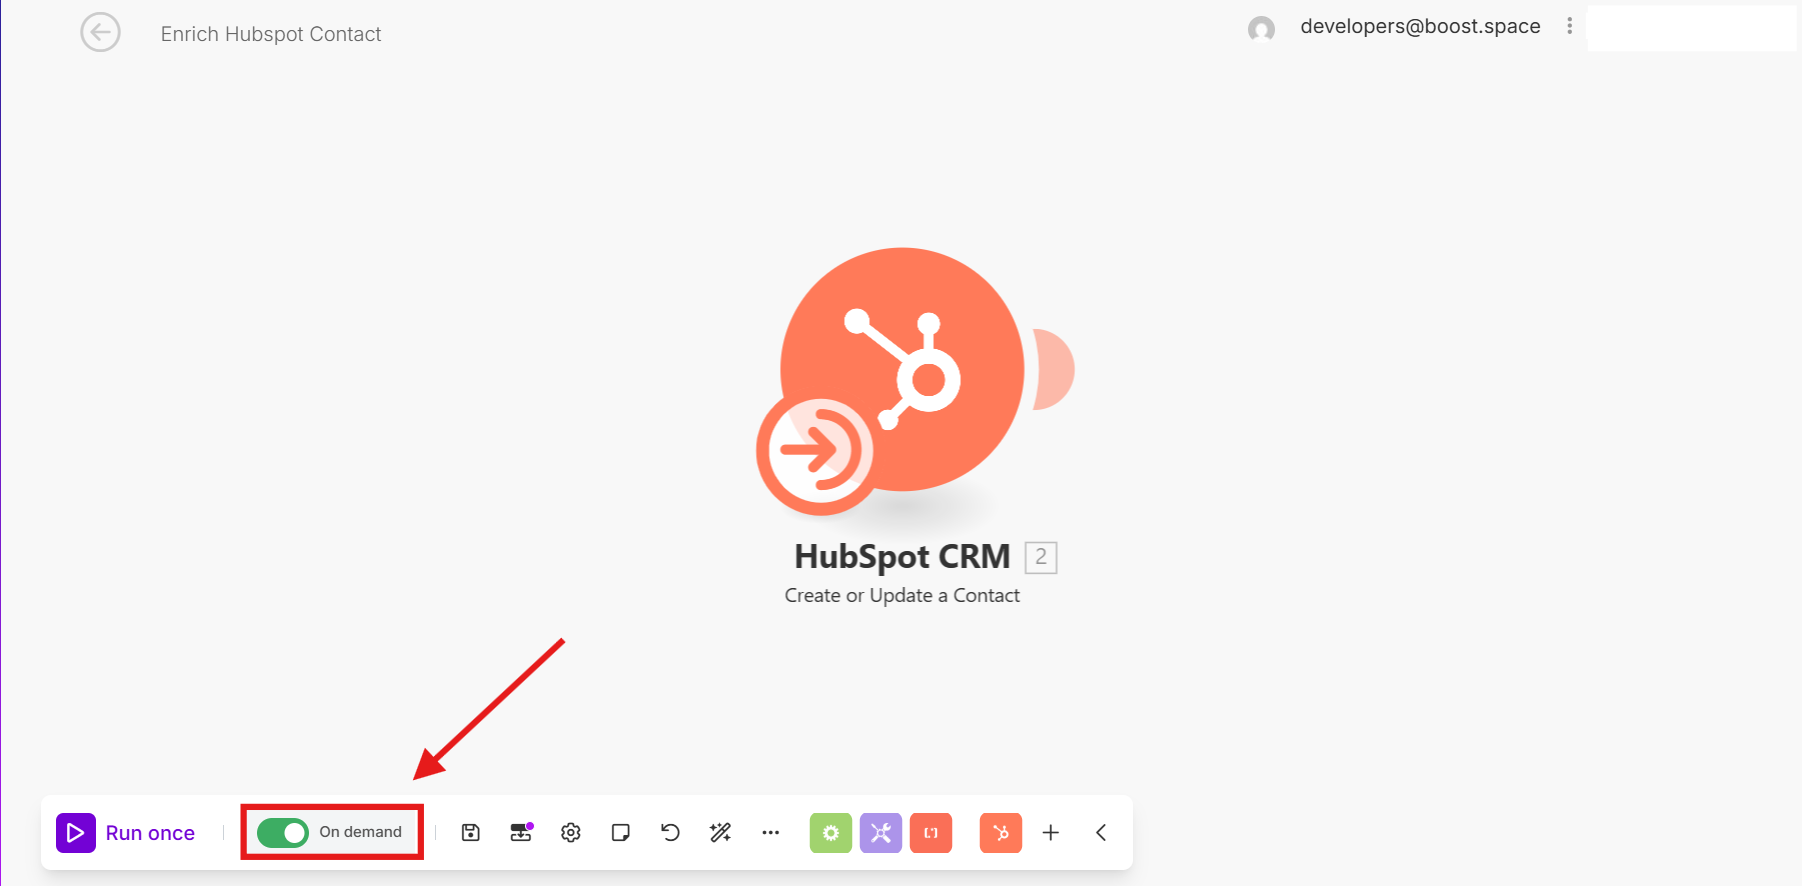
To enable this functionality, the scenarioA specific connection between applications in which data can be transferred. Two types of scenarios: active/inactive. must be marked as On Demand.
Only scenarios with the On Demand setting enabled can be executed via MCP.
Passing Inputs into the Scenario
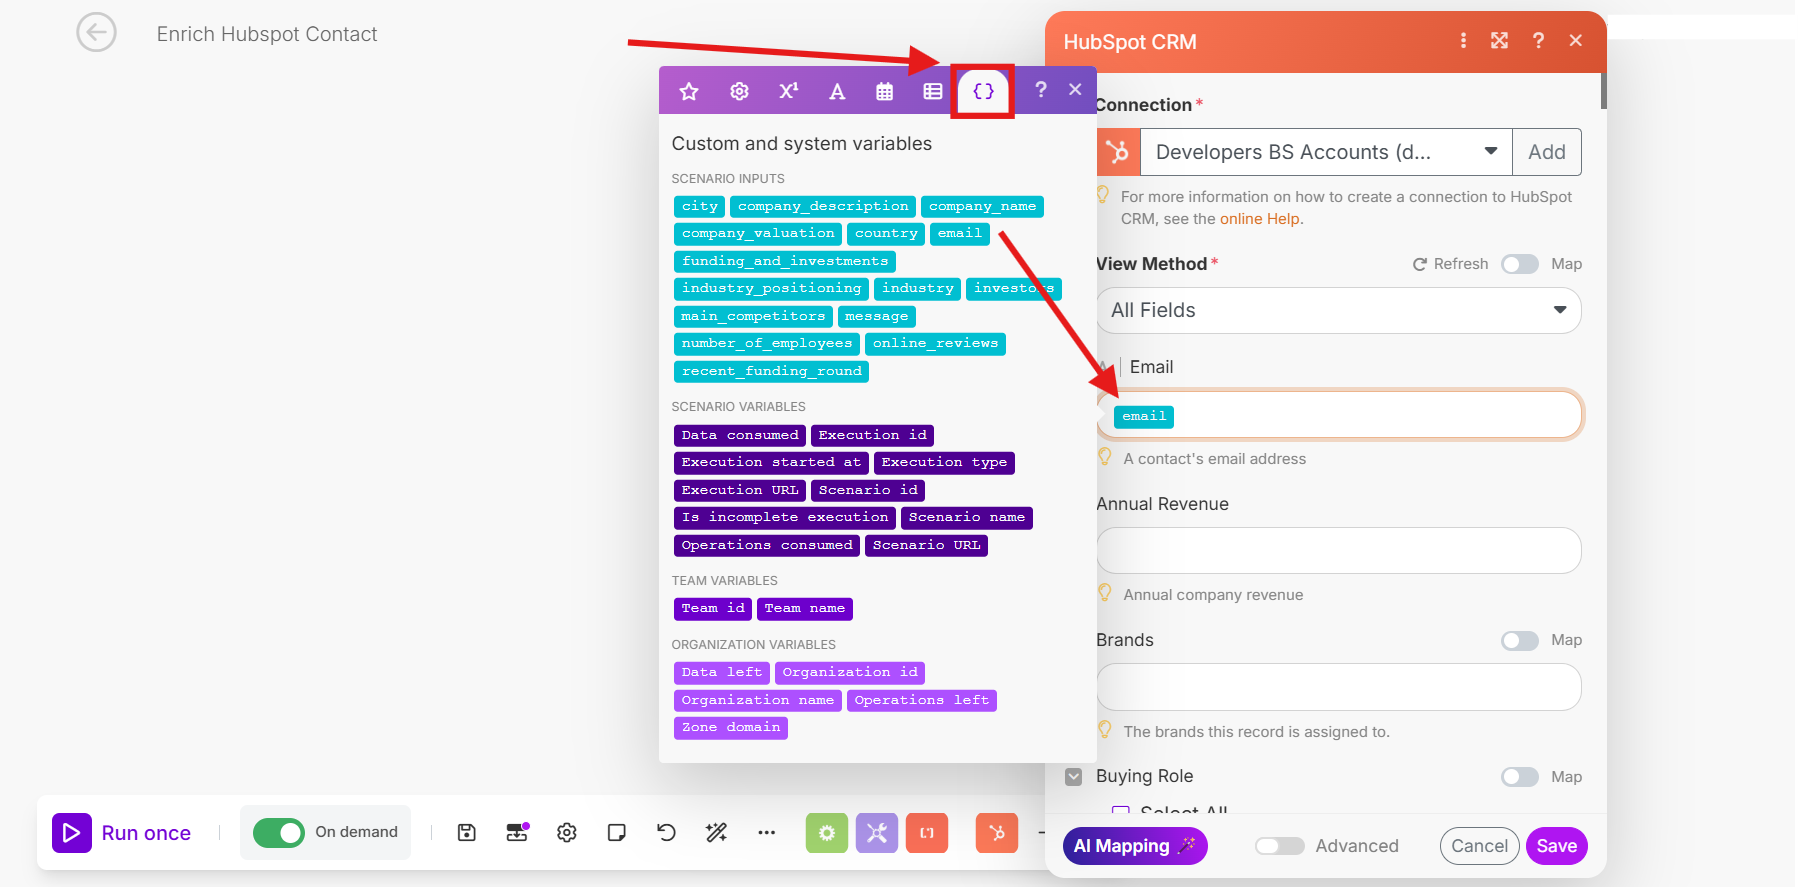
When triggering a scenario via MCP, the AI needs to send the correct input values into the workflow—these are defined as Scenario Inputs in the scenario builder.
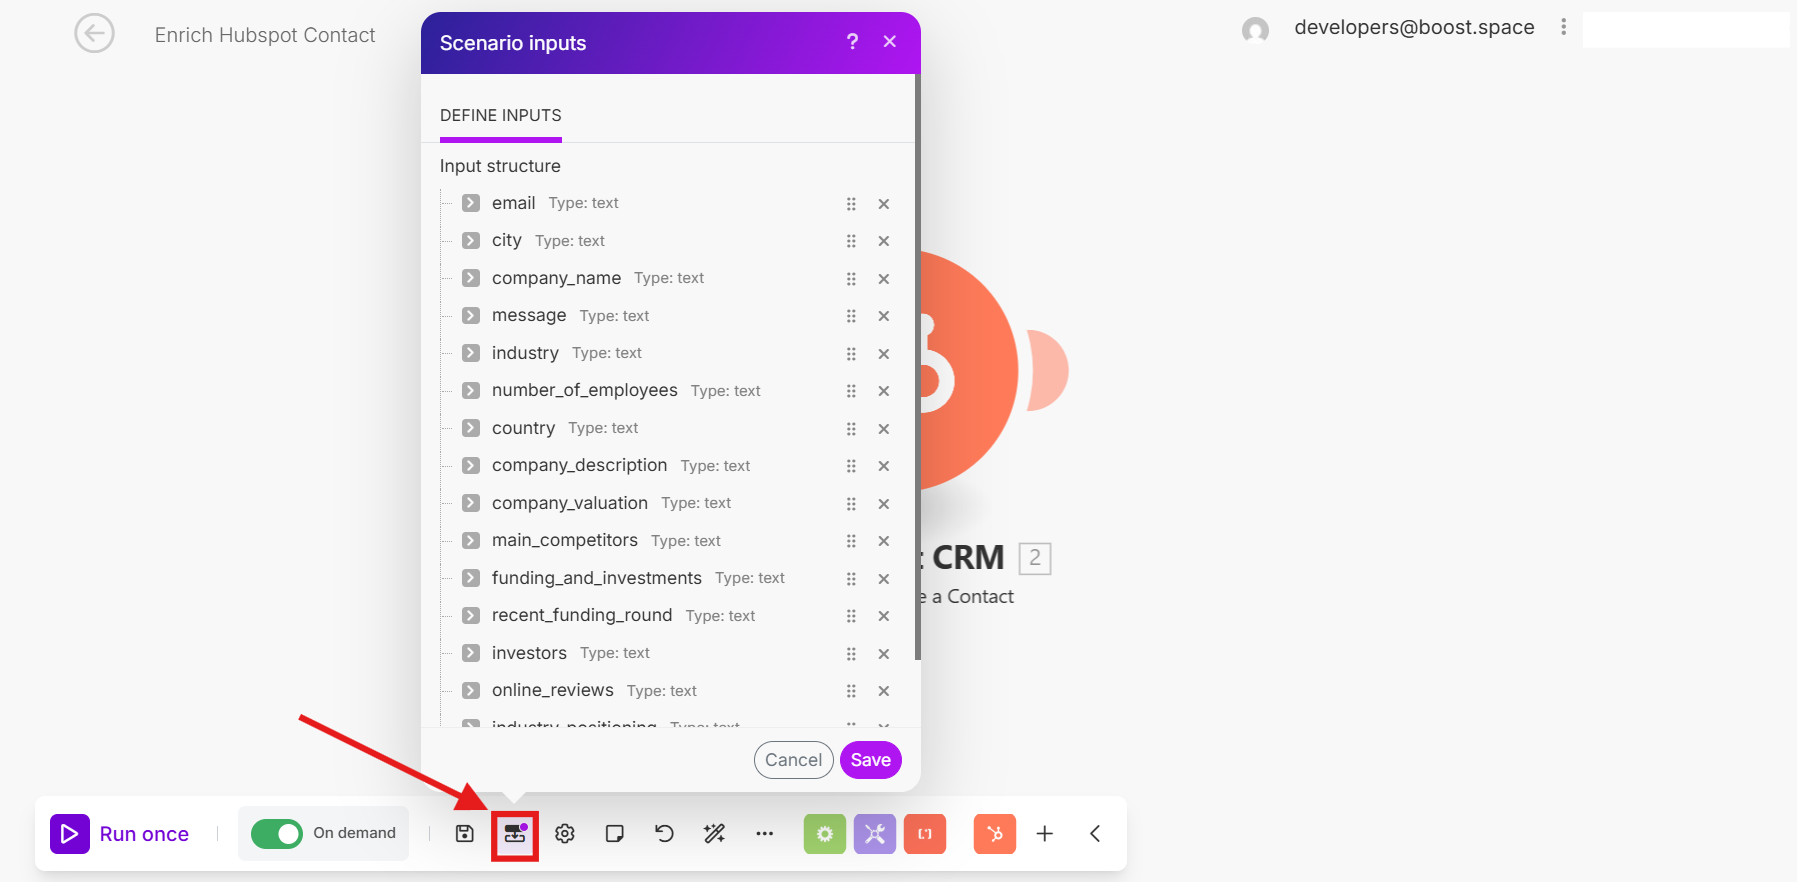
These inputs are created by you in the scenario editor
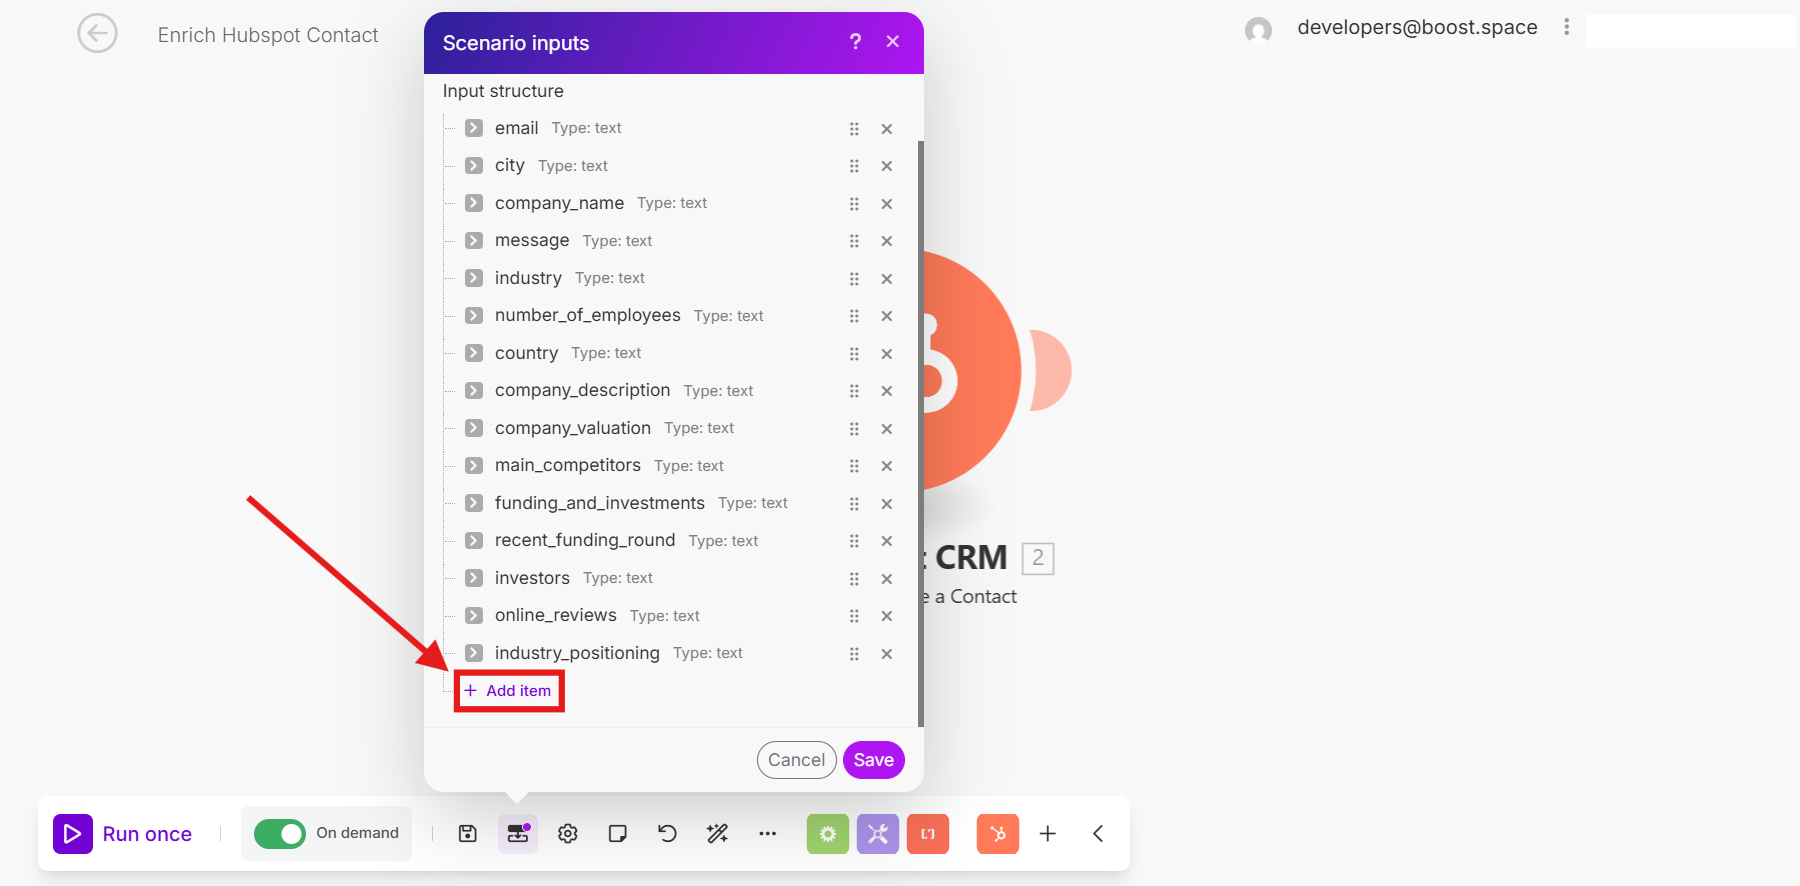
and mapped using the Scenario Inputs feature.
For example, let’s say you ask ChatGPT:
“Create the best offer for company X and send it via email.”
To complete this task, the scenario might require three inputs:
- The email address
- The subject line
- The bullet points of the offer
Once defined, the AI can dynamically fill in those inputs during the conversation and pass them directly to the scenario at runtime.
This enables a whole new layer of automation—letting your AI agent not only read and summarize your system’s data but also take action by triggering predefined processes with context-aware inputs.
With just a few simple steps, you can turn any AI agent into a powerful interface for working with your system—securely accessing data, answering questions, and triggering automated workflows. Ready to explore what’s possible?
If you still need to clarify anything, please reach out to us at [email protected].