What is and how to Set up a CUD Webhook in Boost.space

Video

Before you start with synchronization there are some things that you should know first.

To properly map the contacts module you need to know more about “contact info”. You can find out more information on this topic here.

Module CUD contains all trigger types (create, update, delete). You can find out more information about trigger types in this article.

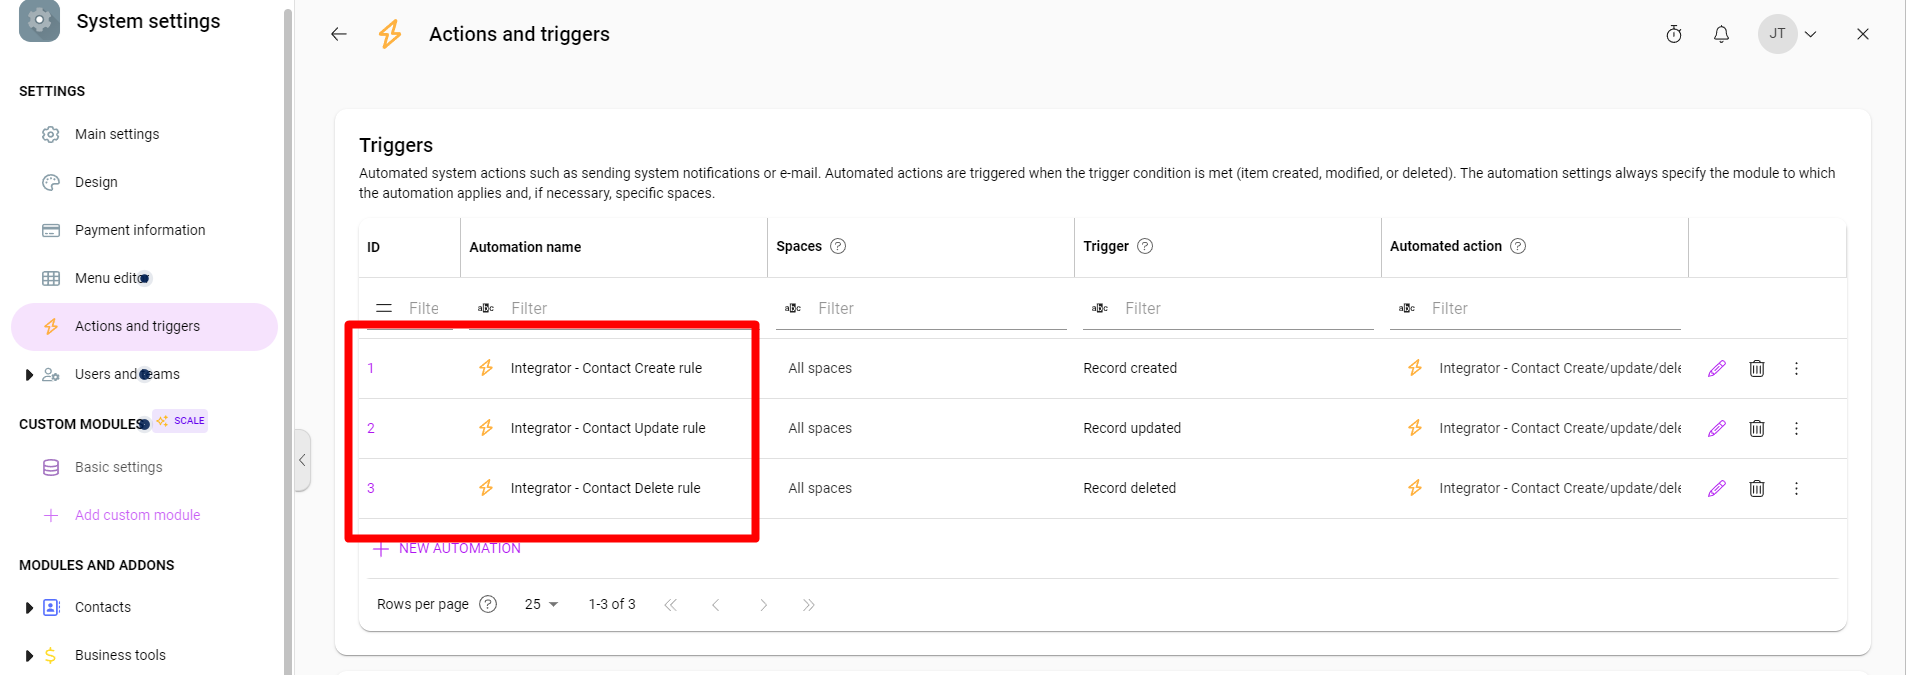
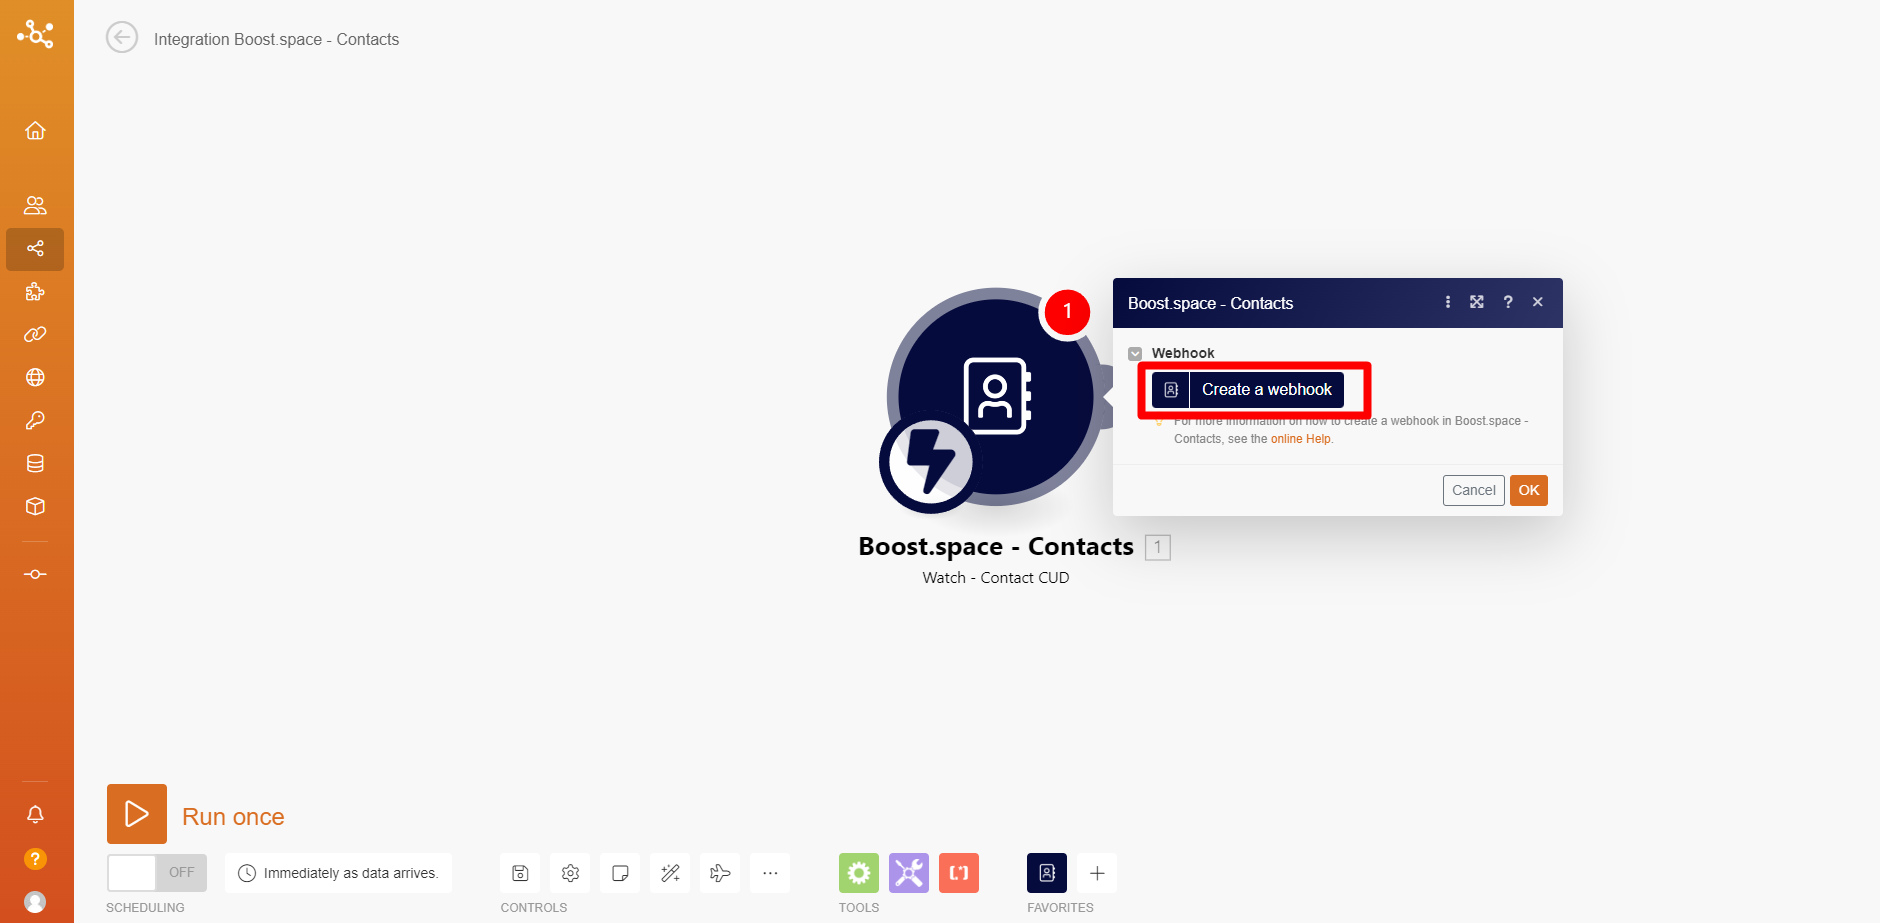
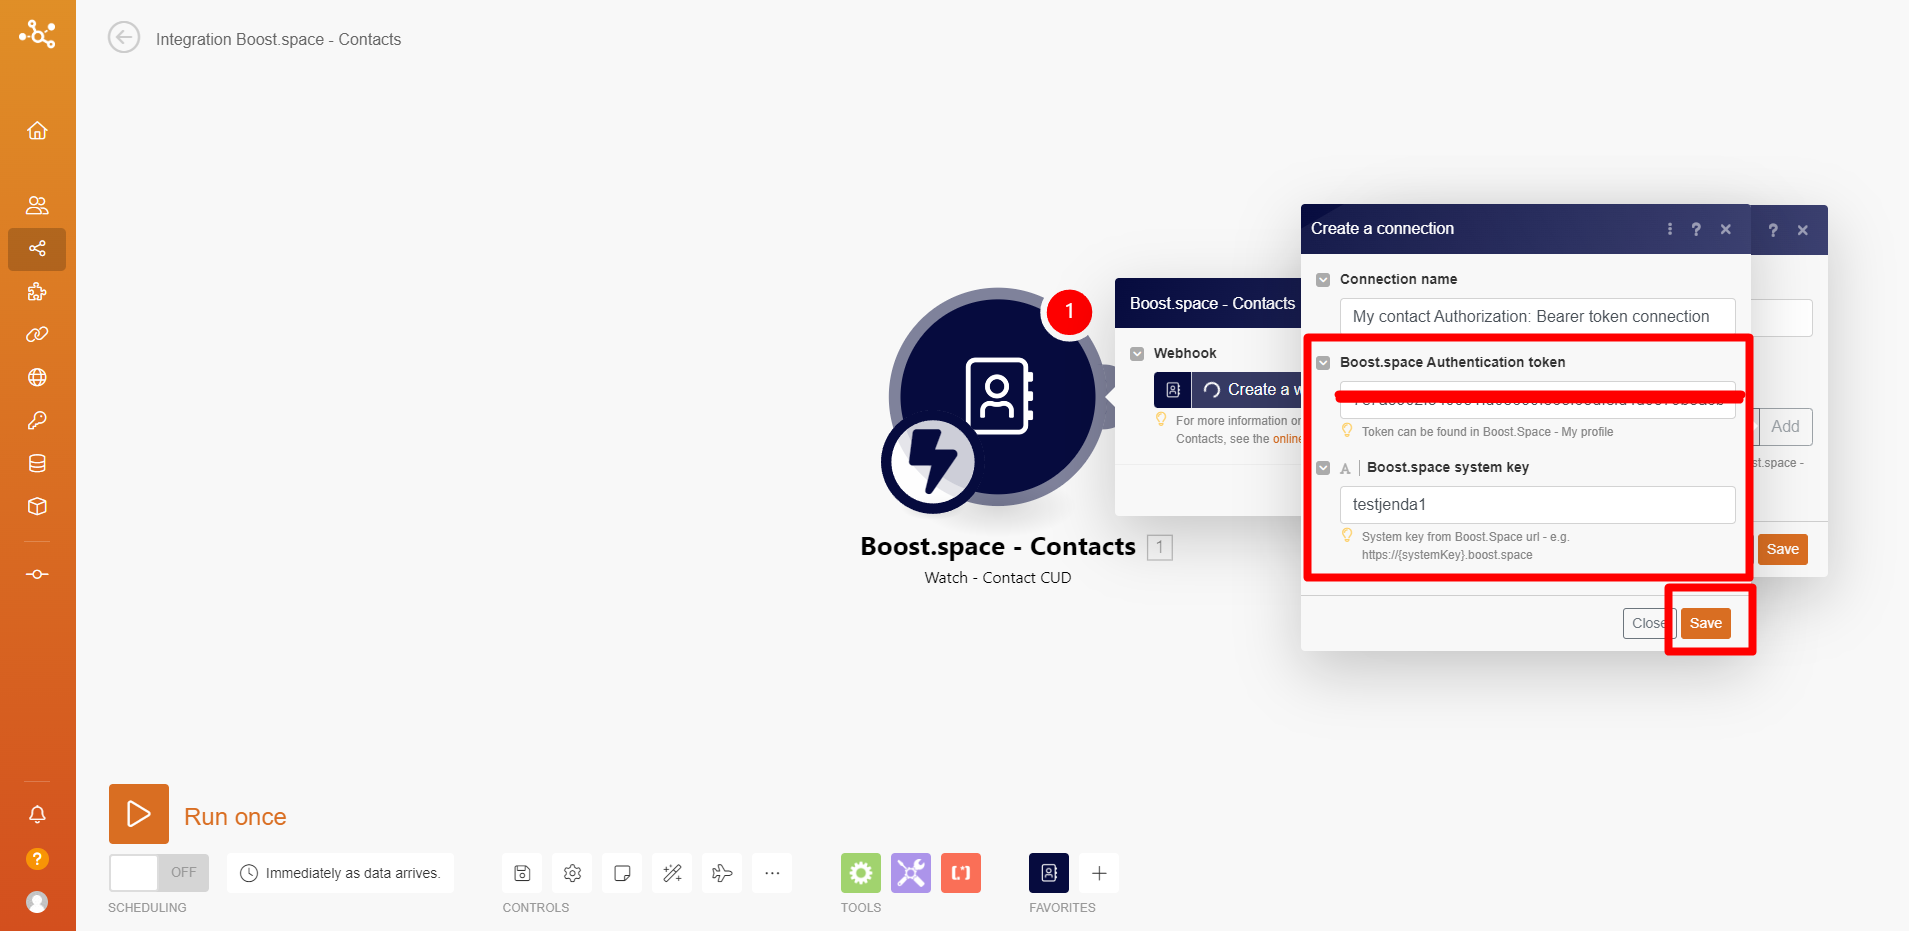
After you create your connection in the CUD module you can find new actions and triggers records in your system settings. You can set up sending information to the email/webhook module, or you can set up a notification right in the system when some actions (create, update, delete) happen. This can be set up not only for Boost.space subject module but in this article, we will use this module as an example.


Setting up the CUD Webhook in Boost.space

1. Log into your Boost.space system and click on your profile icon, then click on Integrator.
2. In the upper right corner, click on New Scenario, then click on the big plus and look for the module Boost.space – Subject CUD. Click on the module and then click on Create a webhook.
3. Create a connection. Fill in the name of the connection, insert Boost.space Authentication token (here is the tutorial if you haven’t created it yet), and your system key – this is the name of your Boost.space system (for example, dev.boost.space -> system key is “dev”). Click on Save and after this create a webhook. Fill in the webhook name and choose from connections and click OK.
PS: If you want to see how to set this up properly please check the article: Connect: Synchronize your data into Boost.space or Share: Synchronize your data from Boost.space.
4. When you create, update, or delete a contact, the output from this module will always be this complete record including all non-updated information. 

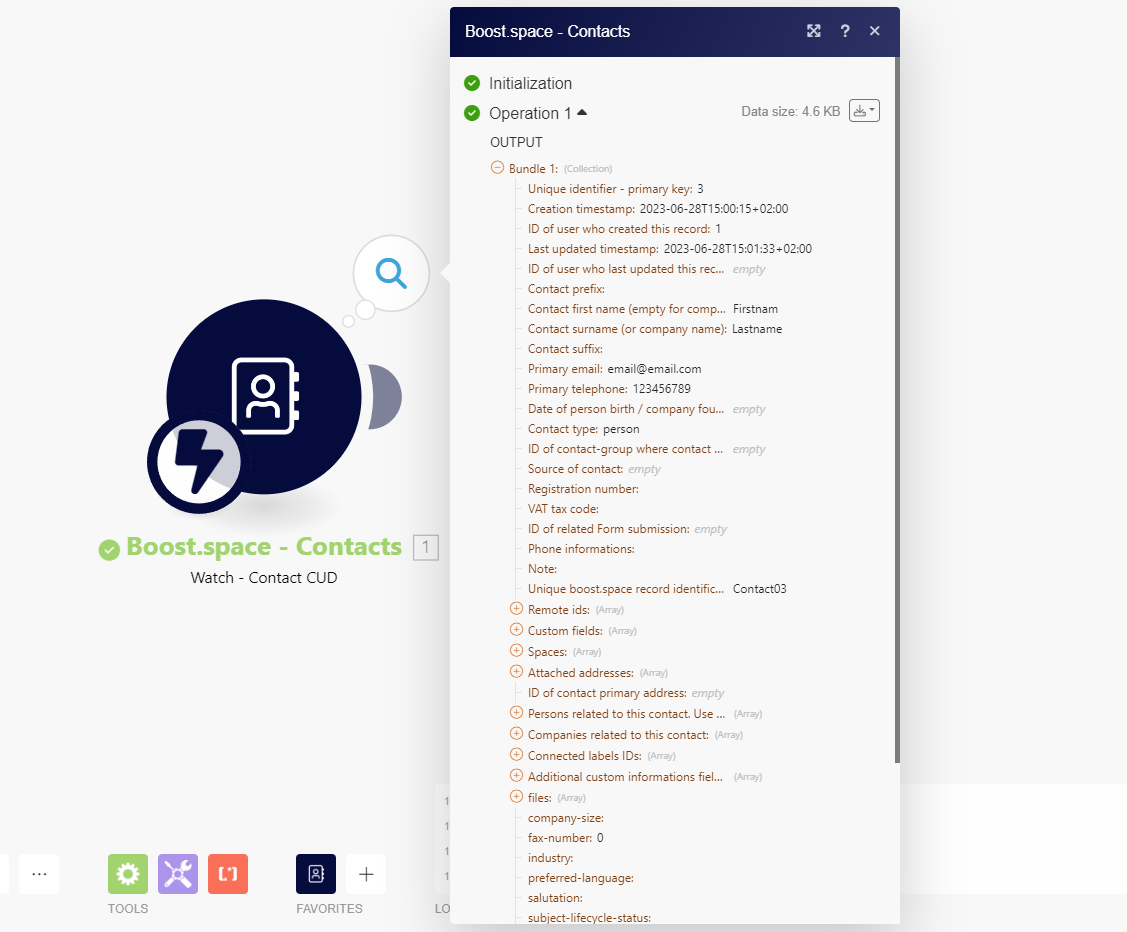
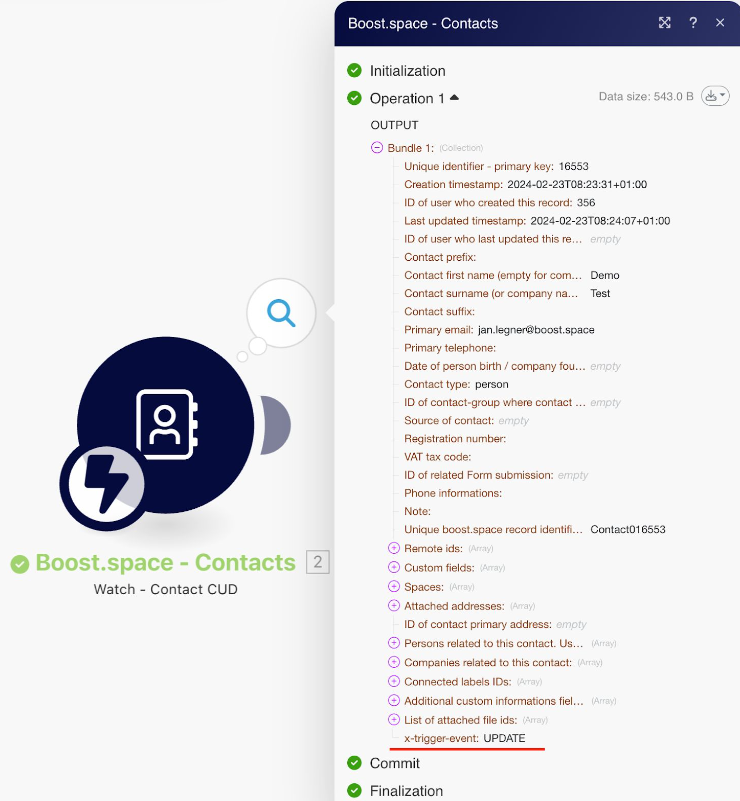
5. In order to recognize the action that triggered the trigger at the record, a field called “x-trigger-event” can be monitored at the output of the module. This field can take 3 values – CREATE/UPDATE/DELETE.

If we want to work in specific branches of the scenario only with the record that was triggered by a certain type of trigger, we can set filtering according to the x-trigger-event field.

6. In the system settings in Actions and Triggers, you can see that you have created one automatic action that has three triggers (Create, Update, and Delete).
7. As an example, we can show this by building modules with Google contacts. When any contact information changes in the Boost.space system, the Search it Updates module in Google Contacts.
Congratulations! You have just created your CUD webhook. If you want to know more about the synchronization features you can try the SYNC request article.