| Active with remarks |
|---|
| This application needs additional settings. Please follow the documentation below to create your own connection. |
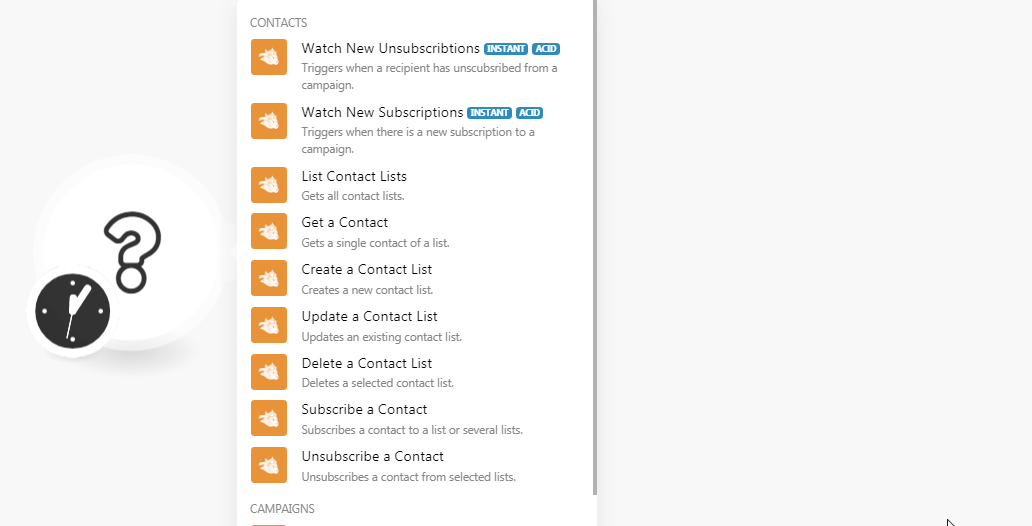
The Unisender modules allow you to watch, create, update, list, and delete the contact lists and campaigns in your Unisender account.
Prerequisites
-
A Unisender account
In order to use Unisender with Boost.space Integrator, it is necessary to have a Unisender account. If you do not have one, you can create a Unisender account at unisender.com/en.
![[Note]](https://docs.boost.space/wp-content/themes/bsdocs/docs-parser/HTML/css/image/note.png) |
Note |
|---|---|
|
The module dialog fields that are displayed in bold (in the Boost.space Integrator scenario, not in this documentation article) are mandatory! |
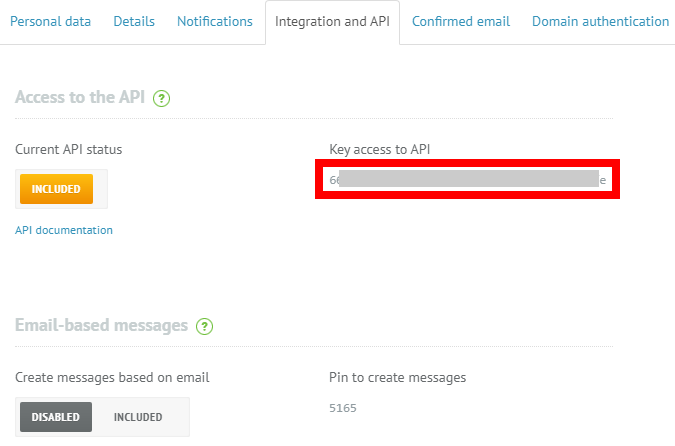
To connect your Unisender account to Boost.space Integrator you need to obtain the API Key from your Unisender account and insert it in the Create a connection dialog in the Boost.space Integrator module.
-
Log in to your Unisender account and open your Dashboard.
-
Click Your Account Name > Account Setup > Integrations and API > Show full.
-
Enter your Unisender account password and click Send. Copy the API Key to your clipboard.
-
Go to Boost.space Integrator and open the Unisender module’s Create a connection dialog.
-
In the Connection name field, enter a name for the connection.
-
In the API Key field, enter the API key copied in step 3.
-
In the Language field, select your preferred language from English, Italian, and Russian. Click Continue.
The connection has been established.
Triggers when a recipient has unsubscribed from a campaign.
|
Note |
|---|---|
|
You do not have to add the webhooks in the Unisender as it is automatically done for you once you add and save an instant trigger module to your scenario. |
|
Webhook Name |
Enter a name for the webhook. |
|
Connection |
Triggers when there is a new subscription to a campaign.
|
Webhook Name |
Enter a name for the webhook. |
|
Connection |
Get all contact lists.
|
Connection |
|
|
Limit |
Set the maximum number of contact lists Boost.space Integrator should return during one scenario execution cycle. |
Gets a single contact of a list.
|
Connection |
|
|
|
Enter the email addresses of the contact whose details you want to retrieve. |
|
Include Lists |
Select whether you want to include the lists in the results. |
|
Include Fields |
Select whether you want to include the fields in the results. |
|
Include Details |
Select whether you want to include the contact details in the results. |
Creates a new contact list.
|
Connection |
|
|
Title |
Enter a name for the contact list you want to create. |
|
Before Subscribe URL |
Enter the URL address for redirecting the contact to the pre-subscription page. Usually, this page shows a message that the contact should follow the confirmation link to activate the subscription. |
|
After Subscribe URL |
Enter the URL address for redirecting the contact to the post-subscription page. Usually, this page shows a message that the subscription has been completed successfully. |
Updates an existing contact list.
|
Connection |
|
|
List ID |
Select the List ID whose details you want to update. |
|
Title |
Enter a name for the contact list. |
|
Before Subscribe URL |
Enter the URL address for redirecting the contact to the pre-subscription page. Usually, this page shows a message that the contact should follow the confirmation link to activate the subscription. |
|
After Subscribe URL |
Enter the URL address for redirecting the contact to the post-subscription page. Usually, this page shows a message that the subscription has been completed successfully. |
Deletes a selected contact list.
|
Connection |
|
|
List ID |
Select the List ID you want to delete. |
Subscribes a contact to a list or several lists.
|
Connection |
|
|
List ID |
Select the List ID(s) to which you want to subscribe the contact. |
|
|
Enter the contact’s email address. |
|
Phone |
Enter the contact’s phone number. |
|
Custom Fields |
Add the custom fields and their values for the contact. For example, |
|
Tags |
Add the tags for the contact’s subscription. |
|
Double Opt-in |
Select the opt-in option for the contact’s subscription:
|
|
Overwrite |
Select the option to overwrite the existing data for the contact:
|
Unsubscribes a contact from selected lists.
|
Connection |
|
|
|
Enter the contact’s email address to whom you want to unsubscribe. |
|
List ID |
Select the List ID(s) from which you want to unsubscribe the contact. If no list is provided, the contact will be unsubscribed from all the lists. |
|
Note |
|---|---|
|
You do not have to add the webhooks in the Unisender as it is automatically done for you once you add and save an instant trigger module to your scenario. |
Triggers when a new campaign has been scheduled.
|
Webhook Name |
Enter a name for the webhook. |
|
Connection |
Triggers when a campaign has been completed.
|
Webhook Name |
Enter a name for the webhook. |
|
Connection |
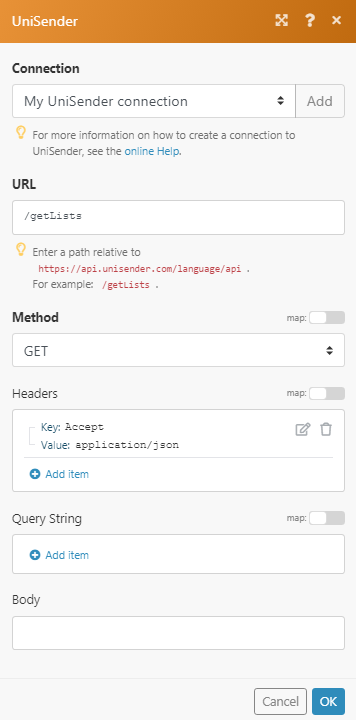
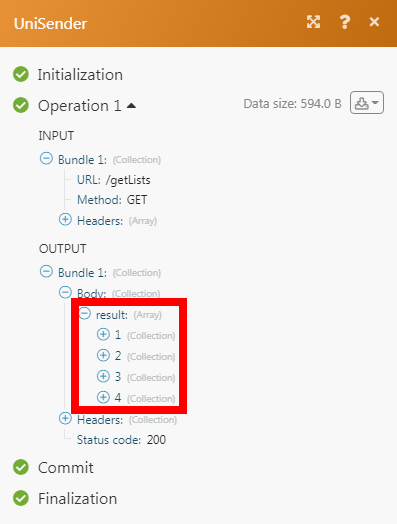
Performs an arbitrary authorized API call.
|
Connection |
||||
|
URL |
Enter a path relative to
|
|||
|
Method |
Select the HTTP method you want to use: GET to retrieve information for an entry POST to create a new entry. PUT to update/replace an existing entry. PATCH to make a partial entry update. DELETE to delete an entry. |
|||
|
Headers |
Enter the desired request headers. You don’t have to add authorization headers; we already did that for you. |
|||
|
Query String |
Enter the request query string. |
|||
|
Body |
Enter the body content for your API call. |