AI Fields creation and usage in Boost.space
Note: To access this feature, you’ll need AI Credits.
With our latest system update, Boost.space introduces a powerful new feature: AI Fields. This feature allows you to create and customize AI-driven fields within your workspace, enabling smarter data management and enhanced functionality. In this article, we’ll guide you through setting up your own AI Field. If you’d like to learn more about custom fields and field groups, please continue to our article here. In that article, you will learn how to create a custom field and assign it to a field group.
Video
AI Field – Creation and usage
- Open the Space where you want to create the Custom Field.
- Click on the “Fields” section.

- Select the option “New Custom Field”.

Configure Your AI Custom Field
A setup window will open for configuring your new Custom Field:
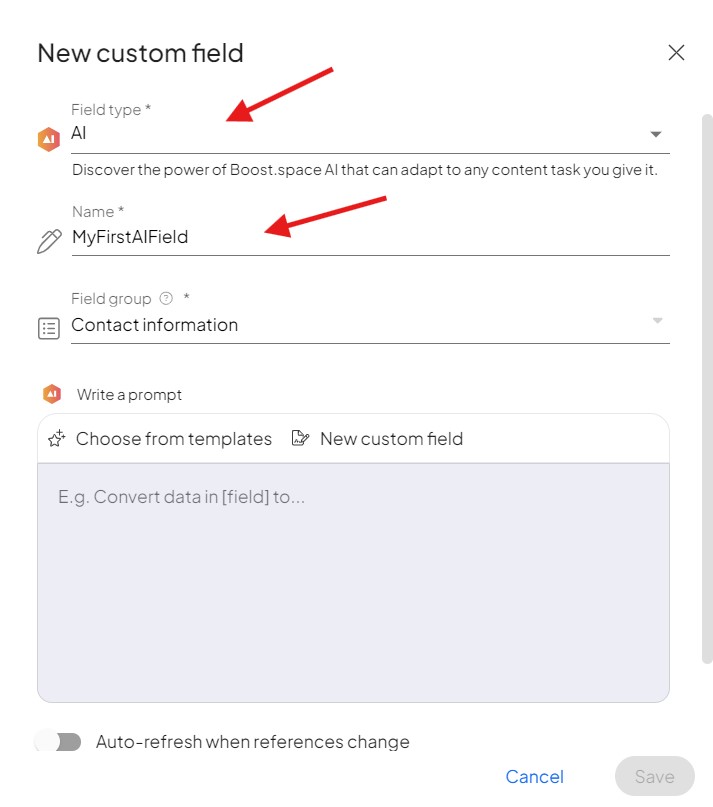
- Step 1: In the first dropdown, select “AI” as the field type.
- Step 2: Enter a name for your Custom Field.

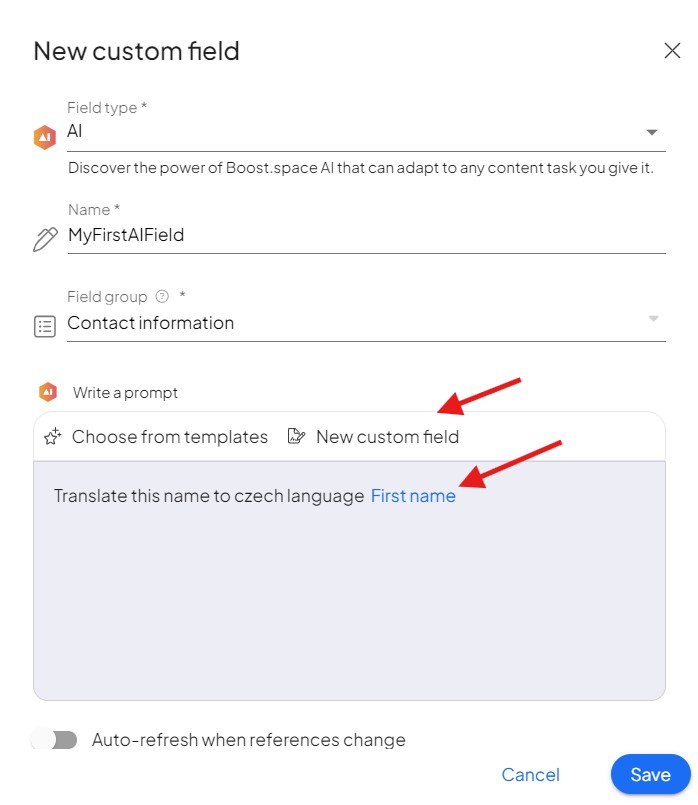
- Step 3: Choose from our range of predefined templates or create a custom setup tailored to your specific preferences.
In the predefined templates, you’ll find our ready-made options. For instance, you can choose the Shorten template to reduce text length or the Summarize template to sum up the data in the field.

If you opt for a custom field, you can create a specialized command tailored to your requirements for that AI field. For example, you can create a command to translate first names from English to Czech.

In the Advanced Settings section, you’ll find options to personalize elements such as tone, length, and other stylistic details of your custom field. Once you’re satisfied with your settings, click “Save“.
Congratulations—your new AI Custom Field is ready to use!
If you are facing any issues, please let us know at [email protected].

