The Qualtrics modules allow you to watch, create, list, retrieve, and delete the directory contact, and survey distributions in your Qualtrics account.
Prerequisites
-
A Qualtrics account
In order to use Qualtrics with Boost.space Integrator, it is necessary to have a Qualtrics account. If you do not have one, you can create a Qualtrics account at qualtrics.com.
![[Note]](https://docs.boost.space/wp-content/themes/bsdocs/docs-parser/HTML/css/image/note.png) |
Note |
|---|---|
|
The module dialog fields that are displayed in bold (in the Boost.space Integrator scenario, not in this documentation article) are mandatory! |
To connect your Qualtrics account to Boost.space Integrator you need to obtain the API Key from your Qualtrics account and insert it in the Create a connection dialog in the Boost.space Integrator module.
1. Log in to your Qualtrics account.
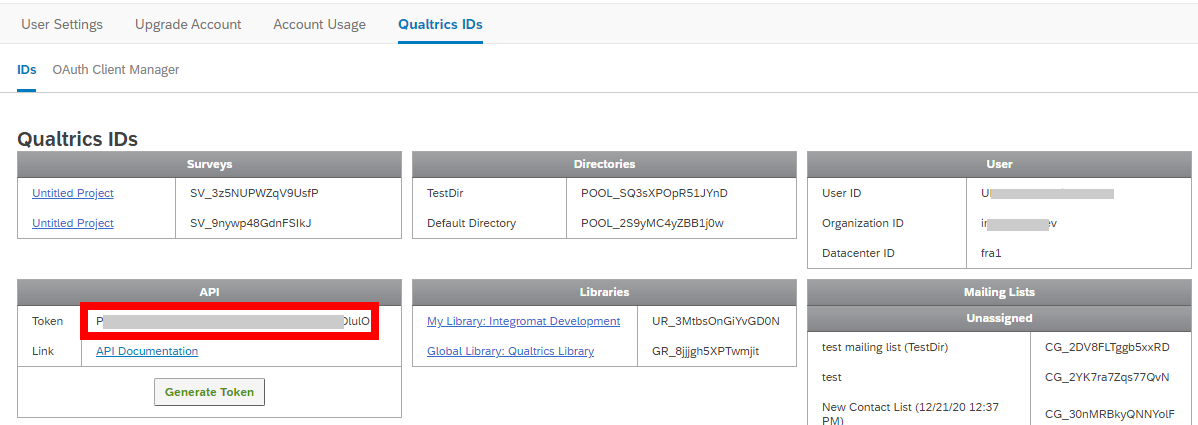
2. Click Your Profile Icon > Account Settings > Qualtrics IDs.
3. Copy the API token to your clipboard.
4. Go to Boost.space Integrator and open the Qualtrics module’s Create a connection dialog.
5. In the Connection name field, enter a name for the connection.
6. In the Data Center ID field, enter your account’s data center ID. You can find it in the Your Profile Icon > Account Settings > Qualtrics IDs.
7. In the API Key field, enter the API token copied in step 3, and click Continue.
The connection has been established.
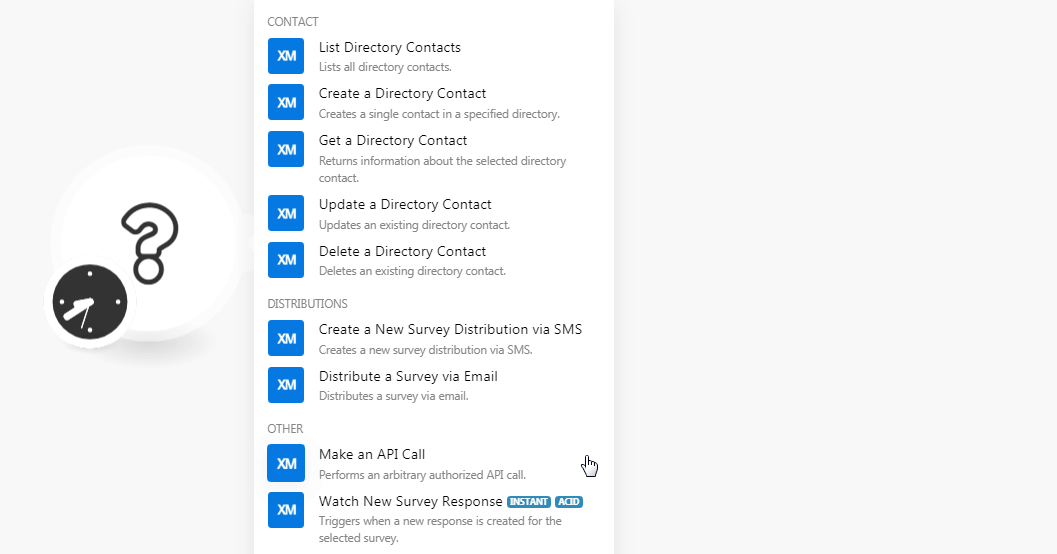
Lists all directory contacts.
|
Connection |
|
|
Directory ID |
Select the Directory ID whose contact details you want to retrieve. |
|
Limit |
Set the maximum number of contacts Boost.space Integrator should return during one scenario execution cycle. |
Creates a single contact in a specified directory.
|
Connection |
|
|
Directory ID |
Select the Directory ID to which you want to add the contact. |
|
First Name |
Enter the contact’s first name. |
|
Last Name |
Enter the contact’s last name. |
|
|
Enter the contact’s email address. |
|
Phone |
Enter the contact’s phone number. |
|
External Reference |
Enter the external reference details of the contact. |
|
Embedded Data |
Add the items you want to embed to the contact by entering its name and value. For example, contact’s address. |
|
Language |
Enter the contact’s preferred language. |
|
Unsubscribed |
Select whether the contact is unsubscribed. |
Returns information about the selected directory contact.
|
Connection |
|
|
Directory ID |
Select the Directory ID whose contact details you want to retrieve. |
|
Contact ID |
Select the Contact ID whose details you want to retrieve. |
Updates an existing directory contact.
|
Connection |
|
|
Directory ID |
Select the Directory ID whose contact details you want to update. |
|
Contact ID |
Select the Contact ID whose details you want to update. |
|
First Name |
Enter the contact’s first name. |
|
Last Name |
Enter the contact’s last name. |
|
|
Enter the contact’s email address. |
|
Phone |
Enter the contact’s phone number. |
|
External Reference |
Enter the external reference details of the contact. |
|
Embedded Data |
Add the items you want to embed to the contact by entering its name and value. For example, |
|
Language |
Enter the contact’s preferred language. |
|
Unsubscribed |
Select whether the contact is unsubscribed. |
Deletes an existing directory contact.
|
Connection |
|
|
Directory ID |
Select the Directory ID whose contact details you want to retrieve. |
|
Contact ID |
Select the Contact ID whose details you want to retrieve. |
Creates a new survey distribution via SMS.
|
Connection |
|
|
Send Date |
Enter the date and time to send the SMS. See the list of supported date and time formats. |
|
Method |
Select the distribution method:
|
|
Directory ID |
Select the Directory ID to whose contacts you want to send the SMS. |
|
Mailing List ID |
Select the Mailing List ID to which you want to send the SMS. You can provide either |
|
Contact ID |
Select the Contact ID to which you want to send the SMS. You can set only one of these fields: |
|
Sample ID |
Select the Contact ID to which you want to send the SMS. You can set only one of these fields: |
|
Transaction Batch ID |
Select the Contact ID to which you want to send the SMS. |
|
Survey ID |
Select the Survey ID you want to distribute. |
|
Parent Distribution ID |
Select the Parent Distribution ID to which this survey distribution belongs to. |
|
Distribution Name |
Enter a name for the distribution. |
|
Library ID |
Select the Library ID to which the message belongs to. |
|
Message ID |
Select the Message-ID you want to distribute. |
|
Message Text |
Enter the message text you want to distribute. |
Distributes a survey via email.
|
Connection |
|
|
From Email |
Enter the email address from which you want to distribute the survey. |
|
From Name |
Enter the name that appears in the From field of the email. |
|
Subject |
Enter the email’s subject line. |
|
Send Date |
Enter the date and time to send the SMS. See the list of supported date and time formats. |
|
Survey ID |
Select the Survey ID you want to distribute through email. |
|
Library ID |
Select the Library ID to which the message belongs to. |
|
Message ID |
Select the Message-ID you want to send in the email. You can provide either |
|
Message Text |
Enter the message text you want to add to the email. You can provide either |
|
Directory ID |
Select the Directory ID to whose contacts you want to send the email. |
|
Mailing List ID |
Select the Mailing List ID to which you want to send the email. You can provide either |
|
Transaction Batch ID |
Select the Contact ID to which you want to send the SMS. Provide either |
|
Contact ID |
Select the Contact ID to which you want to send the email. |
|
Reply to Email |
Enter the email address to which recipients can reply to. |
|
Expiration Date |
Enter the date when the survey expires. See the list of supported date and time formats. |
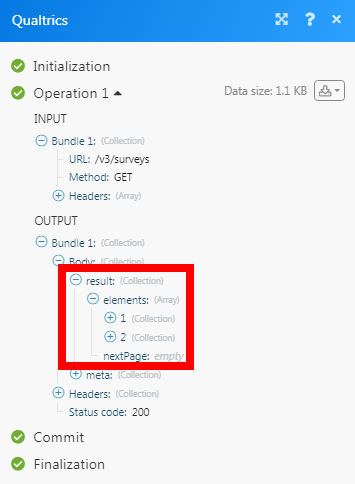
Performs an arbitrary authorized API call.
|
Connection |
||||
|
URL |
Enter a path relative to
|
|||
|
Method |
Select the HTTP method you want to use: GET to retrieve information for an entry. POST to create a new entry. PUT to update/replace an existing entry. PATCH to make a partial entry update. DELETE to delete an entry. |
|||
|
Headers |
Enter the desired request headers. You don’t have to add authorization headers; we already did that for you. |
|||
|
Query String |
Enter the request query string. |
|||
|
Body |
Enter the body content for your API call. |

Triggers when a new response is created for the selected survey.
|
Note |
|---|---|
|
You do not have to add the webhooks in the Qualtrics as it is automatically done for you once you add and save an instant trigger module to your scenario. |
|
Webhook Name |
Enter a name for the webhook. |
|
Connection |
|
|
Survey ID |
Select the Survey ID whose new responses you want to watch. |