The Onfleet modules allow you to watch, create, update, list, and delete the tasks in your Onfleet account.
Prerequisites
-
An Onfleet account
In order to use Onfleet with Boost.space Integrator, it is necessary to have an Onfleet account. You can create an Onfleet account at onfleet.com/signup.
To connect your Onfleet account to Boost.space Integrator you need to obtain the API Key from your Onfleet account and insert it in the Create a connection dialog in the Boost.space Integrator module.
1. Log in to your Onfleet account.
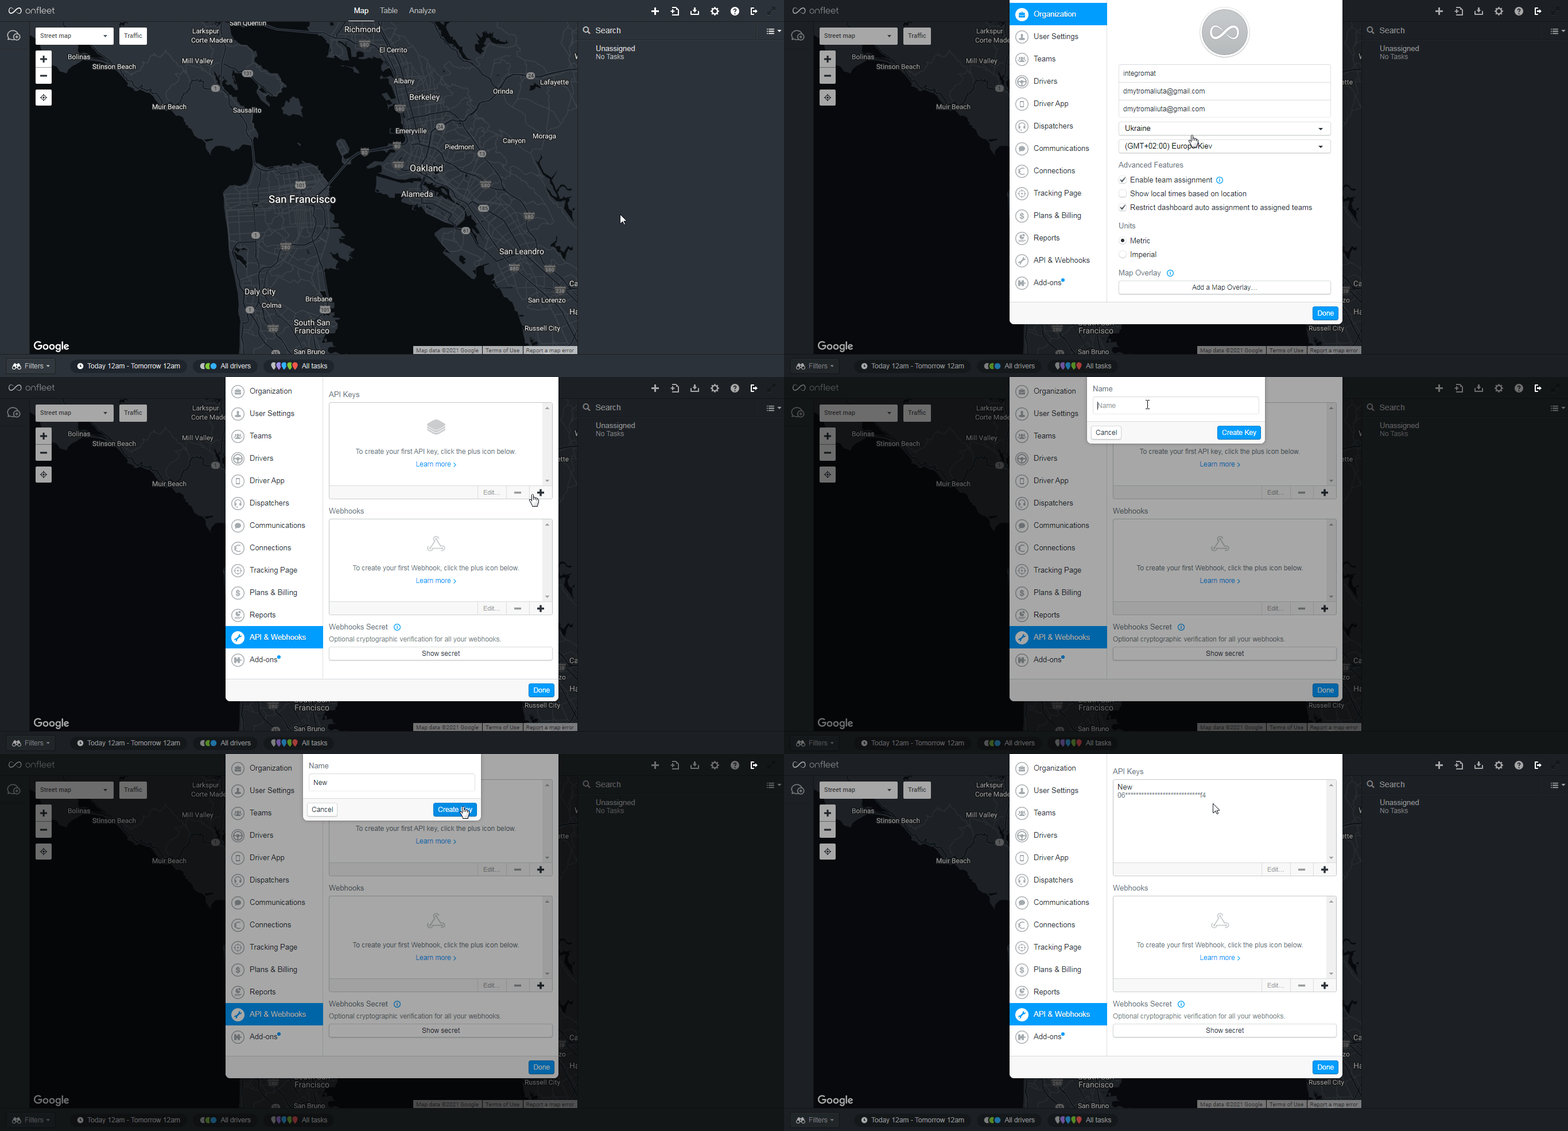
2. Click Settings ( ) > API & Webhooks. In the API Keys section, click (
 ) icon.
3. Enter a name for the API Key and click Create Key.
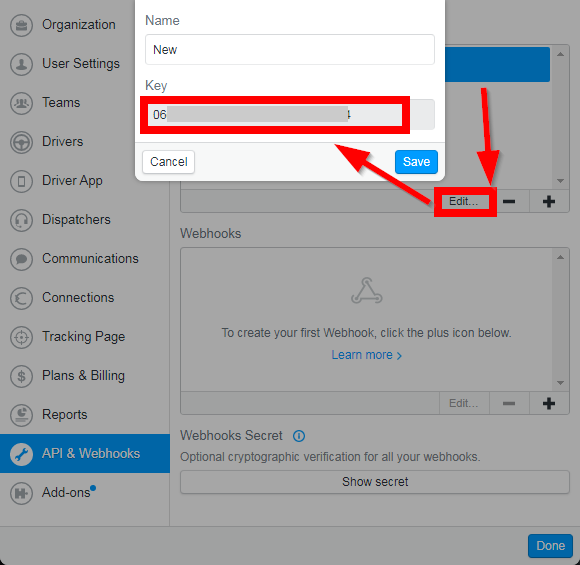
4. Select the API Key, click Edit, and copy the API Key to your clipboard.
5. Go to Boost.space Integrator and open the Onfleet module’s Create a connection dialog.
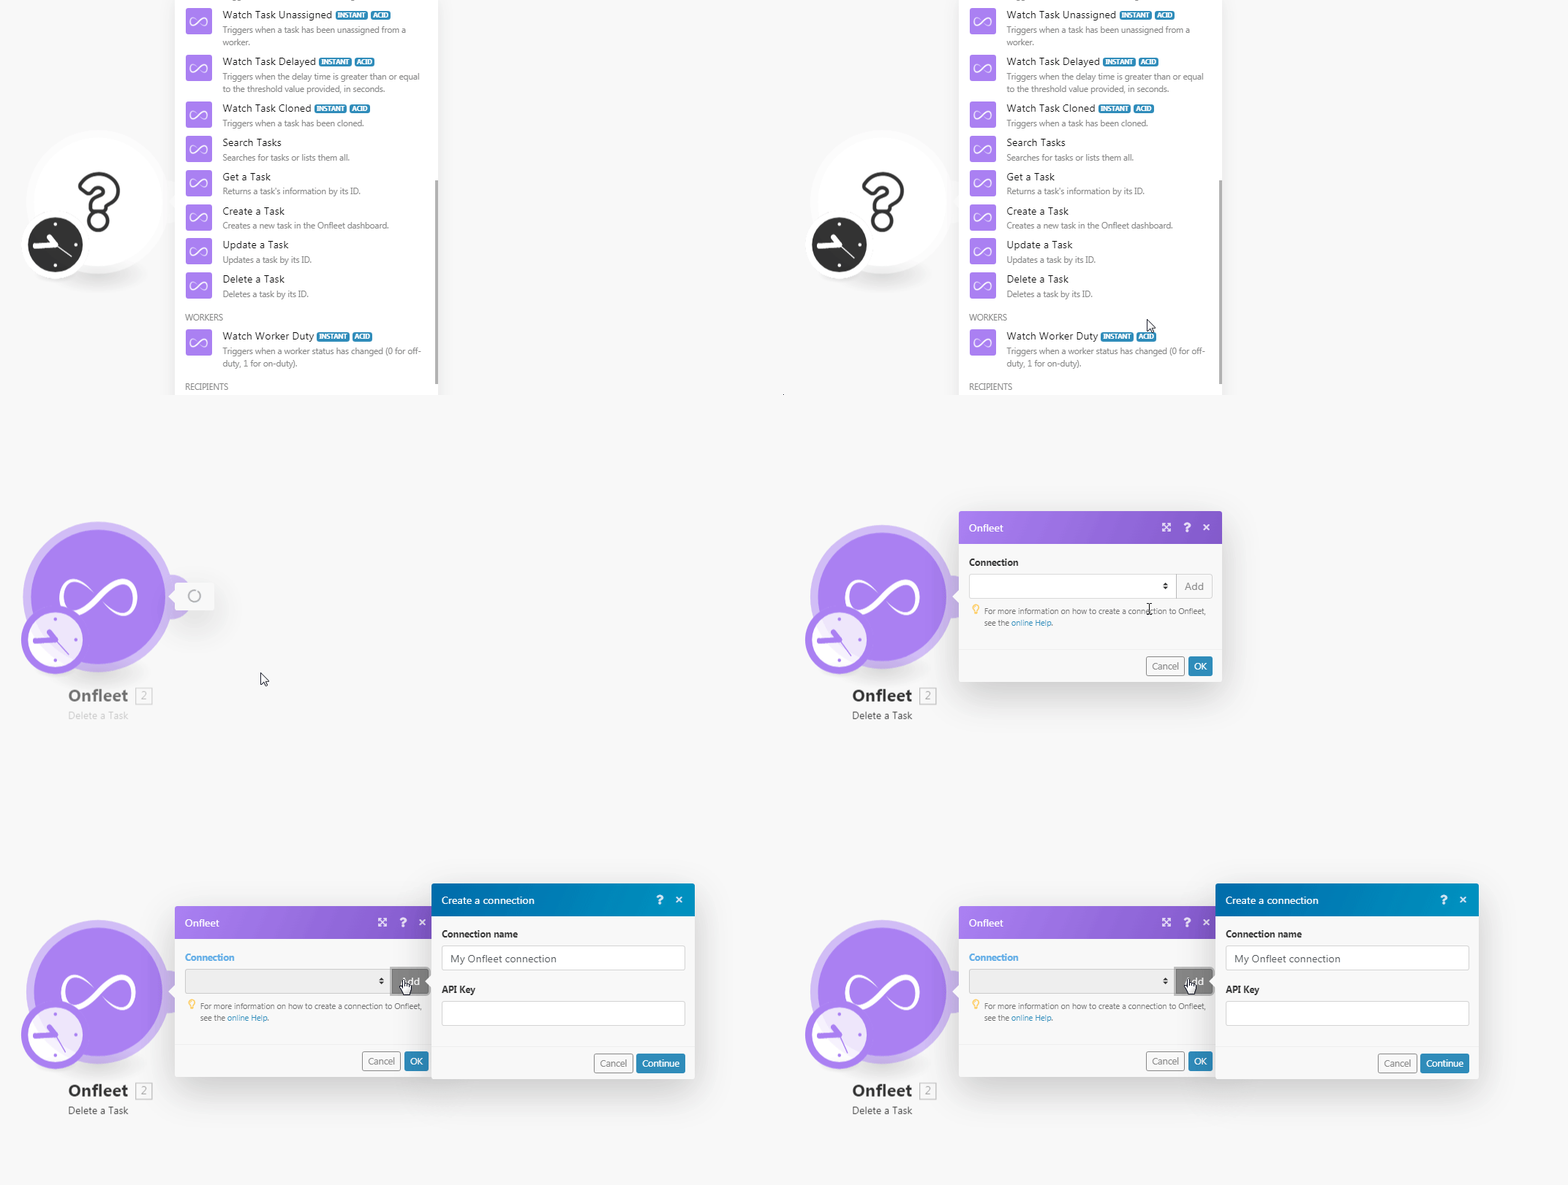
6. In the Connection name field, enter a name for the connection.
7. In the API Key field, enter the API key details copied in step 4, and click Continue.
The connection has been established.
![[Caution]](https://docs.boost.space/wp-content/themes/bsdocs/docs-parser/HTML/css/image/caution.png) |
Caution |
|---|---|
|
You do not have to add the webhooks in the Onfleet as it is automatically done for you once you add and save an instant trigger module to your scenario. |
Triggers when a task has been started by a worker.
|
Webhook Name |
Enter a name for the webhook. |
|
Connection |
Triggers when worker ETA is less than or equal to the threshold value provided in seconds.
|
Webhook Name |
Enter a name for the webhook. |
|
Connection |
Triggers when a worker is arriving at or closer than the threshold value provided in meters.
|
Webhook Name |
Enter a name for the webhook. |
|
Connection |
Triggers when a task has been completed by the worker.
|
Webhook Name |
Enter a name for the webhook. |
|
Connection |
Triggers when a new task has failed.
|
Webhook Name |
Enter a name for the webhook. |
|
Connection |
Triggers when a new task is created.
|
Webhook Name |
Enter a name for the webhook. |
|
Connection |
Triggers when a task has been updated including assignment feedback and attachment (photo, signature) changes.
|
Webhook Name |
Enter a name for the webhook. |
|
Connection |
Trigger when a task is deleted.
|
Webhook Name |
Enter a name for the webhook. |
|
Connection |
Triggers when a task has been assigned to a worker.
|
Webhook Name |
Enter a name for the webhook. |
|
Connection |
Triggers when a task has been unassigned from a worker.
|
Webhook Name |
Enter a name for the webhook. |
|
Connection |
Triggers when the delay time is greater than or equal to the threshold value provided in seconds.
|
Webhook Name |
Enter a name for the webhook. |
|
Connection |
Triggers when a task has been cloned.
|
Webhook Name |
Enter a name for the webhook. |
|
Connection |
Returns a task’s information by its ID.
|
Connection |
|
|
From |
Enter the date to search the task started from the specified date. See the list of supported date and time formats. |
|
To |
Enter the date to search the task started until the specified date. See the list of supported date and time formats. |
|
Last ID |
Enter the ID to search the tasks |
|
State |
Select the status of the task you were searching for:
|
|
Worker |
Select the worker ID of a worker who is currently assigned to the tasks or has previously completed the tasks. |
|
Complete Before |
Enter the date to search the tasks completed before the specified date. See the list of supported date and time formats. |
|
Complete After |
Enter the date to search the tasks completed after the specified date. See the list of supported date and time formats. |
|
Dependencies |
Enter the Task IDs that are dependent on the task you are searching for. |
|
Limit |
Set the maximum number of tasks Boost.space Integrator should return during one scenario execution cycle. |
Returns a task’s information by its ID.
|
Connection |
|
|
Task ID |
Select the Task ID whose details you want to retrieve. |
Creates a new task in the Onfleet dashboard.
|
Connection |
|
|
Destination |
Select the option to provide the destination details:
|
|
Destination ID |
Select the Destination ID for the task. |
|
Number |
Enter the house number. |
|
Street |
Enter the street name. |
|
City |
Enter the city name. |
|
Country |
Enter the country name. |
|
Name |
Enter the contact person’s name. |
|
Apartment |
Enter the apartment name or number. |
|
State |
Enter the state name. |
|
Postal Code |
Enter the area postal code. |
|
Unparsed |
Enter the complete address specified in a single, unparsed string where the various elements are separated by commas. |
|
Longitude |
Enter the location’s longitude details. |
|
Latitude |
Enter the location’s latitude details. |
|
Notes |
Enter the notes about the task. |
|
Recipients |
Select the option to choose the recipients. |
|
Recipient ID |
Select the Recipient ID of the task. |
|
Name |
Enter the recipient’s name. |
|
Phone |
Enter the recipient’s phone number. |
|
Notes |
Enter the notes for the recipient. |
|
Skip SMS Notifications |
Select whether to skip the SMS notifications for the recipient. |
|
Skip Phone Number Validation |
Select whether to skip the validation of the recipient’s phone number. |
|
Pickup Task |
Select whether this task is picked up from another recipient. |
|
Notes |
Enter the details about the task. |
|
Complete After |
Enter the date and time the task should be completed. See the list of supported date and time formats. |
|
Complete Before |
Enter the date and time the task should be completed. See the list of supported date and time formats. |
|
Quantity |
Enter the number of units to be dropped off while completing this task for route optimization purposes. |
|
Service Time |
Enter the number of minutes to be spent by the worker on arrival at this task’s destination for route optimization purposes. |
|
Signature |
Select whether the recipient’s signature is required. |
|
Photo |
Select whether a photo is required. |
|
Notes |
Select whether the delivery note is required. |
|
Minimum Age |
Enter the minimum age of the recipient’s ID must be scanned and their age verified to be greater than or equal to the minimum age in order to complete the task. Must be in a plan that supports ID verification. |
|
Mode |
Select the assignment mode of the task:
|
|
Team |
Select the ID of a team from which to pick the workers to consider for automatic assignment. |
|
Max Assigned Task Count |
Enter the maximum number of tasks a worker can have assigned after the automatic assignment is made. |
|
Consider Dependencies |
Select whether you want to include the target task’s dependency family (parent and child tasks) in the resulting assignment operation. |
|
Worker ID |
Enter the worker IDs separated by comma whom you do not want to include in the task assignment calculations. |
|
Merchant |
Select the ID of the organization that appears to the recipient of the task. |
|
Executor |
Select the ID of the organization responsible for fulfilling the task. |
|
Dependencies |
Enter the dependent task IDs which must be completed before the main task. |
|
Type |
Select the container to which you want to append this task. By default, this will be a creator organization container.
|
|
Team ID |
Select the Team ID to which you want to append this task. |
|
Worker ID |
Select the Worker ID to which you want to append this task. |
|
Recipient Name |
Enter the recipient’s name. |
|
Recipient Notes |
Enter the information about the recipient. |
|
Recipient Skip SMS Notifications |
Select whether you want to skip SMS notifications for recipients. |
|
Use Merchant For Proxy |
Select whether you want to override the Organization ID to use the Merchant org ID. |
|
Scan Only Required Barcode |
Select whether you want to scan only the required barcodes. |
|
Triangle Color |
Select the color for triangle colored pins on the map. |
Updates a task by its ID.
|
Connection |
|
|
Task ID |
Select the Task ID whose details you want to update. |
|
Notes |
Enter the details or any other additional information about the task. |
|
Type |
Select the container to which you want to append this task. By default, this will be a creator organization container.
|
|
Team ID |
Select the Team ID to which you want to append this task. |
|
Worker ID |
Select the Worker ID to which you want to append this task. |
Deletes a task by its ID.
|
Connection |
|
|
Task ID |
Select the Task ID you want to delete. |
Triggers when a worker status has changed (0 for off-duty 1 for on-duty)
|
Webhook Name |
Enter a name for the webhook. |
|
Connection |
Triggers when the recipient responds to a notification via SMS but the organization is unable to handle it at that time.
|
Webhook Name |
Enter a name for the webhook. |
|
Connection |
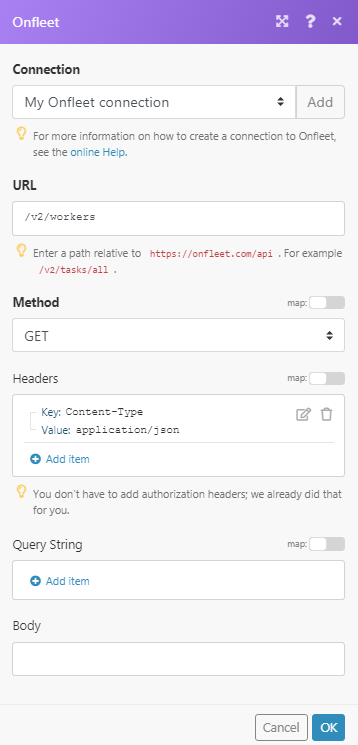
Performs an arbitrary authorized API call
|
Connection |
|
|
URL |
Enter a path relative to For the list of available endpoints, refer to the Onfleet API Documentation. |
|
Method |
Select the HTTP method you want to use: GET to retrieve information for an entry. POST to create a new entry. PUT to update/replace an existing entry. PATCH to make a partial entry update. DELETE to delete an entry. |
|
Headers |
Enter the desired request headers. You don’t have to add authorization headers; we already did that for you. |
|
Query String |
Enter the request query string. |
|
Body |
Enter the body content for your API call. |
