| Active |
|---|
| This application does not need additional settings. So you can make connectionUnique, active service acces point to a network. There are different types of connections (API key, Oauth…). only by using your login credentials or by following the instructions below . |
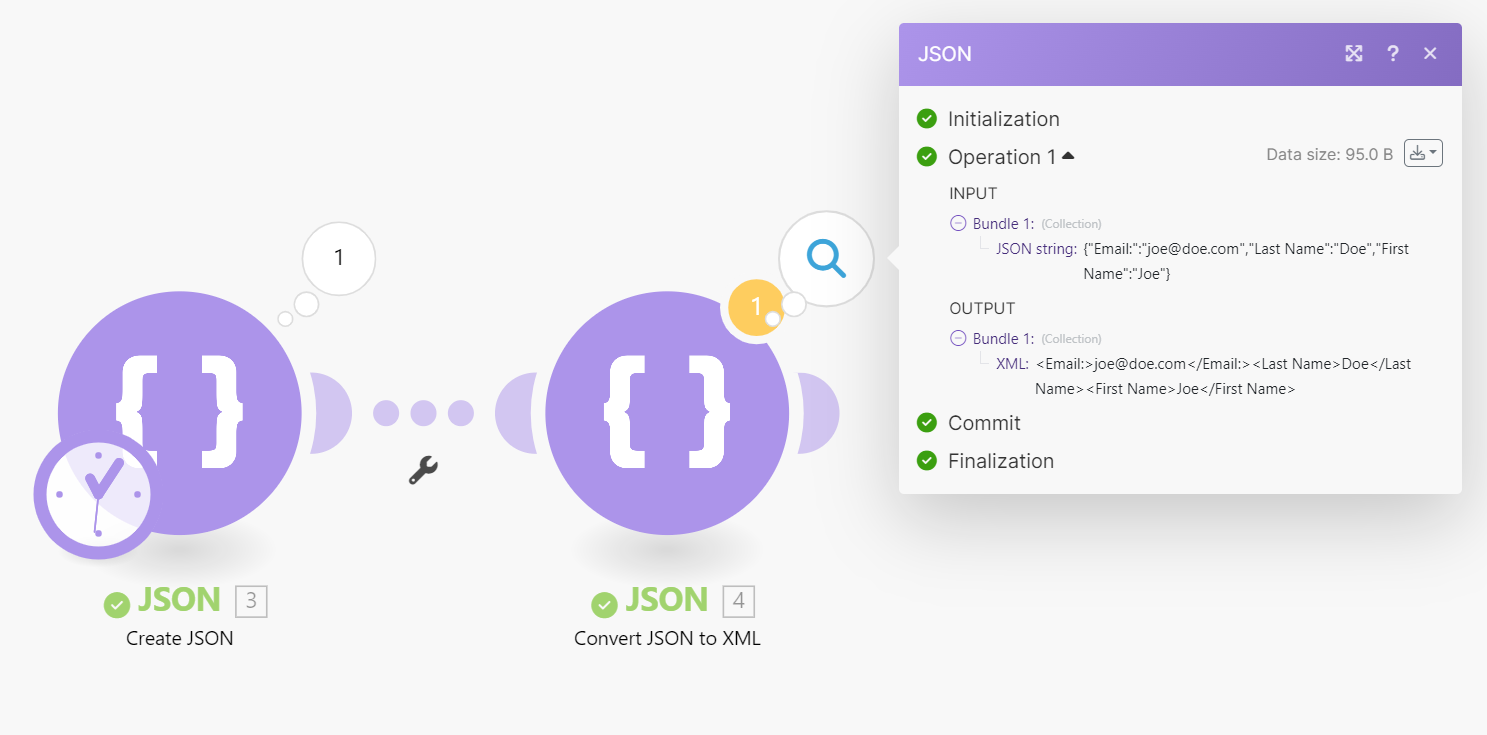
The JSON app provides modules to process data in JSON format so that Boost.space IntegratorPart of the Boost.space system, where you can create your connections and automate your processes. can further work with the data content or create new JSON content.
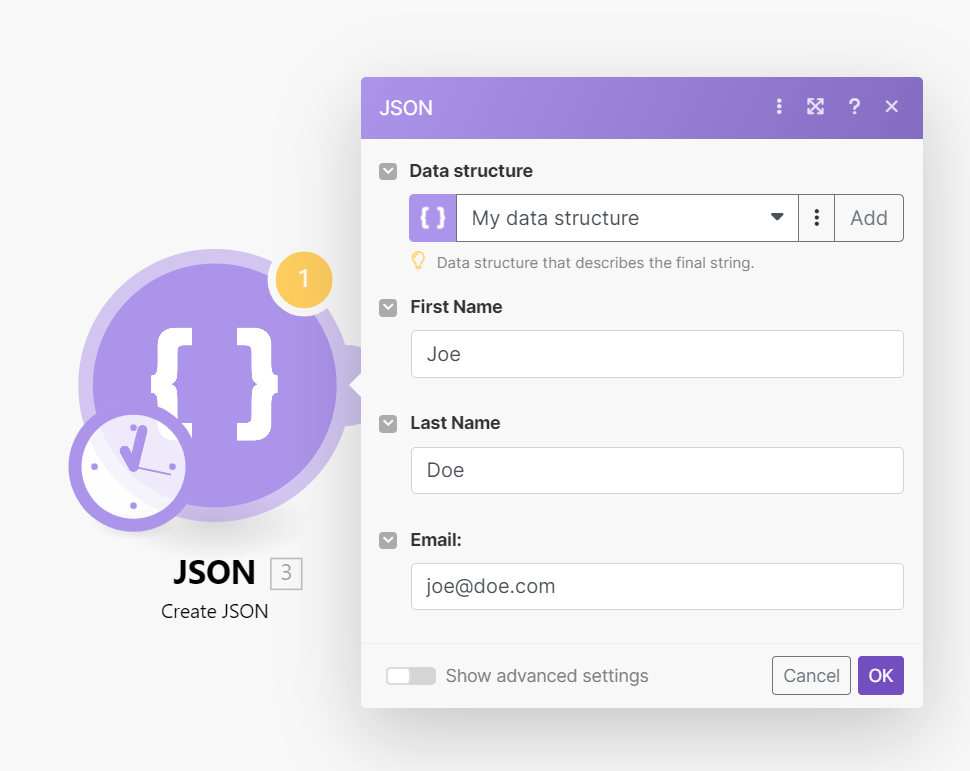
This module helps you create JSON. The fields in this module depends on your data structureWhen you create a data store, you need to create a data structure that formats your data store in Boost.space Integrator. Think of the data store as a spreadsheet and the data structure as the headers. The data structure defines the kind of data (i.e. text, numeric, etc.) that the data store records. You can view and manage your data....
The data structure describes how the JSON data is organized and enables mappingMapping links the modules in your scenario. When you map an item, you connected the data retrieved by one module to another module to perform the desired action. For example, you can map the email address and subject lines from the Email > Watch emails module to Google Sheets > Add a row and create a spreadsheet of email addresses... individual JSON items to other modules in your scenarioA specific connection between applications in which data can be transferred. Two types of scenarios: active/inactive..
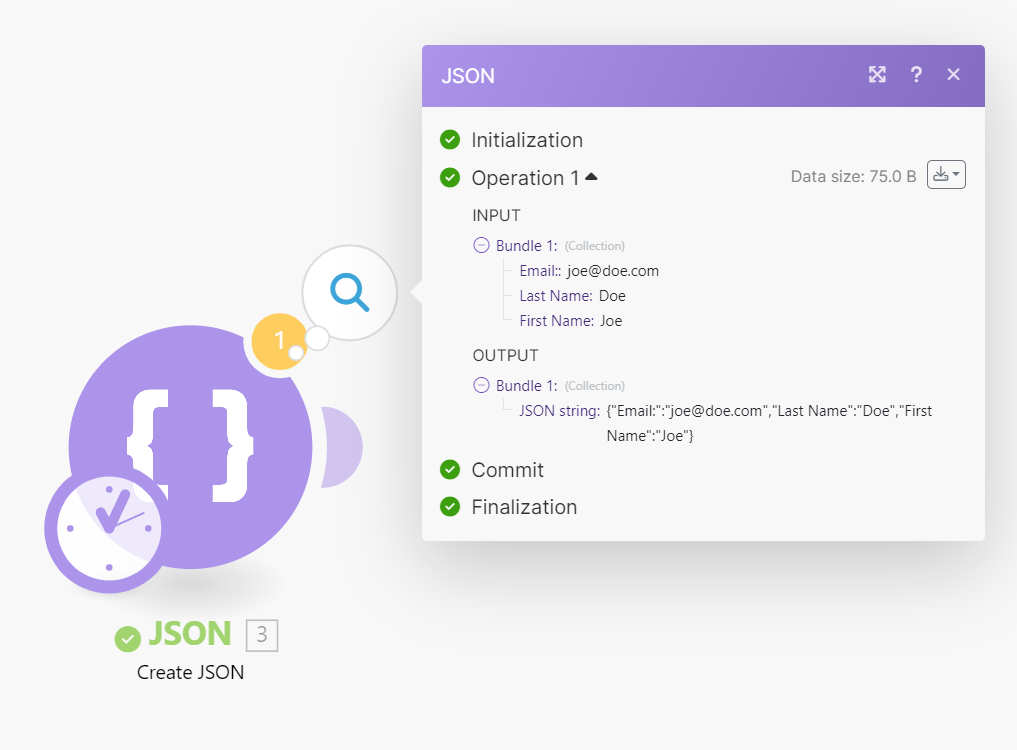
Select the data structure, and enter the field details to create JSON. The data provided in the module returns in the JSON format in the output.
The data structure describes how the JSON data is organized and enables mapping individual JSON items to other modules in your scenario. If you don’t provide the Data structure, you may manually execute the module and Boost.space Integrator will build the structure from the provided JSON:
-
Fill the JSON String field in the Parse JSON module.
-
Do not yet connect the other following modules. Because Boost.space Integratordoes not know the structure of the JSON data, it will not be possible to map data from the Parse JSON module to other modules in your scenario.
-
Manually run the scenario. The Parse JSON module will identify the JSON structure from your provided JSON.
-
You can now connect the following modules. The items from the Parse JSON module will now be available for mapping.
JSON string field can contain a collection
{ ... }
{ "name" : "Peter", "ID" : 1}
In which case, the output will be a single bundleA bundle is a chunk of data and the basic unit for use with modules. A bundle consists of items, similar to how a bag may contain separate, individual items. containing the items of the collection:
Or it can contain an arrayWithin a bundle, data items of the same type are sometimes in an array. You can find an array by looking at the details of a bundle. Depending on the details of your scenario, you can map other modules to a specific item in an array or use iterators and aggregators to manipulate your data into other formats. When mapping,....
[ ... ]
:
[ { "name" : "Peter", "ID" : 1 }, { "name" : "Mike", "ID" : 2 }]
In which case the output will be a series of bundles, each bundle containing one array’s item:
Let us assume that the data records you wish to transform to JSON format reside in a Google spreadsheet. Here is the procedure on how to transform the data records to JSON format described in ten steps:
-
Place the Google Sheets > Select rows module in your scenario to fetch the data. Set up the module to retrieve rows from your Google spreadsheet and set the Maximum number of returned rows to a small number but larger than one for testing purposes (e.g., three). Execute the Google Sheets module (right-click it and choose “Run this module only”) and verify its output.
-
Connect the Array AggregatorWhen designing a scenario, use an array aggregator to merge multiple bundles into one single bundle. This may be necessary to format data properly for subsequent modules. The array aggregator also lets you define your target data structure. module after the Google Sheets module. In the module’s setup, choose the Google Sheets module in the Source node field. Leave the other fields as they are for the moment.
-
Connect JSON > Create JSON module after the Array AggregatorYou can use a table aggregator to create a table from multiple bundles. The table aggregator merges values based on your specified column and row parameters and outputs into a single bundle. One possible use is compiling blog posts or emails into a single email summary. module. The module’s setup requires a data structure that describes the JSON format. Click the Add button to open the Data structure setup. The easiest way to create this Data structure is to generate it automatically from a JSON sample. Click the Generator button and paste your JSON sample to the Sample data field:
{ "books": [ { "id": "ID", "title": "Title", "author": "Author" } ]}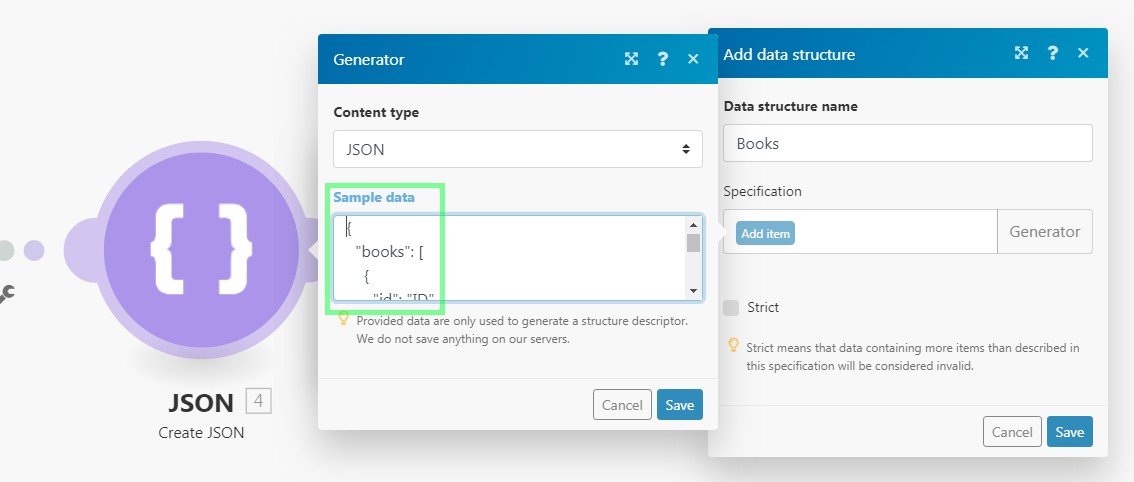
-
Click Save. The Specification field in the Data structure setup should now contain the generated structure.
-
Change the name of your Data structure to something more specific (e.g., “Books”) and click Save. If everything goes well, a field corresponding to the root array attribute should appear mappable in the JSON module’s setup.
-
Click the Map button next to the field and map the
Array[]item outputted from the Array aggregatorAn aggregator is a type of module that allows you to merge multiple bundles into one single bundle. Aggregators are useful in making data readable for certain modules or generating meaningful output. Boost.space Integrator offers:
Array aggregator
Numerical aggregator
Table aggregator
Text aggregator
module to it:
-
Click OK to close the JSON module’s setup.
-
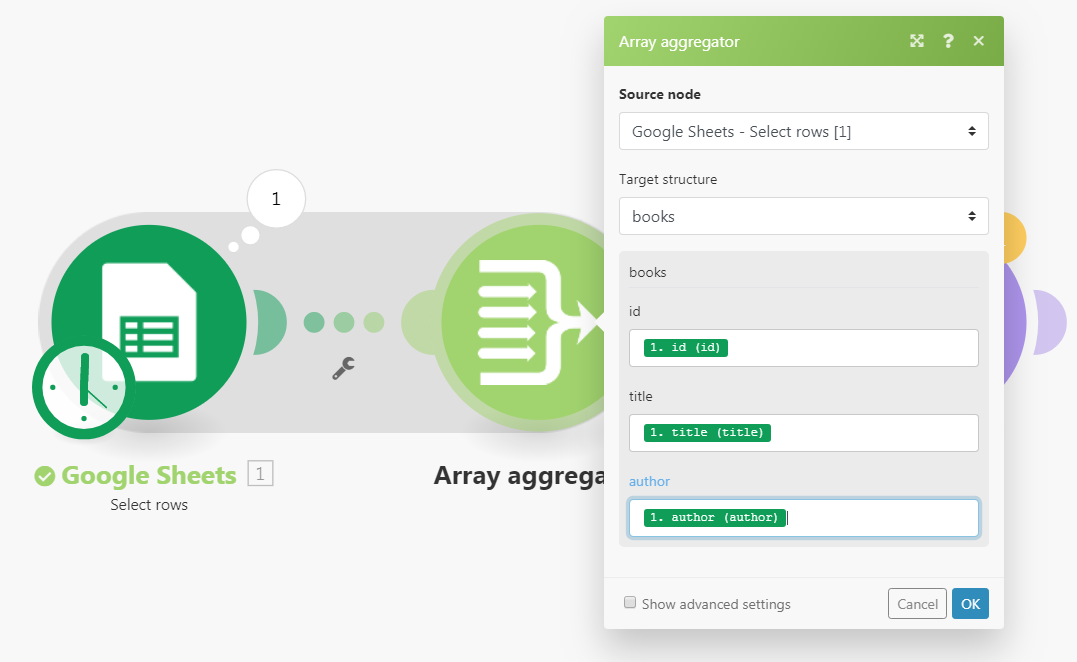
Open the setup of the Array Aggregator module. Change the Target structure from Custom to the JSON module’s field corresponding to the root array attribute. Map items outputted from the Google Sheets module to the appropriate fields:
-
Click OK to close the Array Aggregator module’s setup.
-
Run the scenario. If everything goes well, the JSON module should output the correct JSON format. Open the setup of the Google Sheets module and increase the Maximum number of returned rows number to be larger than the number of rows in your spreadsheet to process all the data. The resulting JSON can then be used as a body of an HTTP request, returned as a Webhook’s response, etc.
Boost.space Integrator allows you to mock the data from the existing module and perform testing for your scenario. You can execute this operationOperations are tasks in integration scenarios, similar to "operations" in Make.com. Each action, like reading or updating a record, counts as one operation. They’re essential for data syncing between apps and reset monthly. Going over the limit pauses syncing until you add more or upgrade your plan. using the Parse JSON tool from the Apps section.
-
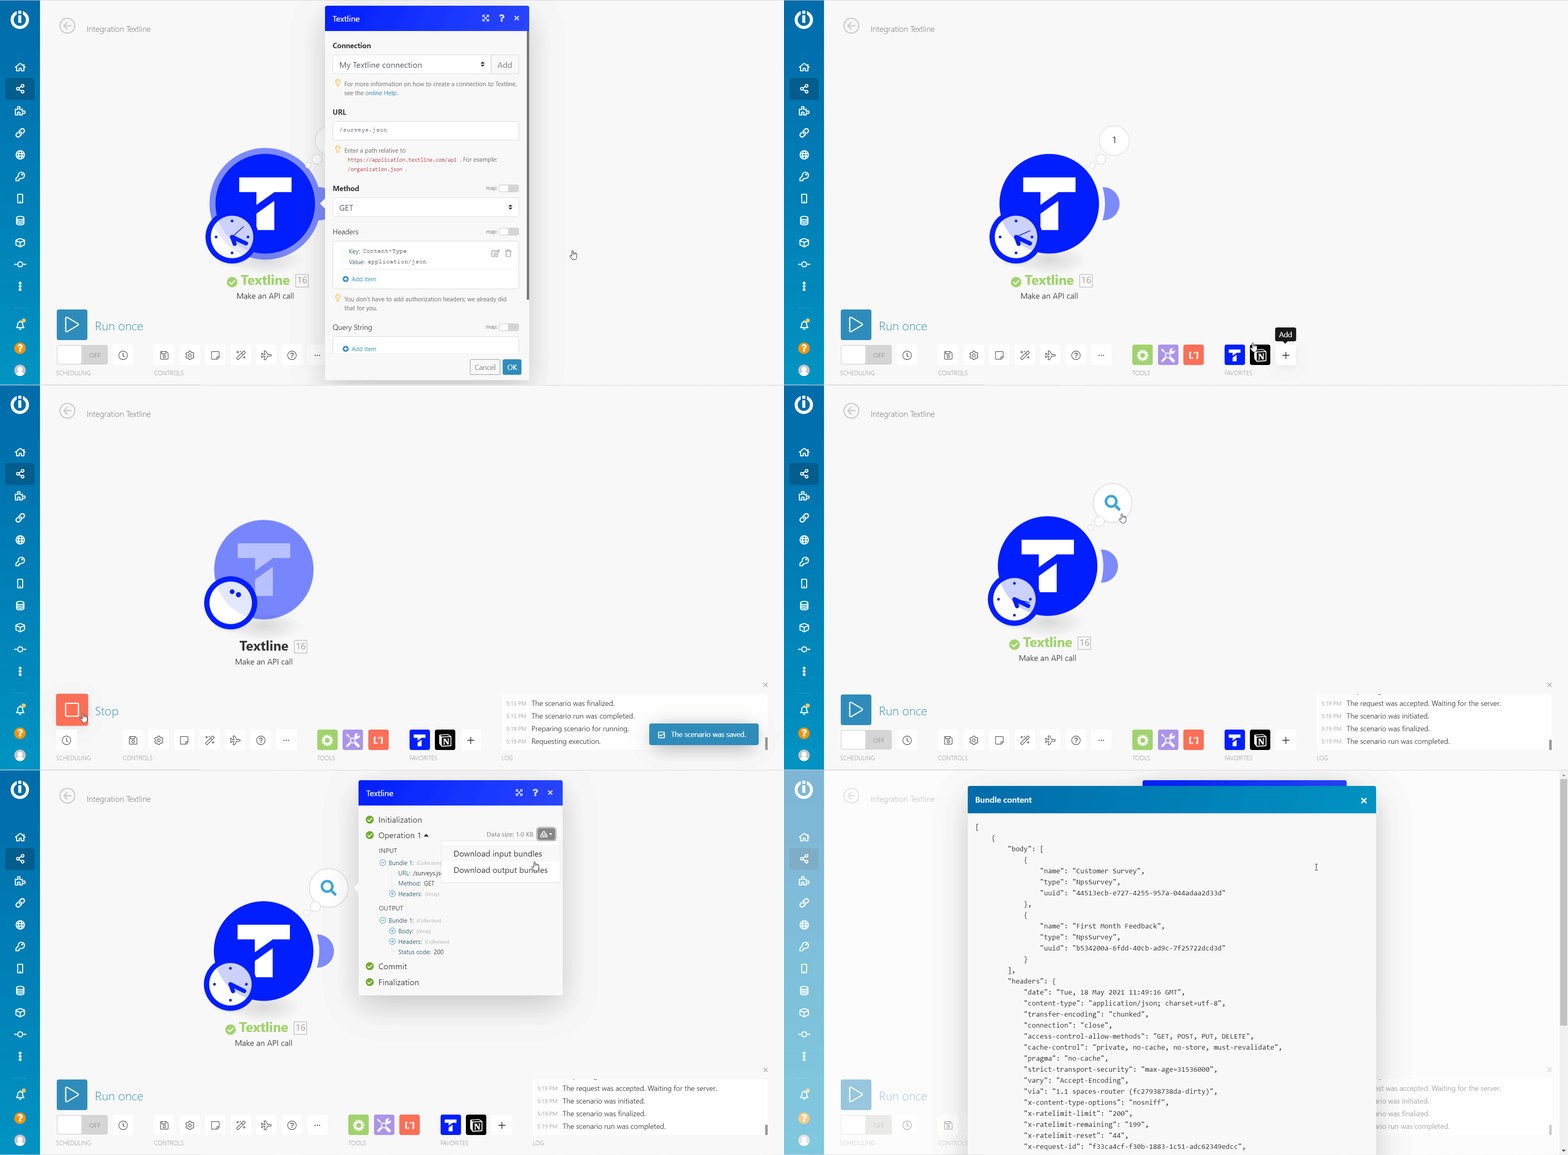
Execute the module whose output data you want to mock using the Parse JSON.
-
Click the resulting output above the module.
-
Click Download output bundles from the dropdown menu.
A window containing the original module’s output bundles in JSON format pops up.
-
Copy the window’s content and click Close.
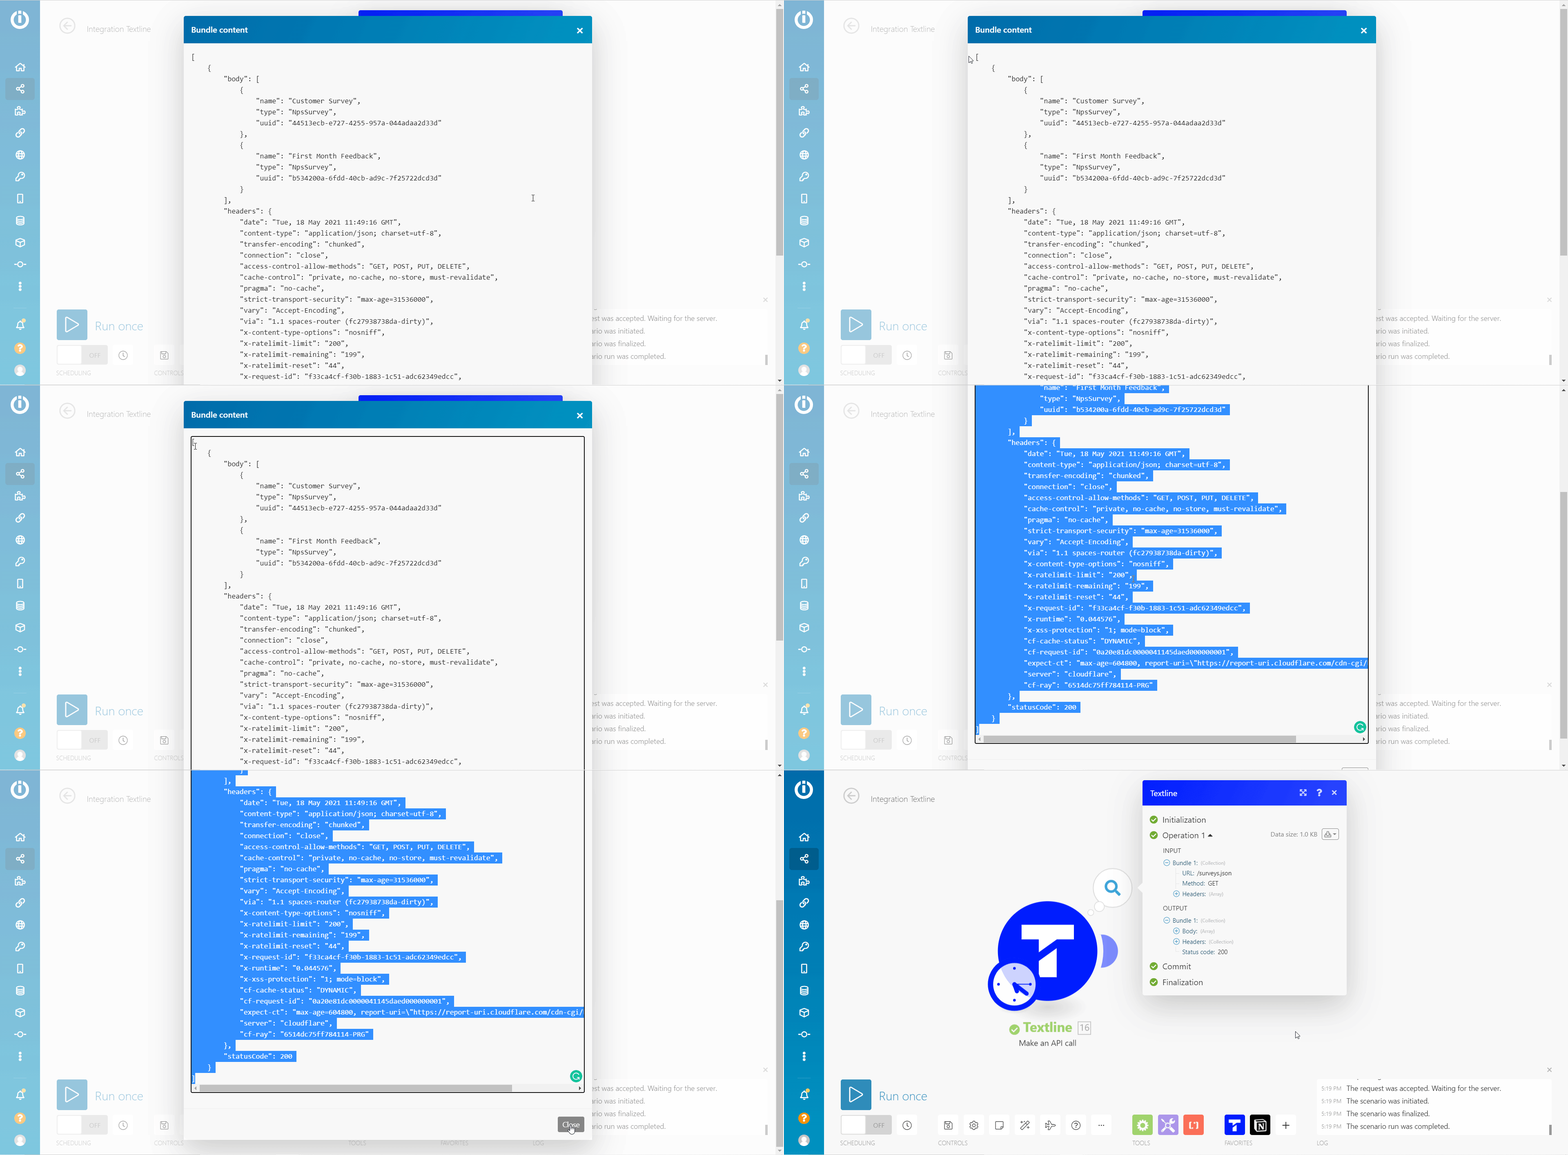
-
Insert the Tools > Parse JSON module after the original module, open its configuration, and paste the copied JSON data in Step 4 into the JSON string field.
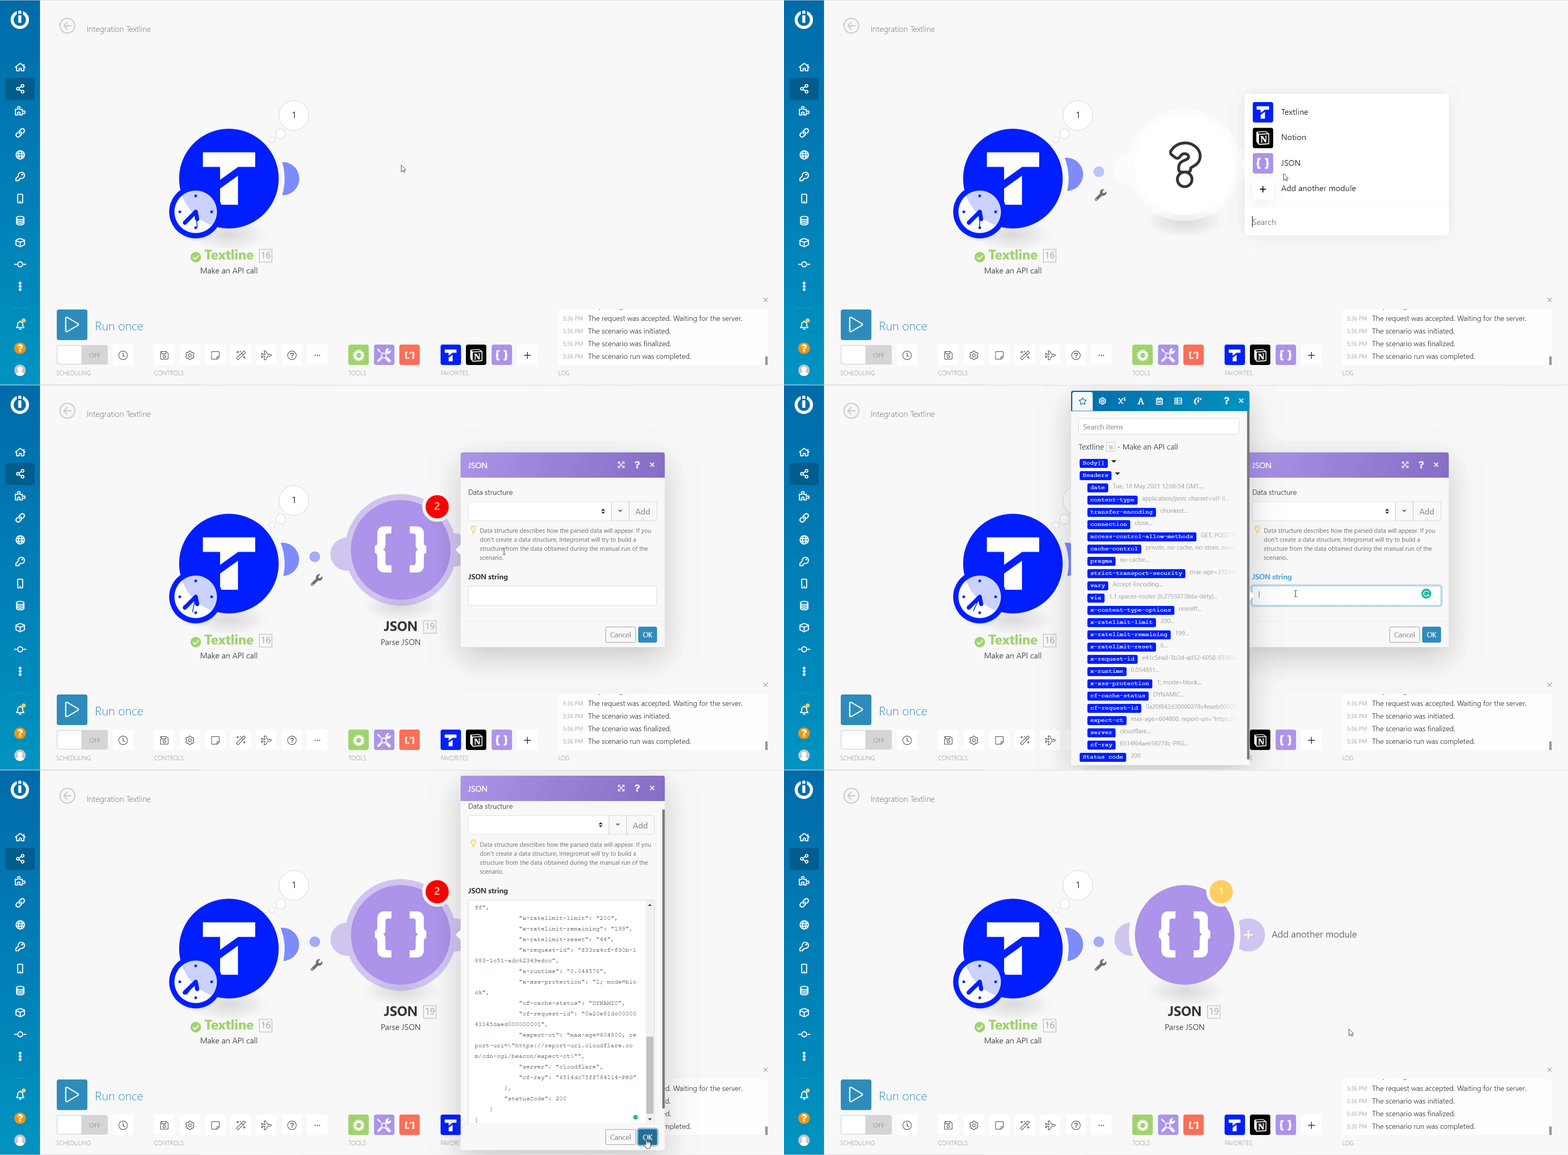
-
Unlink the original module from the scenario.
Do not delete the original module.
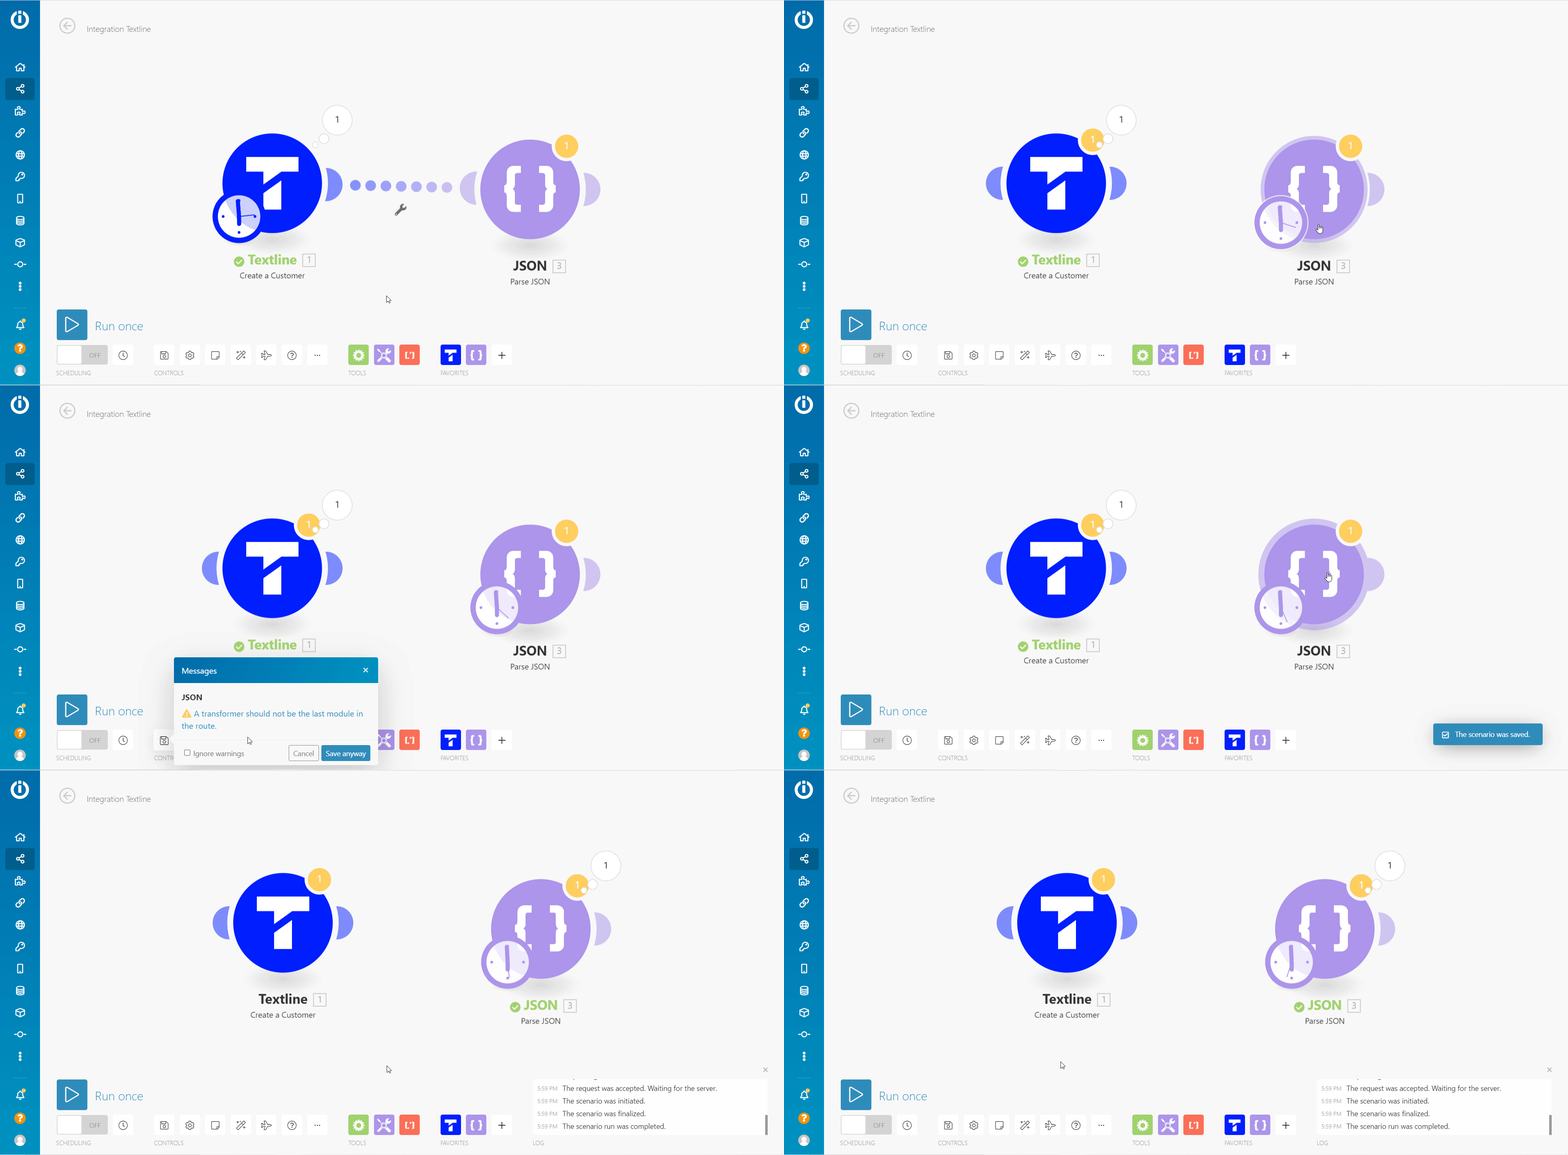
-
Execute the mock-up JSON module and use its output instead of the original module’s output in your scenario.
-
Build and test your scenario.
Once you are done with the testing, change the mapping from the mock-up module to the original module across the whole scenario with the DevTool’s Remap Source tool.
Put back the original module before the mock-up JSON module and remove the JSON module.
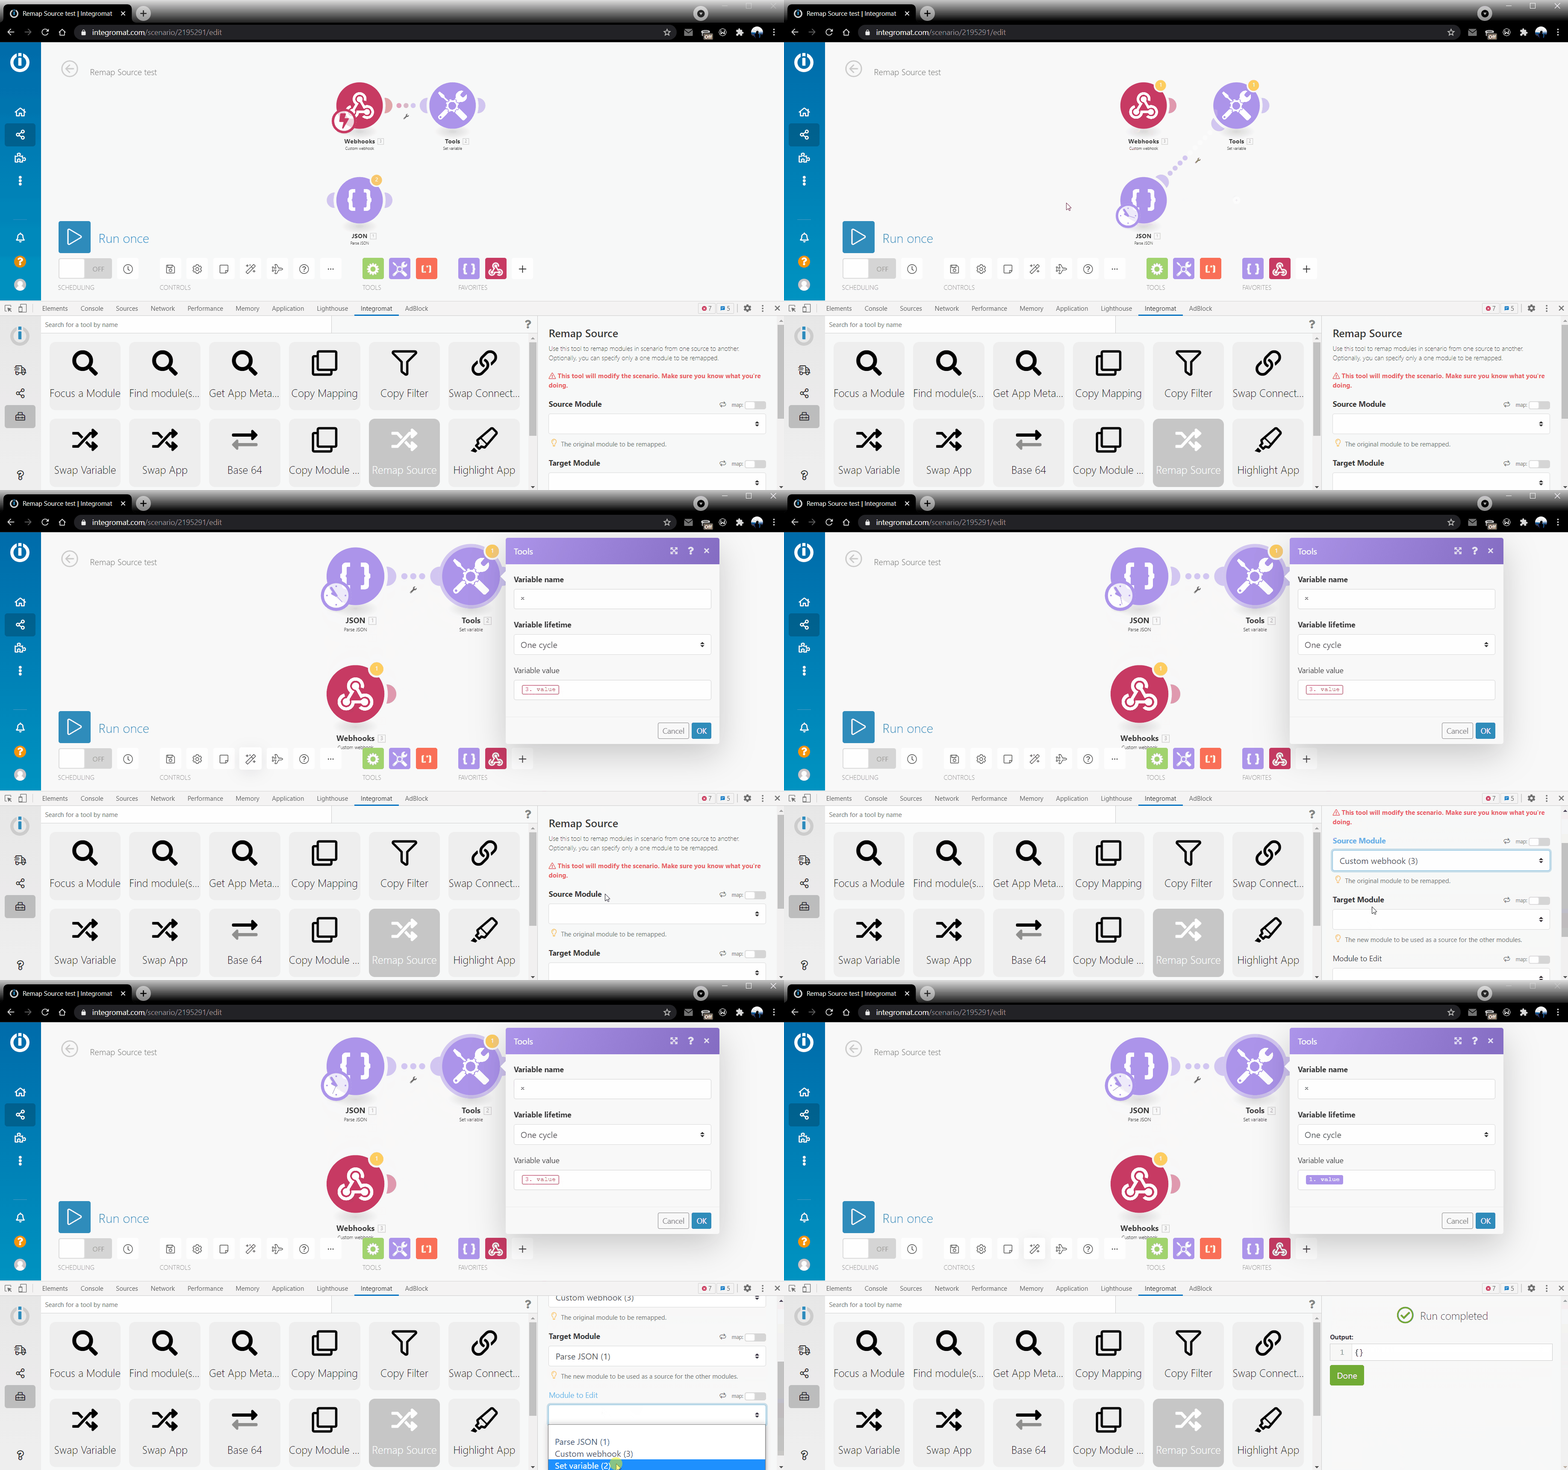 |
In the Remap Source section, it is not necessary to fill the Module to Edit field unless you do not want to remap all values from the original module in the whole scenario.
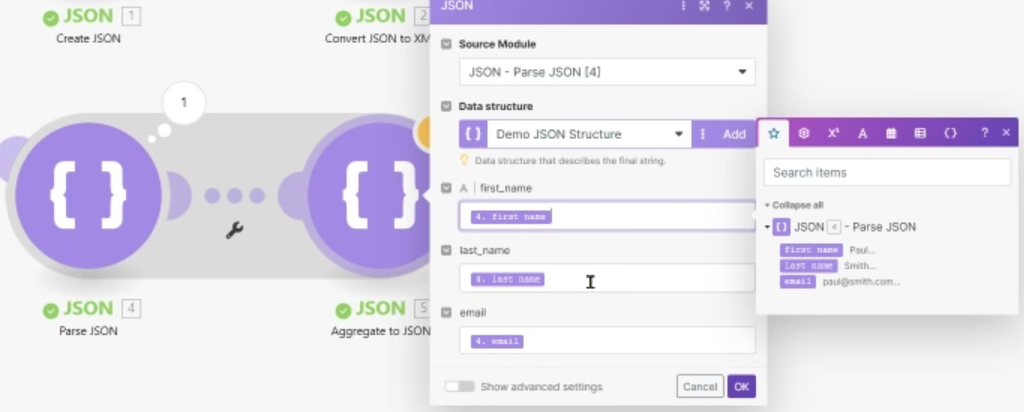
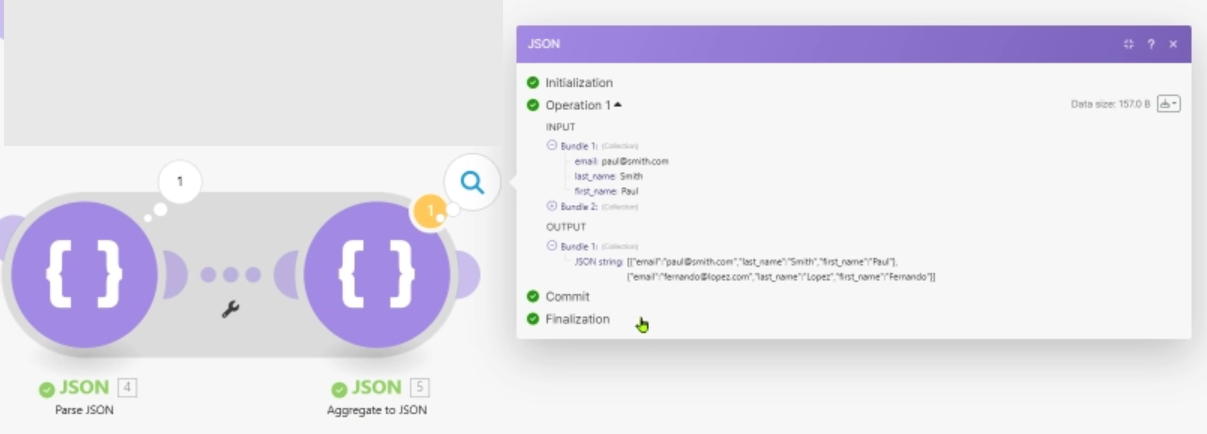
Converts the multiple output bundles to a single bundle.
You need to attach this aggregator module to the source module whose output you want to convert to a single module; for example, the Parse JSON modules give the output in multiple bundles.
After selecting the source module, select the data structure, and the remaining fields are populated from the source module.
Save the scenario and execute it. You can see the output is only one bundle.


