- Subscenarios
- Types of scenarios in a scenario chain
- Create a scenario chain
- Create the parent scenario
- Create the child scenarios
- Connect the parent scenario with the child scenarios
- Set the scheduling for scenarios in the scenario chain
- Migrate from using the Run a scenario module
- Migrate from using the HTTP and custom webhook apps
- Manage scenario chains
- Add scenarios to a scenario chain
- Remove scenarios from a scenario chain
- Scenario chaining comparison with other options to connect scenarios
- Scenario chaining limitations
Subscenarios allow you to link multiple scenariosA specific connection between applications in which data can be transferred. Two types of scenarios: active/inactive. together to form a scenarioA specific connection between applications in which data can be transferred. Two types of scenarios: active/inactive. chain. When the first scenario in the scenario chain finishes, it triggersThe initial event that starts a scenario. It can be an action, a scheduled time, or a custom event, and is essential to define at the beginning of each scenario. the next scenario. This is useful in workflows with different stages or processes that need to run in a specific order. Creating a scenario chain with subscenarios brings in the following features:
- Run in sequence: when the first scenario finishes, it automatically triggers the execution of the next scenario. This ensures that tasks are carried out in the desired order without manual intervention.
- Data transferData transfer is the amount of data transferred through your scenario.: The first scenario can send data to the second scenario. This allows for using the result of the first scenario as an input for the second scenario.For example, you can send an order number to a scenario that updates the warehouse inventory and to another scenario that sets up tracking of the order delivery.
- Modularity: You can split a complex scenario into multiple chained scenarios. By breaking down a complex workflow into smaller, manageable scenarios, it becomes easier to design, debug, and maintain. In addition, you can link the scenarios with other scenarios in the future, avoiding building the same logic.For example, you can have multiple scenarios to send customers notification emails and order invoices. Each of these scenarios starts with a few modulesa module is an application or tool designed to handle specific business functions, such as CRM, project management, or inventory. The system's modular architecture allows you to activate only the modules you need, enabling customization and scalability as your business requirements evolve. retrieving userCan use the system on a limited basis based on the rights assigned by the admin. data. With scenario chaining, you can extract the repeating modules to a separate scenario and put it at the start of the scenario chain.
There are three types of scenarios in a scenario chain:
- Parent scenario:
- A parent scenario starts the scenario chain.
- A parent scenario triggers bridge or child scenarios.
- A parent scenario can have multiple Run a scenario modules.
- Bridge scenario:
- A bridge scenario connects child scenarios or other bridge scenarios with parent scenarios in the scenario chain.
- A bridge scenario is triggered by a parent scenario, or another bridge scenario. In addition, the bridge scenario triggers another bridge scenario or a child scenario.
- A bridge scenario can have multiple Run a scenario modules.
- Child scenario:
- A child scenario ends the scenario chain.
- Child scenarios are triggered by parent or bridge scenarios.
- A child scenario doesn’t have any Run a scenario modules.
The following diagramThe diagram is a visual representation of your scenario and appears exactly the same way as you see your scenario in the Scenario editor. Use the diagram tab to quickly view: <br> the execution history of your scenario.<br> the number of operations and data consumed.<br> the controls to manage the scenario.<br> shows the relation between parent, bridge and child scenarios:
The scenario chains can even create branches, like this:
To create a scenario chain, you need to create multiple scenarios. The following steps focus on a quick and simple showcase, where you don’t need to build complicated scenarios to try out scenario chaining. Keep in mind that scenario chaining brings the most benefits when you want to split a complex scenario into multiple parts.
Overview of the steps to create a scenario chain:
- Create the parent scenario.
- Create the child scenarios.
- Connect the scenarios with Run a scenario modules to form a chain from the parent and child scenarios.
- Set the schedulingBoost.space Integrator allows you to define when and how often an active scenario runs. Use the Schedule setting panel under the Options tab and choose Scheduling to set your preferred schedule. for the scenarios in the scenario chain.
The scenario chain can be visualized like this:
 |
In the parent scenario, we will use the OpenWeather app to get weather data. We will use the Set multiple variables modulea module is an application or tool designed to handle specific business functions, such as CRM, project management, or inventory. The system's modular architecture allows you to activate only the modules you need, enabling customization and scalability as your business requirements evolve. to set the data we will be sending to the child scenarios.
- In Make, click Create a new scenario.
- In the scenario editor, click the big plus icon and search for the OpenWeather app.In search results, select the Get current weather module.Configure the Get current weather module to get weather data from your favorite city and run the module to get a bundleA bundle is a chunk of data and the basic unit for use with modules. A bundle consists of items, similar to how a bag may contain separate, individual items. for mappingMapping links the modules in your scenario. When you map an item, you connected the data retrieved by one module to another module to perform the desired action. For example, you can map the email address and subject lines from the Email > Watch emails module to Google Sheets > Add a row and create a spreadsheet of email addresses....
- Connect the Get current weather module with the Set mutliple variables module. In the Set multiple variables module, create new variables and map the data you want to send to the child scenarios.For example, map the Temperature and Pressure pills from the Get current weather module to the
london_temperatureandlondon_pressurevariables:
You created a starting piece of the parent scenario in the scenario chain.
Your scenario should look like this:
 |
In the following steps, we will create two child scenarios. Both child scenarios will use scenario inputs to receive data from the parent scenario.
- Click Create a new scenario.
- In the scenario editor, click the big plus icon and search for the Gmail app.In search results, select the Send an email module.
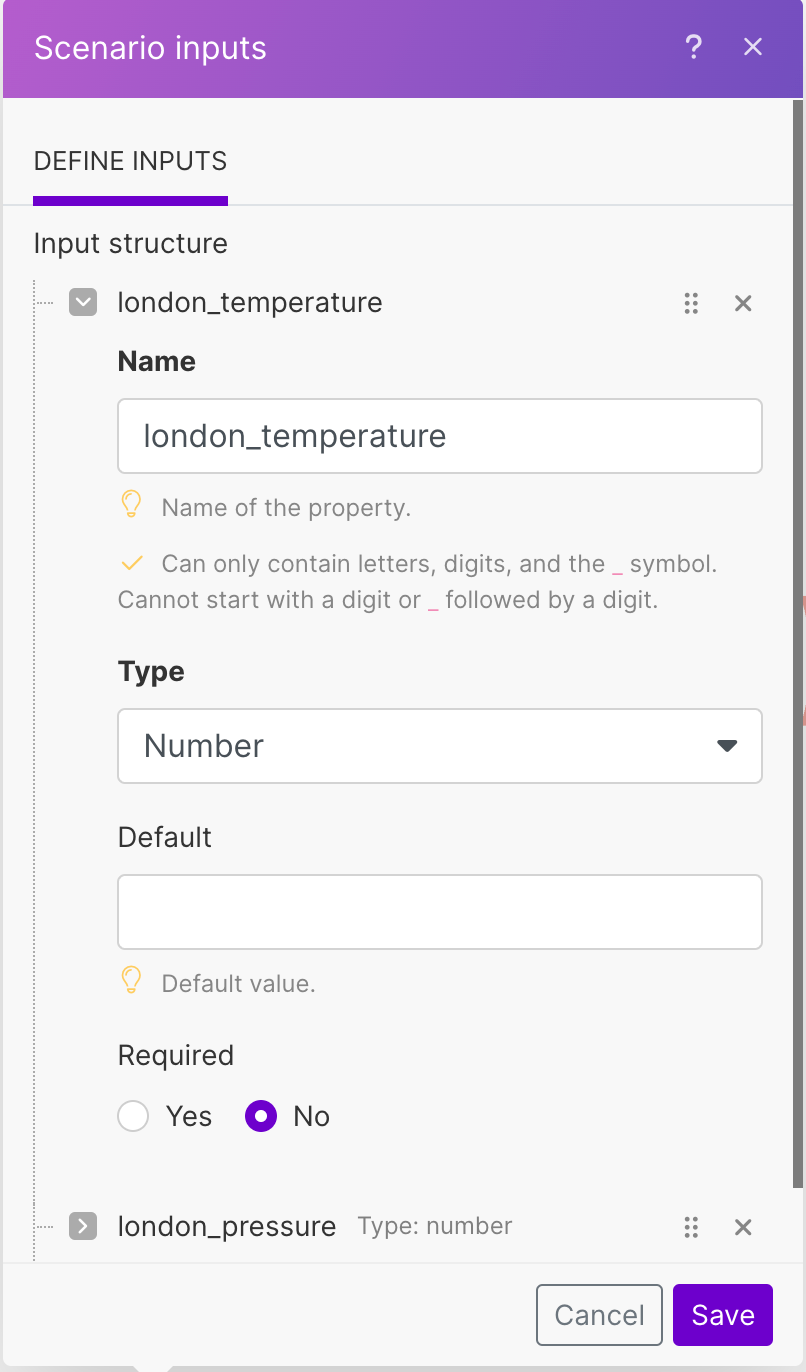
- Set up the scenario inputs for the scenario. The scenario will expect the
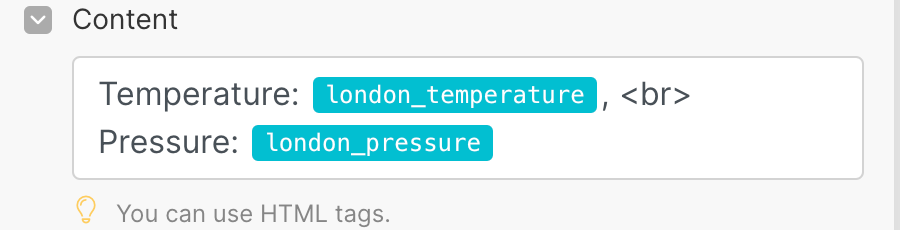
london_temperatureandlondon_pressurevariables as its inputs. - Configure the Send an email module. Use the scenario inputs in the email message.For example:
- Confirm the module settings and save the scenario.
- Create another child scenario.For example, you can use another messaging app if you have created a connectionUnique, active service acces point to a network. There are different types of connections (API key, Oauth…). for it, like the Slack app.
The following steps describe how to use the Scenarios > Run a scenario modules to connect the parent scenario with the child scenarios.
- Go to the first scenario with the Get current weather and Set multiple variables modules.Add to the scenario the Scenarios > Run a scenario module.
- In the Scenario field, select the scenario you want to triggerThe initial event that starts a scenario. It can be an action, a scheduled time, or a custom event, and is essential to define at the beginning of each scenario. with the module. If you are following the example, select the scenario which sends the email notifications.Note that the scenarios are organized in scenario folders.
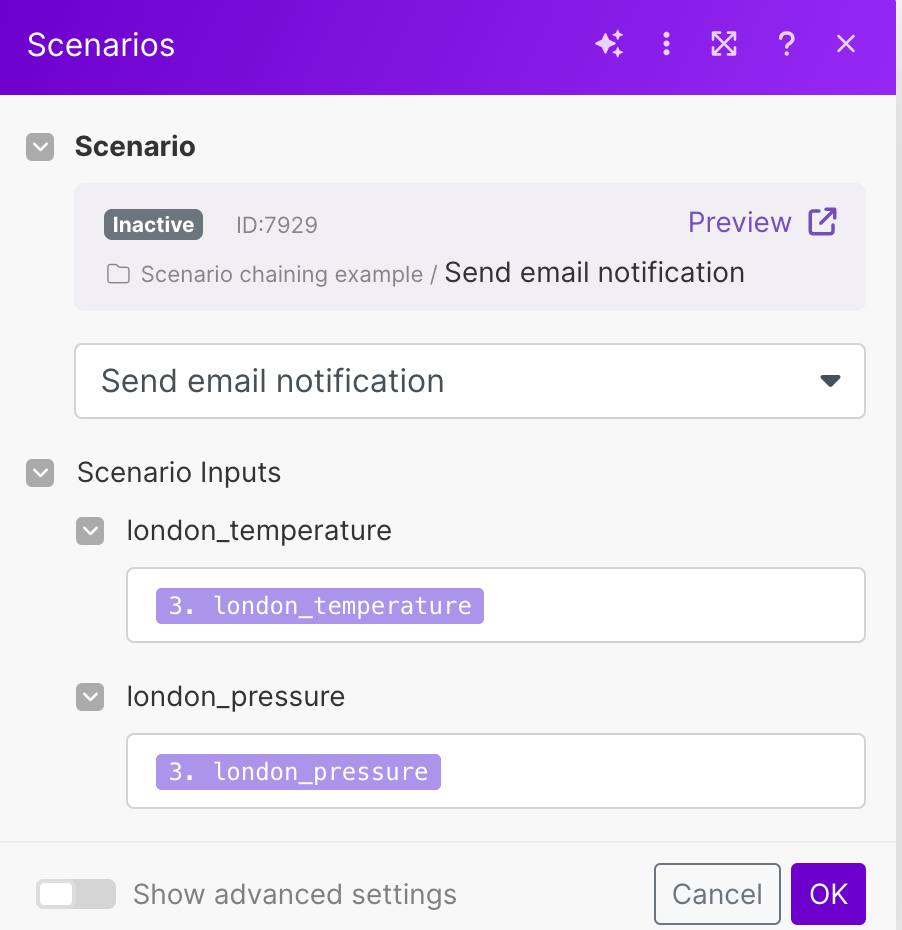
- Make retrieves the scenario inputs of the scenario you select. Map the
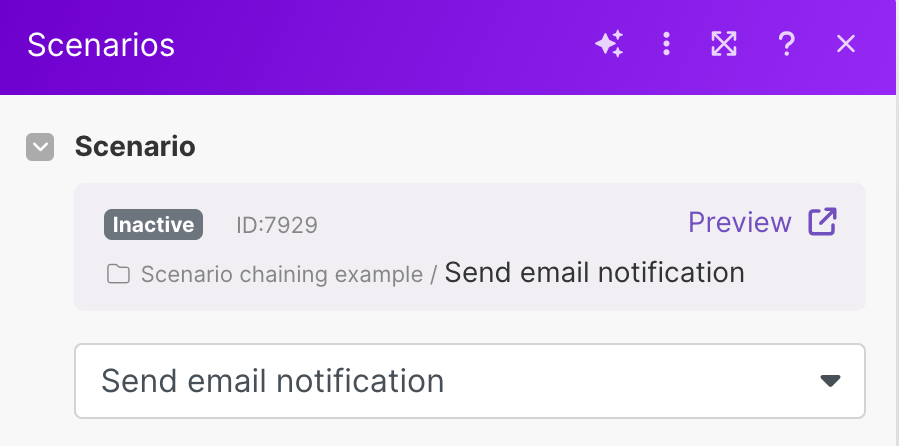
london_temperatureandlondon_pressurevariables to the scenario input fields:Note that at the top of the module settings, there’s the Inactive labelIn Boost.space, a label is a tag that can be added to items within a module. It's a flexible tool used to categorize and organize data, making it easier to customize workflows and processes. informing you that the child scenario is not active. There’s also the child scenario ID, the scenario folder and name and a Preview link that opens a new tab with the child scenario open in the scenario editor.
- Click OK to confirm the settings and save the parent scenario.
- Open the Run a scenario module settings again and click the Preview link to go to the child scenario.Set the child scenario scheduling to On demand. Enable the scenario and save the scenario.
- Repeat the same steps for the second child scenario.
![[Note]](https://docs.boost.space/wp-content/themes/bsdocs/docs-parser/HTML/css/image/note.png) |
Note |
|---|---|
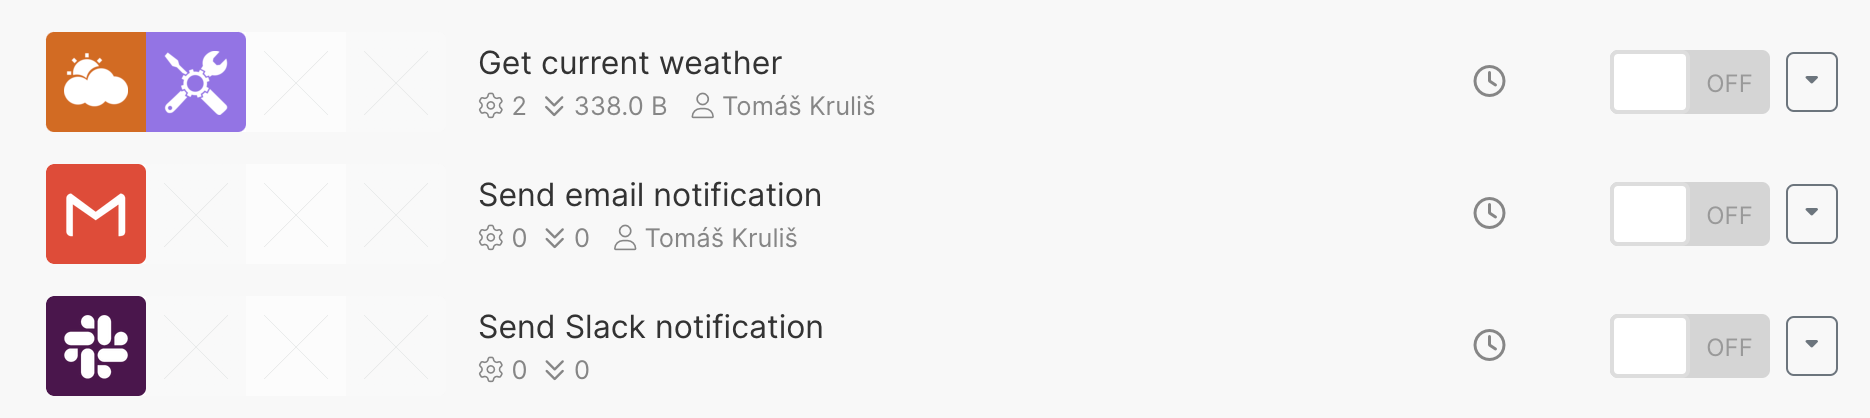
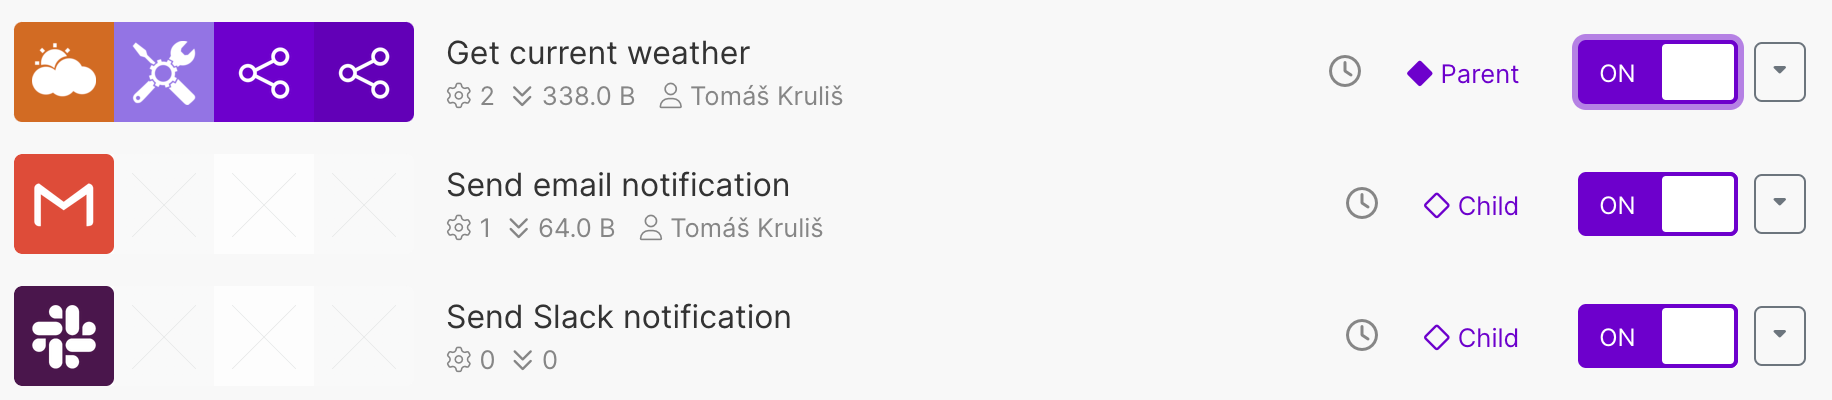
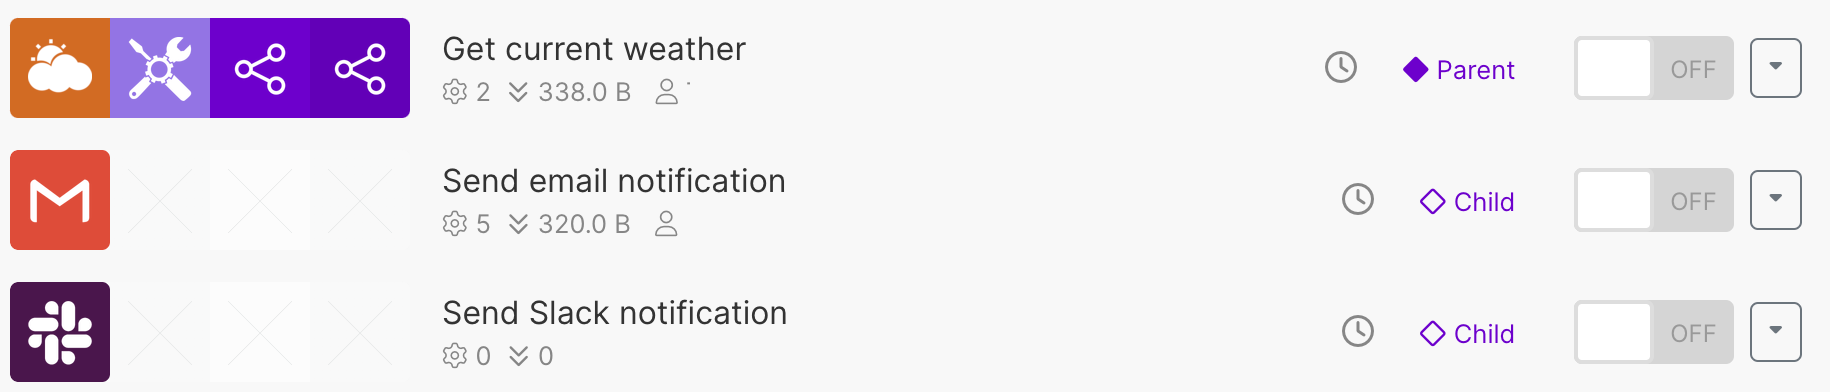
| Note the second to the last column in the scenario list. The column shows whether the scenario is a parent, bridge, or child scenario in a scenario chain. UsersCan use the system on a limited basis based on the rights assigned by the admin. in organizations with the Teams and Enterprise pricing plans can see the column.
See Make pricing for more information. |
In the previous section, we’ve set the scenario scheduling to on demand to have the scenarios enabled for testing without running them in intervals.
![[Warning]](https://docs.boost.space/wp-content/themes/bsdocs/docs-parser/HTML/css/image/warning.png) |
Warning |
|---|---|
| The scenarios in the scenario chain have independent scheduling. A child scenario can trigger with its own scheduling, in addition to being triggered by a parent or a bridge scenario.
For example, if the child scenario in a scenario chain runs every two hours, but the parent (or bridge) scenario triggers it every hour, then the child scenario will run four times in three hours:
When setting scenario scheduling for scenarios in the scenario chain, keep in mind that the scheduling of the linked scenarios combines. If you want to run scenarios in a chain in a sequence, use on demand scheduling. |
In the example, set scheduling for the parent scenario, but keep the child scenarios running on demand.
The child scenarios use the scenario inputs from the parent scenario with no default values. If the child scenarios would run with a schedule on their own, they wouldn’t contain any values for the scenario inputs.
|
Note |
|---|---|
| You can prevent running a scenario with empty scenario inputs by setting the scenario input field as Required and the scheduling to On Demand. |
The Run a scenario module from the Make app enables you to trigger a scenario run from another scenario. The Run a scenario module from the Scenarios app works similarly.
The major advantage of scenario chaining over triggering a scenario with the Make app is the management utility and auditability of scenario chaining. You can view connected scenarios in the relation tree tab and you can see chained scenarios in the scenario list and history.
For a full comparison of the individual approaches to trigger a scenario from another scenario, check the comparison section.
To start using scenario chaining instead of the Run a scenario module from the Make app:
- Go to the scenario that uses the Make > Run a scenario module.
- Swap the Make > Run a scenario module for the Scenarios > Run a scenario module.
- In the Scenario field, select the scenario you want to trigger.
- Optional: If you transfer data between scenarios, map scenario inputs to the Run a scenario module.
- Review the scheduling of the child scenario. The child scenario can have its own scheduling in addition to being triggered from the scenario chain.You can access the child scenario from the Preview link in the Run a scenario module settings.
Check the relation tree tab in the details of any of the scenarios. The relation tree tab is now showing two scenarios.
The parent scenario is the scenario that contains the Run a scenario module, and the child scenario is the scenario triggered by the module.
With the HTTP > Make a request module, you can send data to a WebhooksA webhook is a way for an app to send real-time information to a specific URL in response to certain events or triggers. > Custom webhookA webhook is a way for an app to send real-time information to a specific URL in response to certain events or triggers. module. The Scenarios > Run a scenario module works differently. Run a scenario module sends data to a scenario through scenario inputs, instead of using the HTTP app.
The major advantage of scenario chaining is the management utility and auditability of scenario chaining. You can view connected scenarios in the relation tree tab and you can see chained scenarios in the scenario list and history.
You can also use the scenario inputs to validate the data you send to the child scenario instead of checking the data after the webhook receives them.
For a full comparison of the individual approaches to trigger a scenario from another scenario, check the comparison section.
To start using scenario chaining instead of the HTTP and Custom webhook modules:
- Go to the scenario with the HTTP > Make a request module.
- Swap the HTTP > Make a request module for the Scenarios > Run a scenario module.
- In the Scenario field, select the scenario you want to trigger.
- Optional: Set up scenario inputs to transfer data from the parent scenario to the child scenario. Make will evaluate the structure of the inputs before running the scenario, which increases the reliability of the scenario chain.
Note Skip this procedure if you want to use the Run a scenario module only to trigger the child scenario. - Go to the child scenario. You can use the Preview button in the Run a scenario module settings.
- Set the structure of the scenario inputs. You can set the input structure manually, or you can use the Collection data type and generate the input structure from a sample of the data.Check the scenario inputs documentation to learn more.
- Go to the parent scenario.
- Map the data for the scenario inputs to the Run a scenario module.
- Go to the child scenario and replace mappings from the custom webhook with scenario inputs.
- Remove the Custom webhook module from the child scenario.
![[Caution]](https://docs.boost.space/wp-content/themes/bsdocs/docs-parser/HTML/css/image/caution.png)
Caution Check the child scenario mappings again to make sure there are no missing values. - Review the scheduling of the child scenario. The child scenario can run on demand when triggered from the parent scenario, or can have its own scheduling in addition to being triggered from the scenario chain.
Check the relation tree tab in the details of any of the scenarios. The relation tree tab is now showing two scenarios.
The parent scenario is the scenario that contains the Run a scenario module, and the child scenario is the scenario triggered by the module.
Scenario chaining simplifies the management of scenario sequences, where one scenario triggers another. This approach eliminates the need for naming conventions or organizing sequences in folders. Instead, you can easily monitor and manage the scenarios within a scenario chain from multiple places in Make:
|
Note |
|---|---|
The scenario relations, like:
show only to users in organizations with the Pro, Teams, or Enterprise pricing plans. Users in other organizations have to track scenario relations differently. |
- Run a scenario module: When you select a scenario in the Scenarios > Run a scenario module, you can see at the top of the module settings information about the scenario triggered by the module:
You can see:
- whether the scenario is enabled (Active) or disabled (Inactive)
- scenario ID
- the scenario folder name
- the Preview link. Clicking the preview link opens a new browser tab with the linked scenario open in the scenario editor
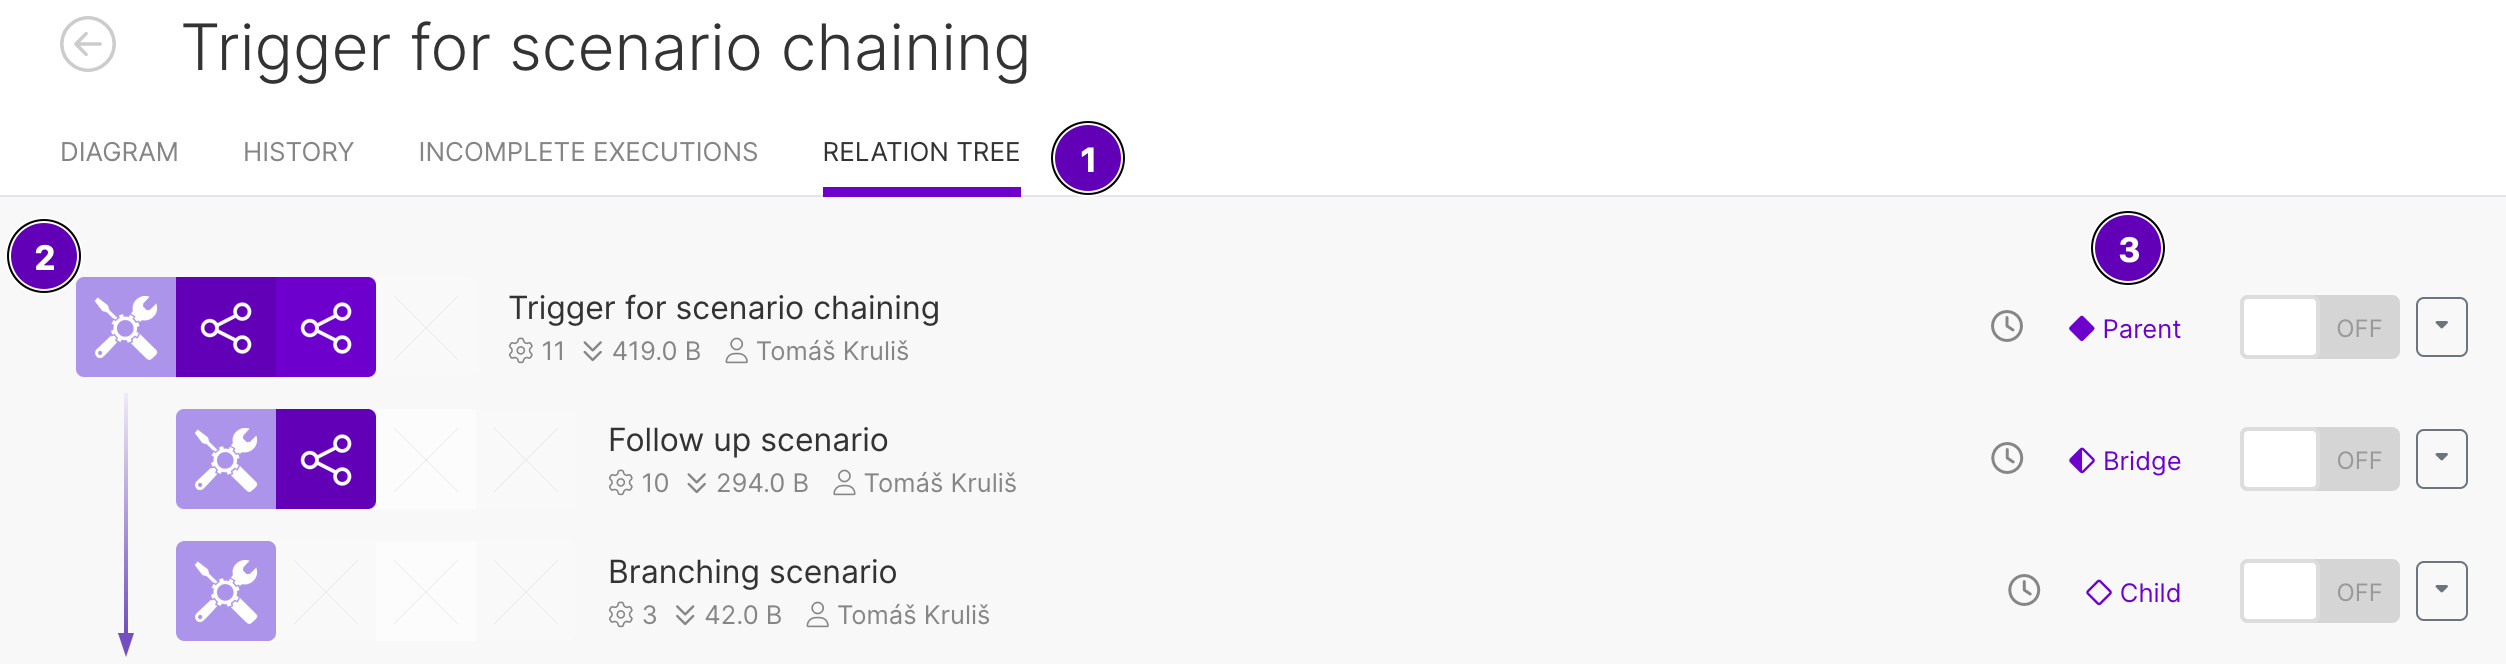
- Relation tree tab: Scenarios that are part of a scenario chain have the Relation tree tab:
- The Relation tree tab shows scenarios directly connected to the currently open scenario in the scenario chain.
- The open scenario is outdented in the scenario relation tree.
- A column in the relation tree shows the relation of the scenario in the scenario chain.
- The scenario list also shows the scenario chain relations:
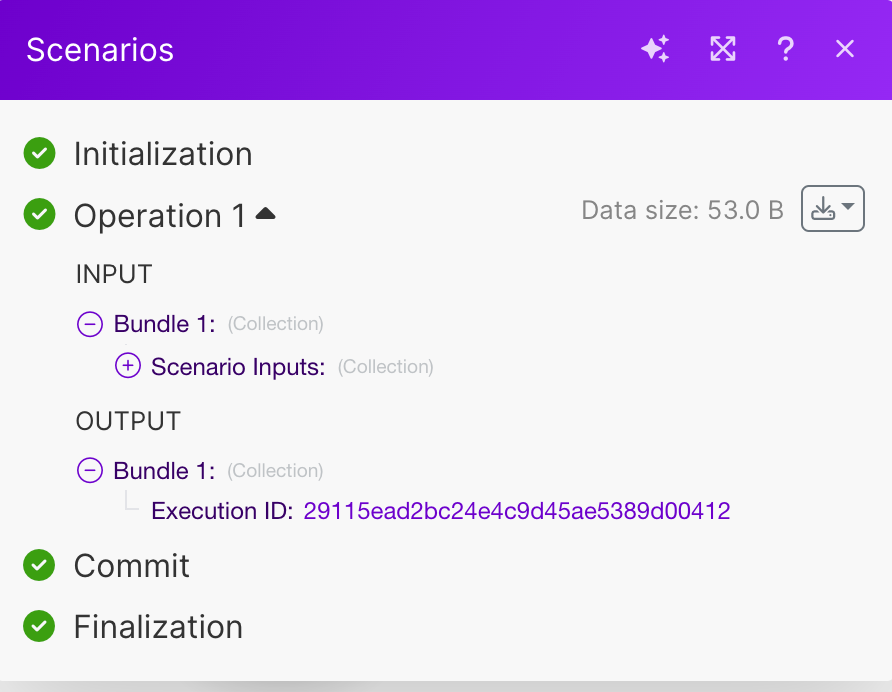
- Bundles output by the Run a scenario module contain a link to the triggered scenario run.
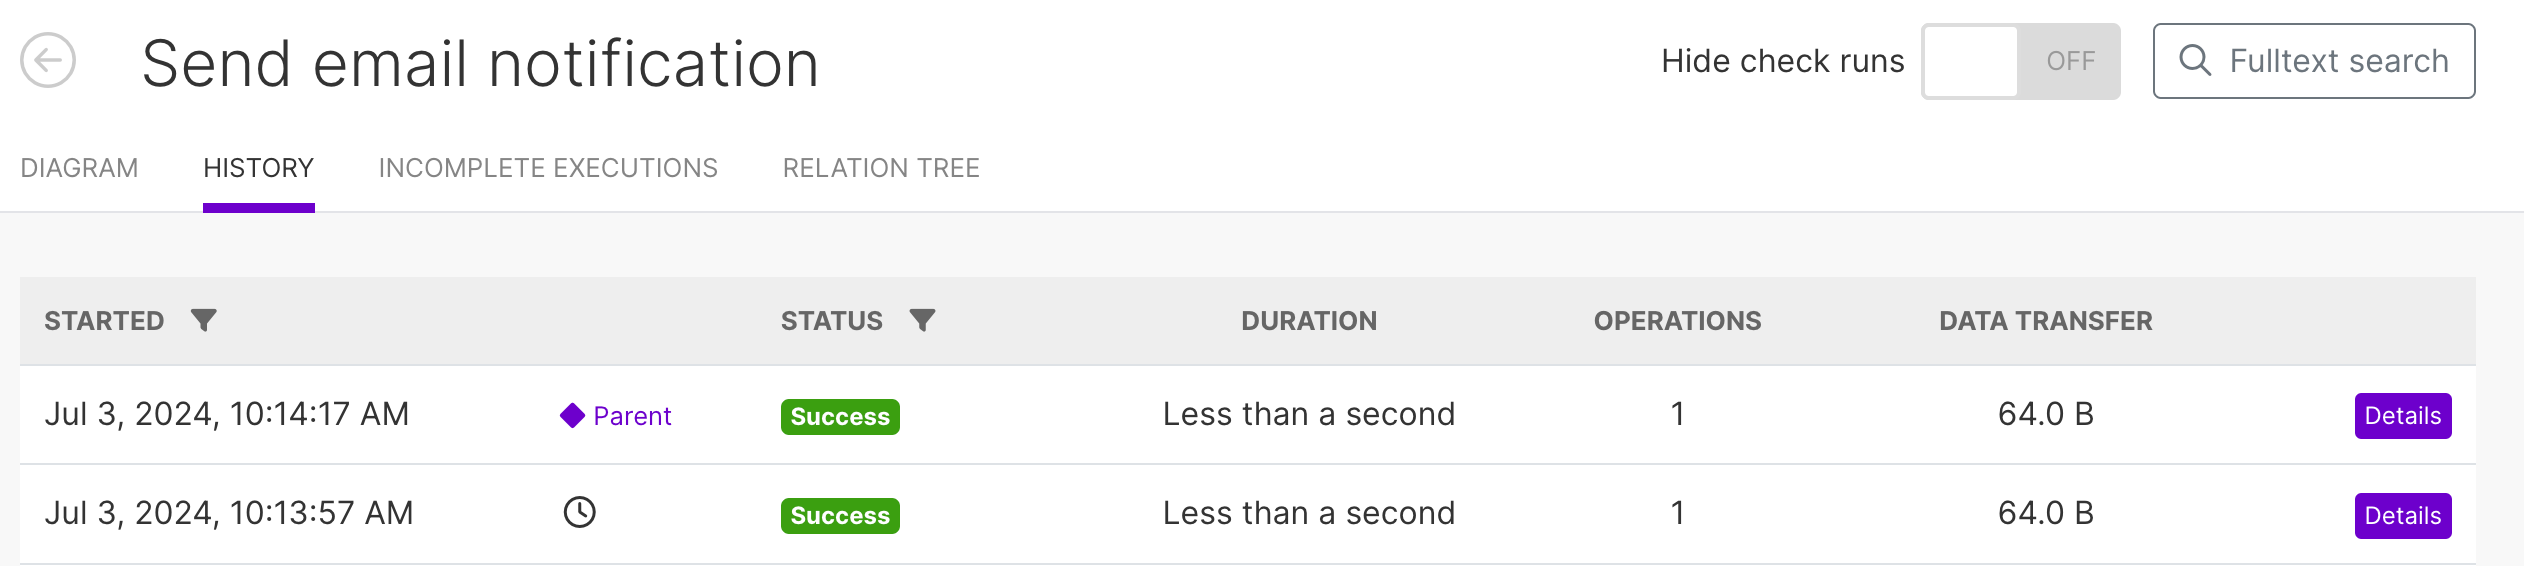
- Scenario history contains a link to the scenario that triggered the scenario run.
Note There is no link if the scenario in the scenario chain runs because of its own scheduling instead of being triggered by a parent or a bridge scenario.
To add a scenario to an existing scenario chain:
- Create the scenario you want to add to the chain.
- Go to the scenario from which you want to trigger the new scenario.
- In the parent scenario, add the Scenarios > Run a scenario module.
- In the Scenario field, select the scenario you want to trigger (the scenario created in step 1).
You connected the scenarios to a scenario chain. Check the Relation tree tab of the added scenario to see the scenario connected to the parent scenario.
|
Note |
|---|---|
| Make sure to review the scenario scheduling and enable the added scenario. |
To remove a scenario from a scenario chain:
- Go to the parent scenario which triggers the scenario you want to remove.
- In the parent scenario, remove the Scenarios > Run a scenario module.
You removed the scenario from a scenario chain. The removed scenario doesn’t have a Relation tree tab anymore and Make doesn’t highlight the scenario as a part of a scenario chain.
If you are a power user of Boost.spaceA platform that centralizes and synchronizes company data from internal and external sources, offering a suite of modules and addons for project management, CRM, data visualization, and more. Has many features to optimize your workflow! IntegratorPart of the Boost.space system, where you can create your connections and automate your processes., you might know of other options on how to connect scenarios into a sequence. The following table compares the other approaches with scenario chaining:
| Scenario chaining | Make app: Run a scenario | Trigger a webhook with the HTTP app | |
|---|---|---|---|
| Scenario triggering | Scenarios > Run a scenario | Make > Run a scenario | HTTP > Make a request the follow-up scenario has to start with a webhook module |
| Setting next scenario | Select from a list of scenarios, categorized in folders.
The scenario has to be in the same team. |
Search scenarios available through the Make app connection.
You can run scenarios in any organization or team to which you have access. |
You have to know the webhook URL.
You can trigger any webhook if you know its URL. |
| Sending data | Use the scenario inputs to accept data from the previous scenario. | Use the scenario inputs to accept data from the previous scenario. | Send the data in the HTTP request body or in the query parameters. |
| Scenario sequence management |
|
There are no dedicated management options.
You can put sequence scenarios in a dedicated folder, use custom scenario properties, or create your own naming convention. |
There are no dedicated management options.
You can put sequence scenarios in a dedicated folder, use custom scenario properties, or create your own naming convention. |
| Scenarios running in parallel | You can trigger the next scenario in a chain before it finishes it’s current run.
You can have multiple scenarios running in parallel. |
You can have multiple scenarios running in parallel. | You can run webhook-triggered scenarios in parallel. |
Scenario chaining has certain feature limitations to help you avoid creating complex or unmanageable chains that could result in infinite loops. These limitations are as follows:
- You cannot use the Run a scenario module to trigger the current scenario itself.
- You cannot form a circular scenario chain. If a scenario is already part of a scenario chain, you cannot add it again to the same chain.
- You cannot connect scenarios from different teams. You can only create a scenario chain from scenarios within the same team.