- Bulk Import Records into Boost.space Using API
Bulk Import Records into Boost.space Using API
This guide shows how to bulk import recordsIn Boost.space, a record is a single data entry within a module, like a row in a database. For example, a contact in the Contacts module or a task in the Tasks module. into Boost.spaceA platform that centralizes and synchronizes company data from internal and external sources, offering a suite of modules and addons for project management, CRM, data visualization, and more. Has many features to optimize your workflow! using a simple automation scenarioA specific connection between applications in which data can be transferred. Two types of scenarios: active/inactive.. While this tutorial uses Google Sheets as an example data source, you can use any other source (e.g., CRM, forms, databases, or other apps).
In this scenario, you will:
- Use any data source (Google Sheets is just an example)
- Aggregate records into JSON format
- Generate a data structureWhen you create a data store, you need to create a data structure that formats your data store in Boost.space Integrator. Think of the data store as a spreadsheet and the data structure as the headers. The data structure defines the kind of data (i.e. text, numeric, etc.) that the data store records. You can view and manage your data...
- Send the data to Boost.space via API
This approach allows you to import multiple records in a single operationOperations are tasks in integration scenarios, similar to "operations" in Make.com. Each action, like reading or updating a record, counts as one operation. They’re essential for data syncing between apps and reset monthly. Going over the limit pauses syncing until you add more or upgrade your plan..
Step 1: Prepare Your Data Source
You can use any data source that provides structured data.
In this example, we use Google Sheets with fields like:
- First Name
- Last Name
- etc.
💡 The same logic applies to any other tool — as long as you can map the data fields, the source does not matter.
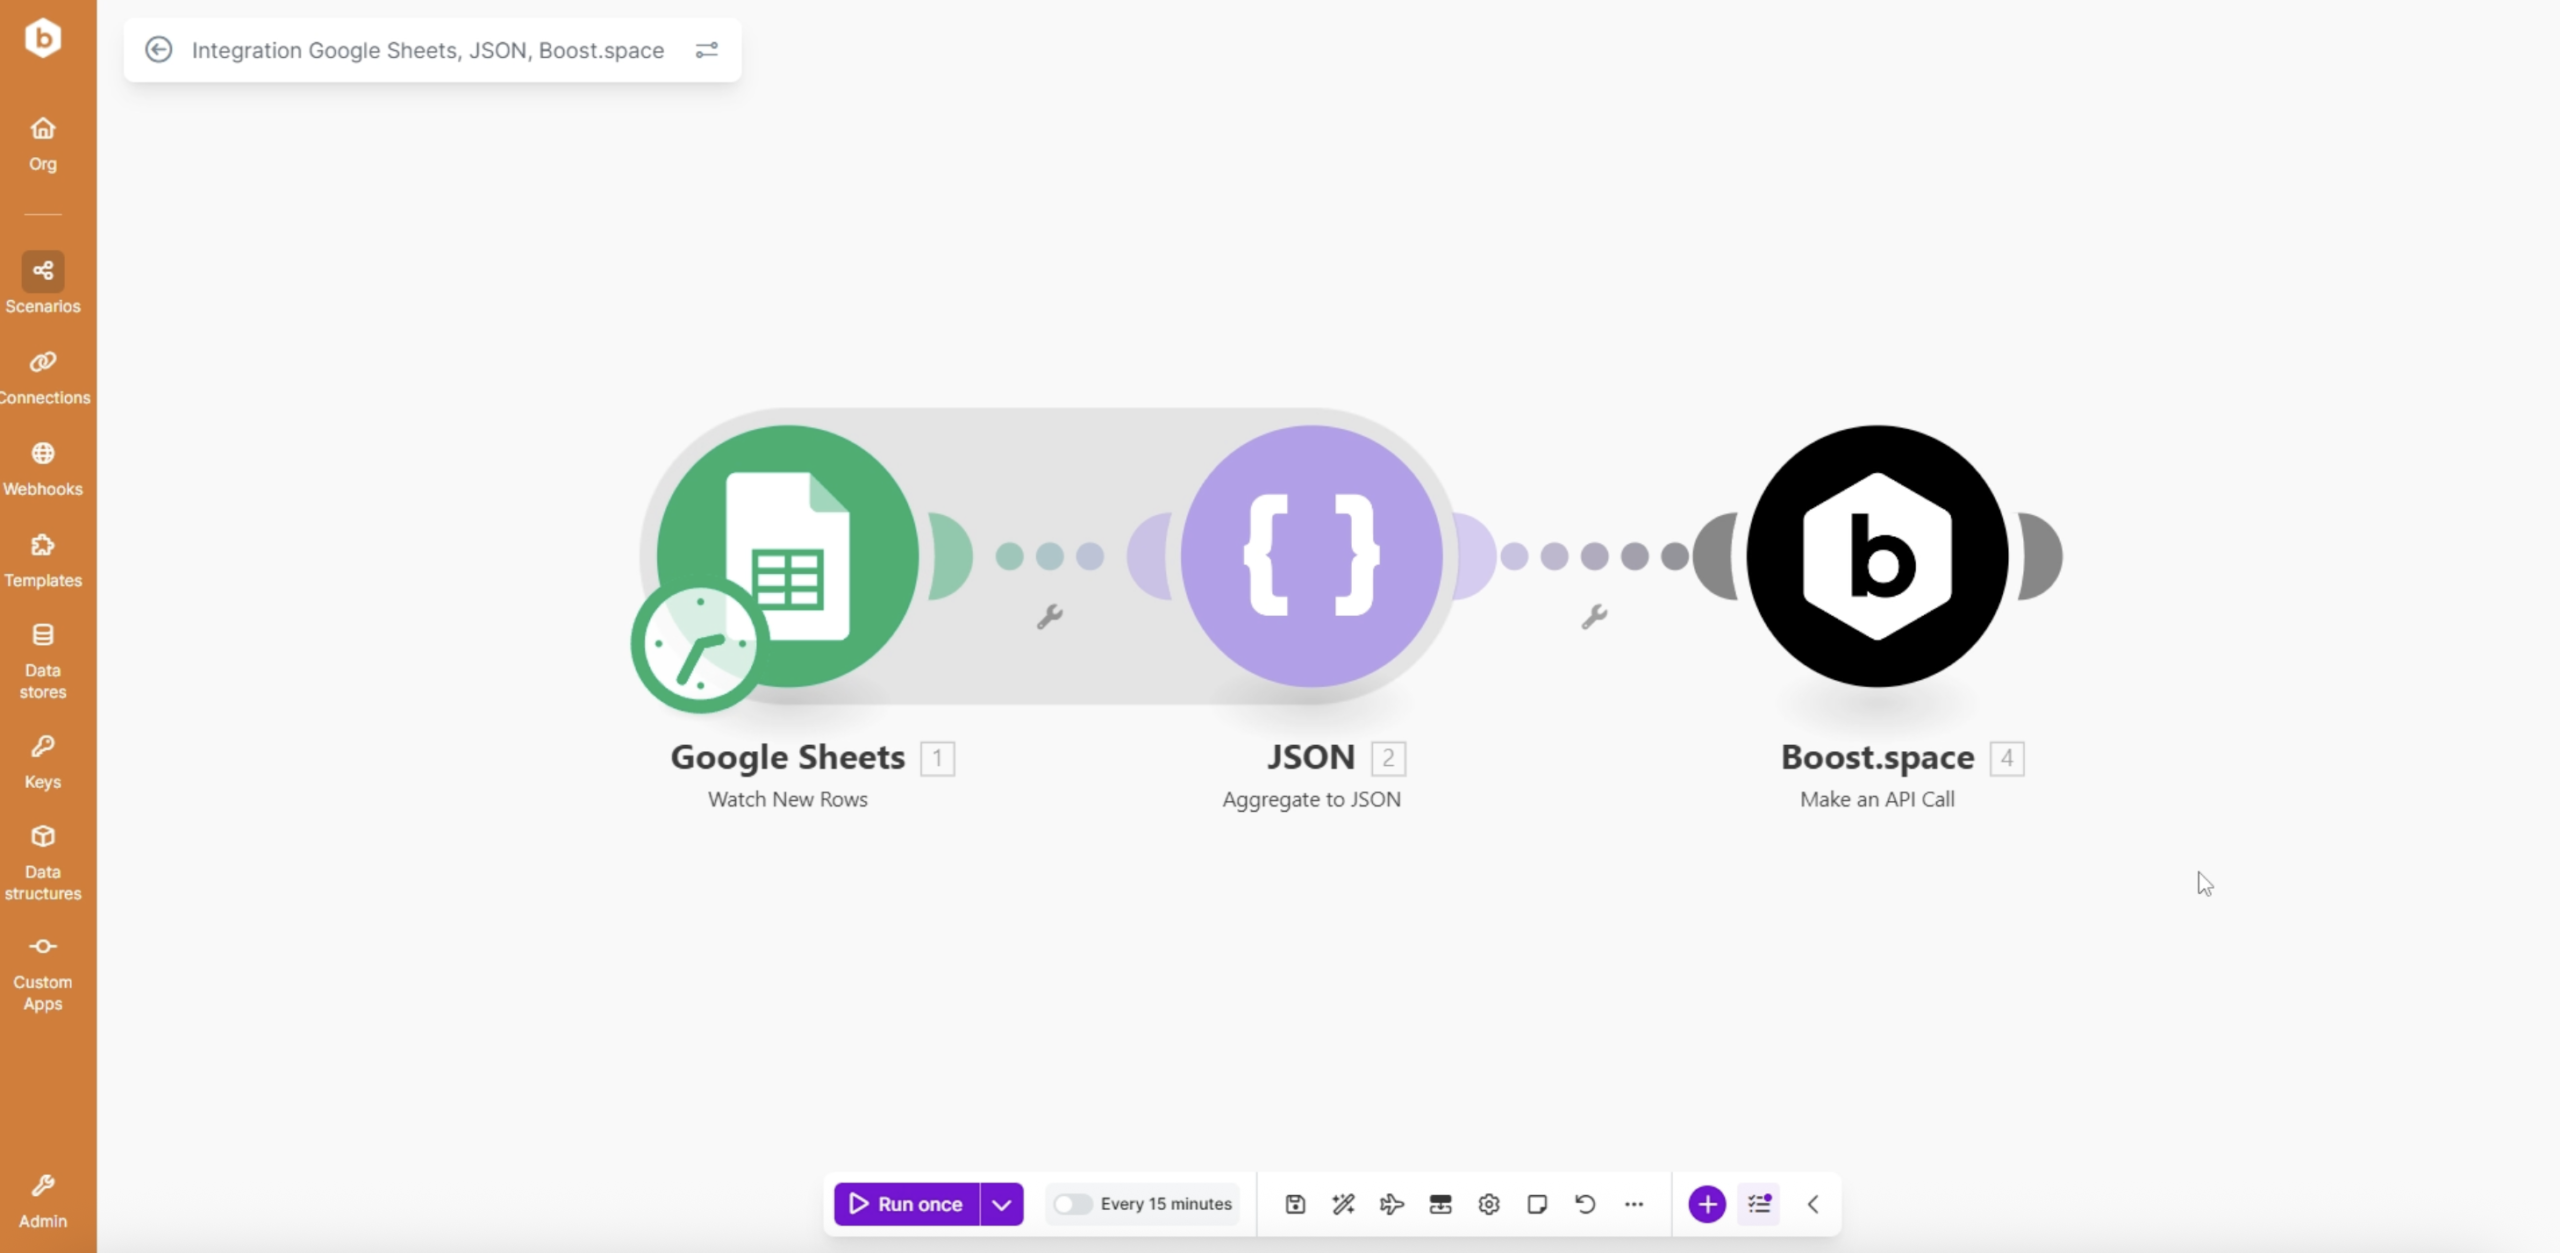
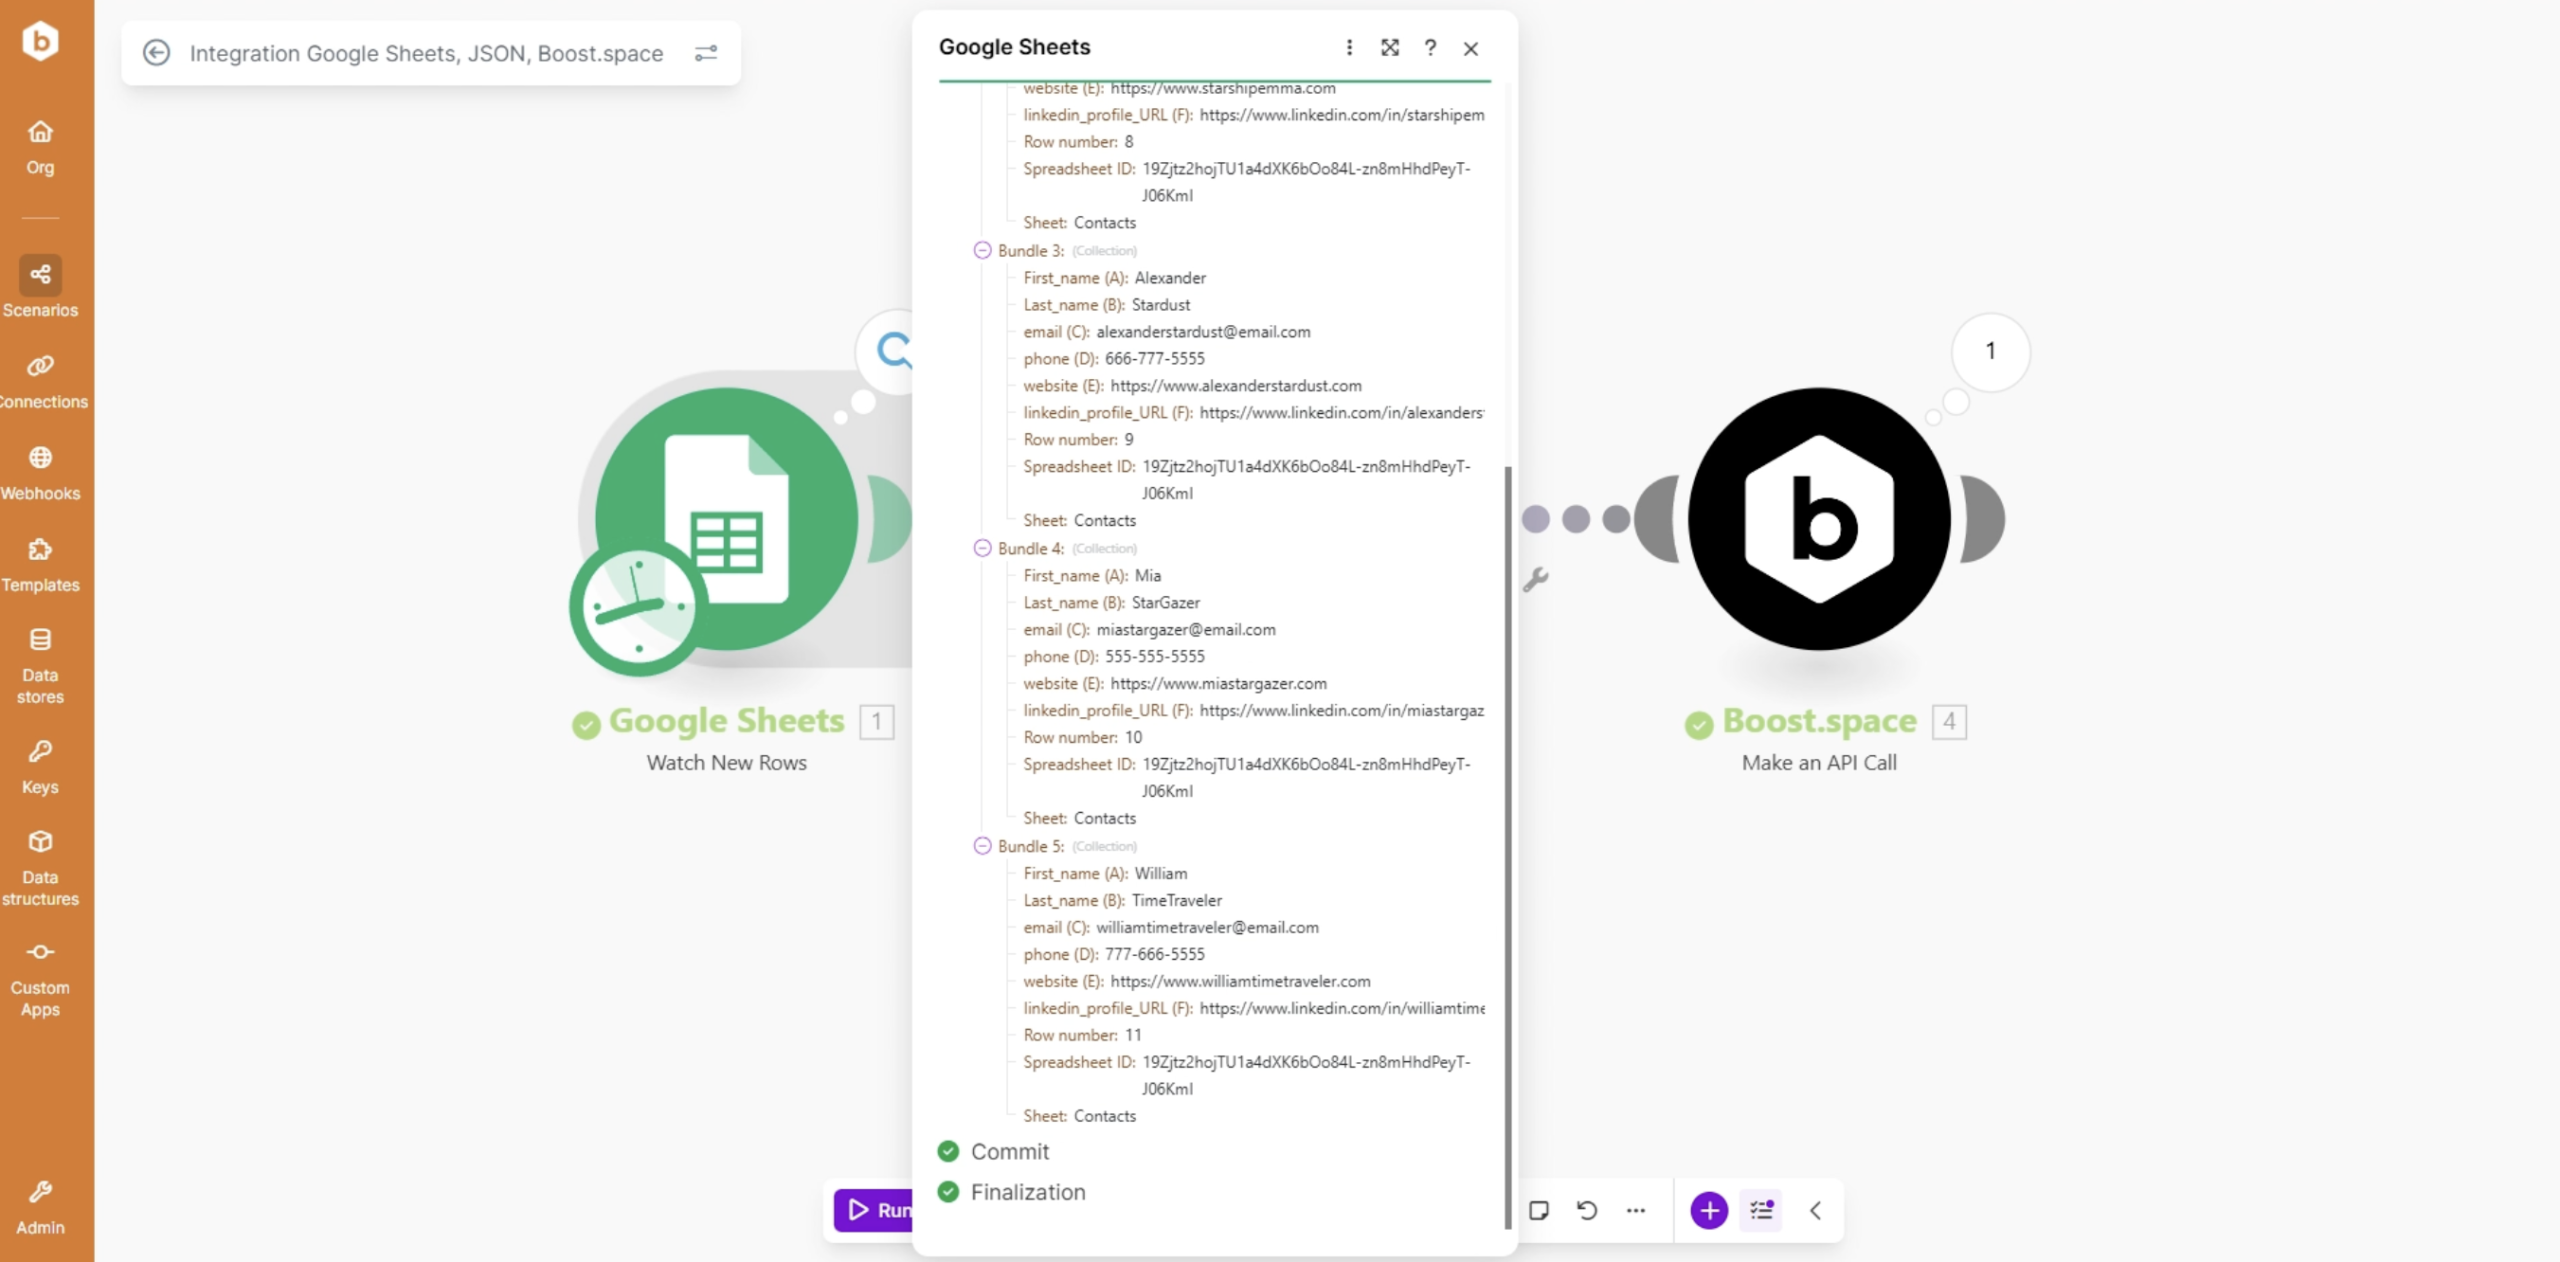
Step 2: Set Up the Scenario
Create a scenario with the following modulesa module is an application or tool designed to handle specific business functions, such as CRM, project management, or inventory. The system's modular architecture allows you to activate only the modules you need, enabling customization and scalability as your business requirements evolve.:
- A triggerThe initial event that starts a scenario. It can be an action, a scheduled time, or a custom event, and is essential to define at the beginning of each scenario. modulea module is an application or tool designed to handle specific business functions, such as CRM, project management, or inventory. The system's modular architecture allows you to activate only the modules you need, enabling customization and scalability as your business requirements evolve. (e.g., Google Sheets – Watch Rows or any other source)
- Aggregate to JSON
- Boost.space Module – Make an API call
This setup collects multiple records and sends them in one request.
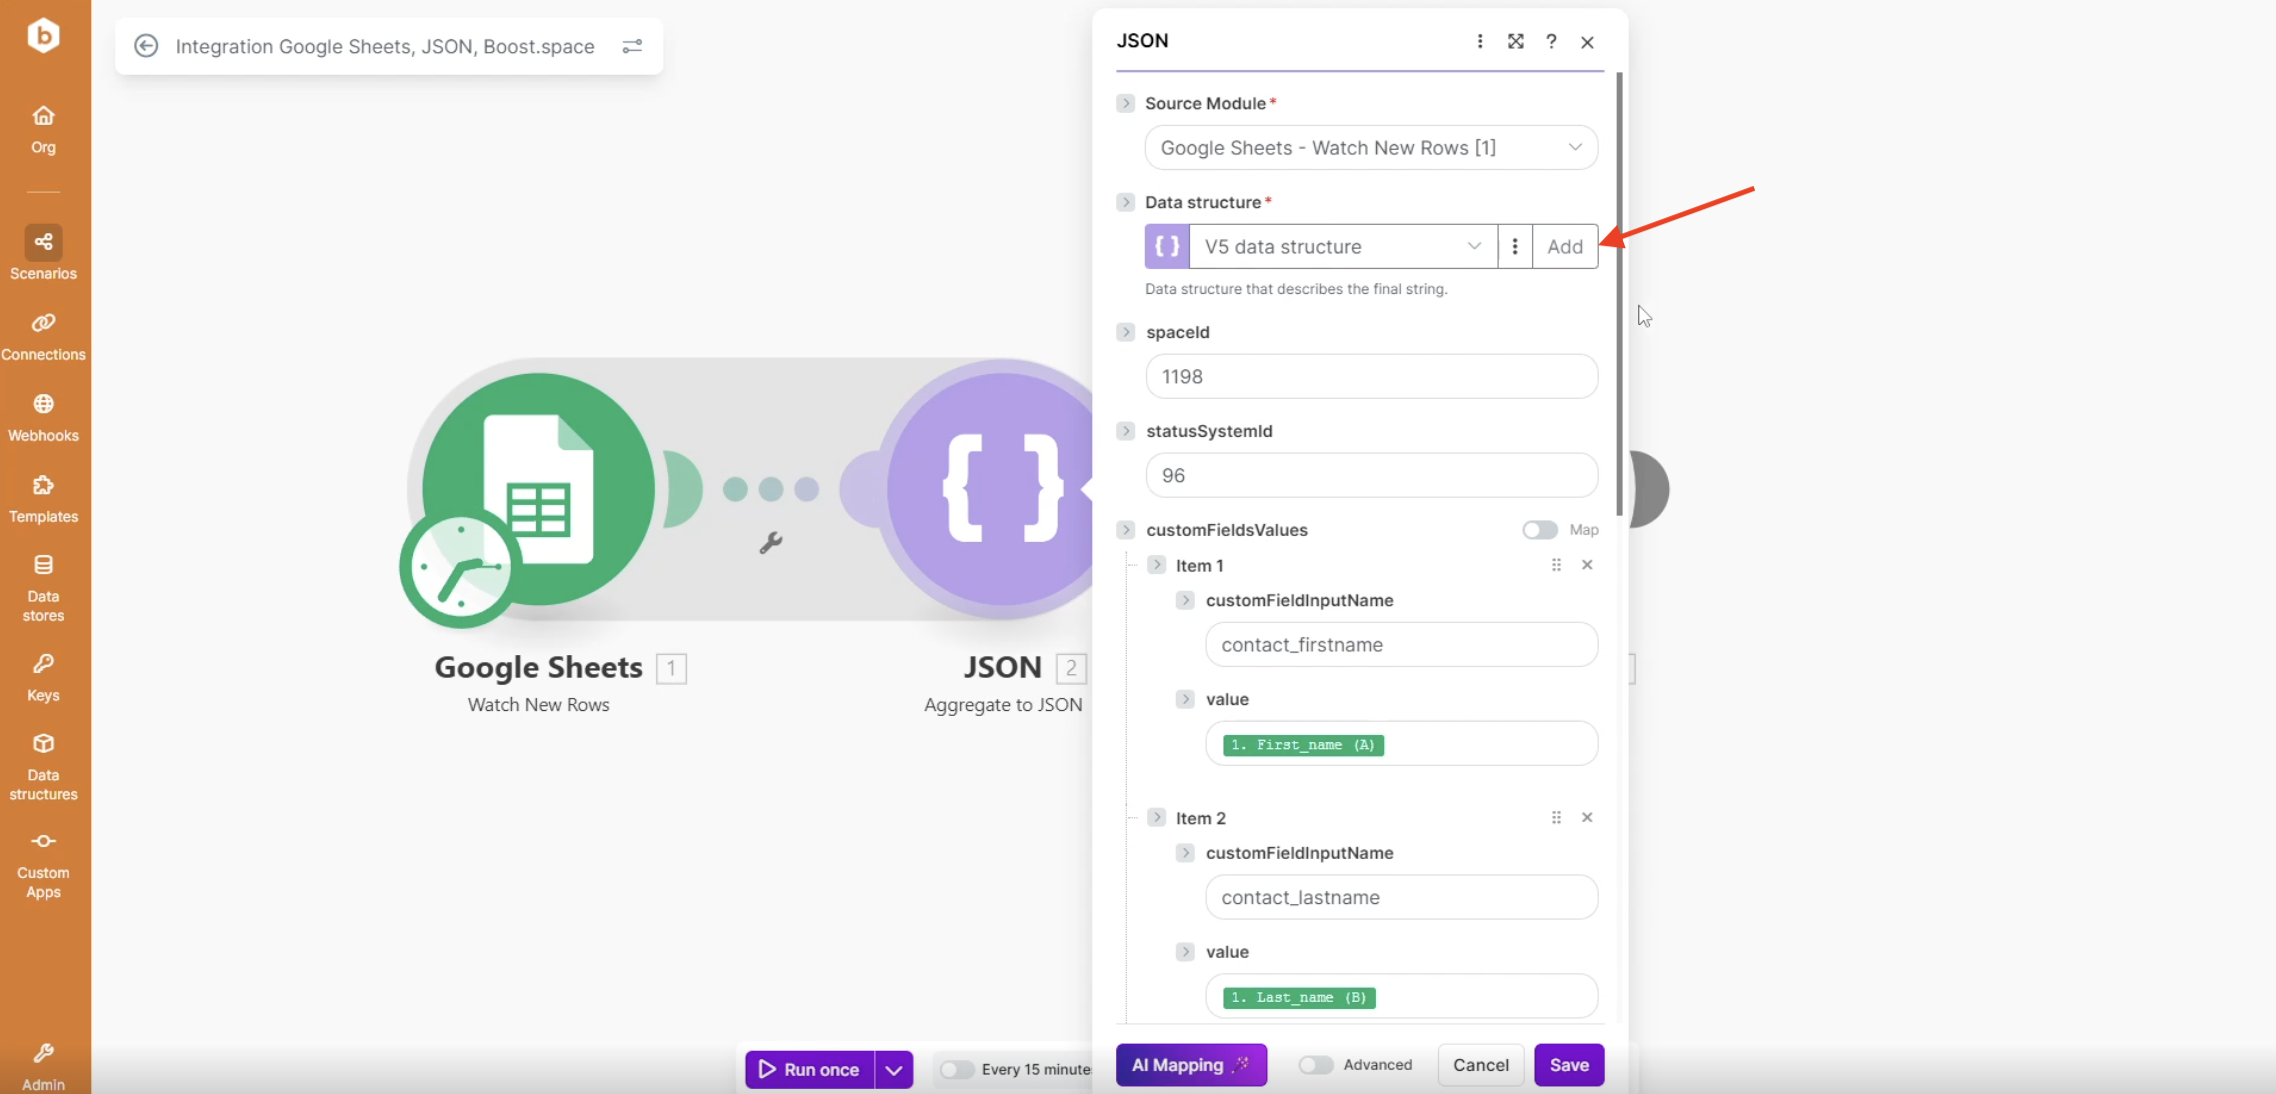
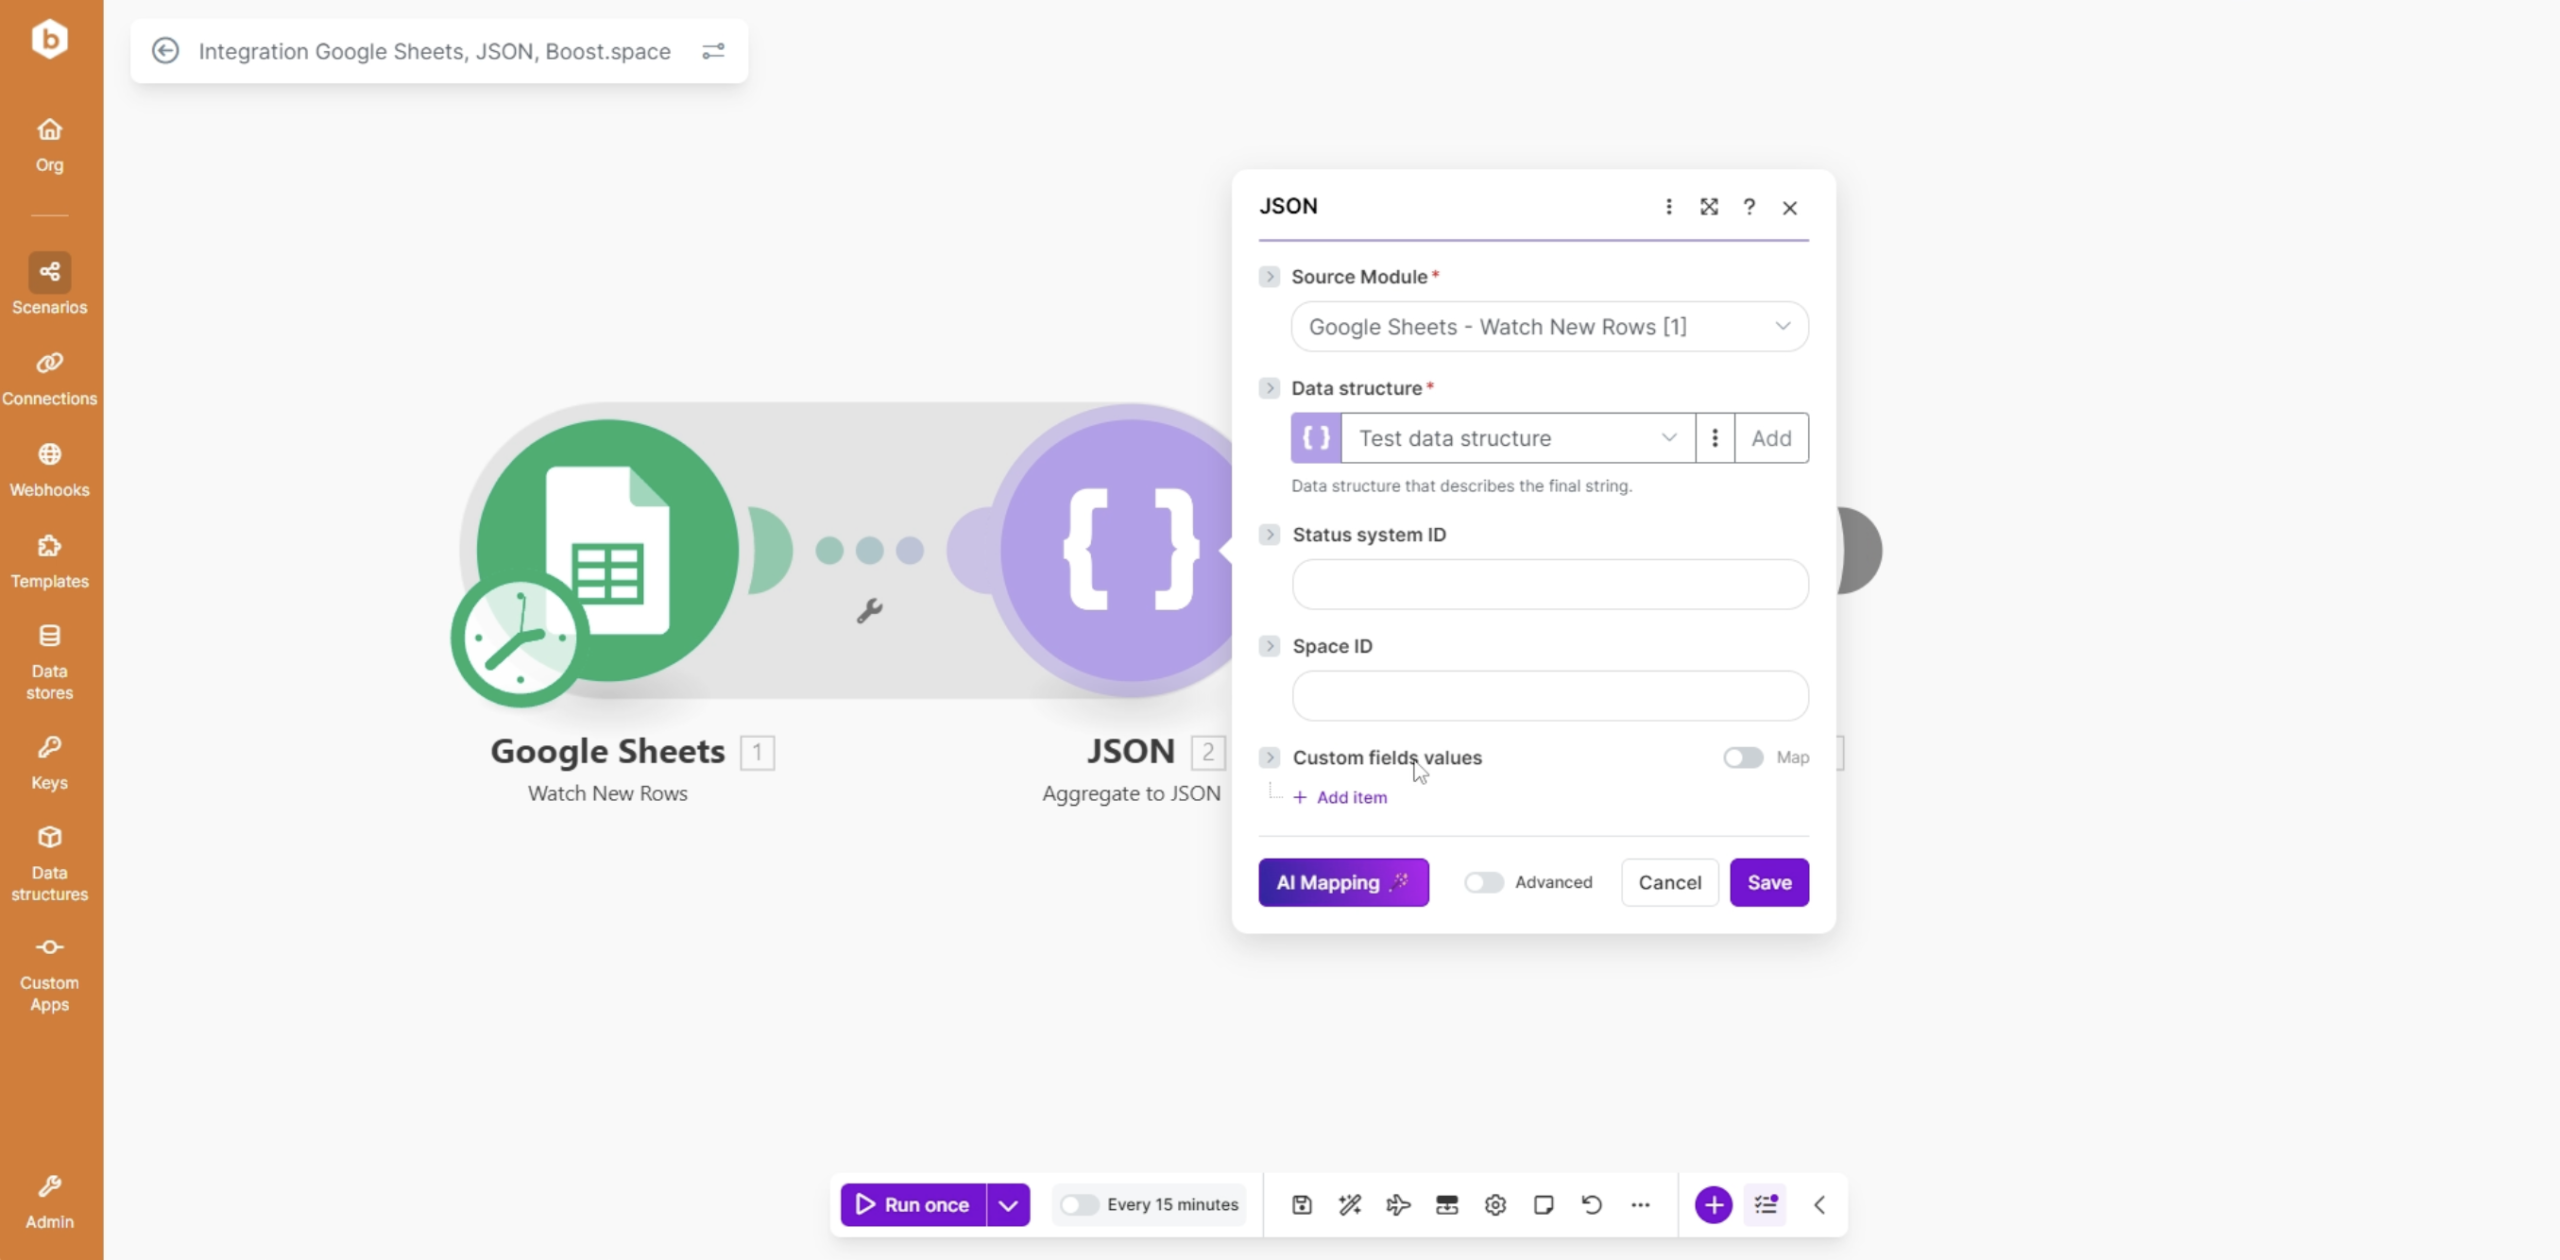
Step 3: Create a Data Structure
In the Aggregate to JSON module:
1. Click Add to create a new data structure
2. Give it a name
3. Click Generate
Use Sample Data
To generate the structure:
- Go to the Boost.space API documentation
- Find: Custom Module section and choose custom module itemItems are rows in records (order/request/invoice/purchase...) and copy the example payload
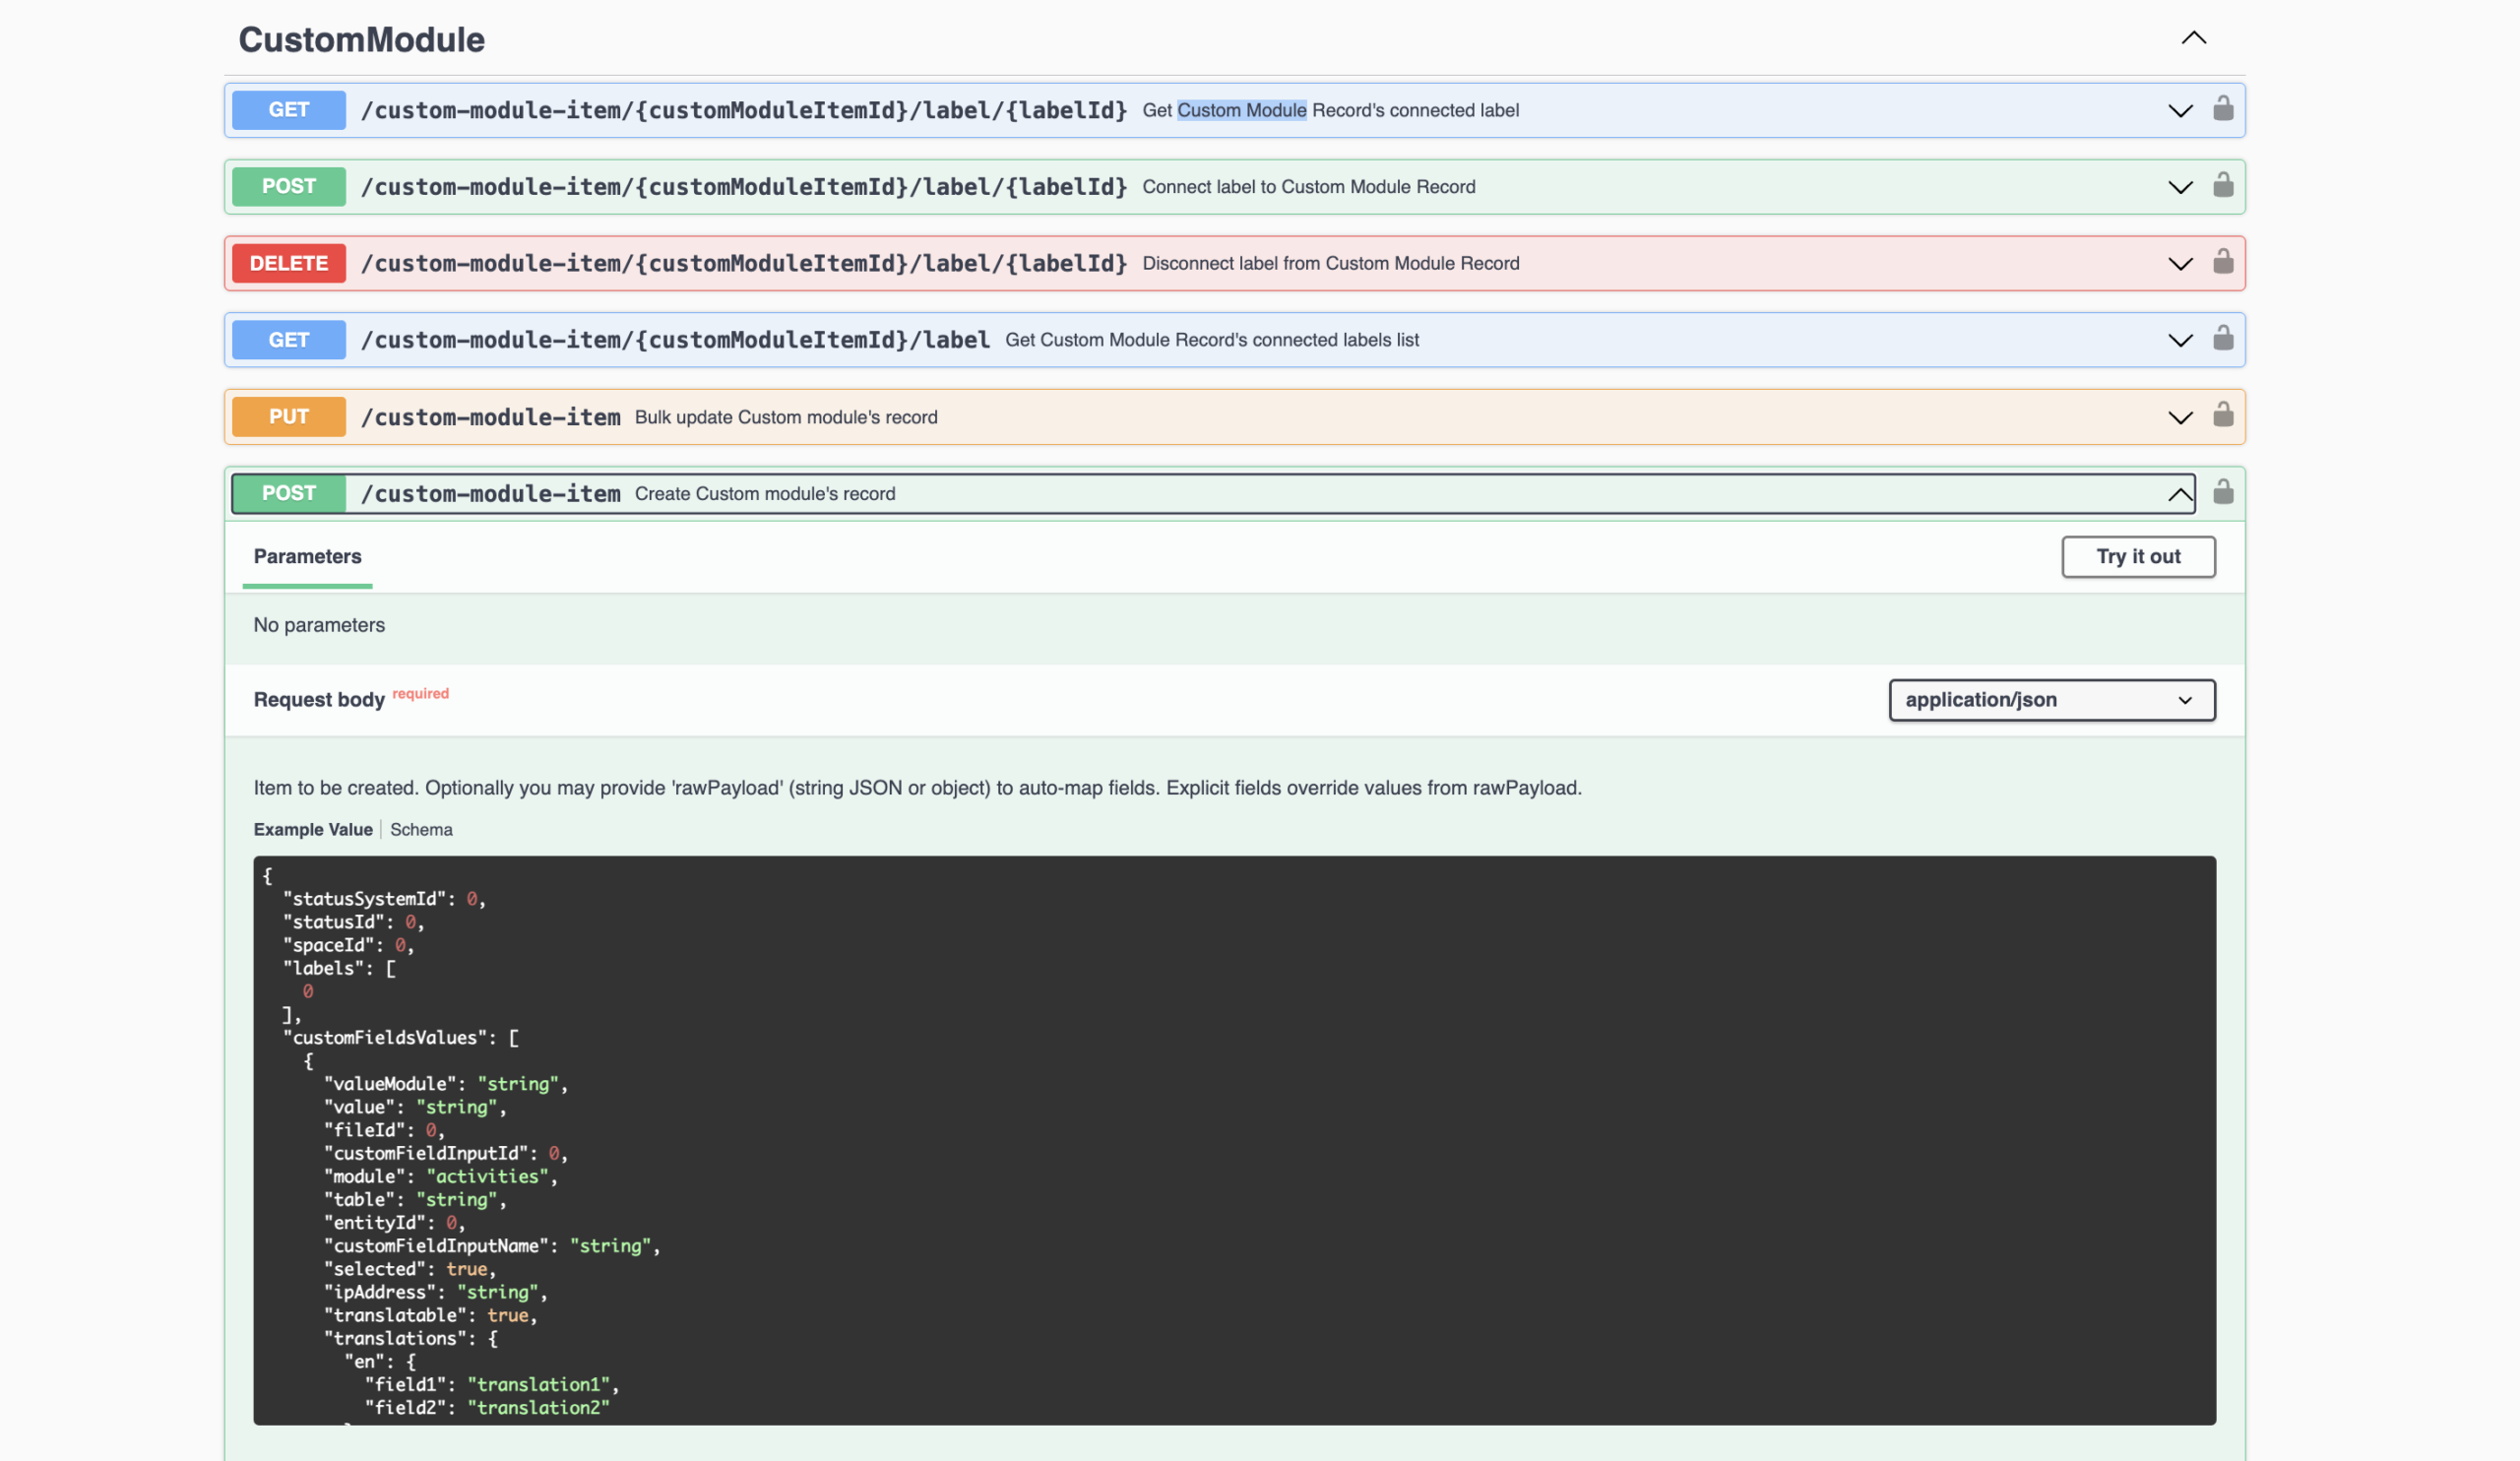
3. Paste it into the sample data field
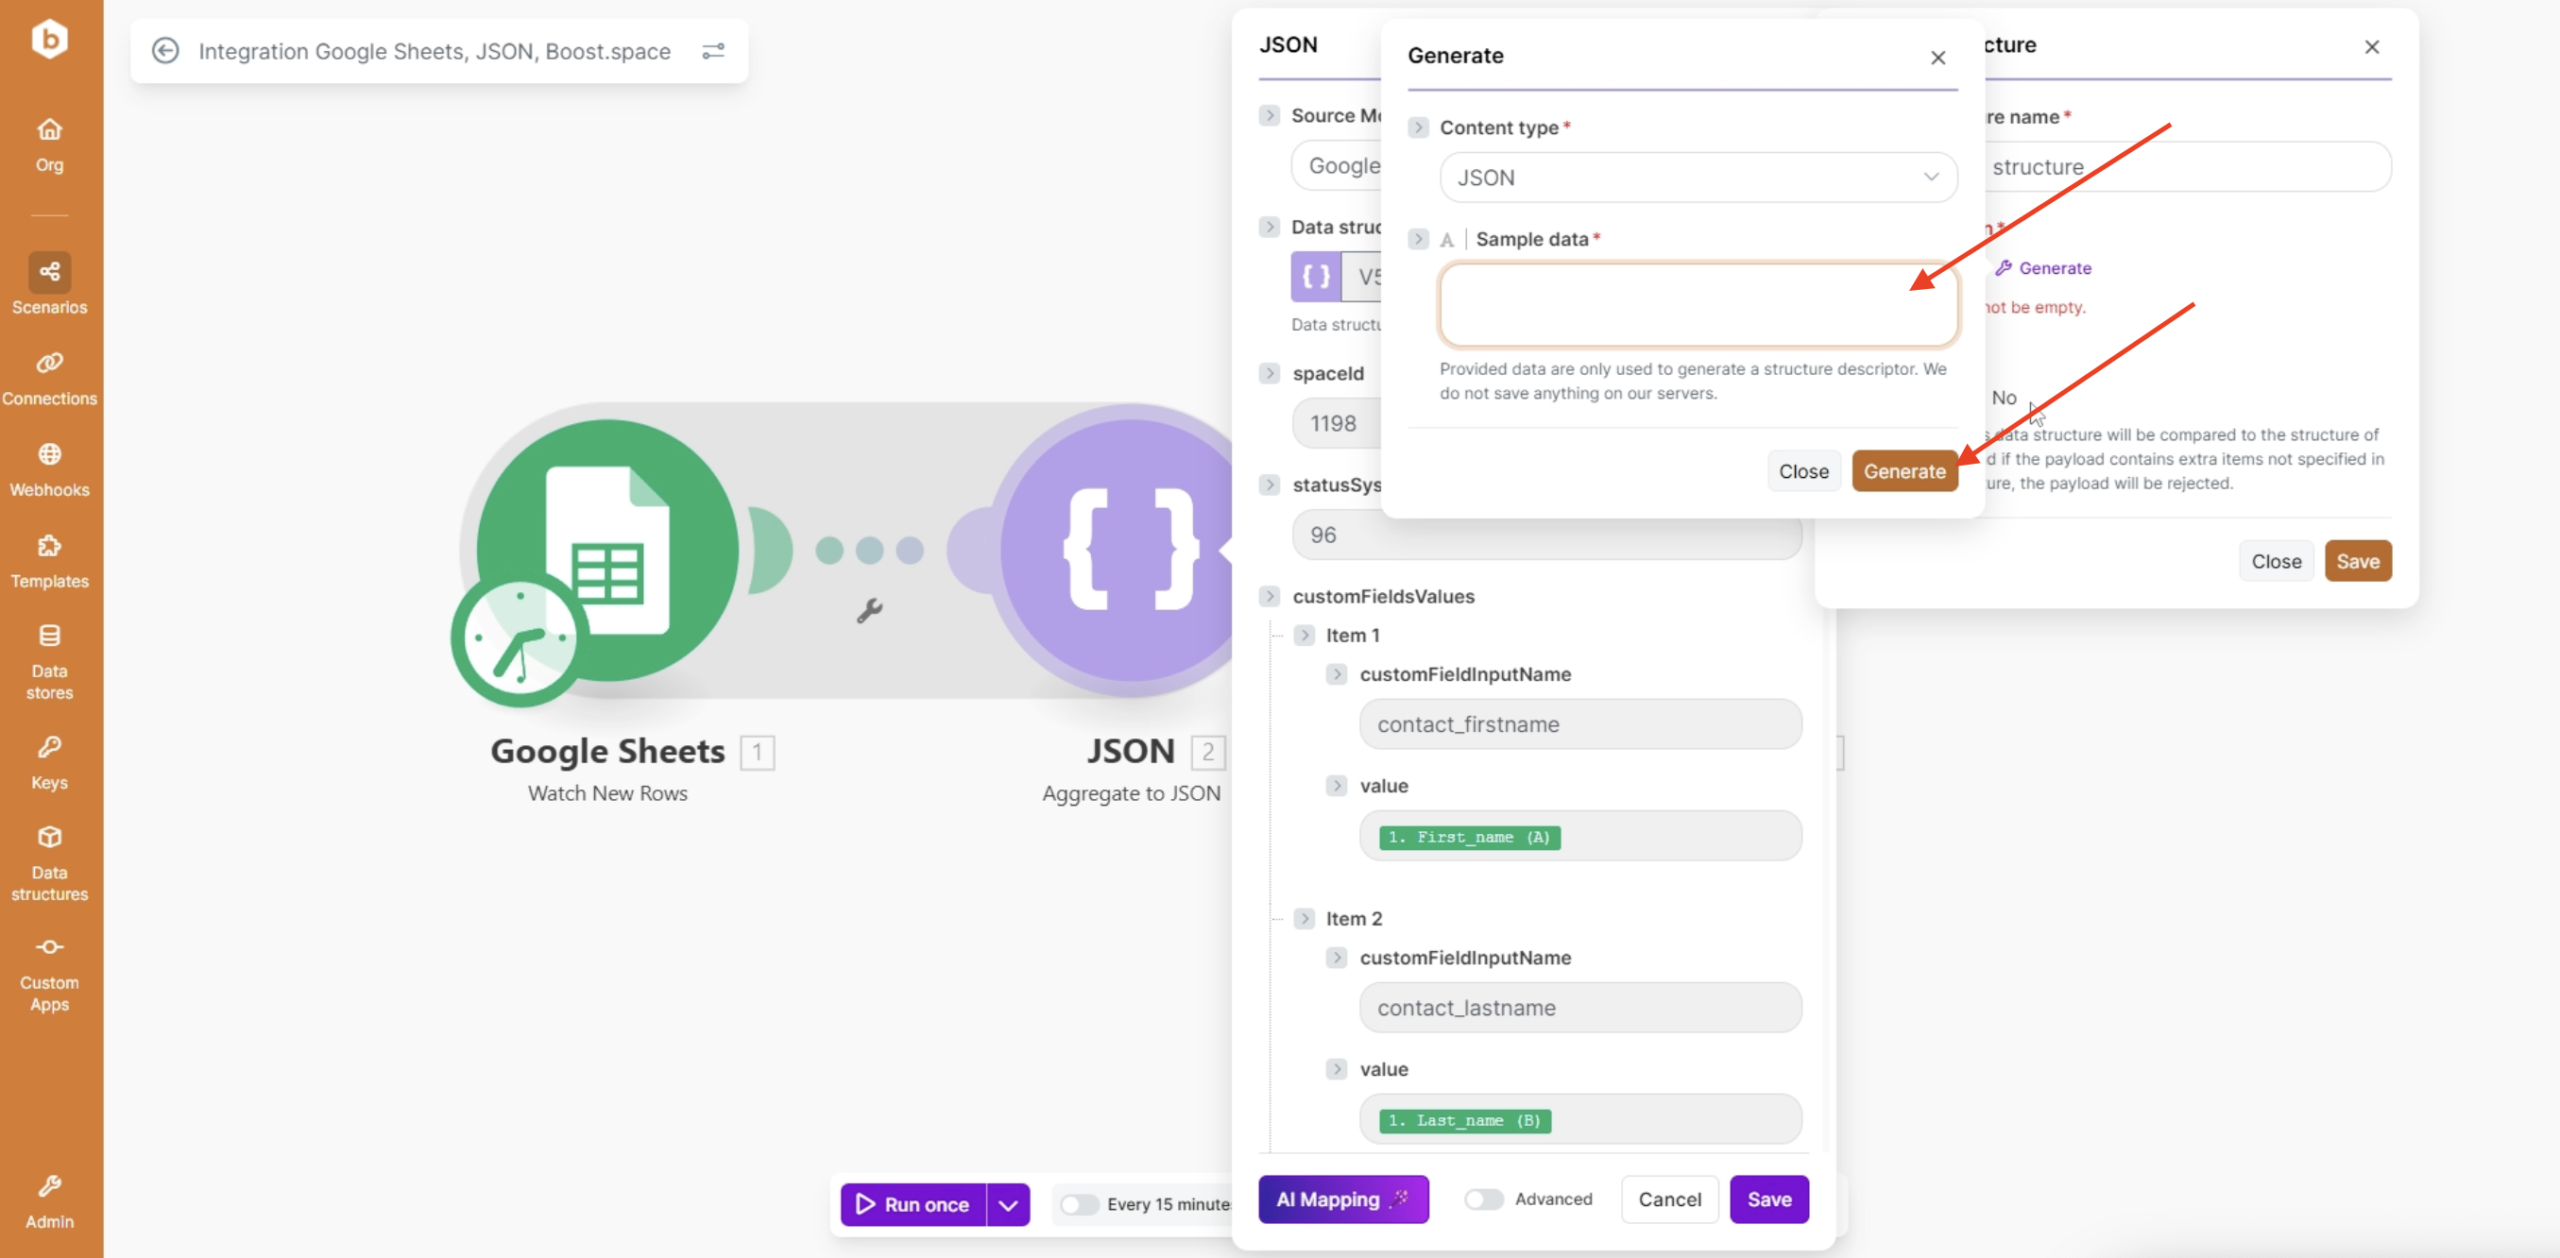
4. Click Generate and your data structure will be generated.
Step 4: Simplify the Data Structure
After generating the structure, remove unnecessary fields.
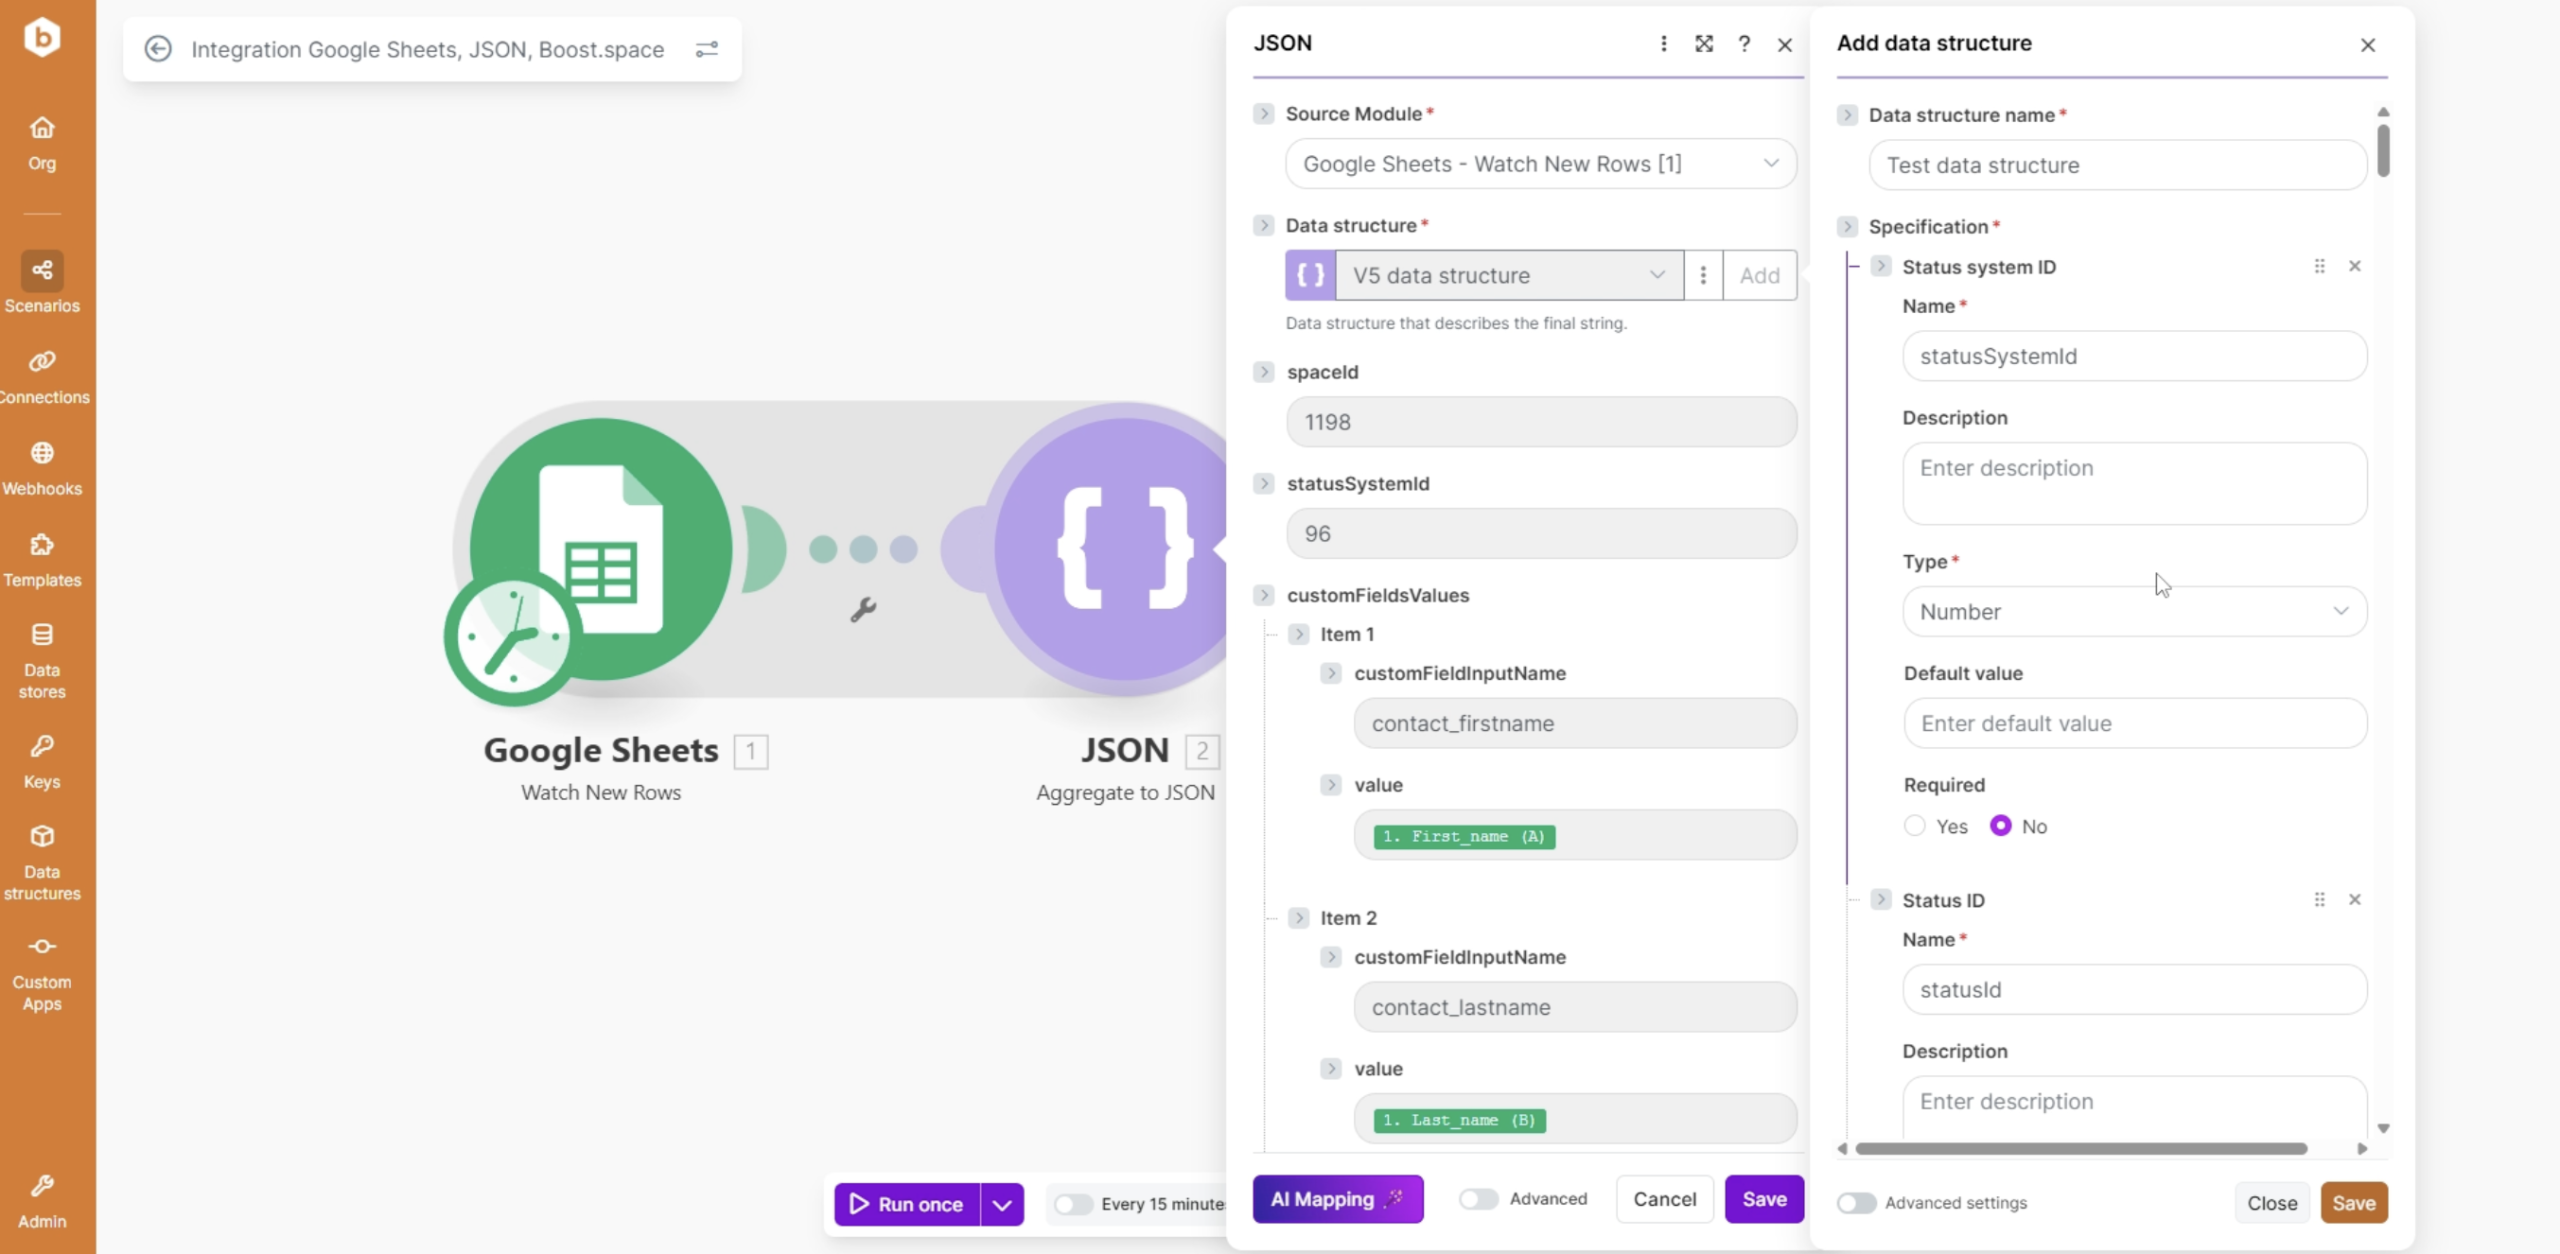
In this example we will keep only:
space_idstatus_system_idcustom_field_values:custom_field_input_namevalue
This makes mappingMapping links the modules in your scenario. When you map an item, you connected the data retrieved by one module to another module to perform the desired action. For example, you can map the email address and subject lines from the Email > Watch emails module to Google Sheets > Add a row and create a spreadsheet of email addresses... easier and reduces potential errorsService is unavailable due to a failure, a service responds with unexpected data or the validation of input data fails.. After that click save.
Step 5: Get Required IDs from Boost.space
Space ID
1. Open your target SpaceIn Boost.space, a space is a subunit within a module that helps organize and categorize data, ensuring clarity even with large volumes. For example, within the Contacts module, you might have spaces like "Client Database" or "Supplier Database." Access to each space is restricted to users who have created it or have been granted access. in Boost.space
2. Copy the Space ID from the URL
Status System ID
1. Go to System Settings → Modules → Settings
2. Scroll to StatusesIn Boost.space, statuses are indicators assigned to records within modules to represent their current state or progress. They can be system-defined, such as "Active" or "Done," or custom-created to fit specific workflows. Statuses help track and manage tasks, projects, and processes efficiently.
3. Copy the ID of the desired statusIn Boost.space, statuses are indicators assigned to records within modules to represent their current state or progress. They can be system-defined, such as "Active" or "Done," or custom-created to fit specific workflows. Statuses help track and manage tasks, projects, and processes efficiently. (e.g., Active)
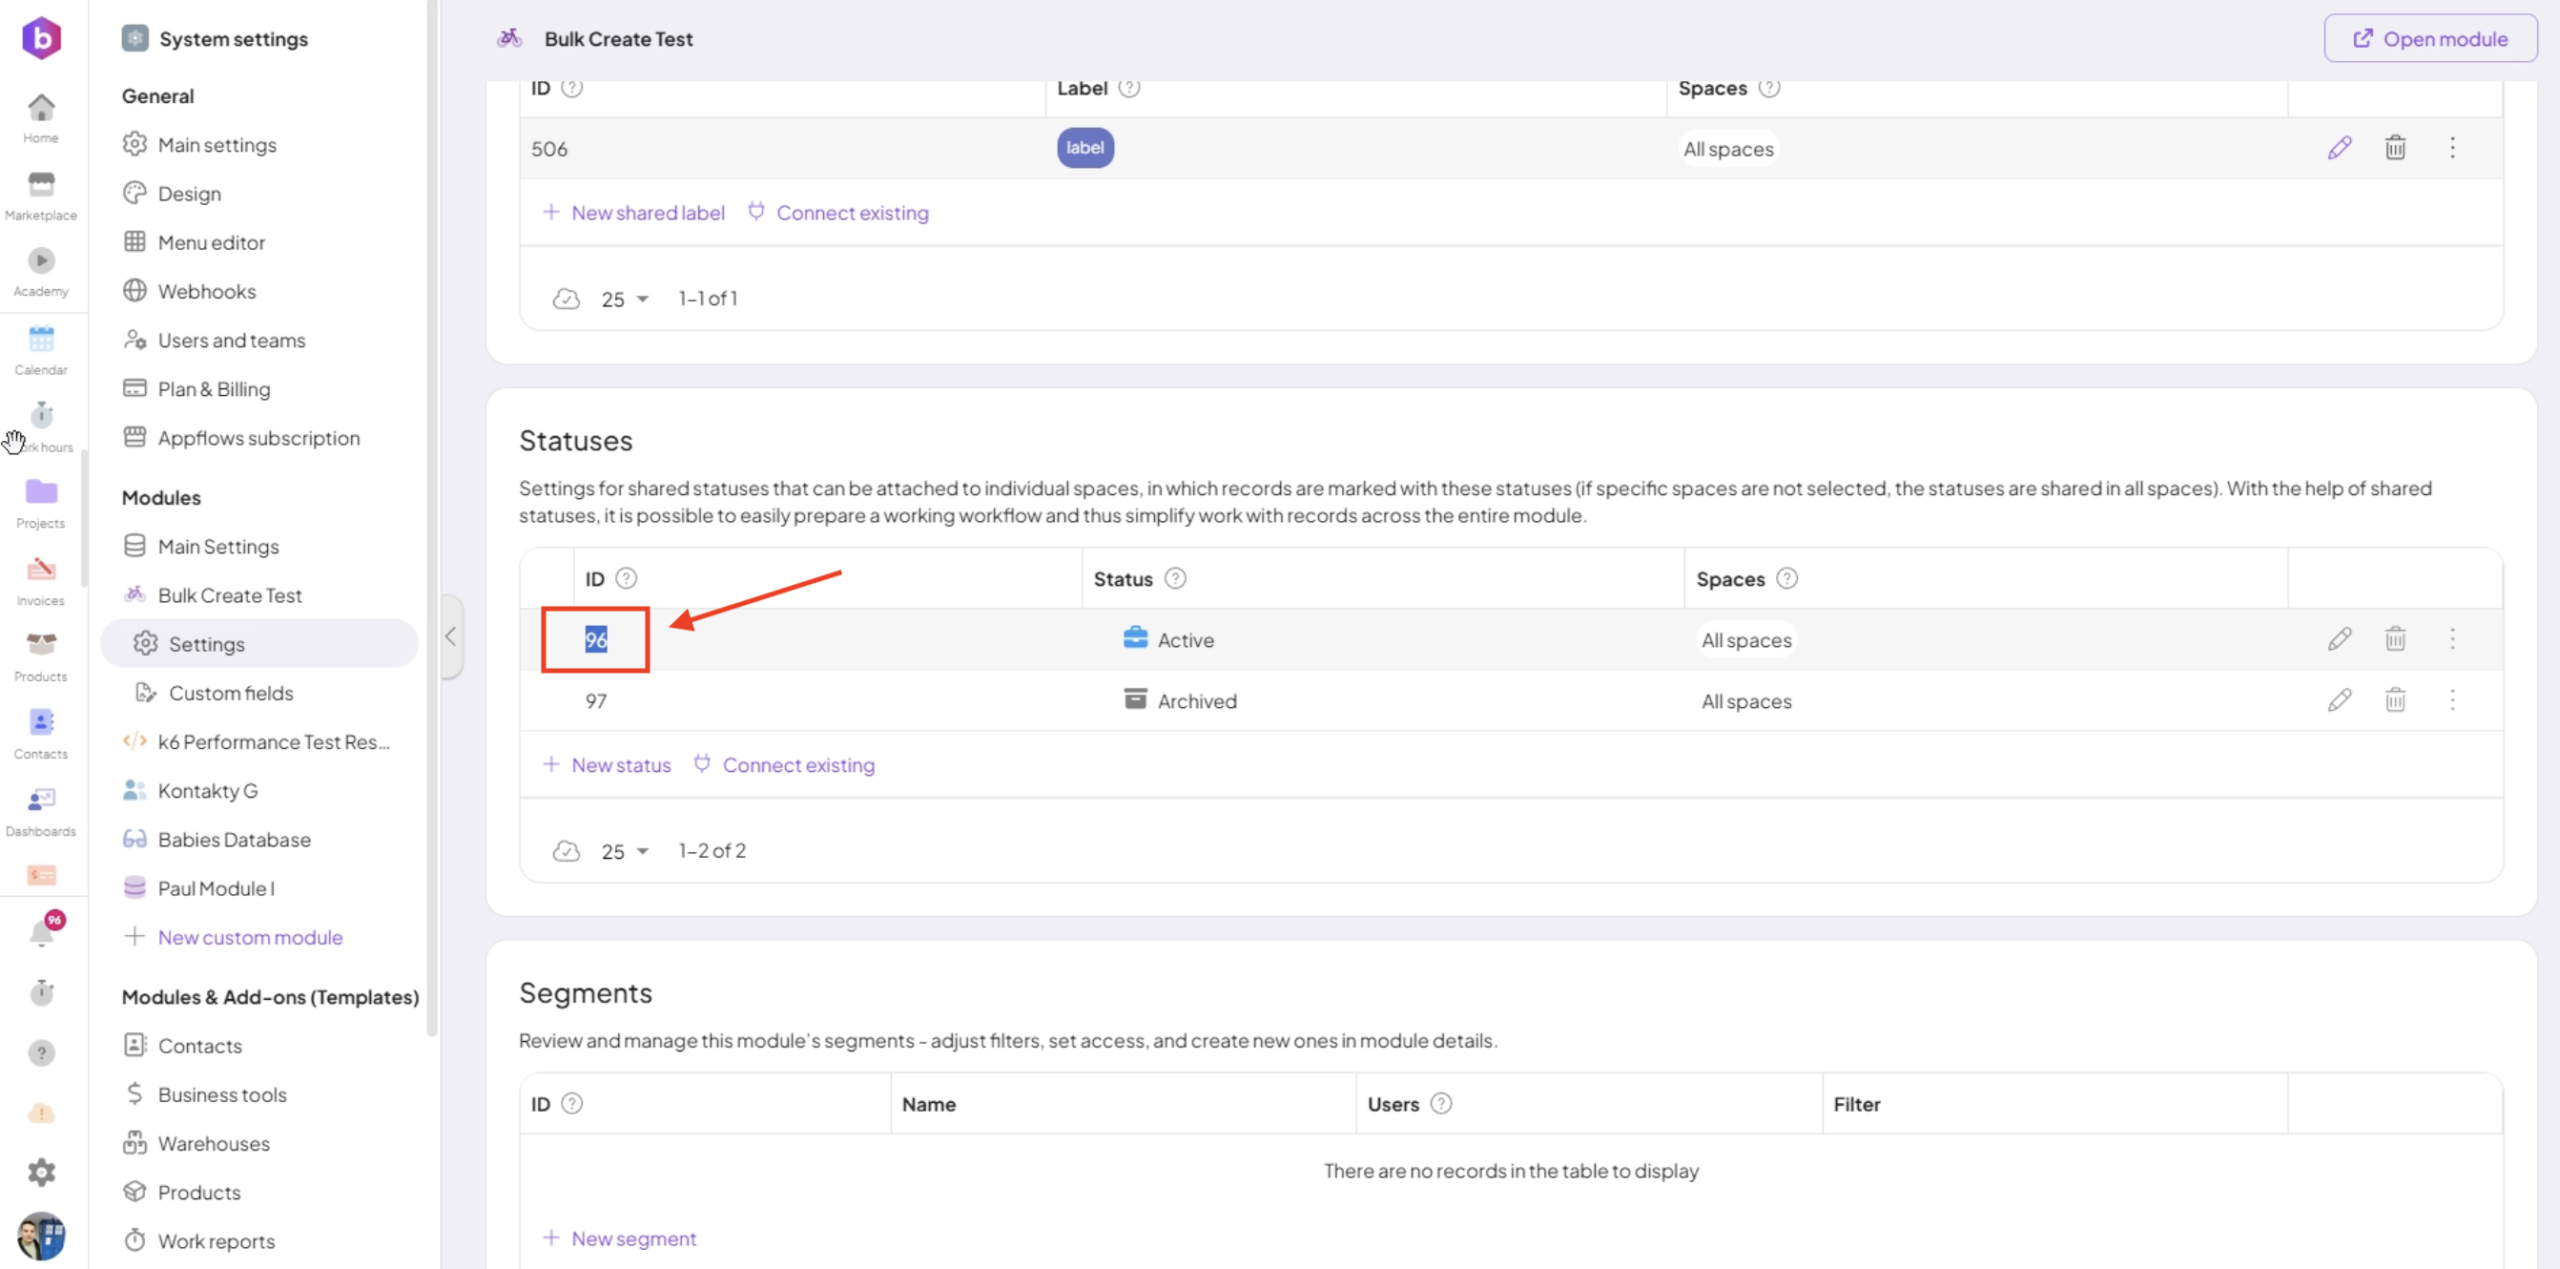
4. Paste it into JSON module.
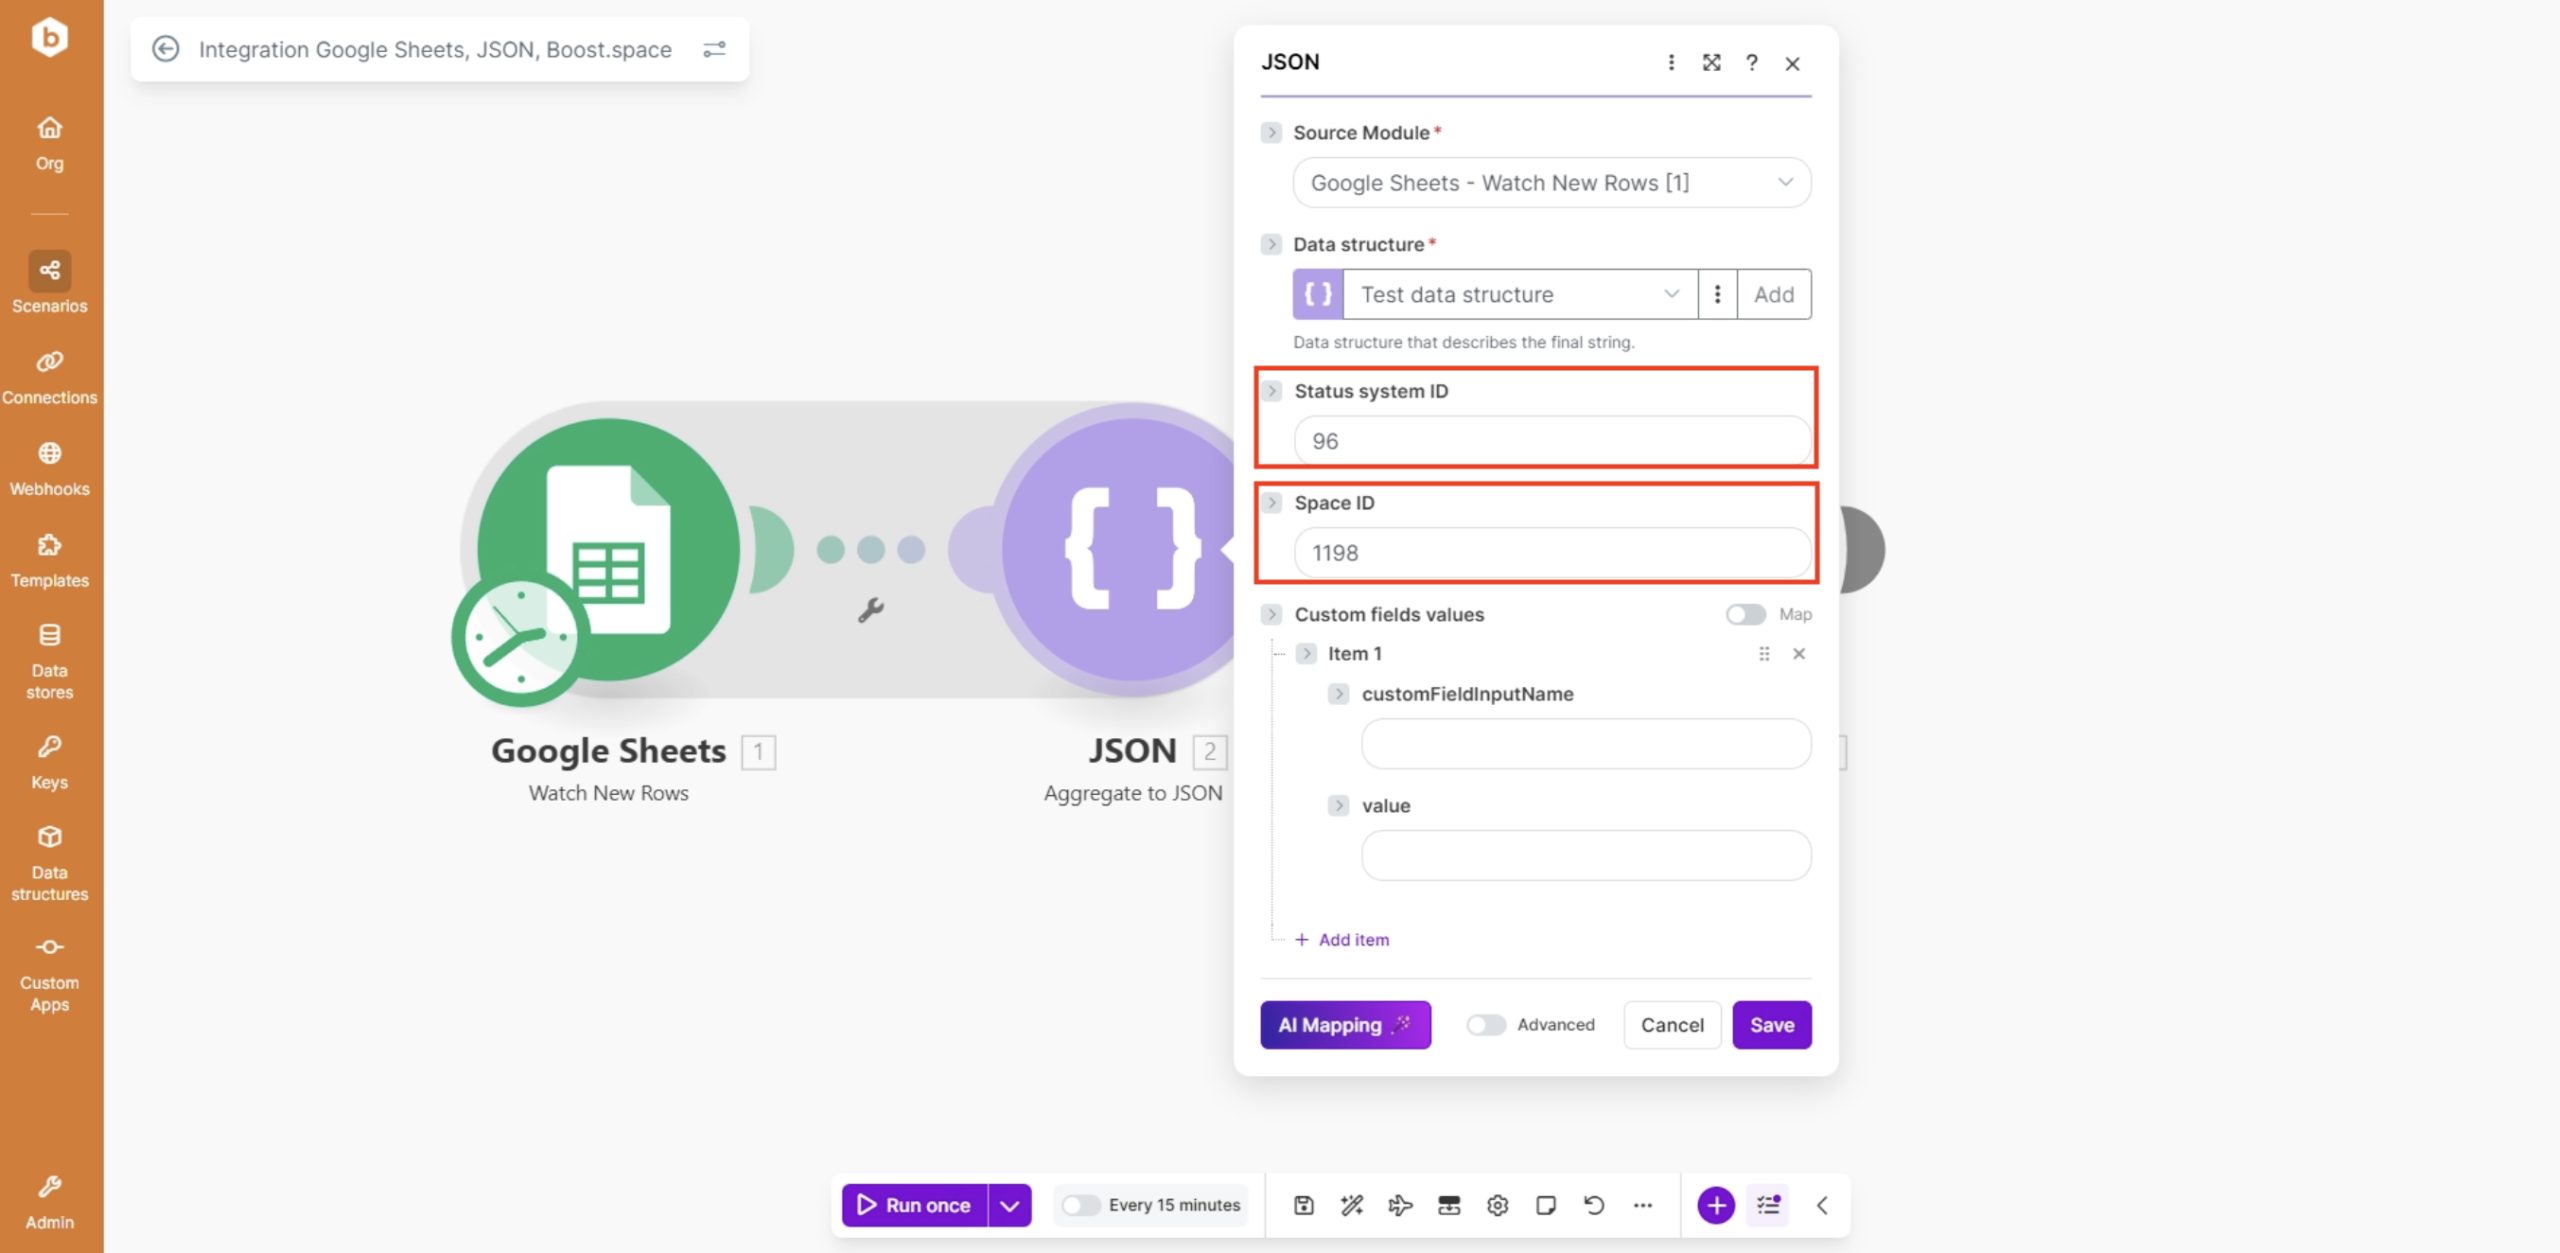
Step 6: Map Custom Fields
Map your source data to Boost.space fields.
Important
- Each field requires:
custom_field_input_namevalue
- Field names must match your Boost.space custom fieldsA feature in Boost.space that allows administrators to define and manage additional data fields within each module, tailoring the system to specific organizational needs.
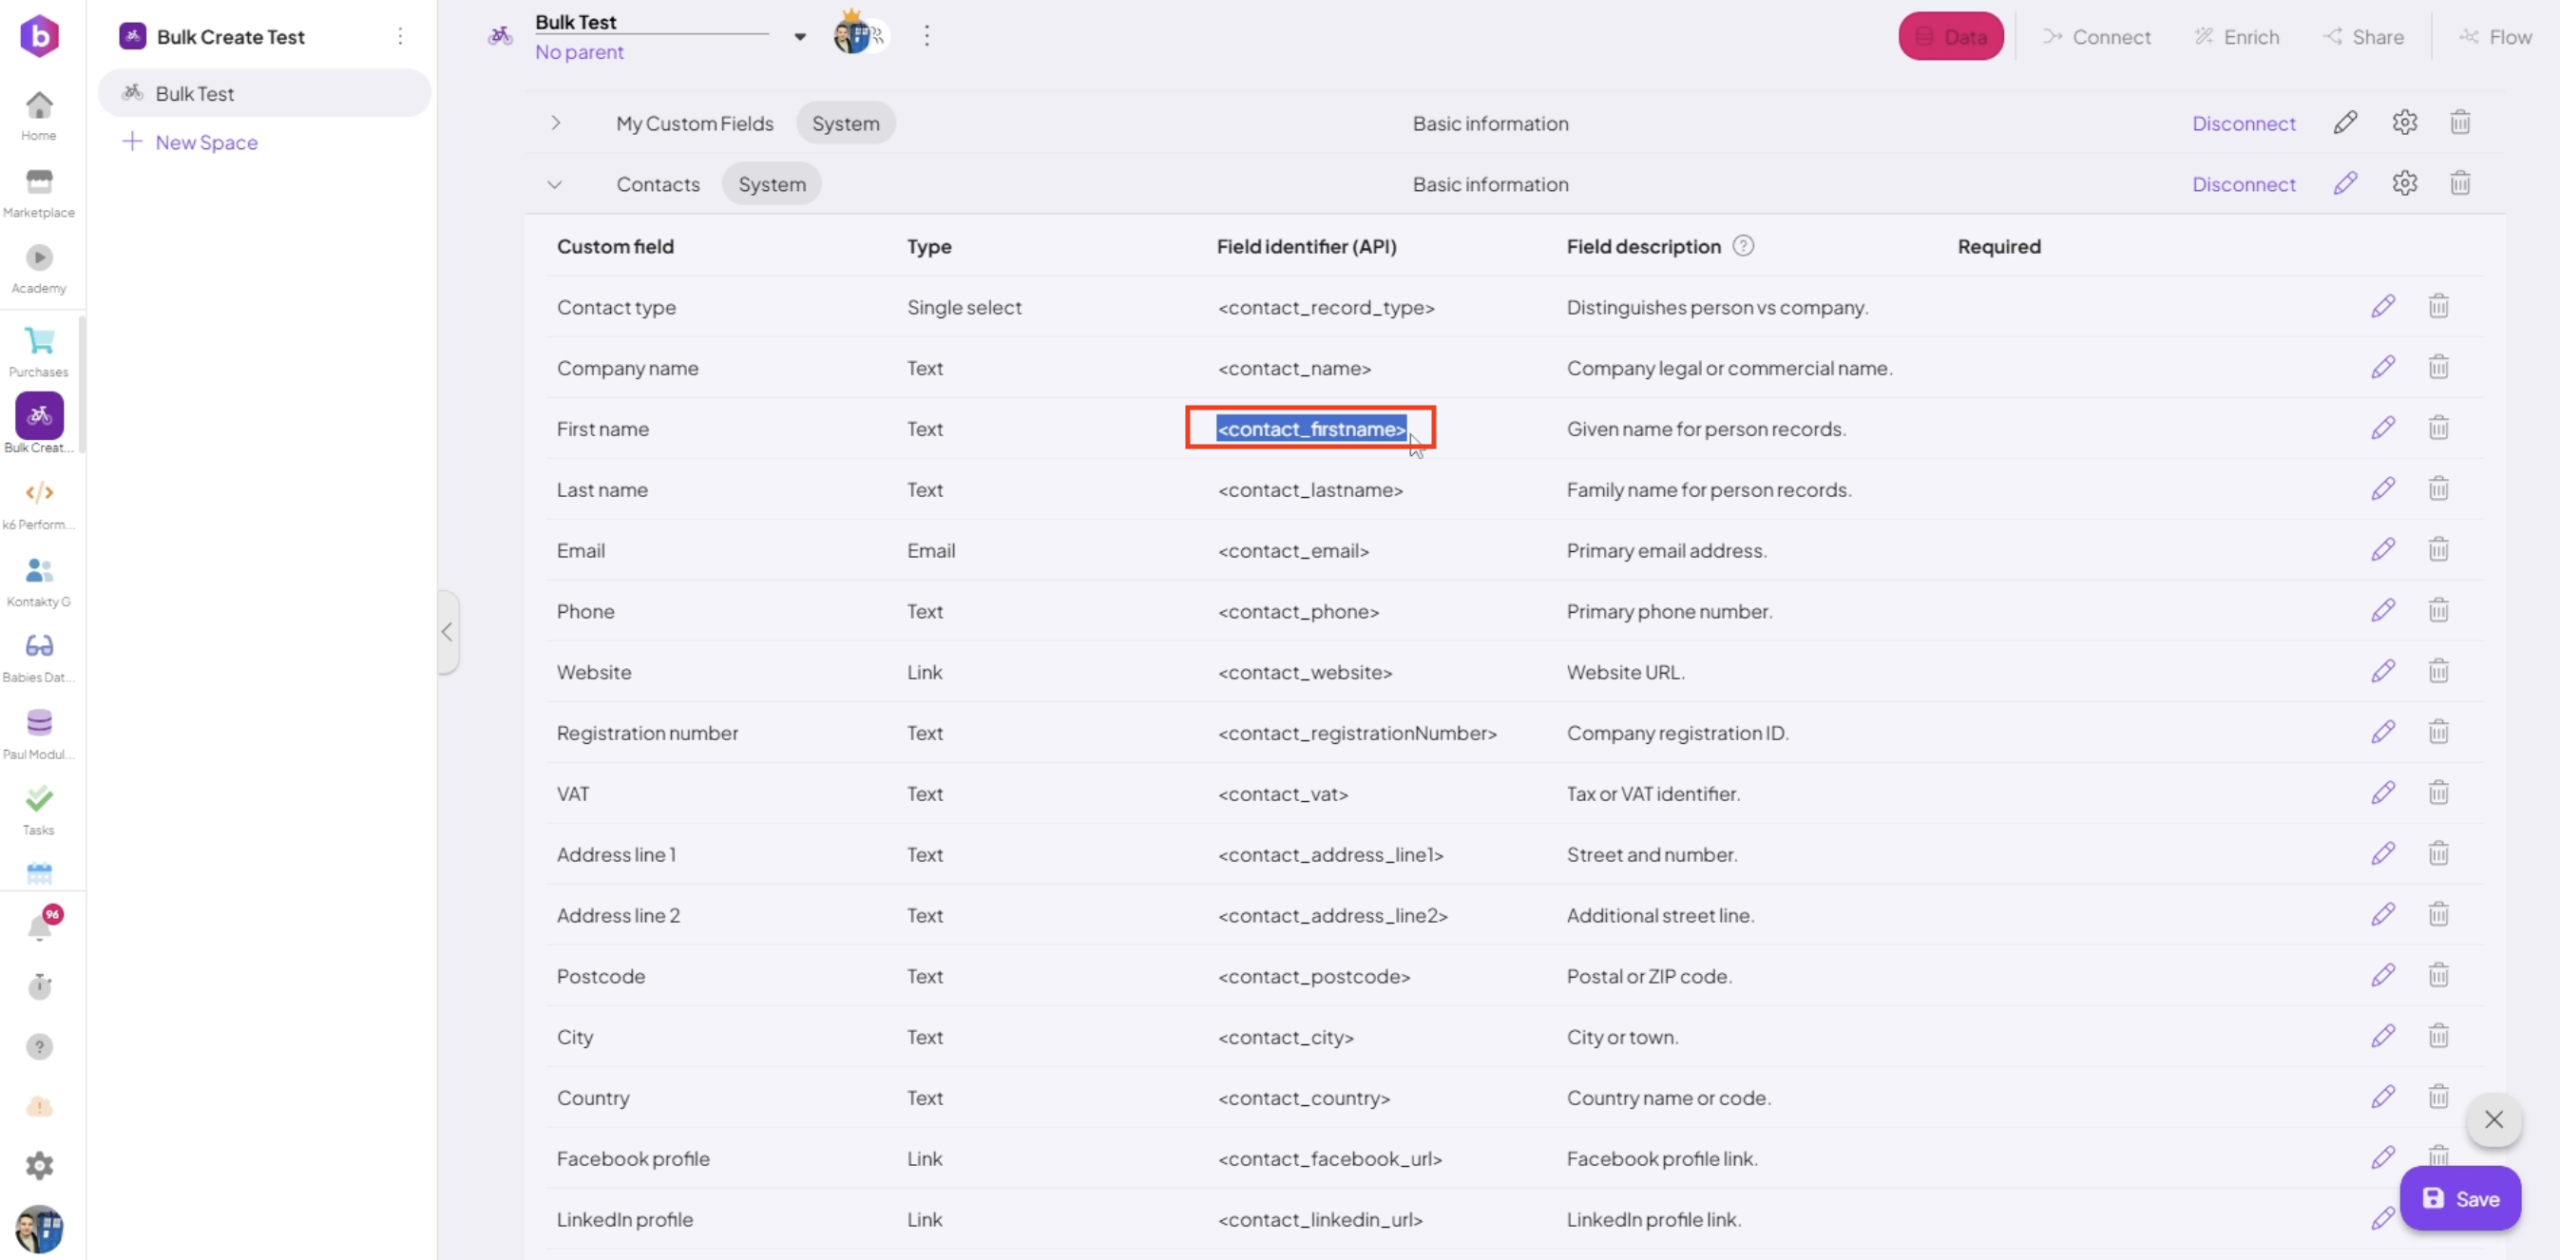
- Now, map it in the IntegratorPart of the Boost.space system, where you can create your connections and automate your processes.. The
valueparameter should be mapped from your source application.
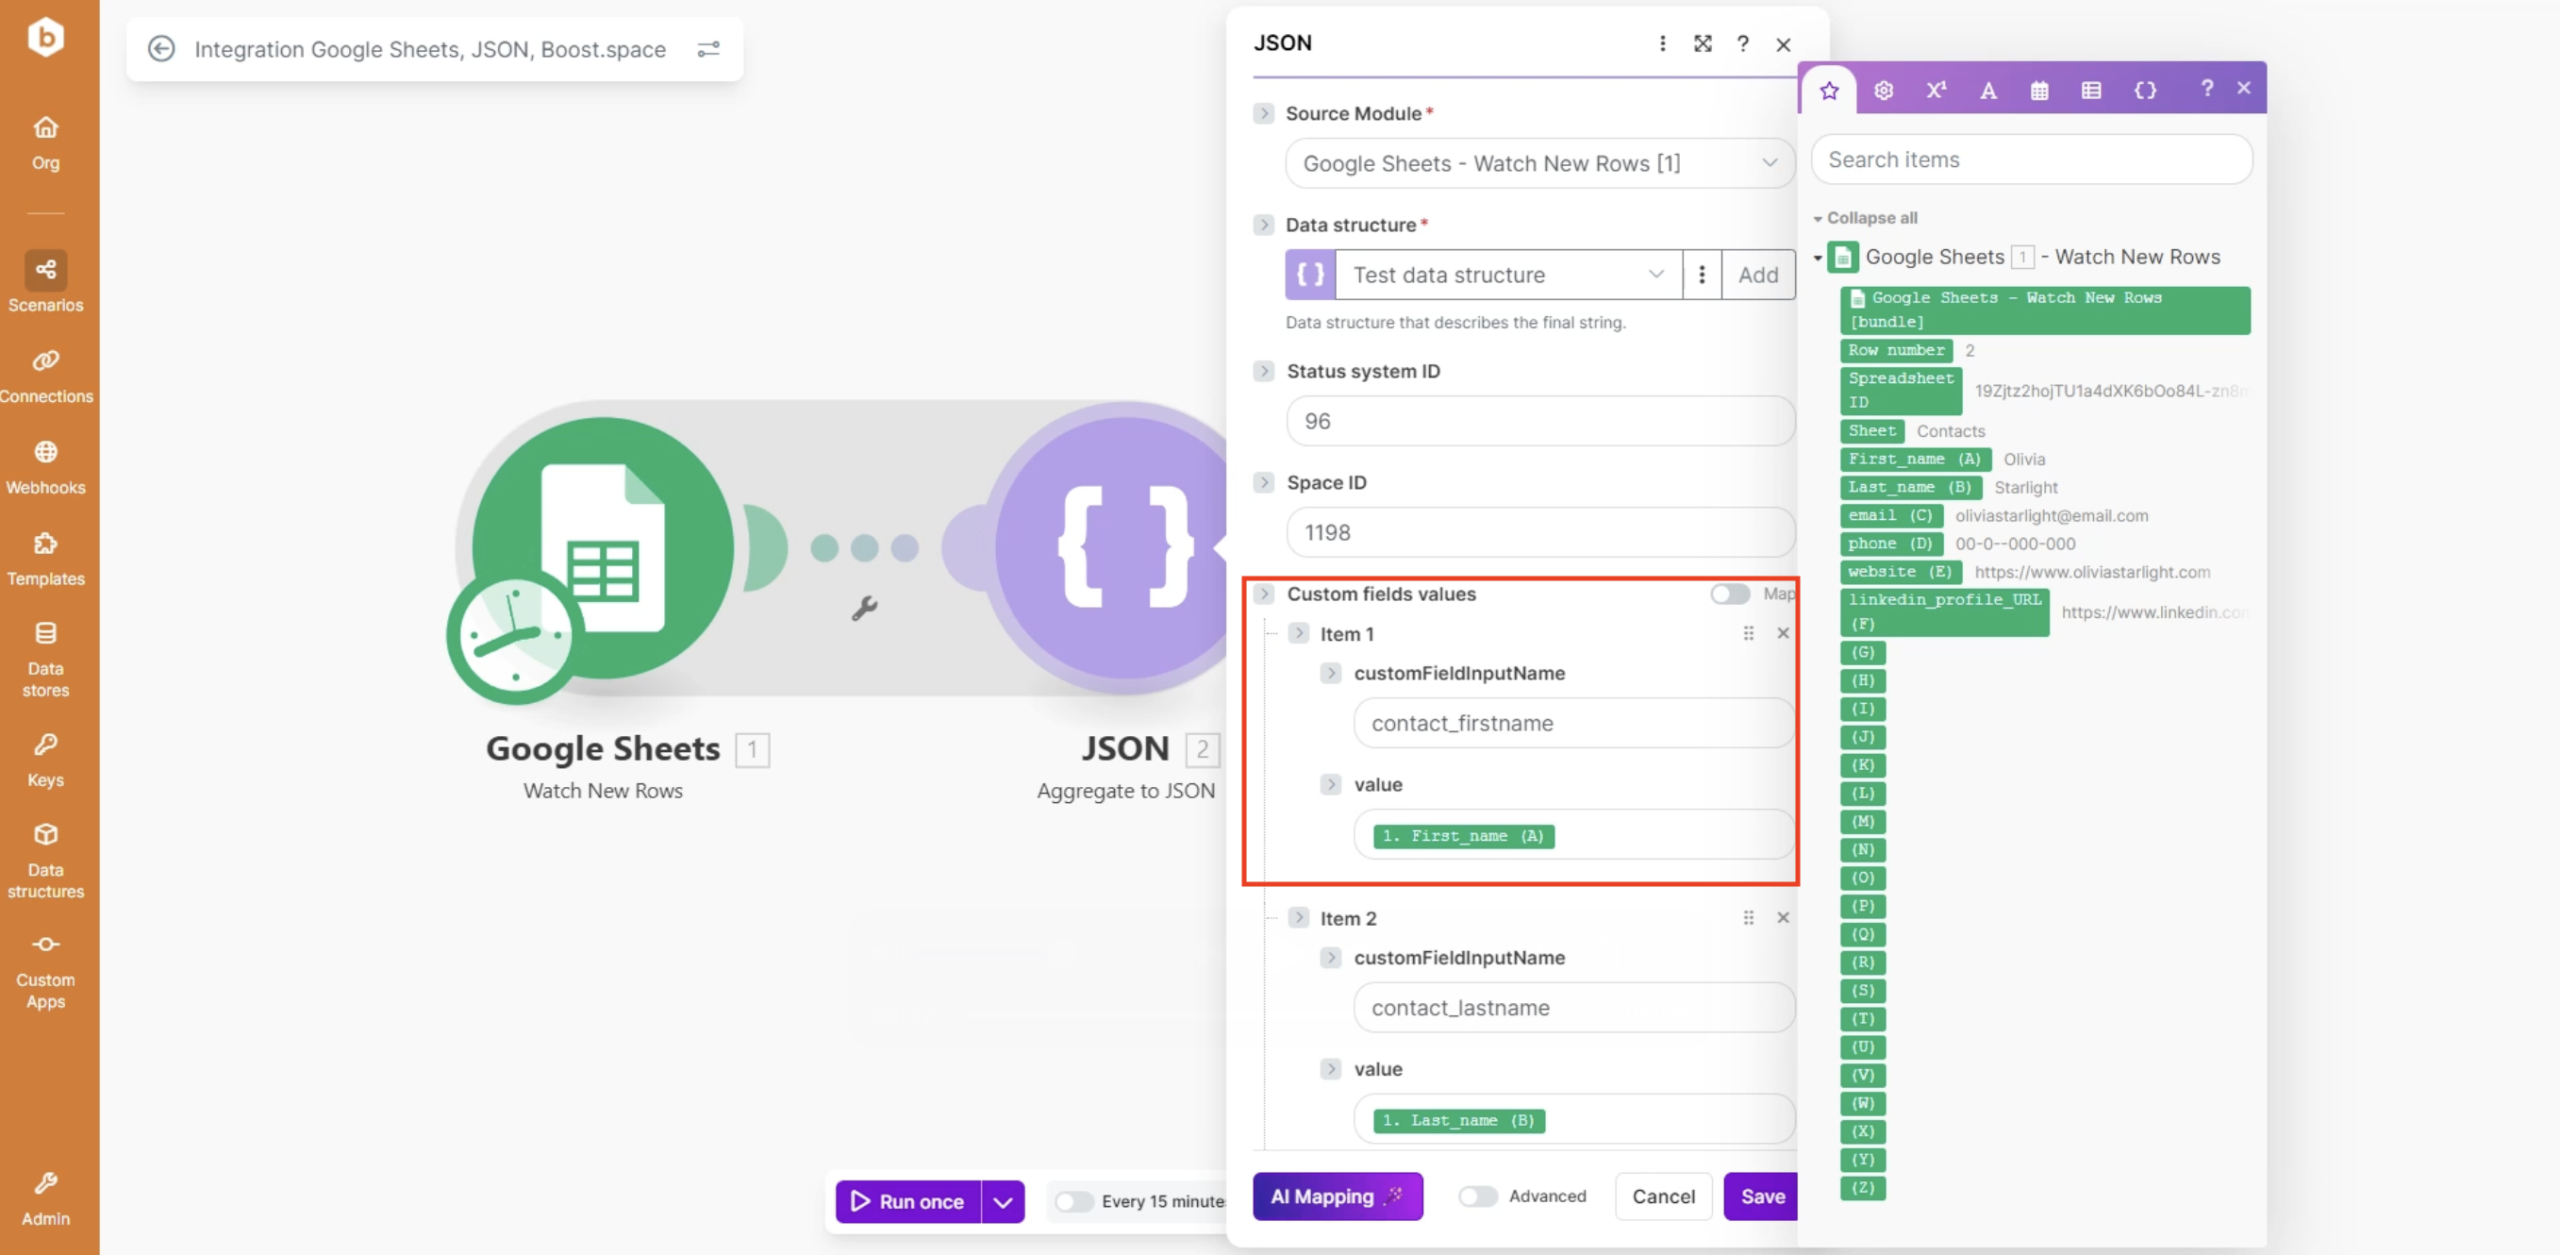
- After mapping all custom fields, click Save.
Step 7: Configure the Boost.space API Module
Set up the Boost.space API request:
- Endpoint:
/custom-module-item - Method:
POST - Content-Type:
application/json - Body: Map the JSON output from the Aggregate module
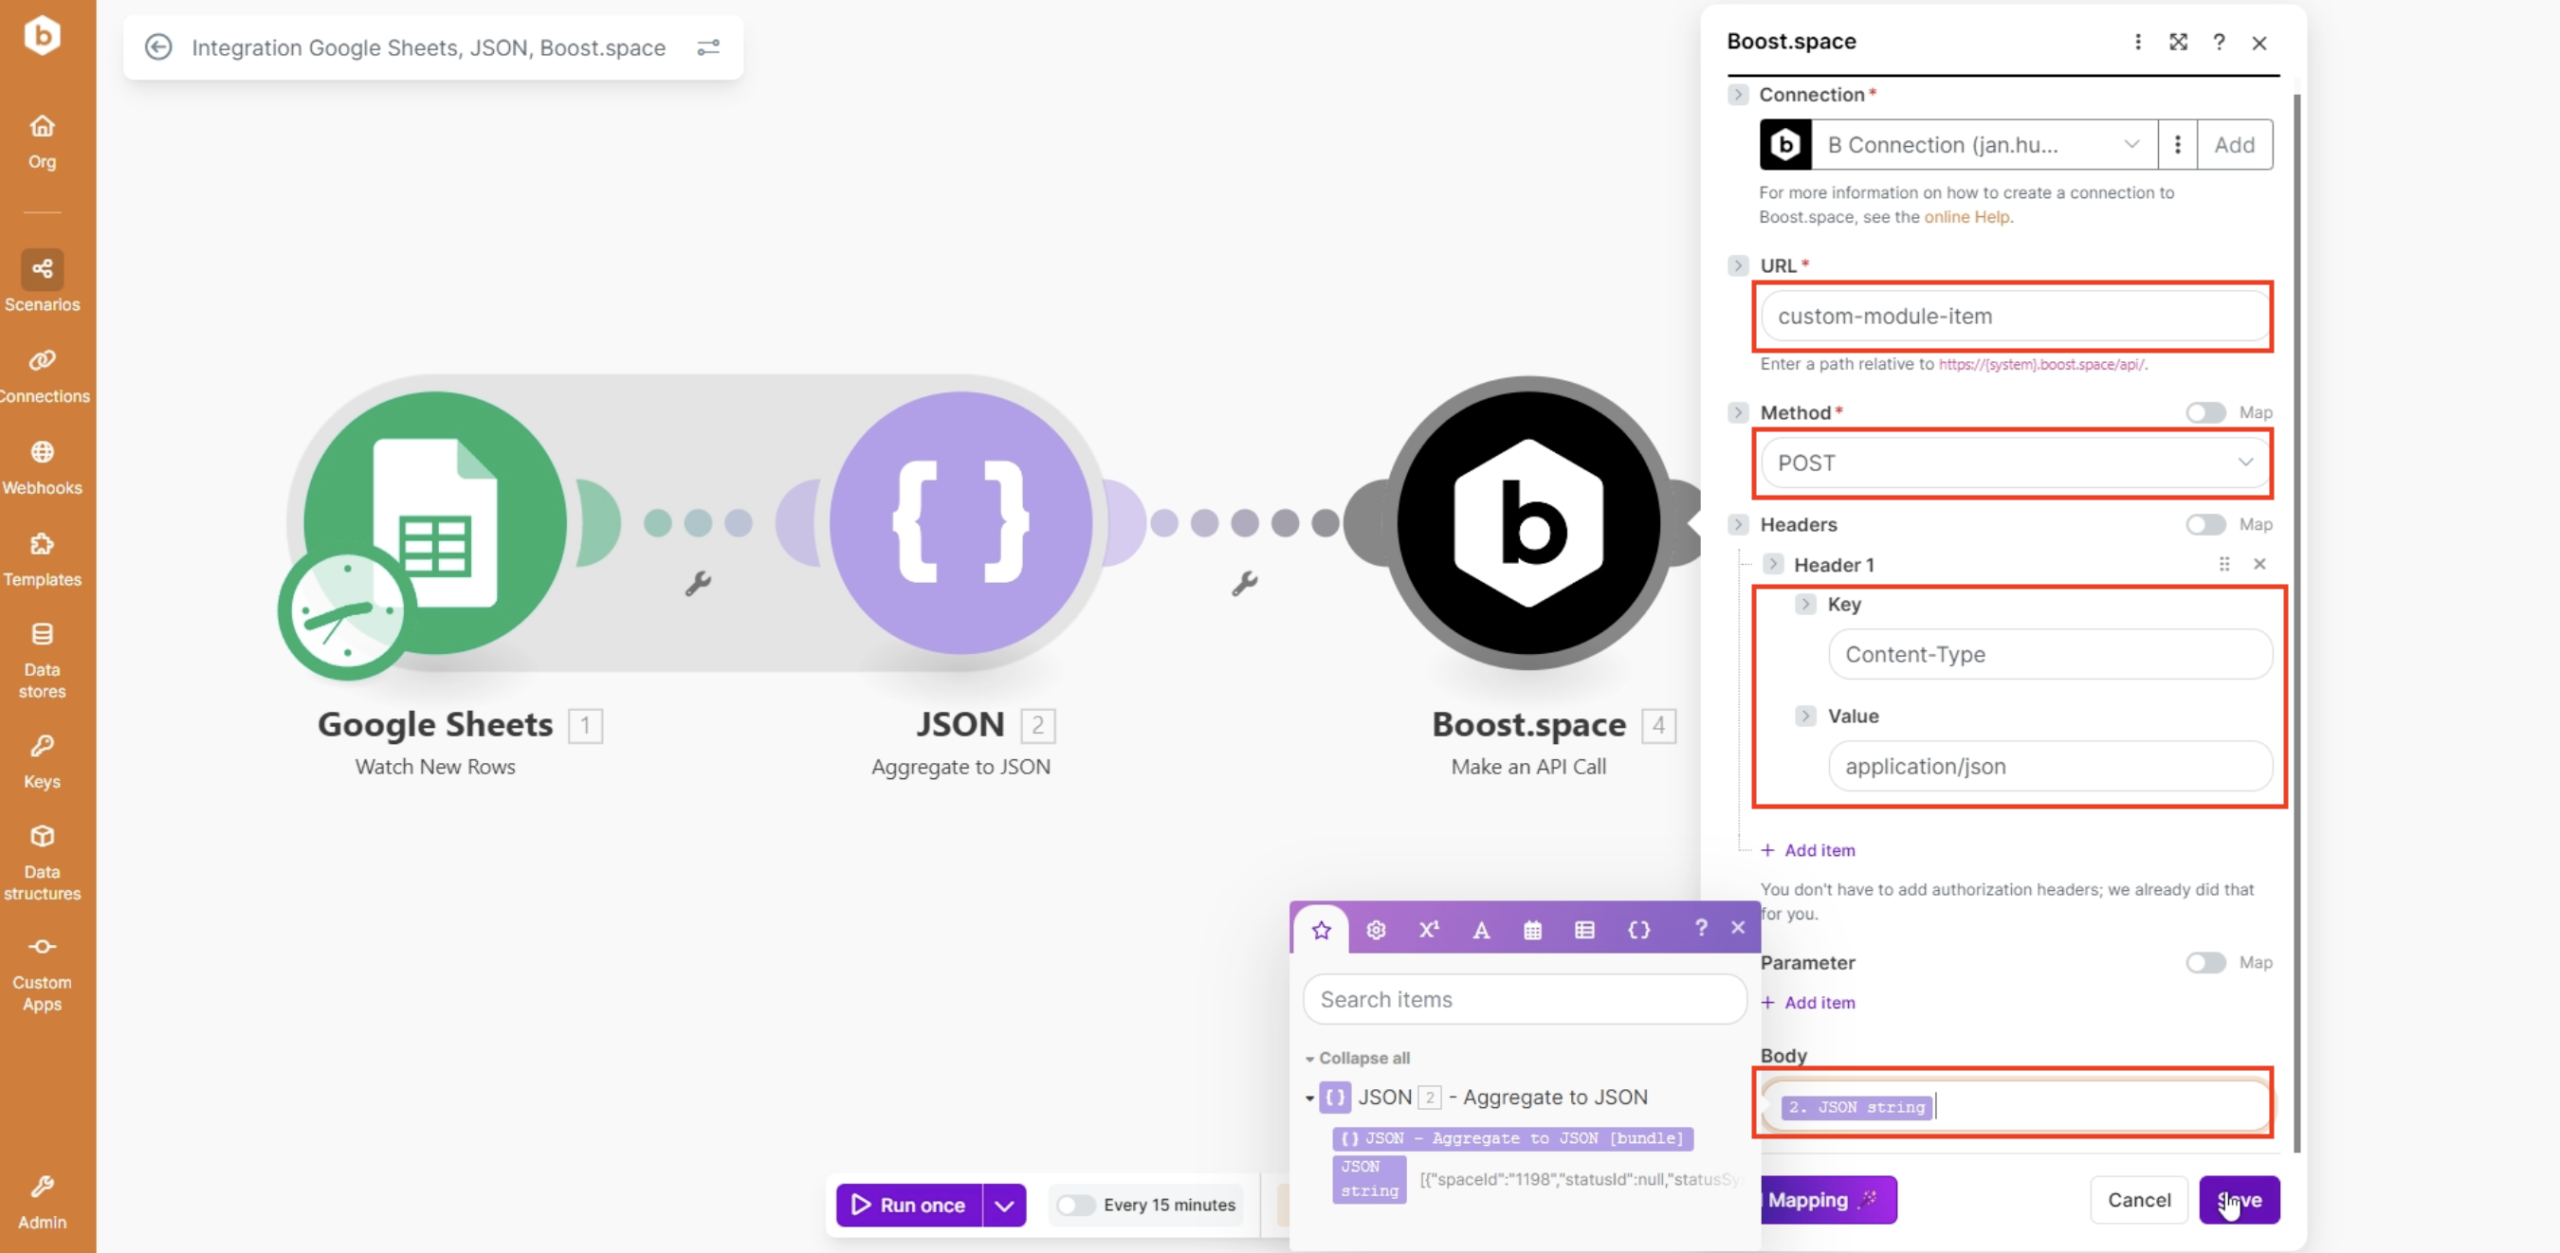
- Save the module and the scenario.
Step 8: Run the Scenario
1. Click Run Once
2. The system processes all records in bulk
Result
- Multiple records are imported in a single operation
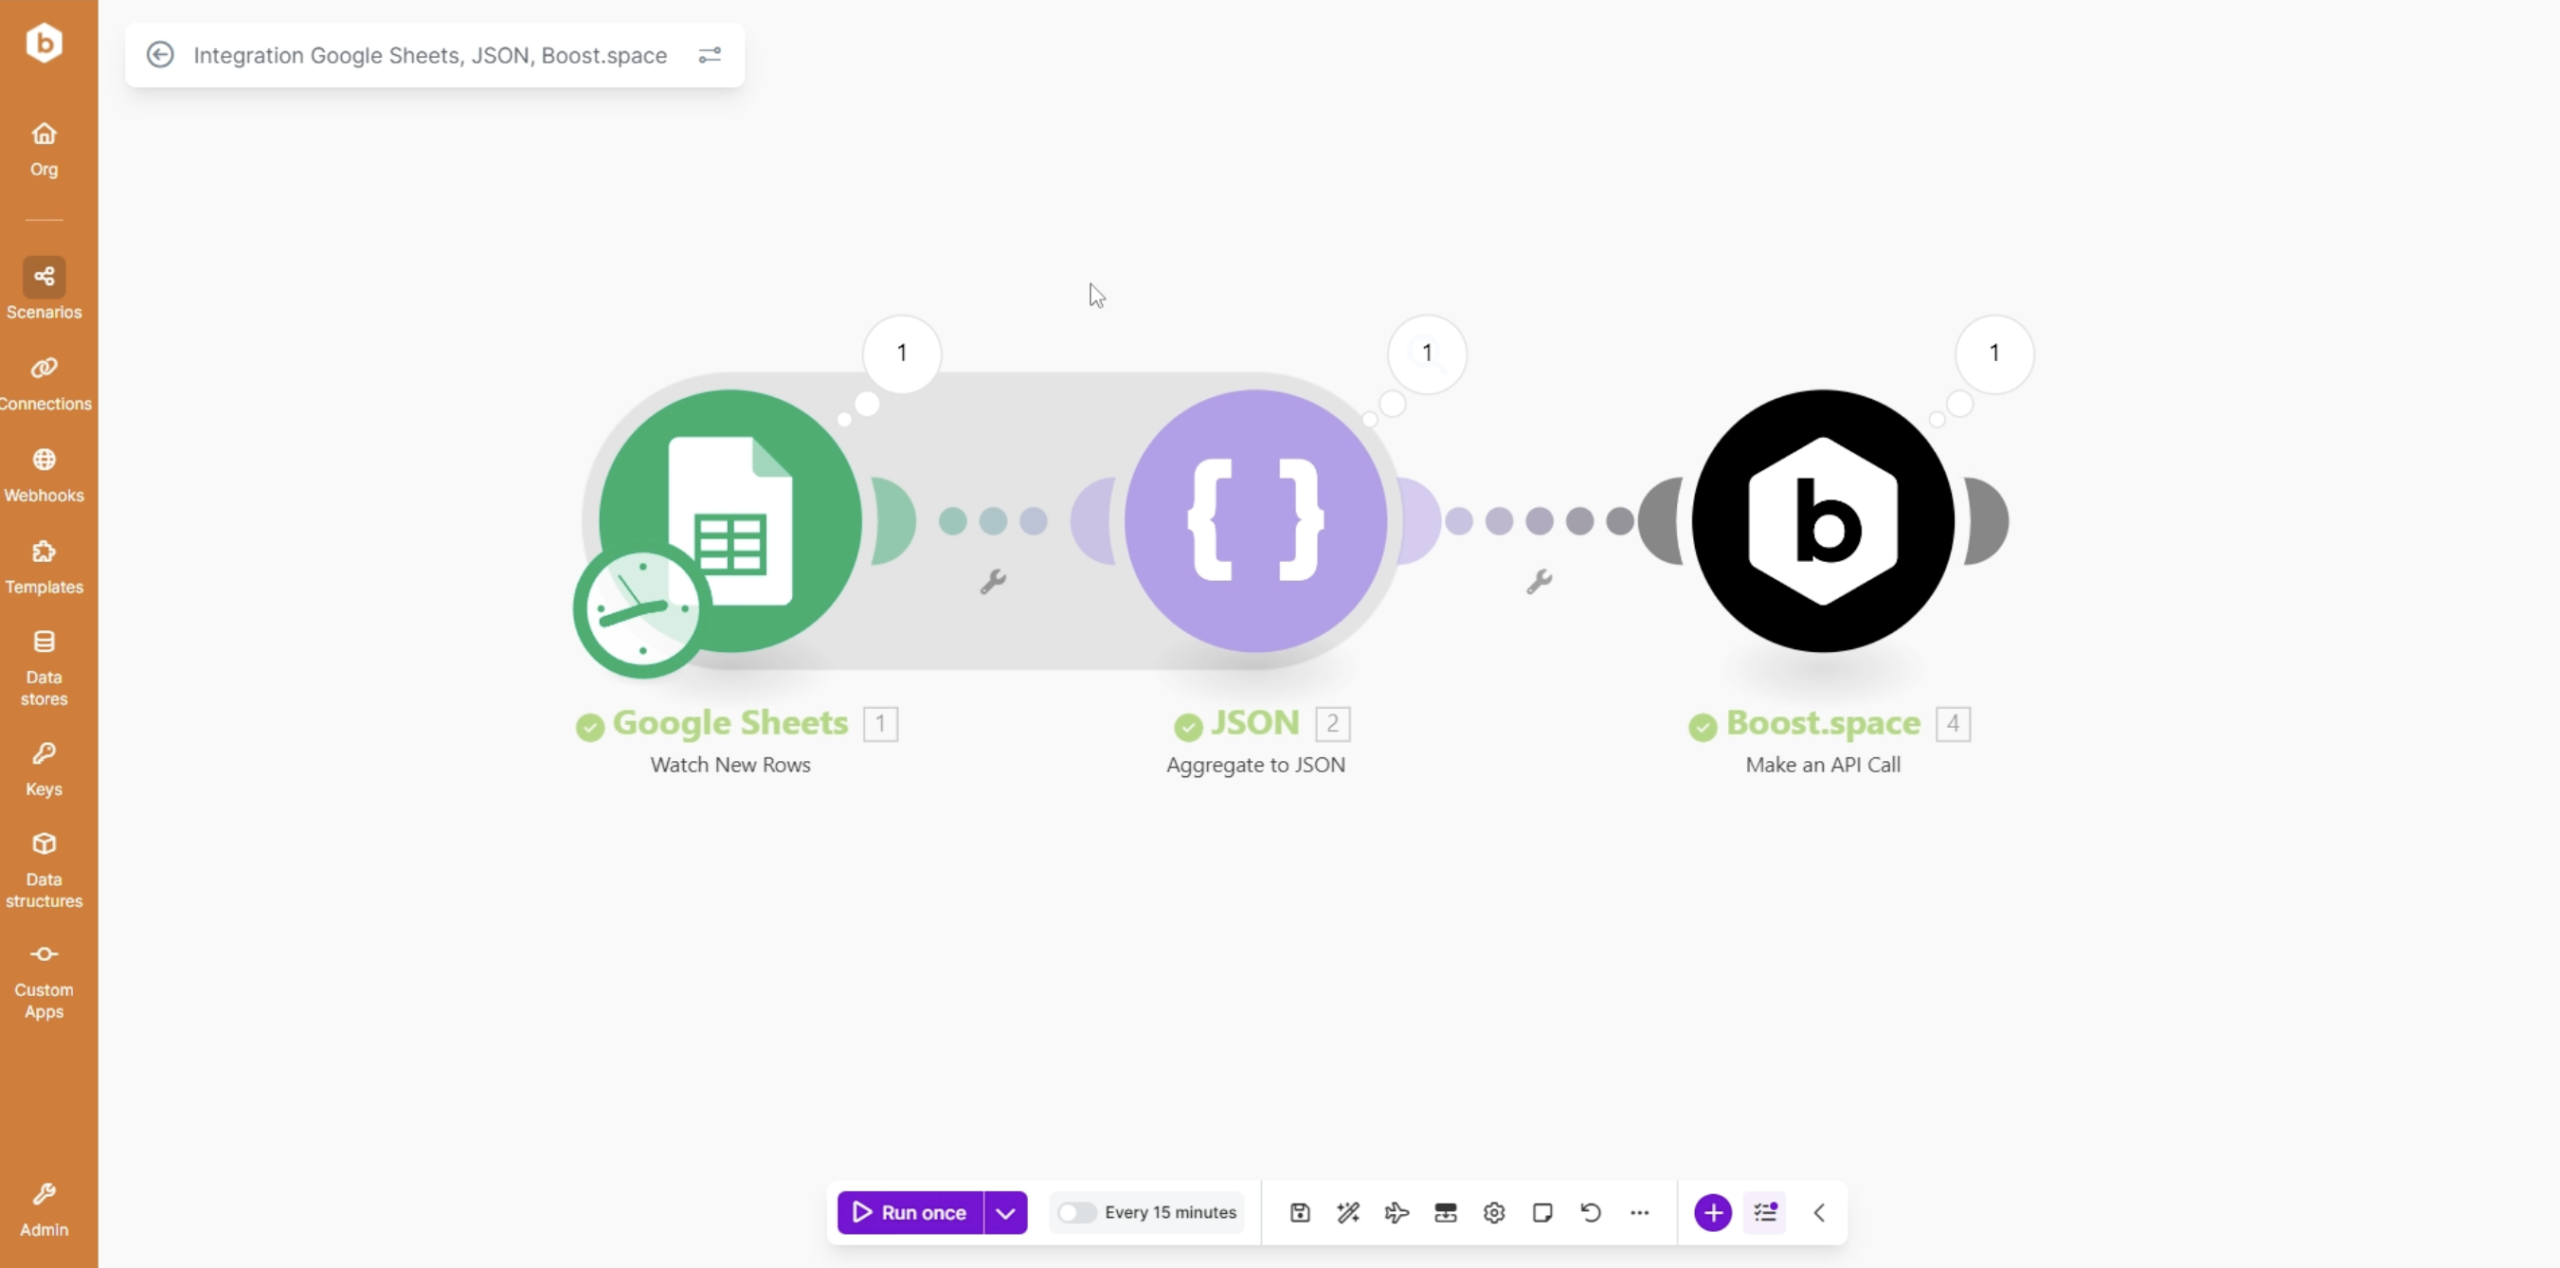
- Example: 5 records = 1 operation
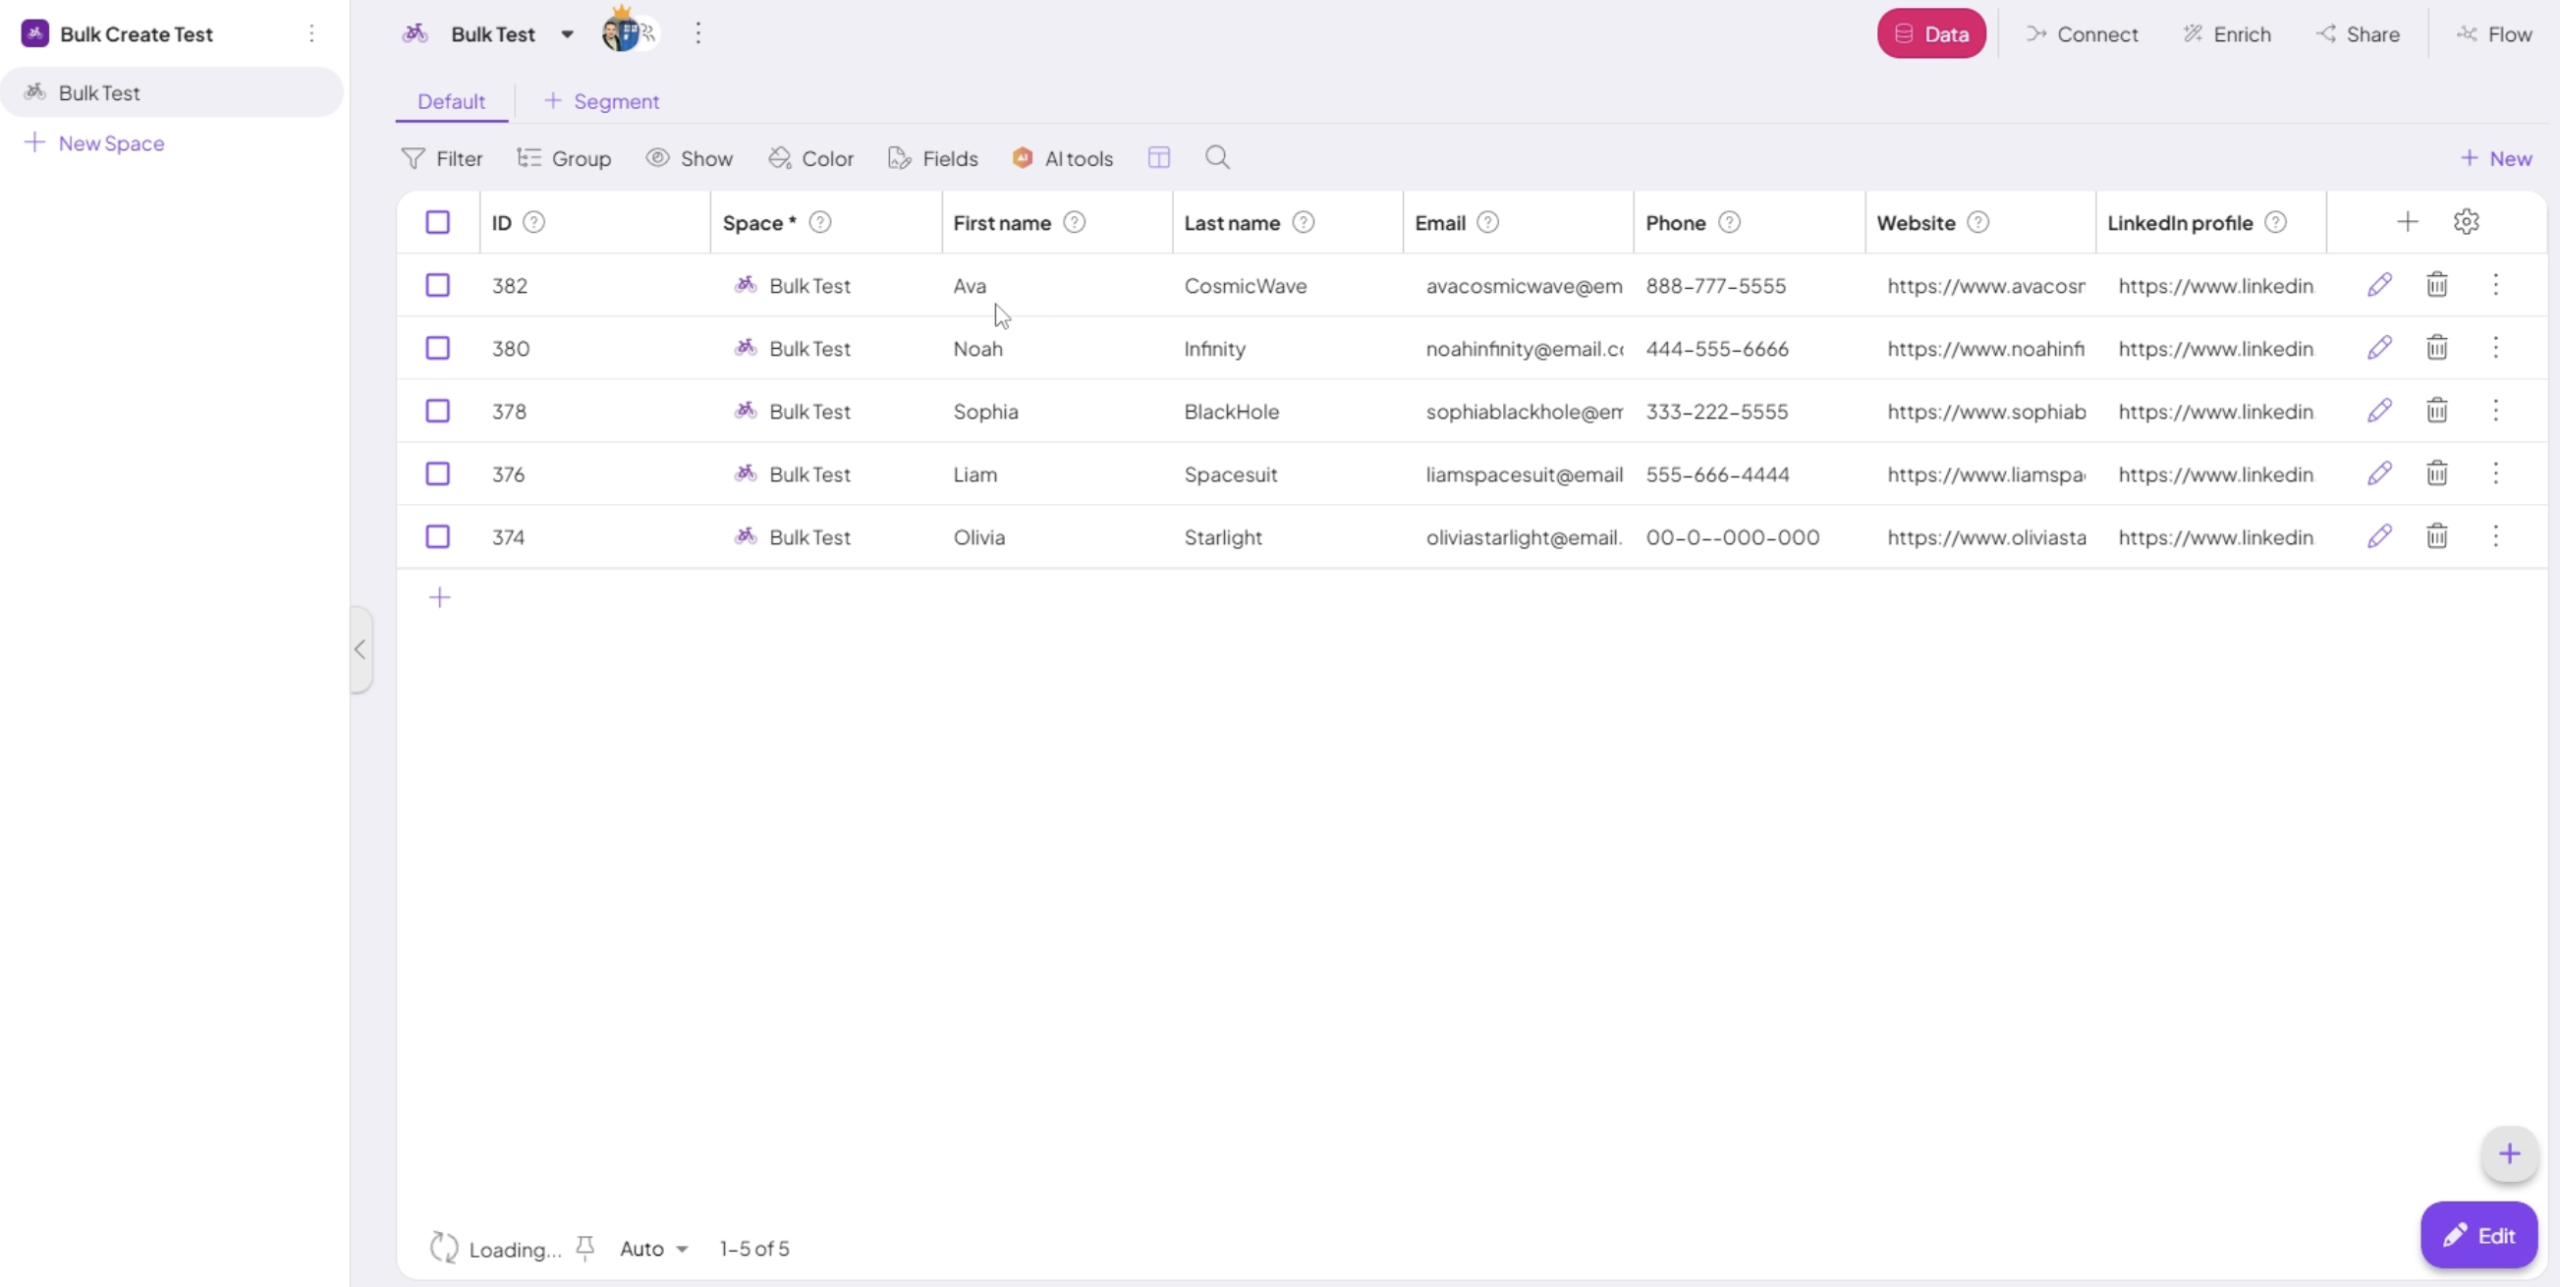
Step 9: Verify Imported Data
1. Open your Boost.space Space
2. Refresh the page
3. Confirm the records were imported successfully
By combining a data source, JSON aggregation, and the Boost.space API, you can import large volumes of data.