Step-by-Step Guide: Obtaining Your access token
For most applications, you can establish a connectionUnique, active service acces point to a network. There are different types of connections (API key, Oauth…). by creating your own application. Instructions on how to create your app can be found here. However, some applications use a tokenA secure code used to authenticate and authorize access to API endpoints, enabling users to connect with third-party applications. (Access token, API tokenA secure code used to authenticate and authorize access to API endpoints, enabling users to connect with third-party applications.) to create a connection. In this article, we will show you how to create this token using the GitLab application as an example.
Creating a Token
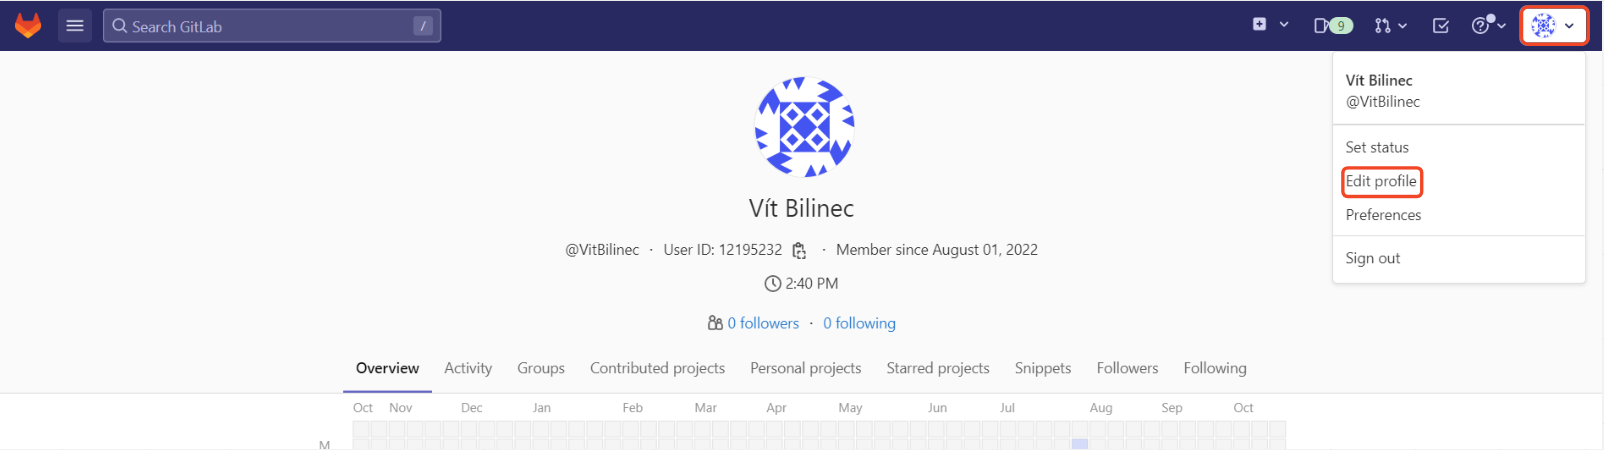
1. To create a token, you need to have an account created on the site. In your account, click on your profile (your avatar). Then select edit profile (for other applications the name may be different: settings, my profile, etc.).
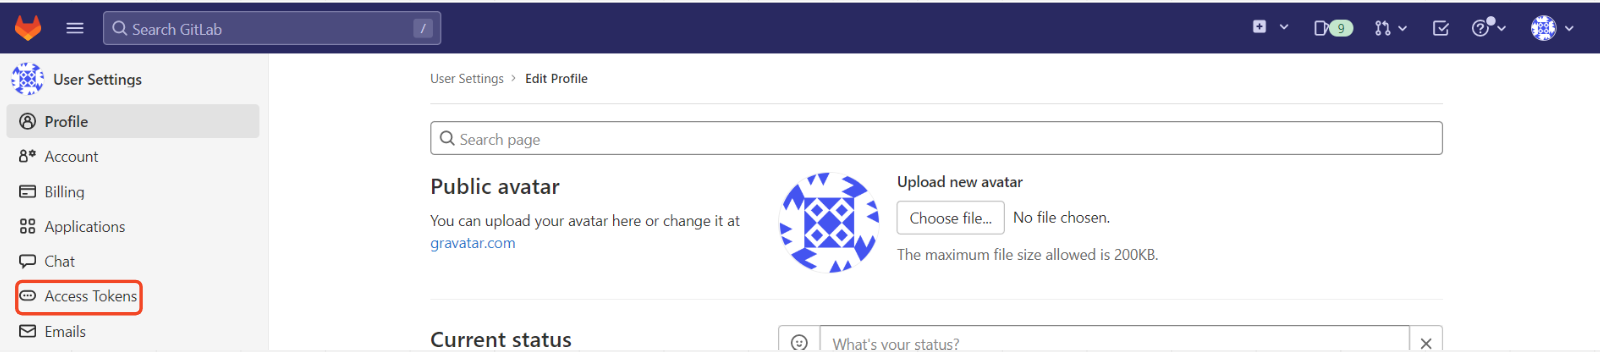
2. On the left bar, select “Access tokens” (API token, Create token, etc.).
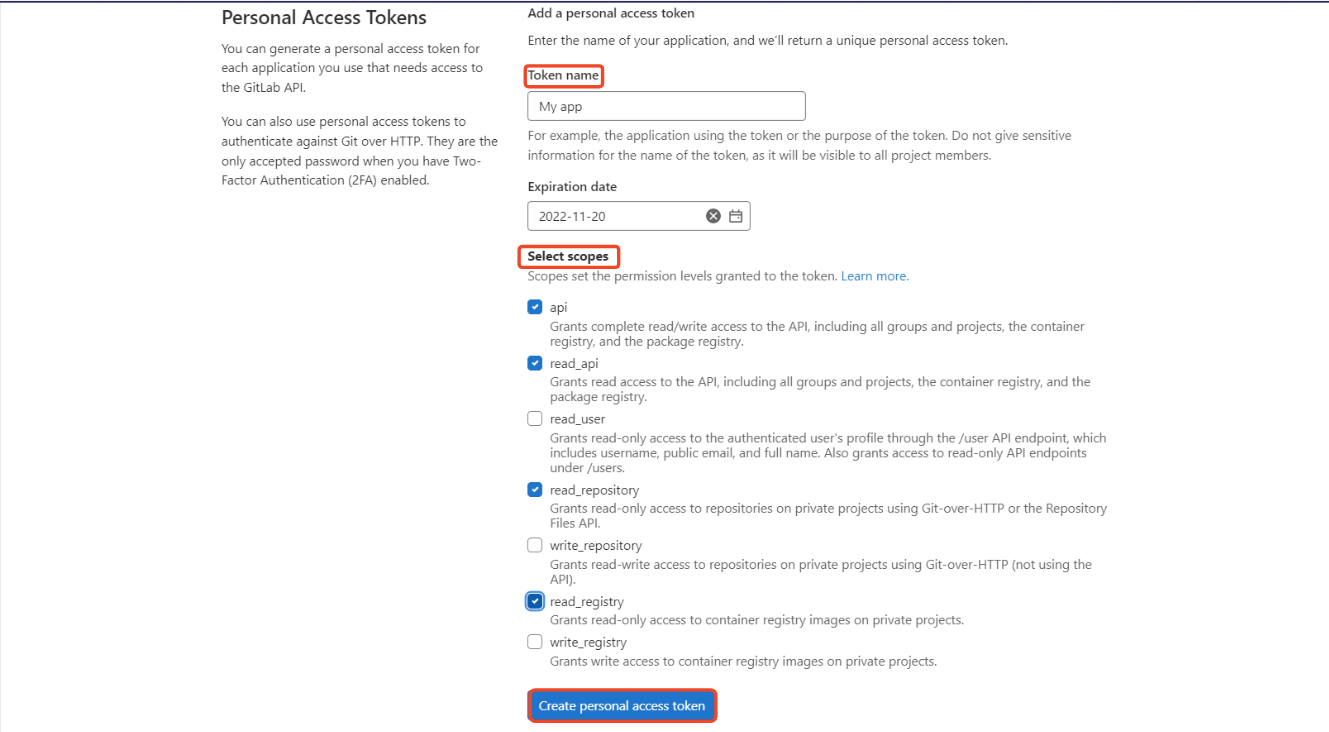
3. Then choose the name of your token (optional). Then check the scopes (token rights) and click create a personal access token.
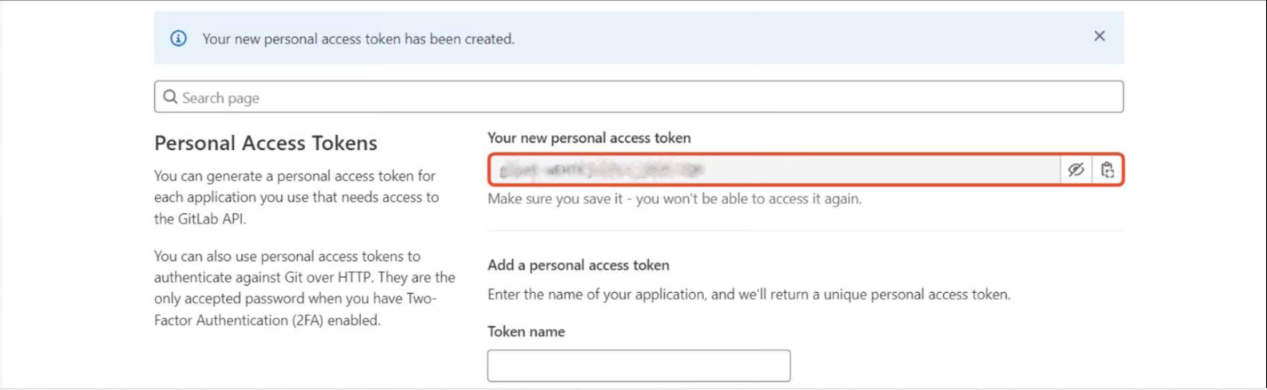
4. Your token has been created. Save your token – it will be used as access for creating your integrations.
How to use the Token
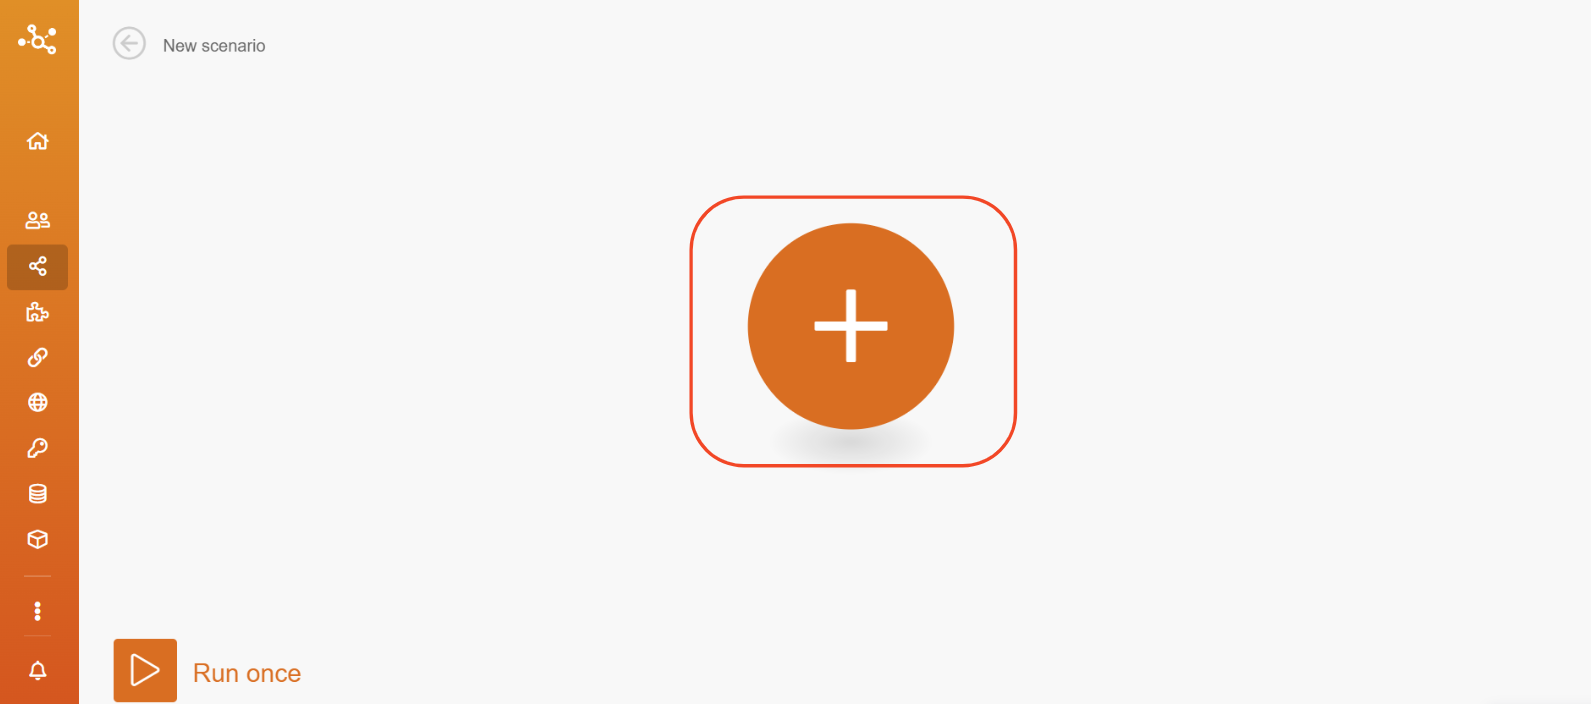
5. In Boost.spaceA platform that centralizes and synchronizes company data from internal and external sources, offering a suite of modules and addons for project management, CRM, data visualization, and more. Has many features to optimize your workflow!, click on create a new scenarioA specific connection between applications in which data can be transferred. Two types of scenarios: active/inactive..
6. Click the plus icon and select the desired application.
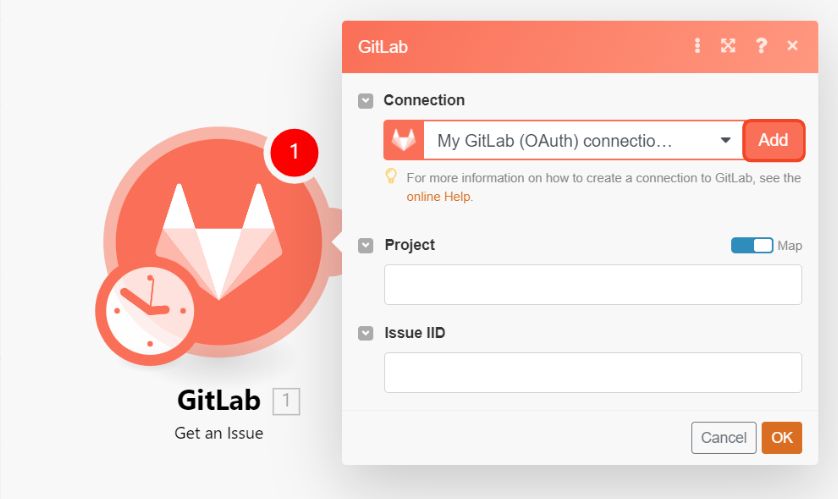
7. Click on Add.
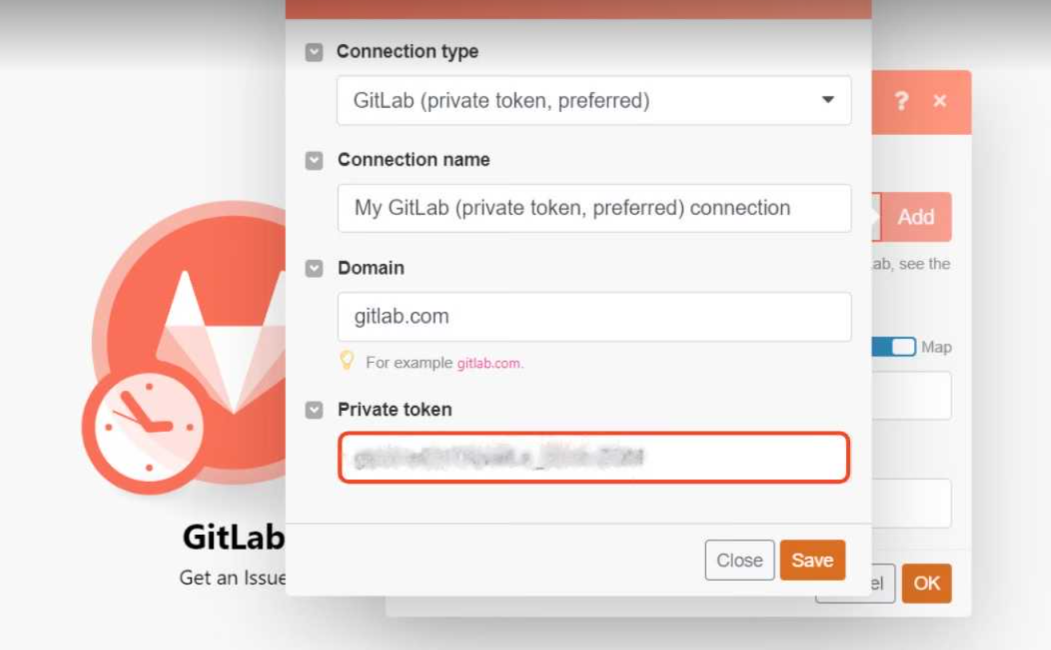
8. In the connection type, select GitLab (private token, preferred).
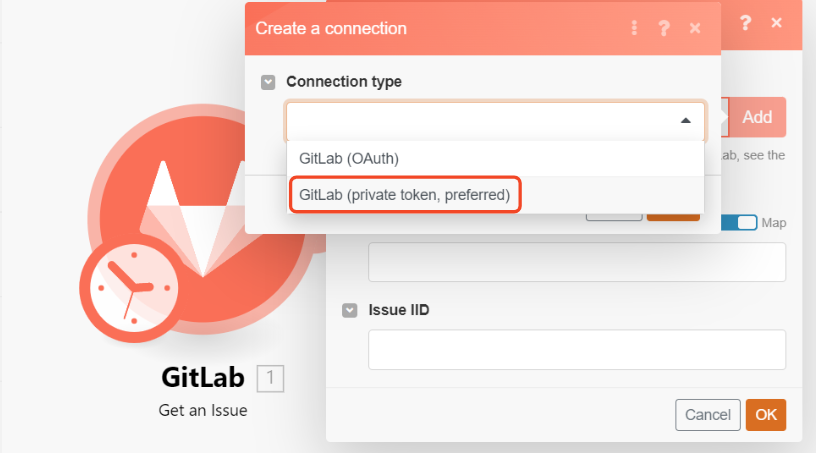
9. Fill in your private token and click save and you’re done.
If you encounter any problems while creating your token, please do not hesitate to contact our support.