With the Notion modules in Boost.space Integrator, you can watch, retrieve, create, append, and update databases, database items, pages, page content, search for objects, list users, and make API calls.
To use the Notion modules, you must have a Notion account. Your Notion account must have admin permissions to establish the connection in Boost.space Integrator. You can create a Notion account at notion.so.
Refer to the Notion API documentation for a list of available endpoints.
Boost.space Integrator provides two ways to connect the Notion app:
To establish a Notion internal connection:
-
Log in to your Notion account.
-
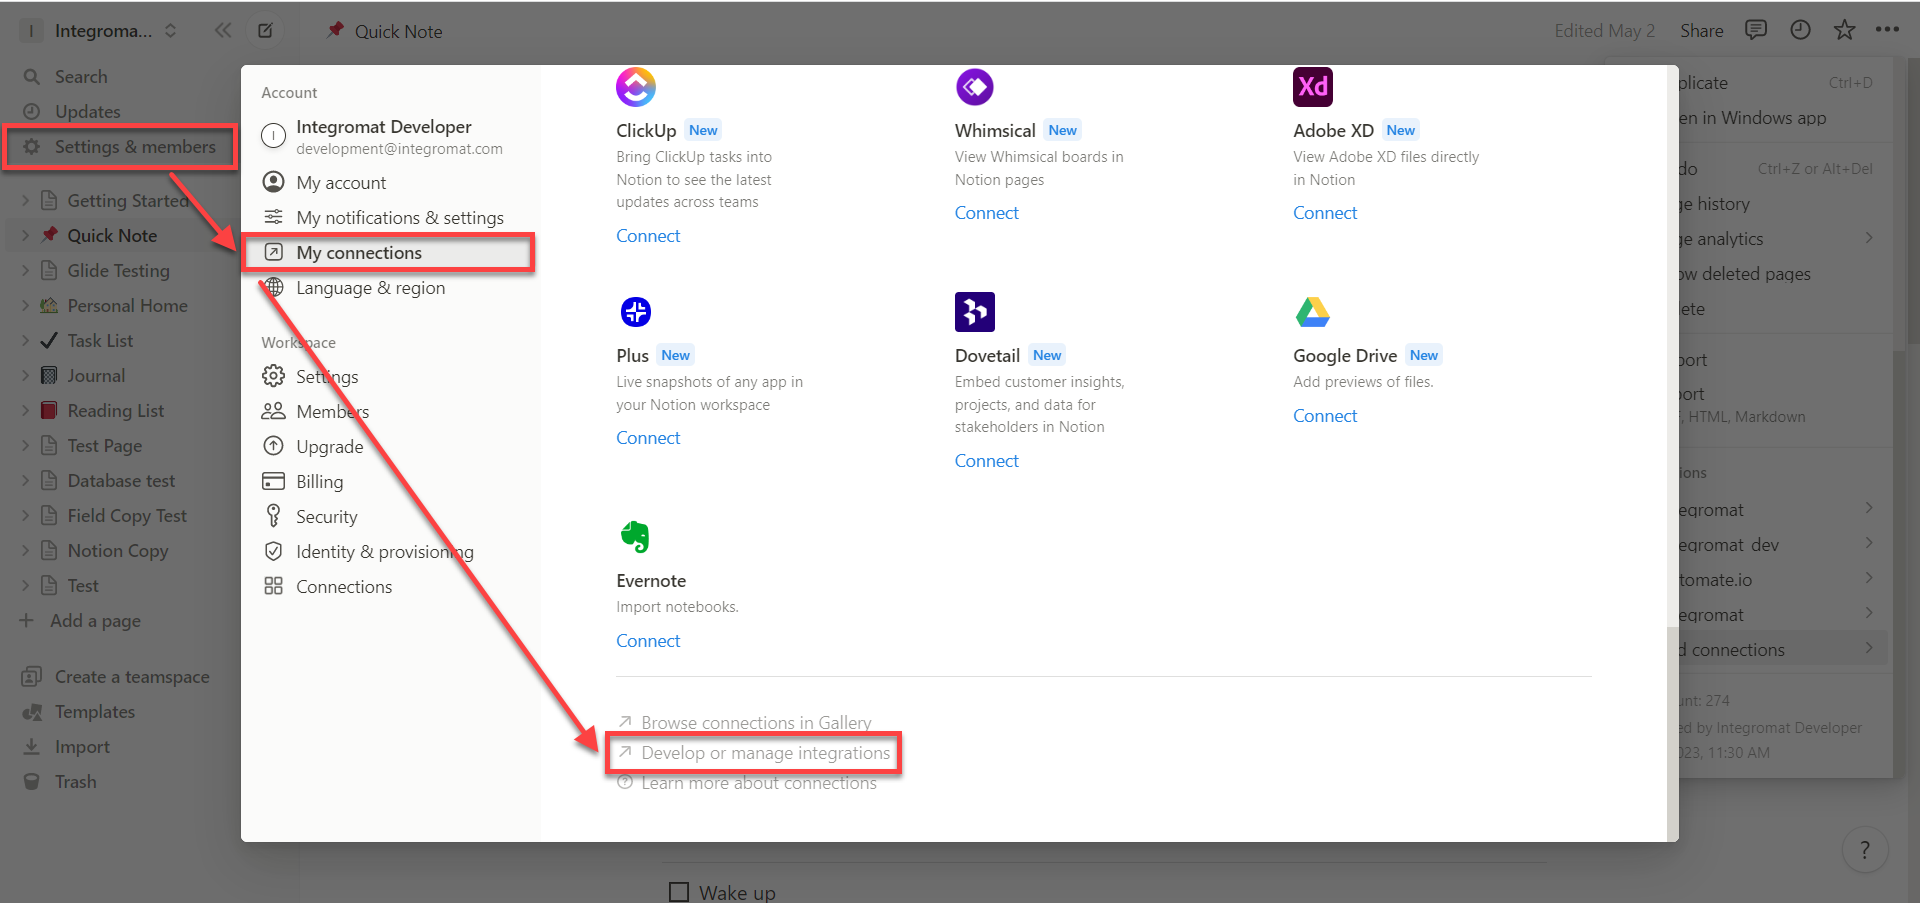
Click Settings & Members > Connections > Develop or manage integrations from the sidebar or go to the My integrations page.
-
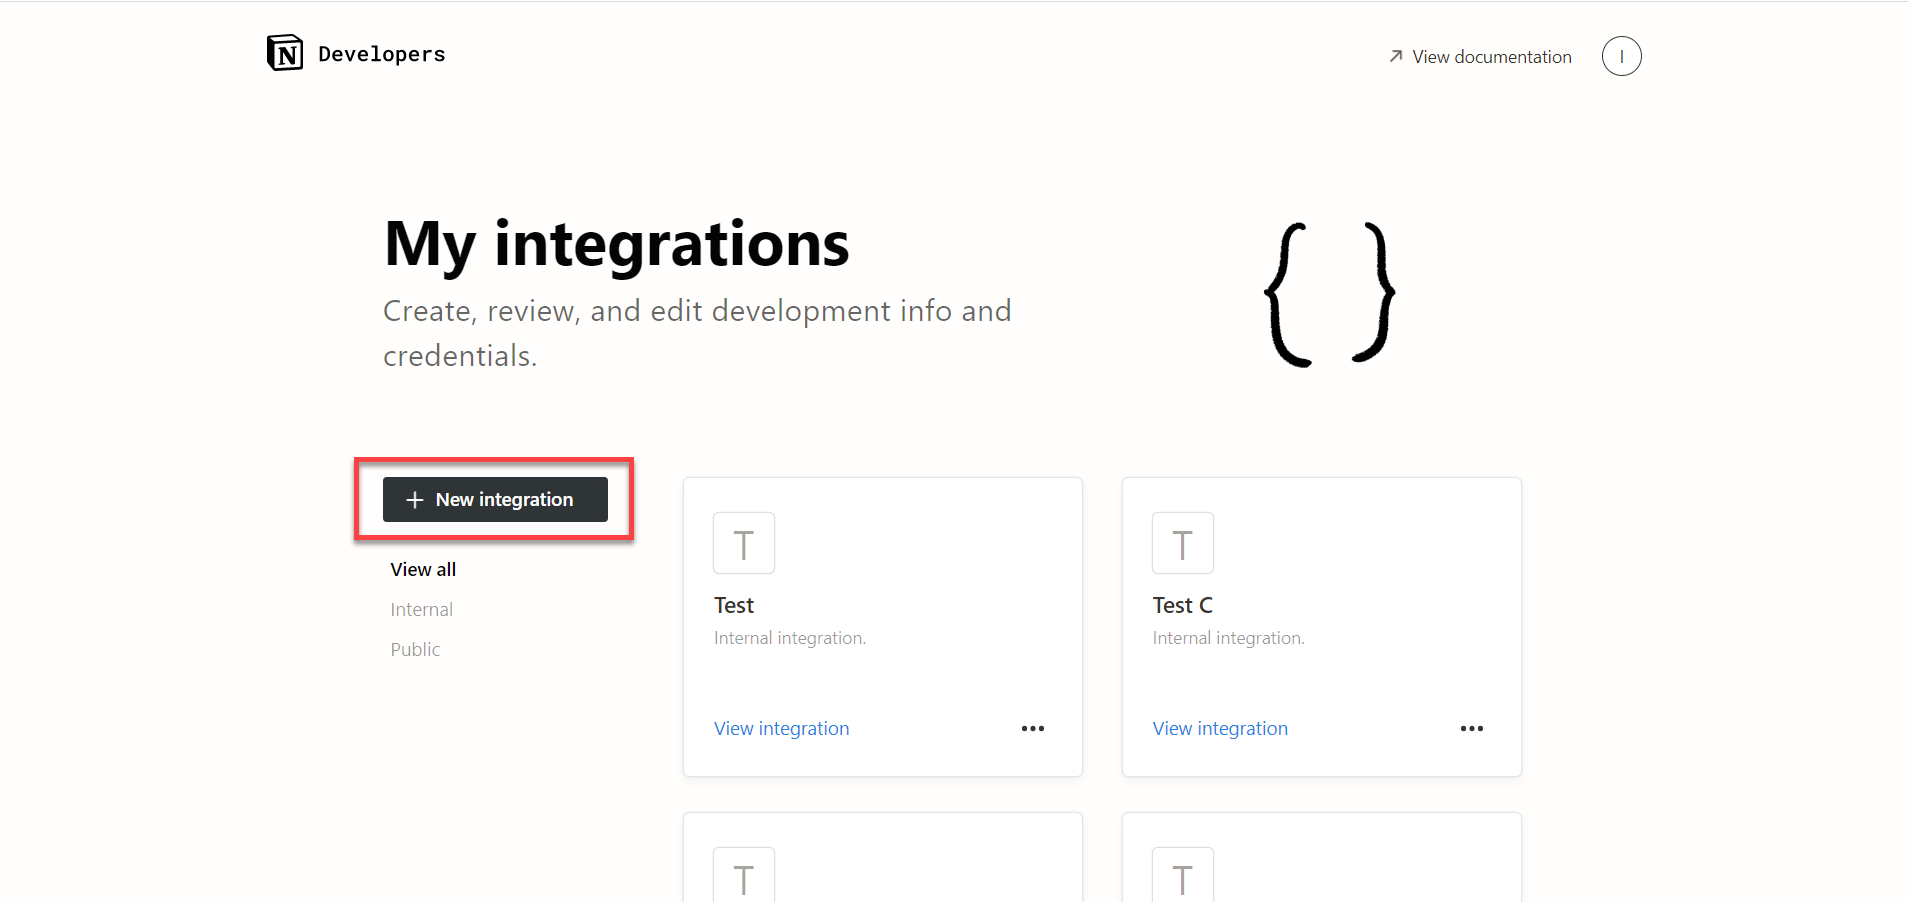
Click New Integration.
-
Select the Associate workspace, fill in the integration Name, upload a logo (optional), choose the Associated workspace, and click Submit.
-
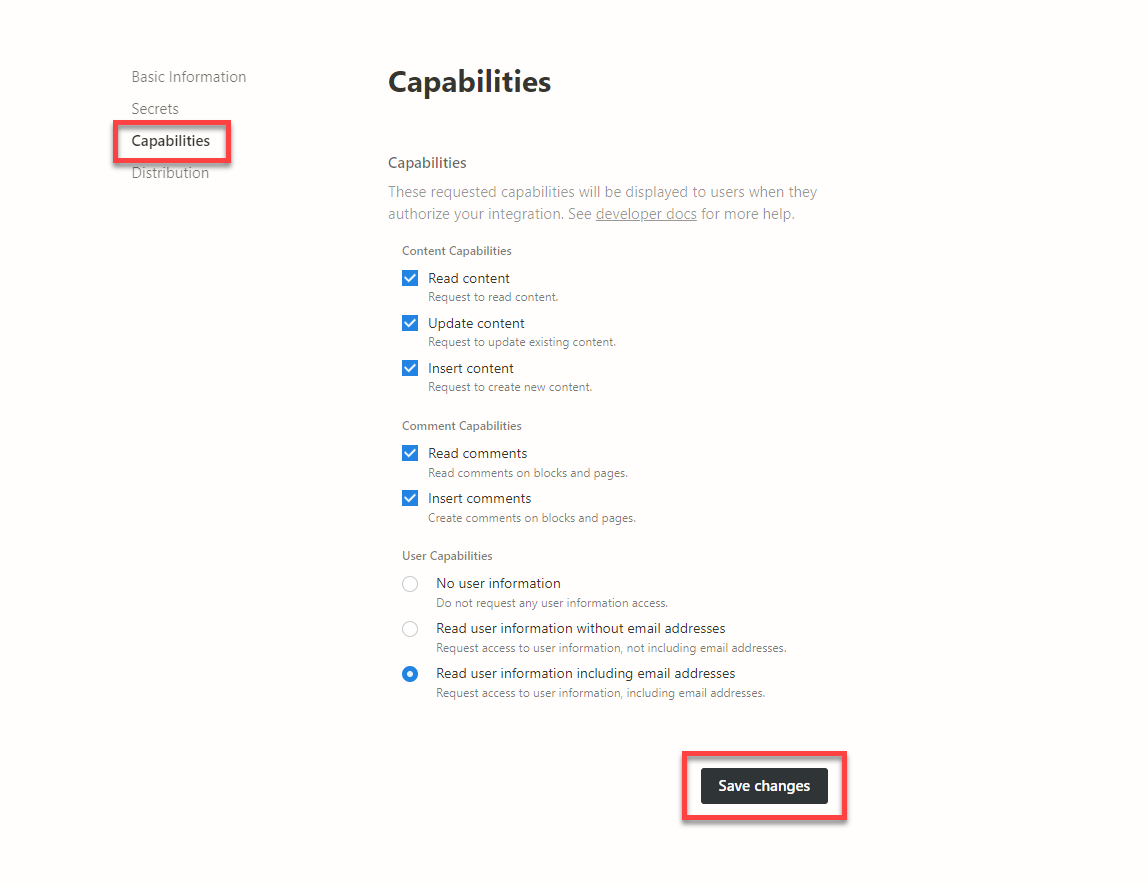
Go to Capabilities, update the requested capabilities, and click Save changes.
-
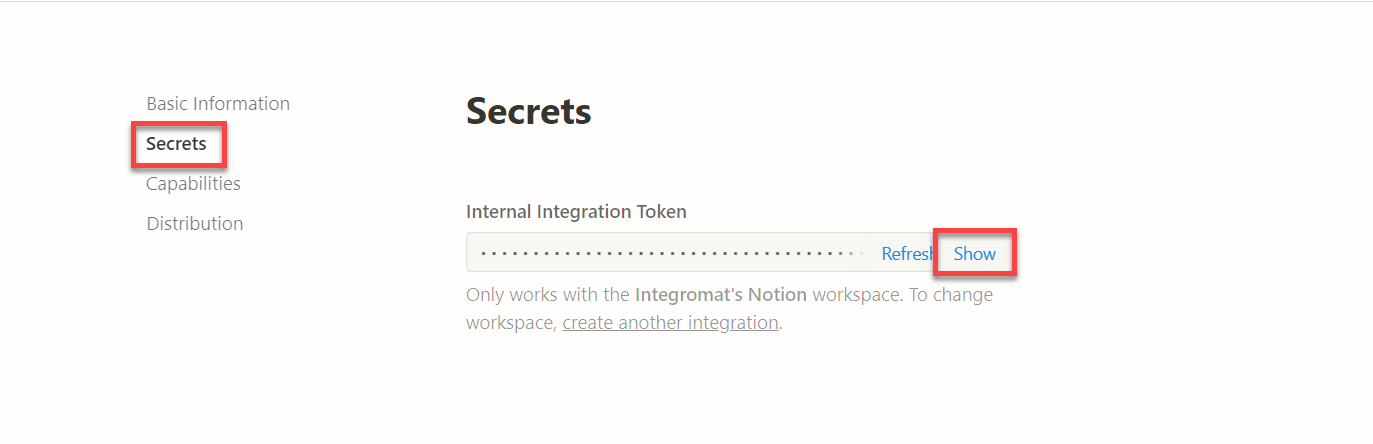
Go to Secrets, click Show next to your internal integration token, and copy the token. Store your token in a safe place.
-
Log in to your Boost.space Integrator account and add a Notion module to your scenario, and click Create a connection.
-
In the Connection type dropdown, select Notion Internal.
-
Optional: In the Connection name field, enter a name for the connection.
-
In the Internal Integration Token field, paste the token copied in Step 6.
-
Click Save.
You have successfully established the connection. You can now edit your scenario and add more Notion modules. If your connection requires reauthorization at any point, follow the connection renewal steps here.
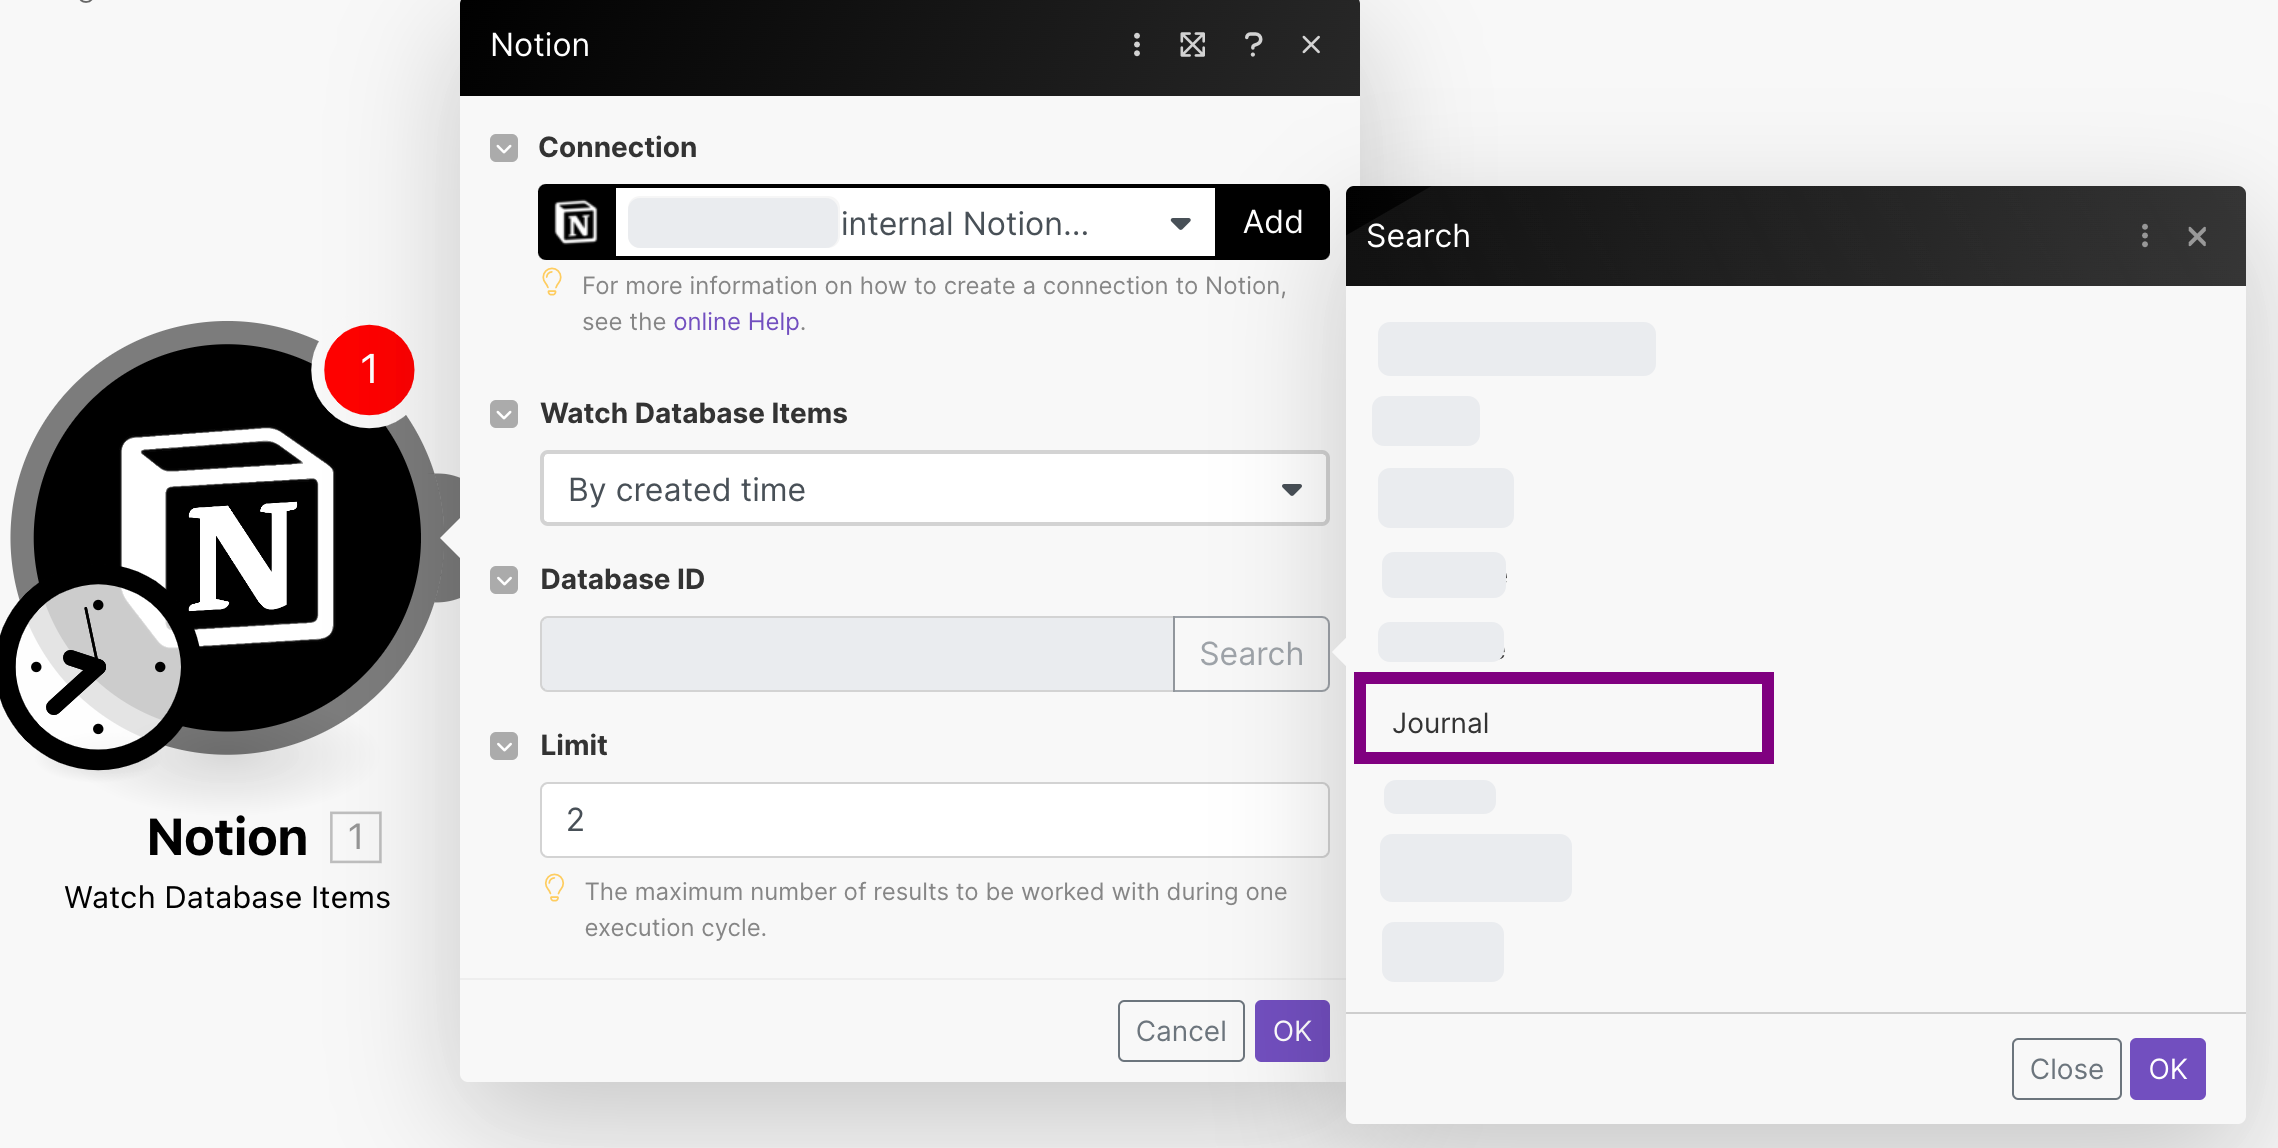
If the databases are not visible in the Database ID > Search field, follow the instructions in Add Databases to be visible in Boost.space Integrator to add them.
To establish a Notion public connection:
-
Log in to your Boost.space Integrator account and add a Notion module to your scenario, and click Create a connection.
-
In the Connection type dropdown, select Notion Public.
-
Optional: In the Connection name field, enter a name for the connection.
-
Optional: Click Show Advanced Settings and enter your client credentials. See Obtain Notion Client Credentials.
-
Click Save.
-
If prompted, authenticate your account, click Select pages, select the pages you want Boost.space Integrator to have access to, and click Allow access.
You have successfully established the connection. You can now edit your scenario and add more Notion modules. If your connection requires reauthorization at any point, follow the connection renewal steps here.
To obtain client credentials:
-
Log in to your Notion account.
-
Click Settings & Members > Connections > Develop or manage integrations from the sidebar or go to the My integrations page.
-
Click New Integration.
-
Select the Associate workspace, fill in the integration Name, upload a logo (optional), choose the Associated workspace, and click Submit.
-
Go to Capabilities, update the requested capabilities, and click Save changes.
-
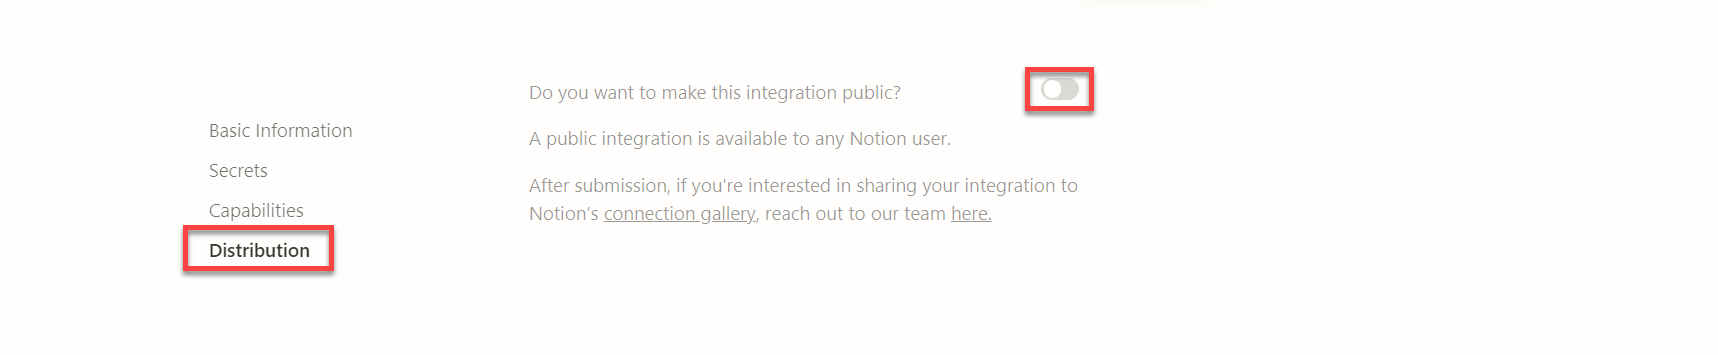
Go to Distribution and click the toggle to make the integration public.
-
Fill in your organization information and click Submit.
Redirect URIs
Enter the redirect URI:
https://integrator.boost.space/oauth/cb/notion2Company name
Name of your company or organization. You may use your own name if this does not apply.
Website or homepage
Used to link to your integration’s website or homepage in your integration page and authentication screens.
Tagline
Optional: A short description of the integration.
Privacy policy
URL address used to link to your integration’s privacy policy in your integration page and authentication screens.
Terms of use
URL address used to link to your integration’s terms of use in your integration page and authentication screens.
Support email
Used to link to your integration’s support email in your integration page and authentication screens.
Notion URL for optional template
Optional. URL must be for a public Notion page. Use this field if you’d like to duplicate a template into a user’s workspace during OAuth.
-
Click Continue in the Switch to Public integration? prompt.
-
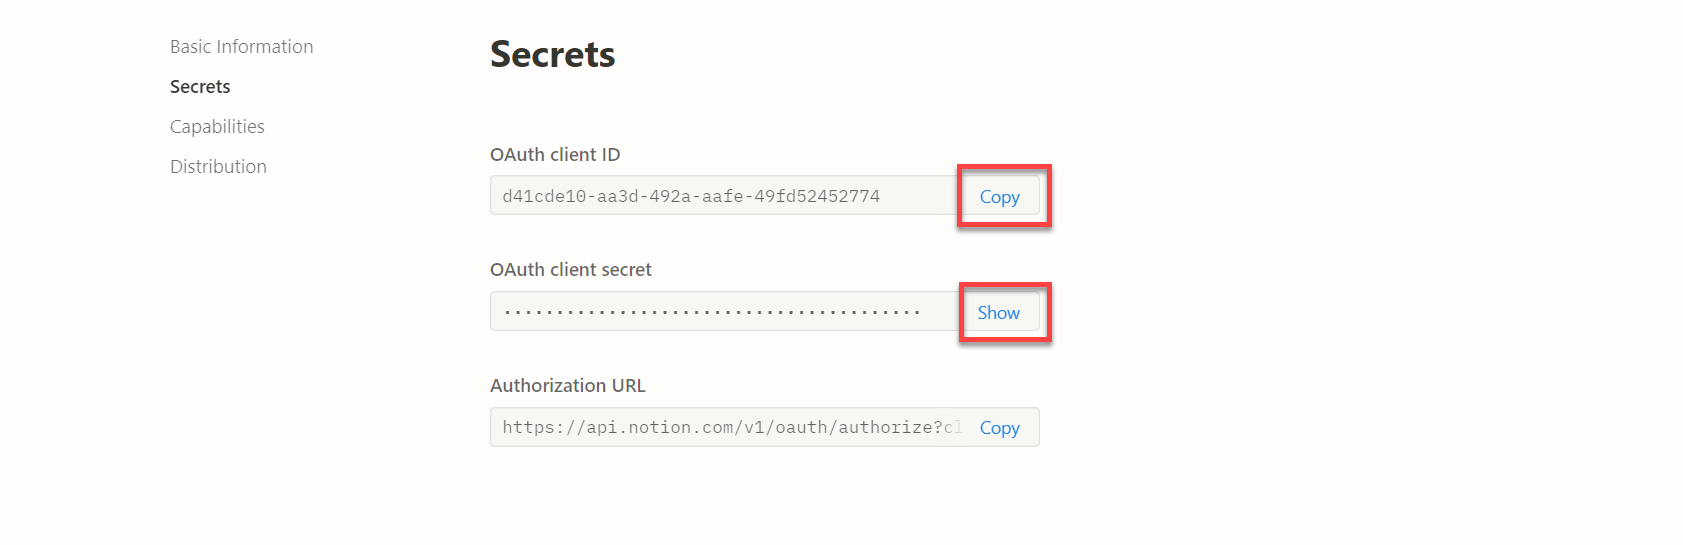
Copy the OAuth client ID and OAuth client secret and save them in a safe place. You will not be able to view the OAuth client secret more than once.
You have successfully created your client credentials.
For the Notion internal connection, by default, Notion databases do not appear in the Database ID field > Search option. You must manually add them to the Boost.space Integrator app from your Notion account.
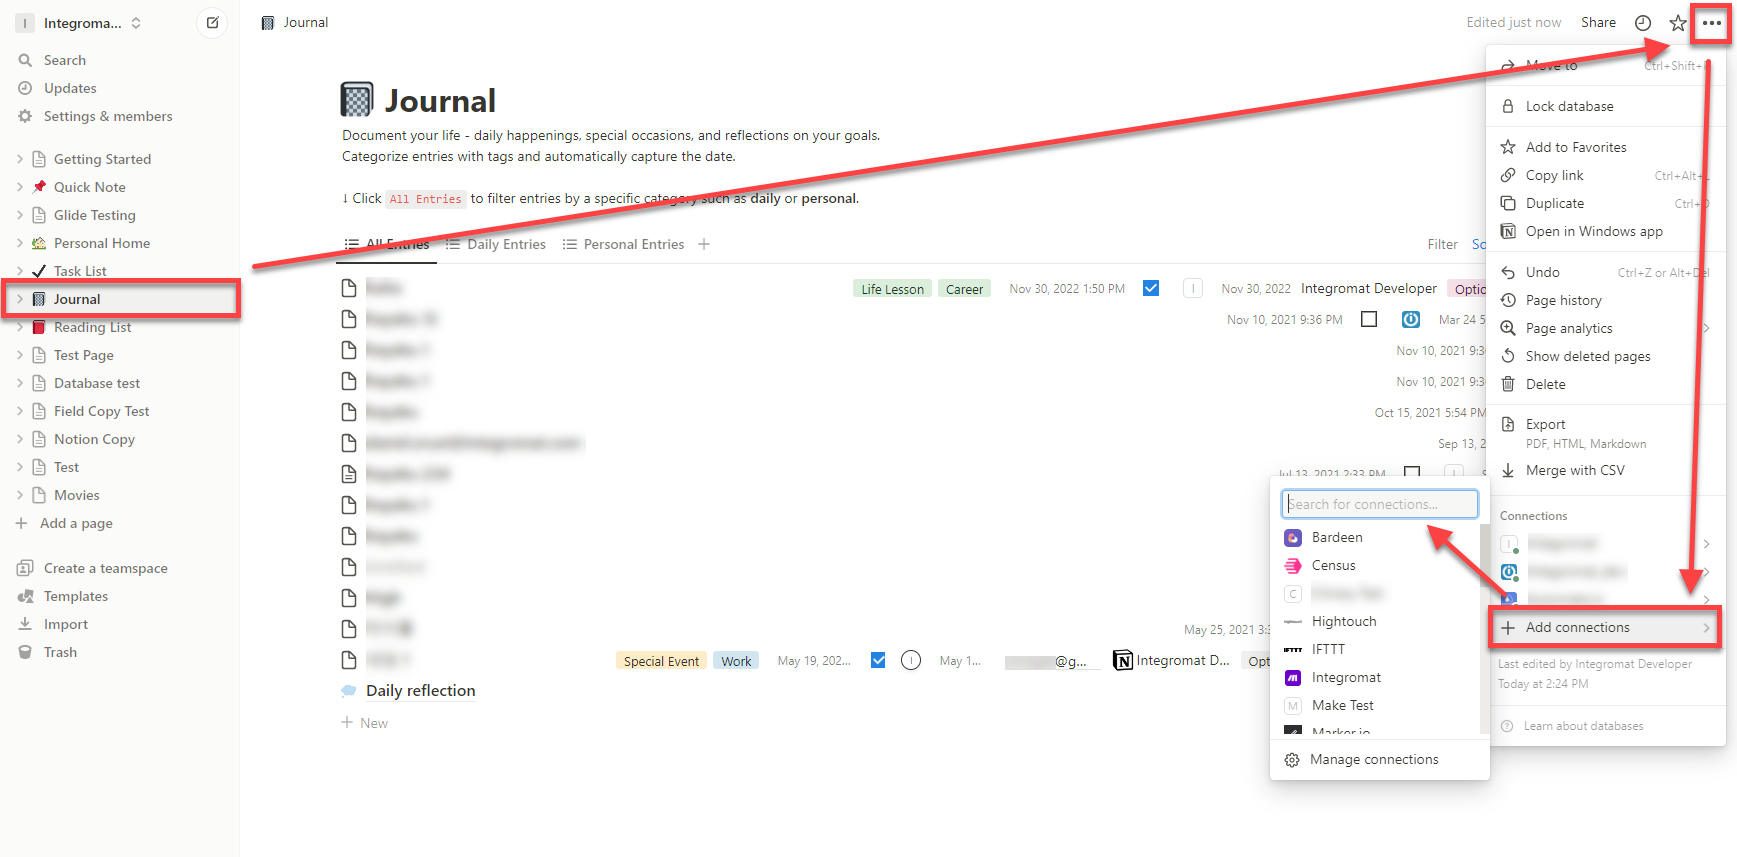
To add databases from your Notion account to Boost.space Integrator app:
![[Note]](https://docs.boost.space/wp-content/themes/bsdocs/docs-parser/HTML/css/image/note.png) |
Note |
|---|---|
|
If new databases or pages are added to the Notion account, you must revoke the connection in your Notion account and reauthorize the connection in Boost.space Integrator to retrieve the added databases or pages. |
To retrieve the newly added databases and pages:
-
Log in to your Notion account.
-
Click Settings & members > Connections > … > Disconnect all users.
-
Go to your Boost.space Integrator account Connections page, search for your Notion connection, and click Reauthorize.
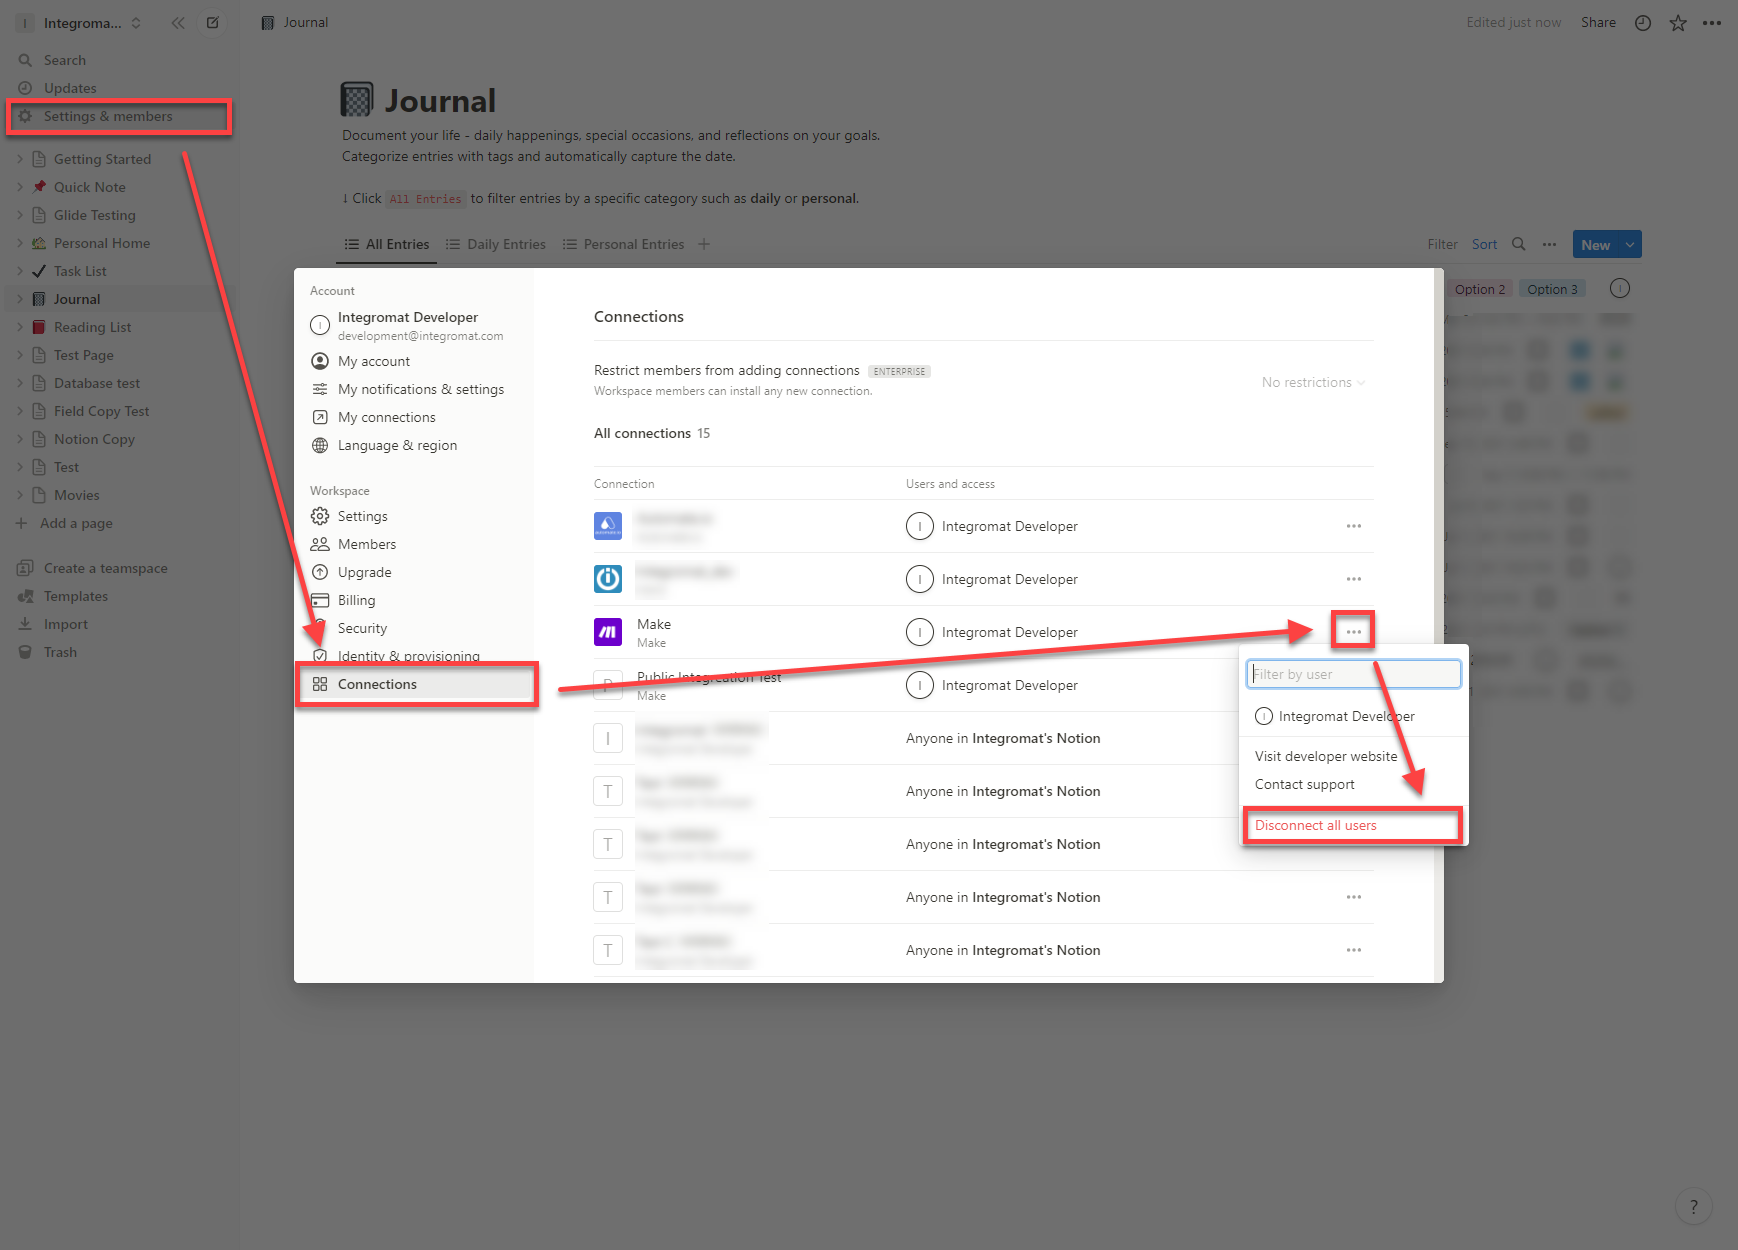
You can now see the newly added databases or pages in your Notion Boost.space Integrator connection.
After connecting the app, you can perform the following actions:
Database Item
-
Watch Database Items
-
Get a Database Item
Note: Add the List Page Property Items module to retrieve the complete details of a property item if the output variable contains the
has_morevalue. This means you must paginate to retrieve all the property item’s property values in the page object as Notion imposes a 25-page reference limit. -
Create a Database Item
-
Append a Database Item Content
-
Update a Database Item
Database/Page
-
Watch Databases/Pages
-
Search Objects
-
Get a Database
-
Get a Page
-
Create a Database
-
Create a Page
-
Update a Database
-
Update a Page
Page Content
-
Watch Page Contents
-
List Page Contents
-
List Page Property Items
Note: Can be used with the following property types: title, text, relation, and person.
Use this module when a property on a database item or page output contains the
has morevalue, indicating there are more than 25 items in that field and you much paginate to retrieve all items in that column. -
Get a Page Content
-
Append a Page Content
-
Update a Page Content
Note: In the Type field, select the page content type that corresponds to the Page Content ID. If an incorrect Type is selected, an error will appear. The page content type cannot be changed using this module.
-
Delete a Page Content
Other
-
Make an API Call
-
List Users