The Simplero modules allow you to watch, create, update, retrieve, and delete the purchases, tags, contacts, and subscription lists in your Simplero account.
Prerequisites
-
A Simplero account
In order to use Simplero with Boost.space Integrator, it is necessary to have a Simplero account. If you do not have one, you can create a Simplero account at simplero.com/accounts/new.
![[Note]](https://docs.boost.space/wp-content/themes/bsdocs/docs-parser/HTML/css/image/note.png) |
Note |
|---|---|
|
The module dialog fields that are displayed in bold (in the Boost.space Integrator scenario, not in this documentation article) are mandatory! |
To connect your Simplero account to Boost.space Integrator you need to obtain the API Key from your Simplero account and insert it in the Create a connection dialog in the Boost.space Integrator module.
-
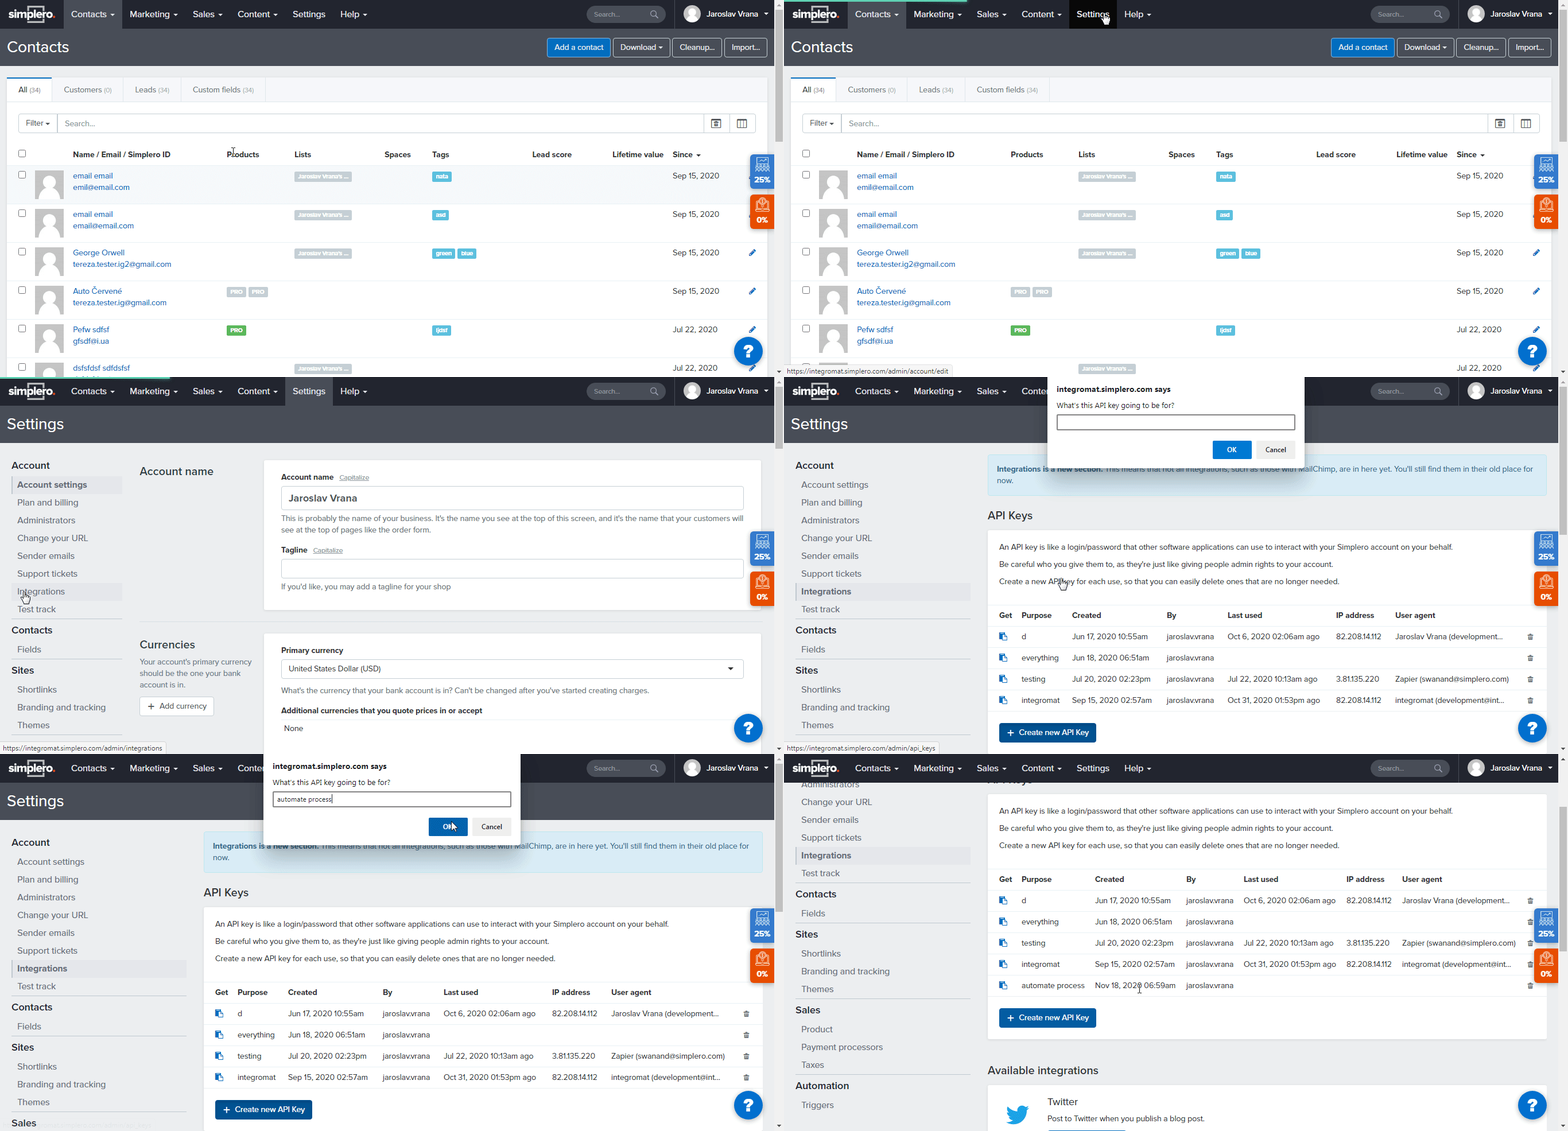
Login to your Simplero account.
-
Click Settings > Integrations > Create New API Key.
-
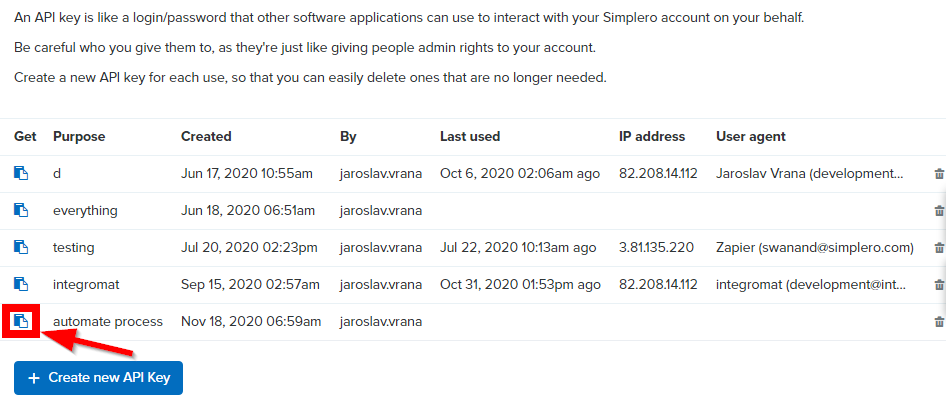
Click the copy (
 ) against the API key to copy the API key to your clipboard.
 -
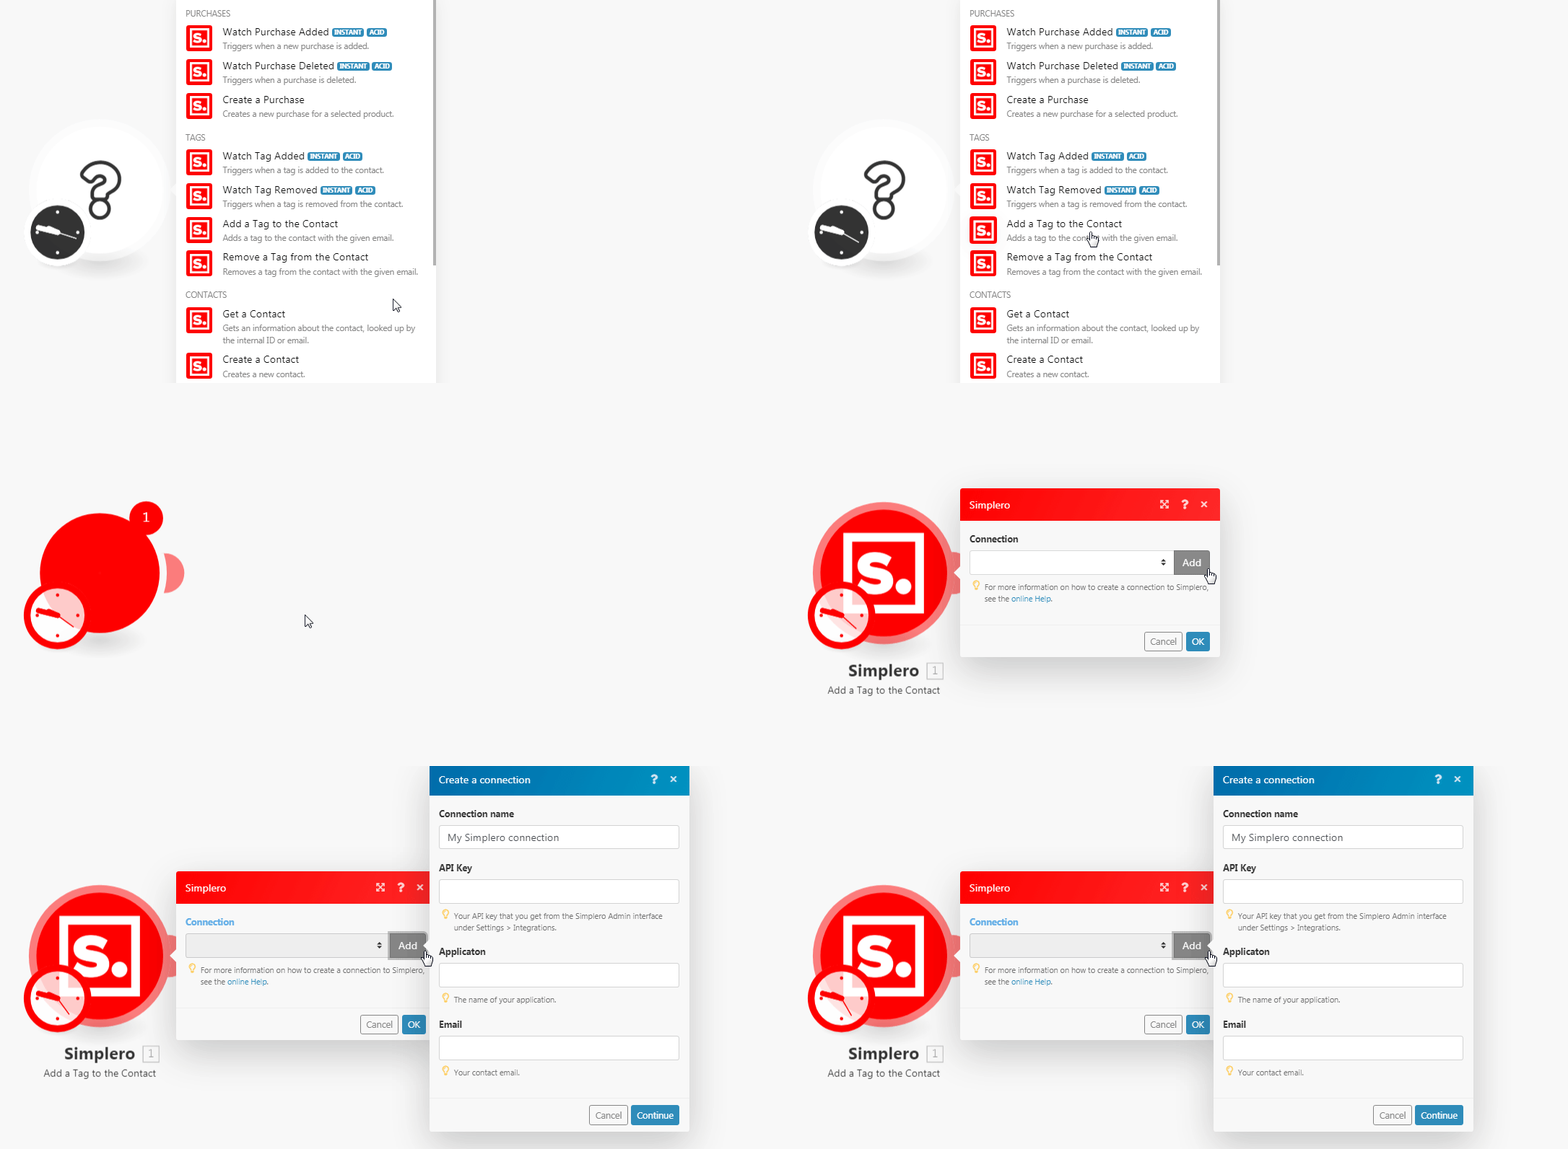
Go to Boost.space Integrator and open the Simplero module’s Create a connection dialog.
-
In the Connection name field, enter a name for the connection.
-
In the API Key field, enter the API key copied in step 3.
-
In the Application field, enter your application name. If your account’s URL address is
www.xyz.simplero.comthen your application isxyz. -
In the Email field, enter the email address used for creating the Simplero account, and click Continue.
The connection has been established.
Triggers when a new purchase is added.
|
Webhook Name |
Enter a name for the webhook. |
|
Connection |
See the Connecting to Simplero Webhook using Boost.space Integrator to add the webhook in your Simplero account.
Triggers when a purchase is deleted.
|
Webhook Name |
Enter a name for the webhook. |
|
Connection |
See the Connecting to Simplero Webhook using Boost.space Integrator to add the webhook in your Simplero account.
Creates a new purchase for a selected product.
|
Connection |
|
|
Product ID |
Select the Product ID for which you want to create a purchase. |
|
Email Address |
Enter the email address of the customer. |
|
First Name |
Enter the first name of the customer. |
|
Last Name |
Enter the last name of the customer. |
Triggers when a tag is added to the contact.
|
Webhook Name |
Enter a name for the webhook. |
|
Connection |
See the Connecting to Simplero Webhook using Boost.space Integrator to add the webhook in your Simplero account.
Triggers when a tag is removed from the contact.
|
Webhook Name |
Enter a name for the webhook. |
|
Connection |
See the Connecting to Simplero Webhook using Boost.space Integrator to add the webhook in your Simplero account.
Adds a tag to the contact with the given email.
|
Connection |
|
|
Email Address |
Enter the email address of the contact to which you want to add the tag. |
|
Tag |
Select the tag for the contact. |
Removes a tag from the contact with the given email.
|
Connection |
|
|
Email Address |
Enter the email address of the contact whose tags you want to remove. |
|
Tag |
Select the tag you want to remove from the contact. |
Gets information about the contact, looked up by the internal ID or email.
|
Connection |
|
|
Search By |
Select the option to choose the contact whose details you want to retrieve. |
|
|
Enter the email address of the contact whose details you want to retrieve. |
|
ID |
Enter the Contact ID whose details you want to retrieve. |
Creates a new contact.
|
Connection |
|
|
Email Address |
Enter the email address of the contact. |
|
First Name |
Enter the contact’s first name. |
|
Last Name |
Enter the contact’s last name. |
|
Tags |
Add the tags applicable to the contact. |
|
Note |
Enter any additional information about the contact. |
|
Track |
Enter a keyword that you want to associate with this contact for tracking. |
|
Auto Responder Start At |
Enter the date when you want to begin receiving responses automatically for this contact. |
|
Landing Page ID |
Enter the Landing Page ID (signup form) within Simplero for this contact. This is only relevant when using Simplero’s conversion tracking feature. |
|
IP Address |
Enter the IP address used to create this contact. |
|
Referrer |
Enter the external URL address from which the customer reached Simplero to create the contact. |
|
Ref |
Enter the reference details for this contact. |
Updates an existing contact with the same email.
|
Connection |
|
|
Email Address |
Enter the email address of the contact. |
|
First Name |
Enter the contact’s first name. |
|
Last Name |
Enter the contact’s last name. |
|
Tags |
Add the tags applicable to the contact. |
|
Note |
Enter any additional information about the contact. |
|
Track |
Enter a keyword that you want to associate with this contact for tracking. |
|
Auto Responder Start At |
Enter the date when you want to begin receiving responses automatically for this contact. |
|
Landing Page ID |
Enter the Landing Page ID (signup form) within Simplero for this contact. This is only relevant when using Simplero’s conversion tracking feature. |
|
IP Address |
Enter the IP address used to create this contact. |
|
Referrer |
Enter the external URL address from which the customer reached the Simplero to create the contact. |
|
Ref |
Enter the reference details for this contact. |
Triggers when a contact is subscribed to the list.
|
Webhook Name |
Enter a name for the webhook. |
|
Connection |
See the Connecting to Simplero Webhook using Boost.space Integrator to add the webhook in your Simplero account.
Triggers when a contact is unsubscribed from the list.
|
Webhook Name |
Enter a name for the webhook. |
|
Connection |
See the Connecting to Simplero Webhook using Boost.space Integrator to add the webhook in your Simplero account.
Returns all the account’s list.
|
Connection |
|
|
Limit |
Set the maximum number of subscriber lists Boost.space Integrator should return during one scenario execution cycle. |
Adds a new subscriber to a list.
|
Connection |
|
|
List |
Select the list to which you want to add the subscriber. |
|
Email Address |
Enter the email address of the subscriber. |
|
First Name |
Enter the first name of the subscriber. |
|
Last Name |
Enter the last name of the subscriber. |
|
Phone |
Enter the phone number of the subscriber. For example, 15551231234. |
|
Tags |
Add the tags for the list or the subscriber. |
|
Note |
Enter any additional information for this subscription. |
|
Track |
Enter a keyword that you want to associate with this opt-in to track the subscribers. |
|
First Activated at |
Enter the date when the subscriber is activated first. |
|
Auto Responder Start at |
Enter the date when you want to begin receiving responses automatically. |
|
Landing Page ID |
Enter the Landing Page ID (signup form) within Simplero that this conversion should be counted for. This is only relevant when using Simplero’s conversion tracking feature. |
|
IP Address |
Enter the IP address used to subscribe the customer to the list. |
|
Referrer |
Enter the external URL address from which the customer reached the Simplero list. |
|
Ref |
Enter the reference details for this subscription. |
Unsubscribes a customer from a list.
|
Connection |
|
|
List ID |
Select the List ID from which you want to unsubscribe the customer. |
|
Email Address |
Enter the email address of the customer. |
Performs an arbitrary authorized API call.
|
Connection |
||||
|
URL |
Enter a path relative to
|
|||
|
Method |
Select the HTTP method you want to use: GET to retrieve information for an entry. POST to create a new entry. PUT to update/replace an existing entry. PATCH to make a partial entry update. DELETE to delete an entry. |
|||
|
Headers |
Enter the desired request headers. You don’t have to add authorization headers; we already did that for you. |
|||
|
Query String |
Enter the request query string. |
|||
|
Body |
Enter the body content for your API call. |
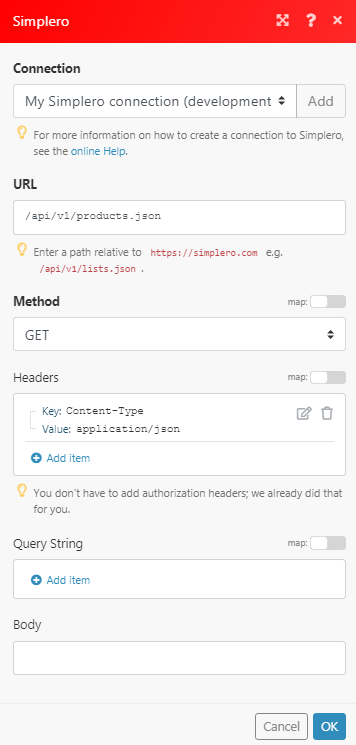
The following API call returns all the products from your Simplero account:
URL:
/api/v1/products.json
Method:
GET
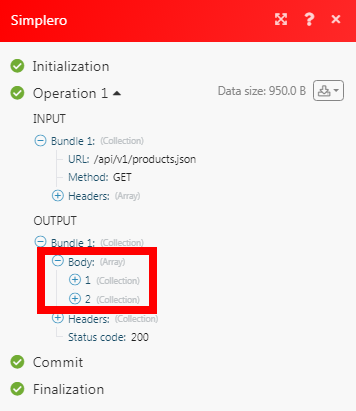
Matches of the search can be found in the module’s Output under Bundle > Body.
In our example, 2 products were returned:
-
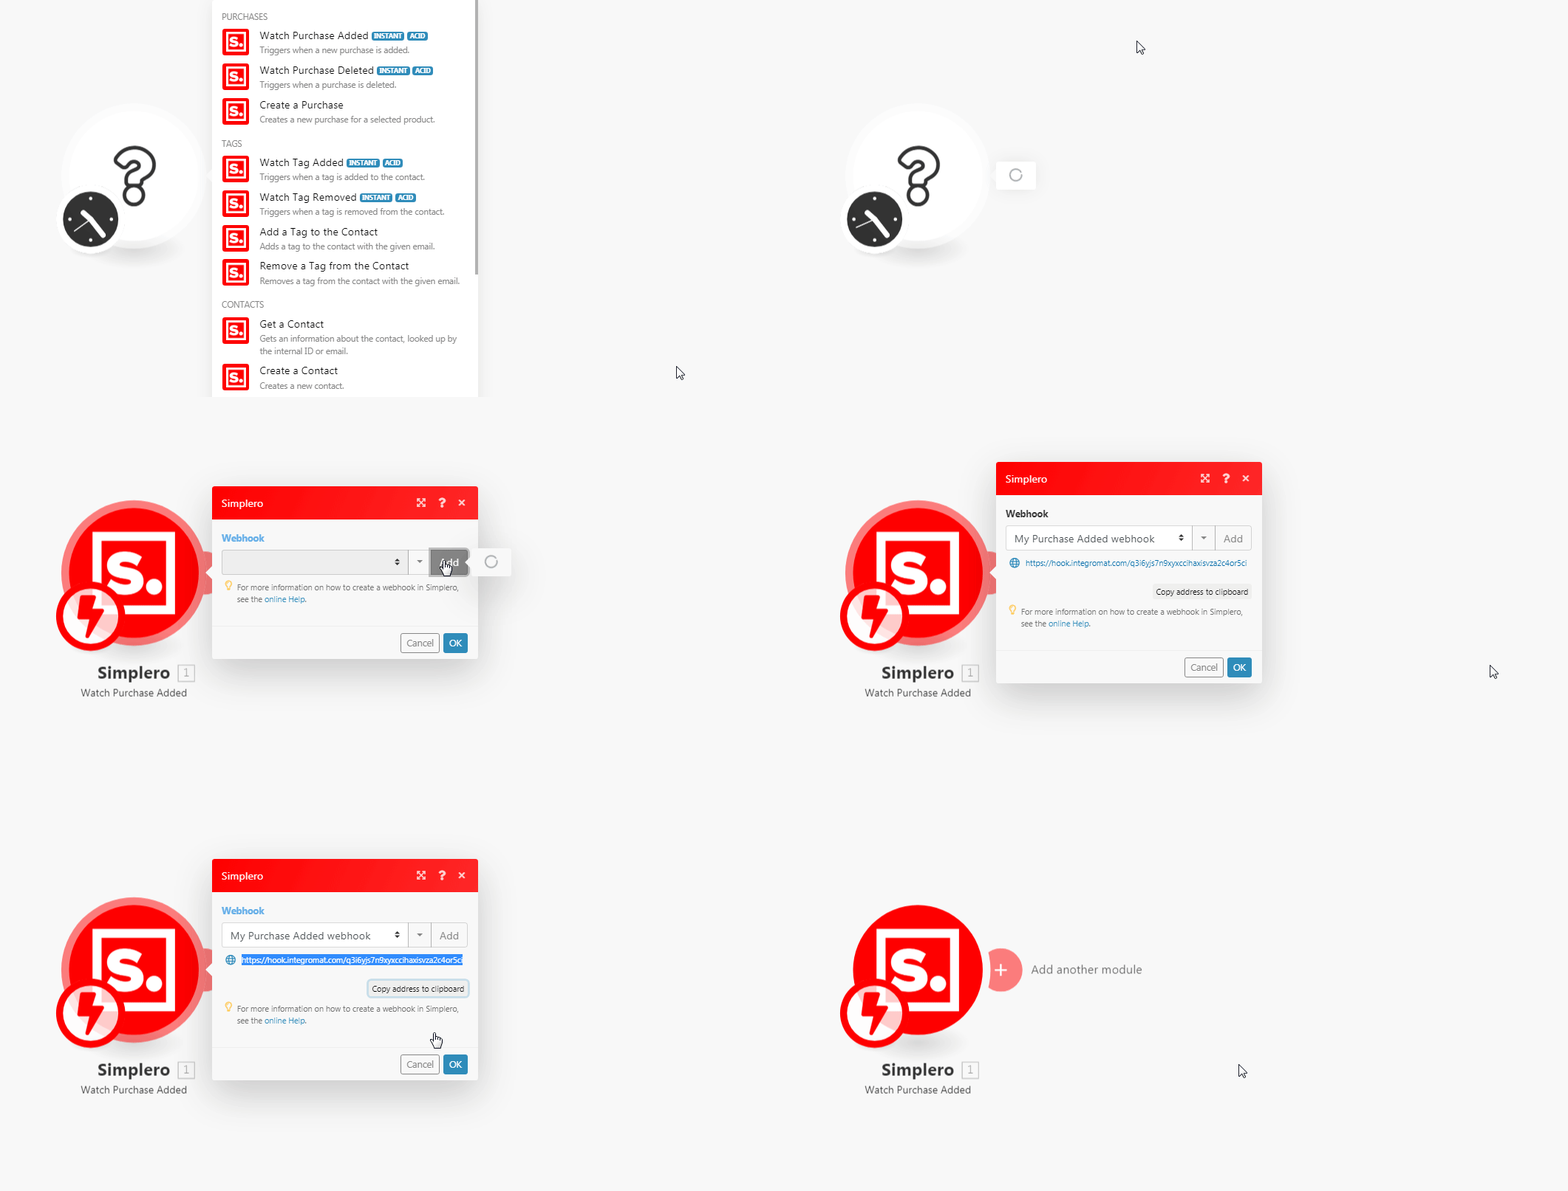
Open any Watch module, establish the connection as mentioned in the respective modules, click Save, copy the URL address to your clipboard, click OK, and save the trigger.
-
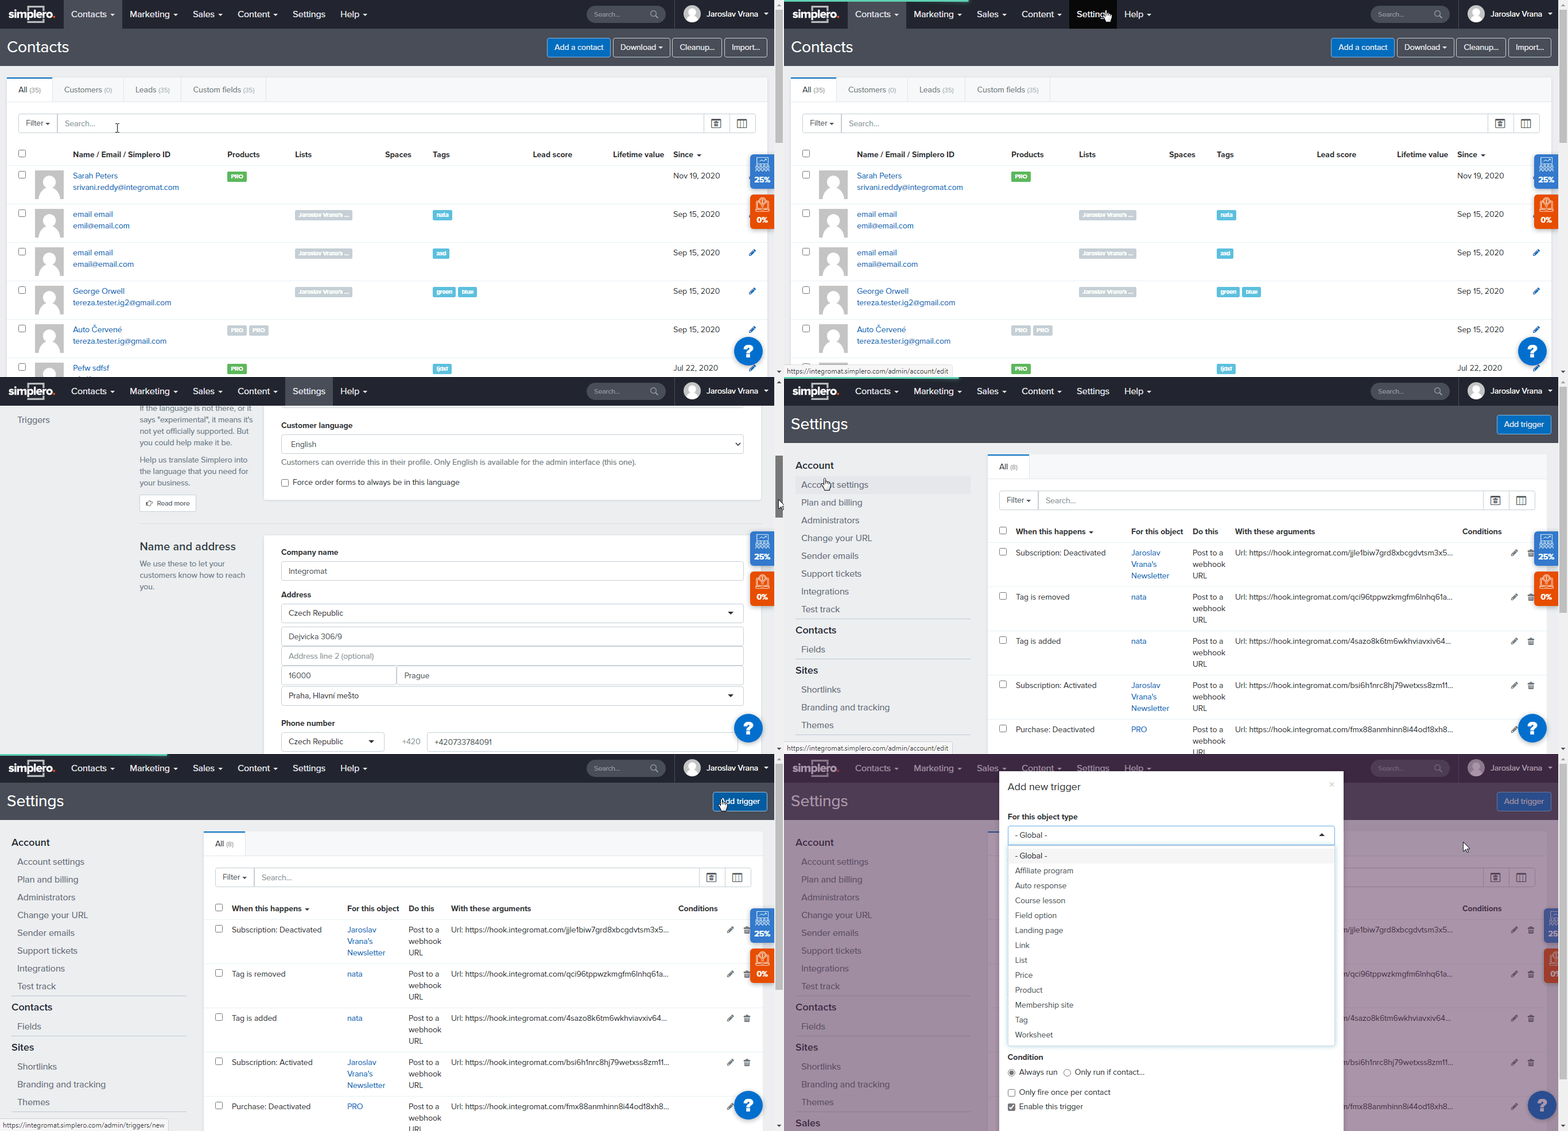
Login to your Simplero account. Click Settings > Triggers > Add trigger.
For this object type
Select the object type for which you want to add the trigger. For example, product, list.After you select the object type, choose the specific object for which you want to add the trigger.
When this happens
Select the option for which action you want to add the trigger. For example,
Purchase: activated.Value
Enter the value if applicable.
Do this
Select the action to perform when the specified action happens. For example,
send an email.Once you select the action, a field auto-populates to select (enter) the particular action details. For example, enter the email address to send the email.Which email
Enter the email address to notify.
Condition
Select the condition for which you want to receive the trigger.
Only fire once per contact
Select the checkbox to receive only one trigger for one single contact.
Enable this trigger
Select the checkbox to enable the webhook.
-
Click Save to add the webhook.
