-
A ClickFunnels account. Create an account on www.clickfunnels.com.
-
An already built funnel. More information about building your first funnel.
-
An established connection to ClickFunnels using a webhook.
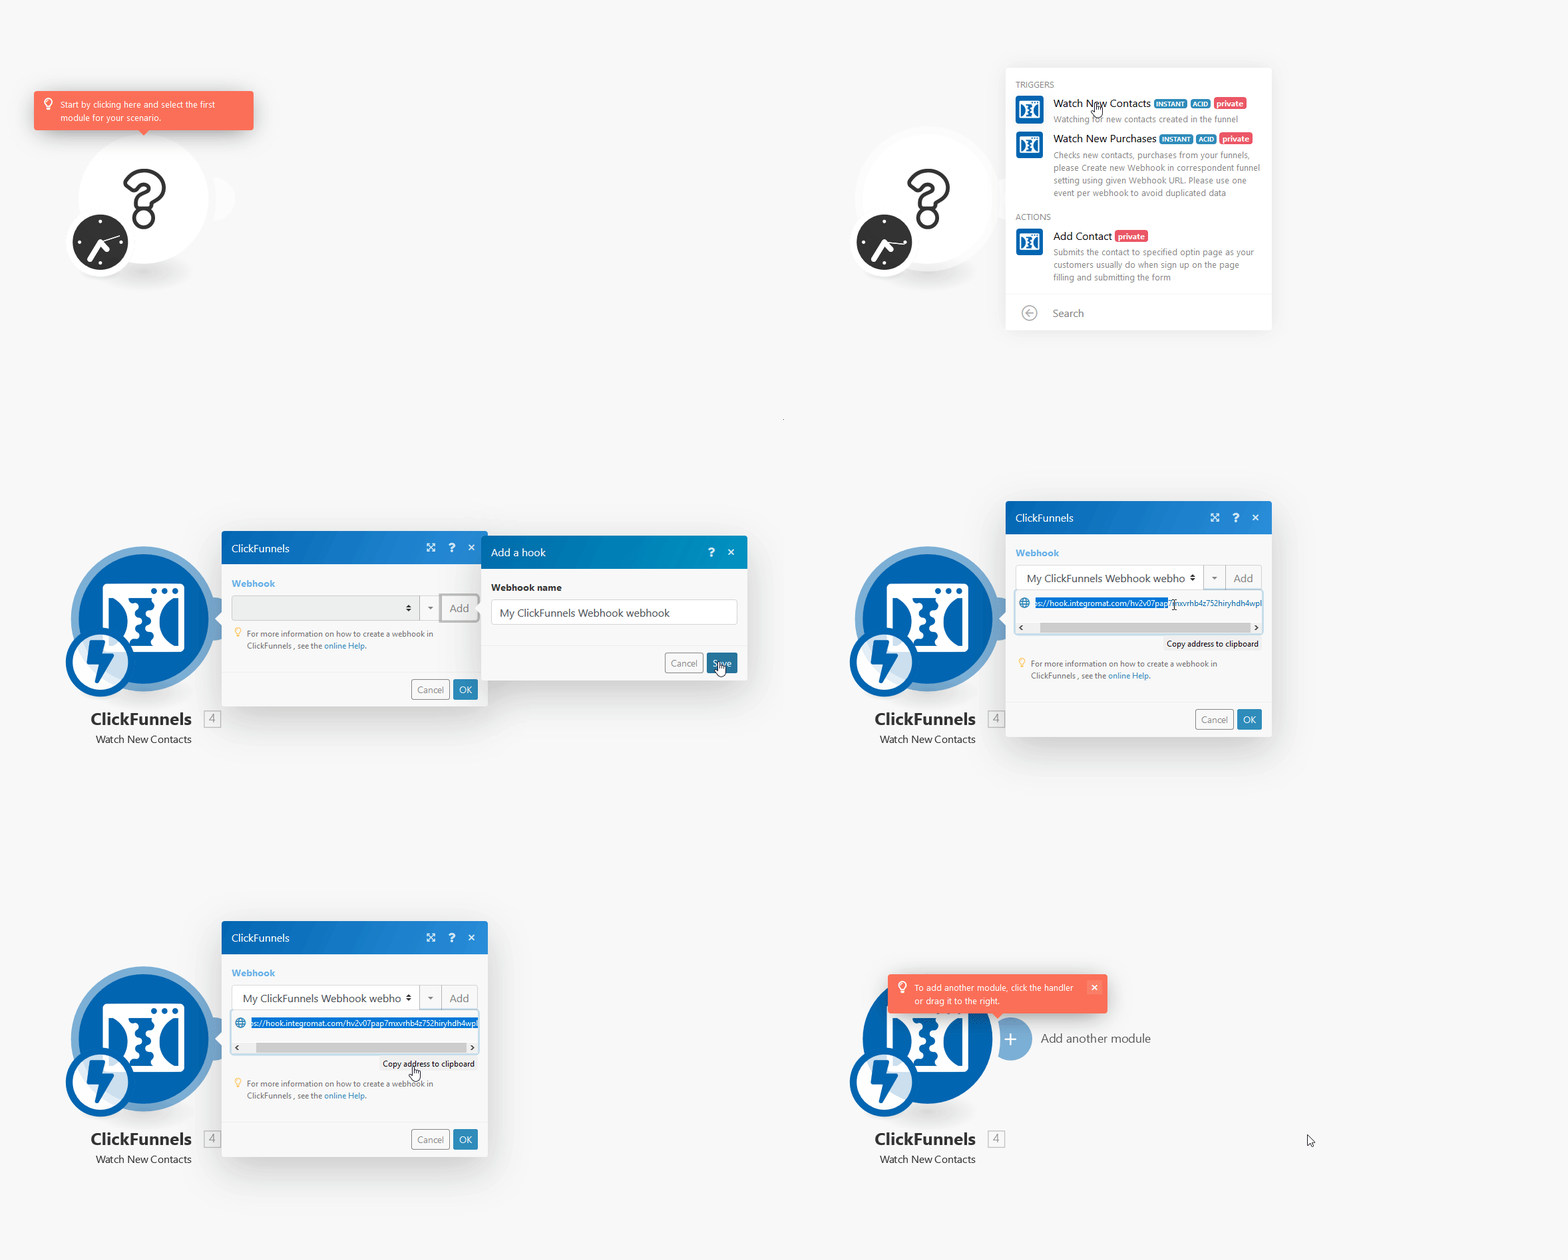
1. Create an Boost.space Integrator webhook and copy the provided link.
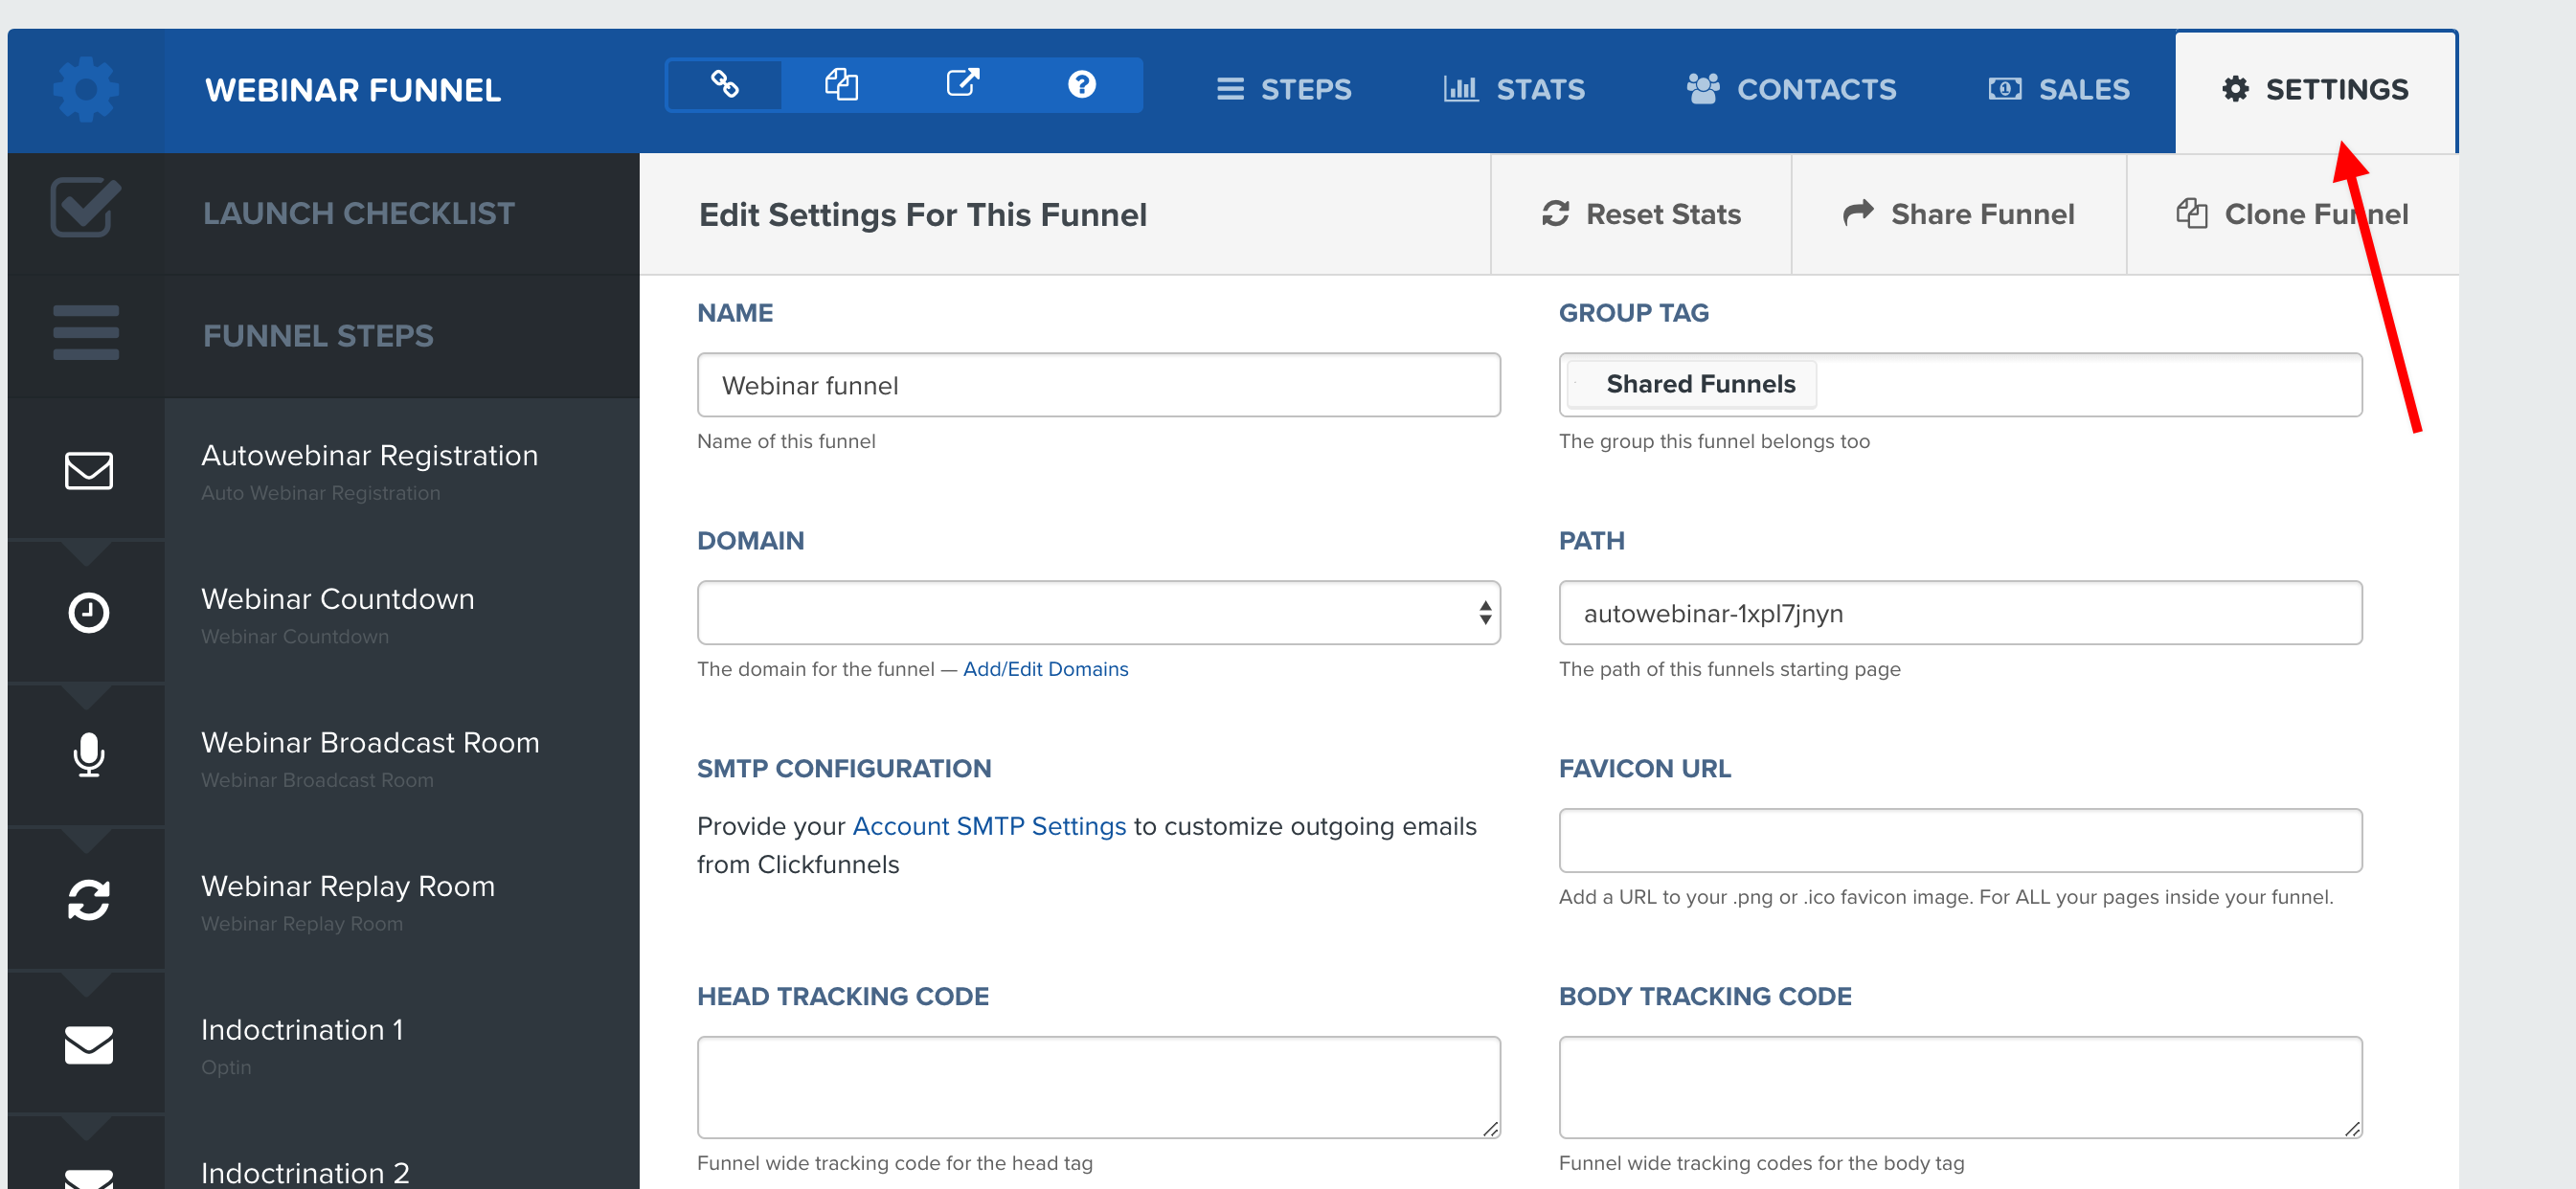
2. Open the Settings in the funnel that you want to process data from.
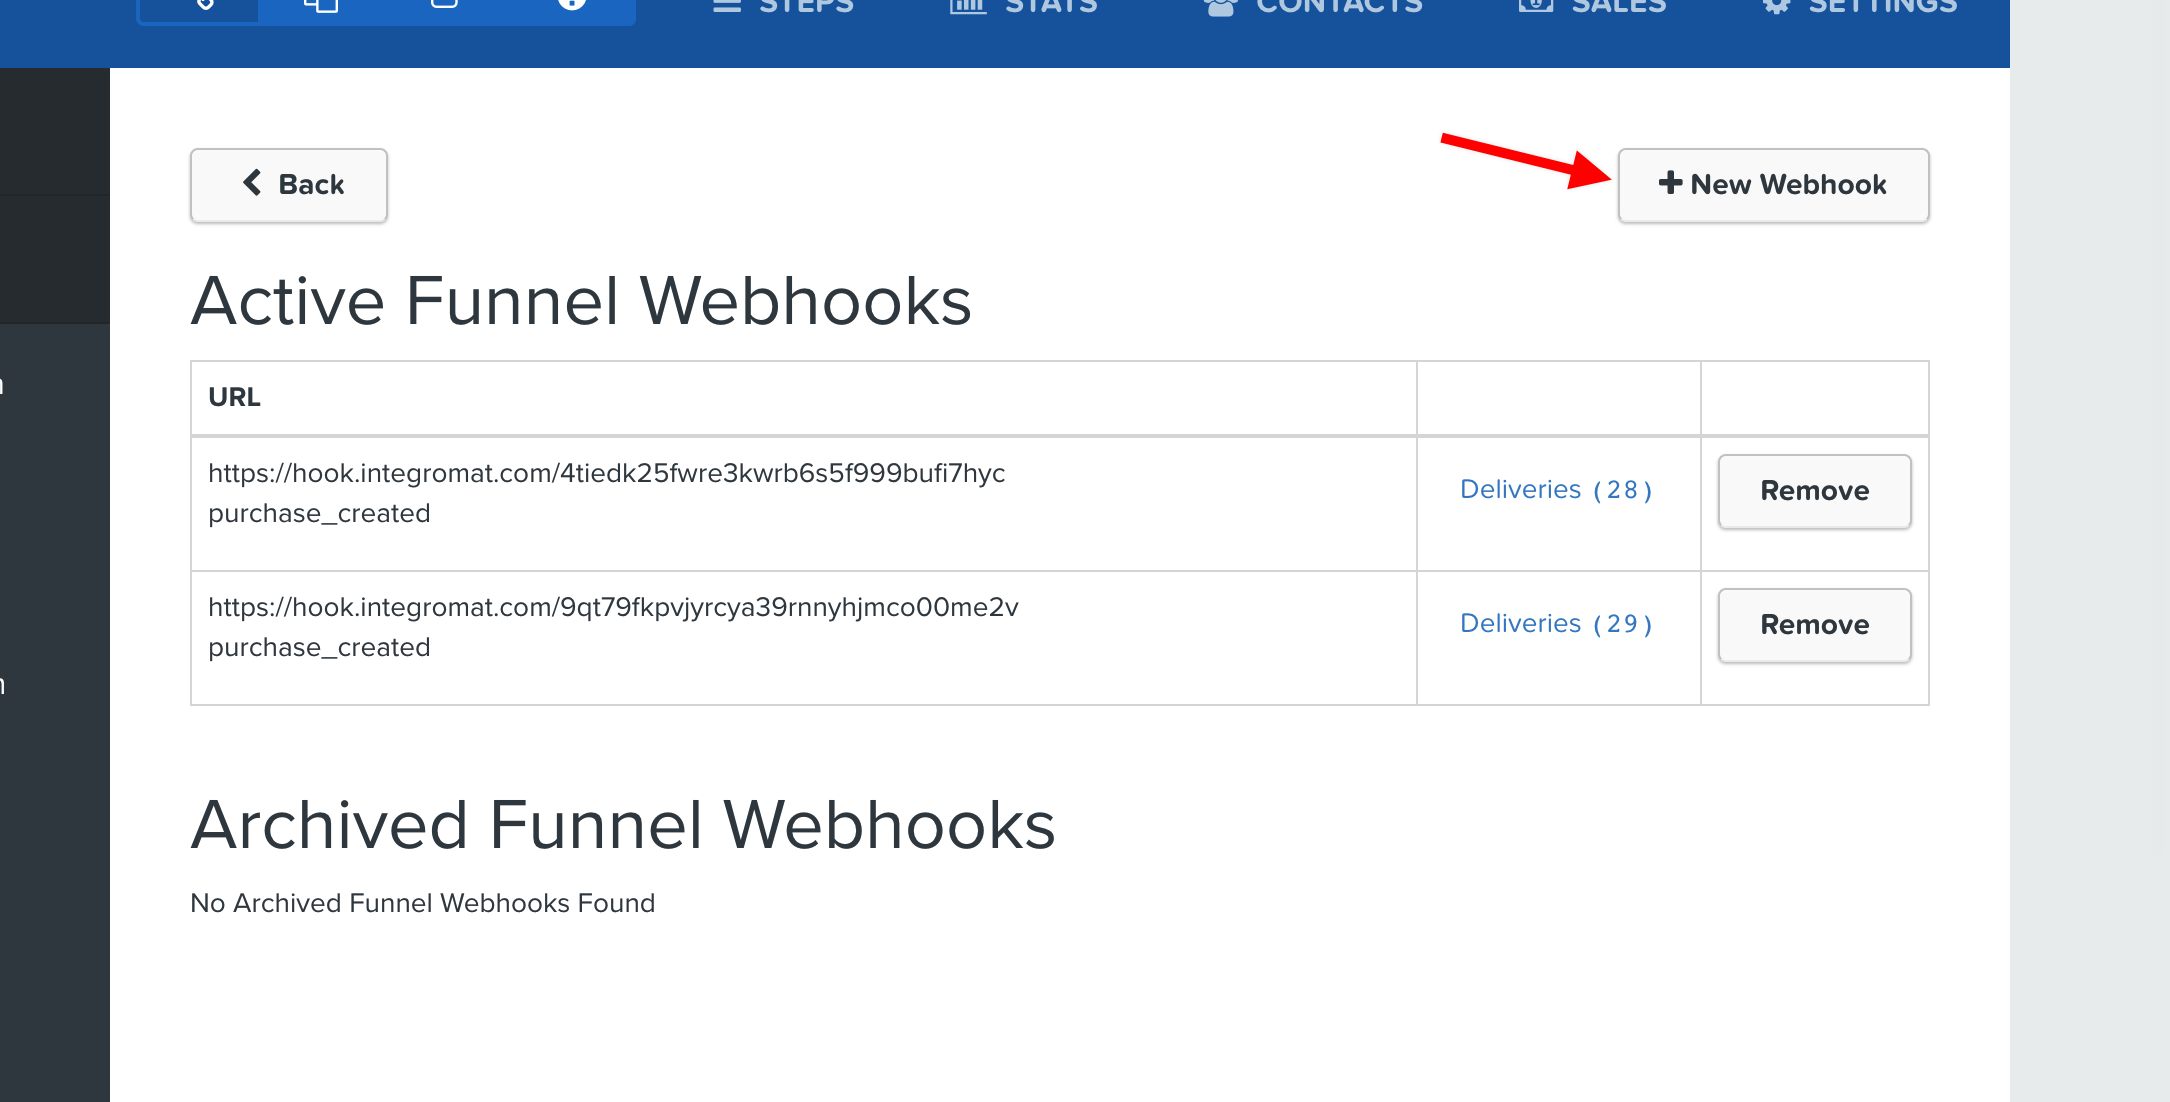
3. Click the Manage Your Funnel Webhooksbutton at the bottom of the Settings page.

4. Click on the New Webhook button.
5. Paste the Boost.space Integrator webhook in the URL field.
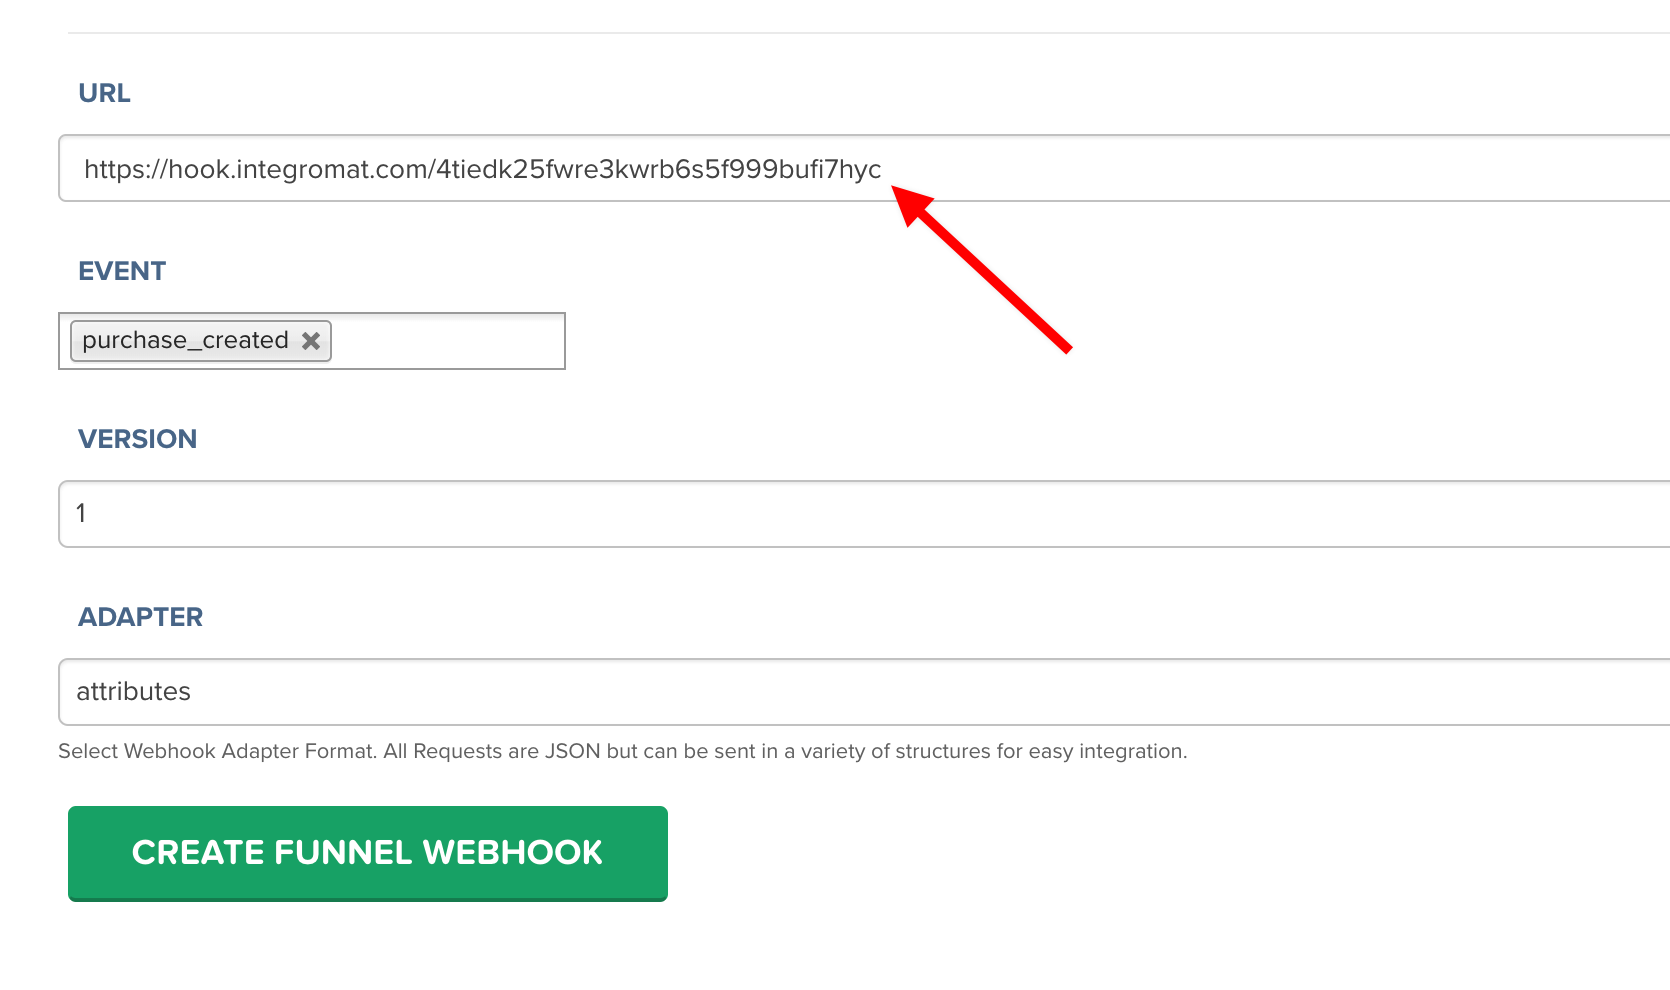
6. Select the event you want to watch.
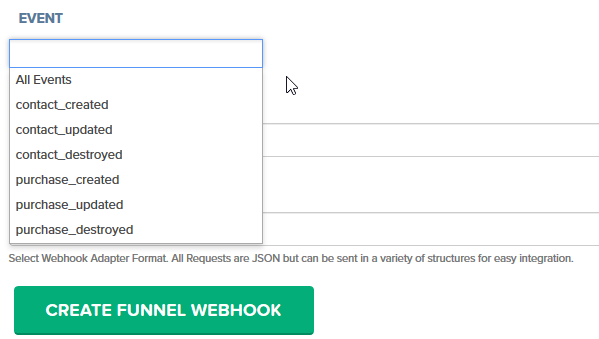
7. Click on the green button, CREATE FUNNEL WEBHOOK
If you select more events, for example, “purchase created” and “purchase updated” your webhook module (in Boost.space Integrator) will be triggered twice after any new purchase.
ClickFunnels sends webhooks from each page. Even though it’s only transferred to the next step, the action on the button says Submit Form. So, what happens if you use this button on different pages? ClickFunnels submits the form again, even though the event calls for creating a contact.
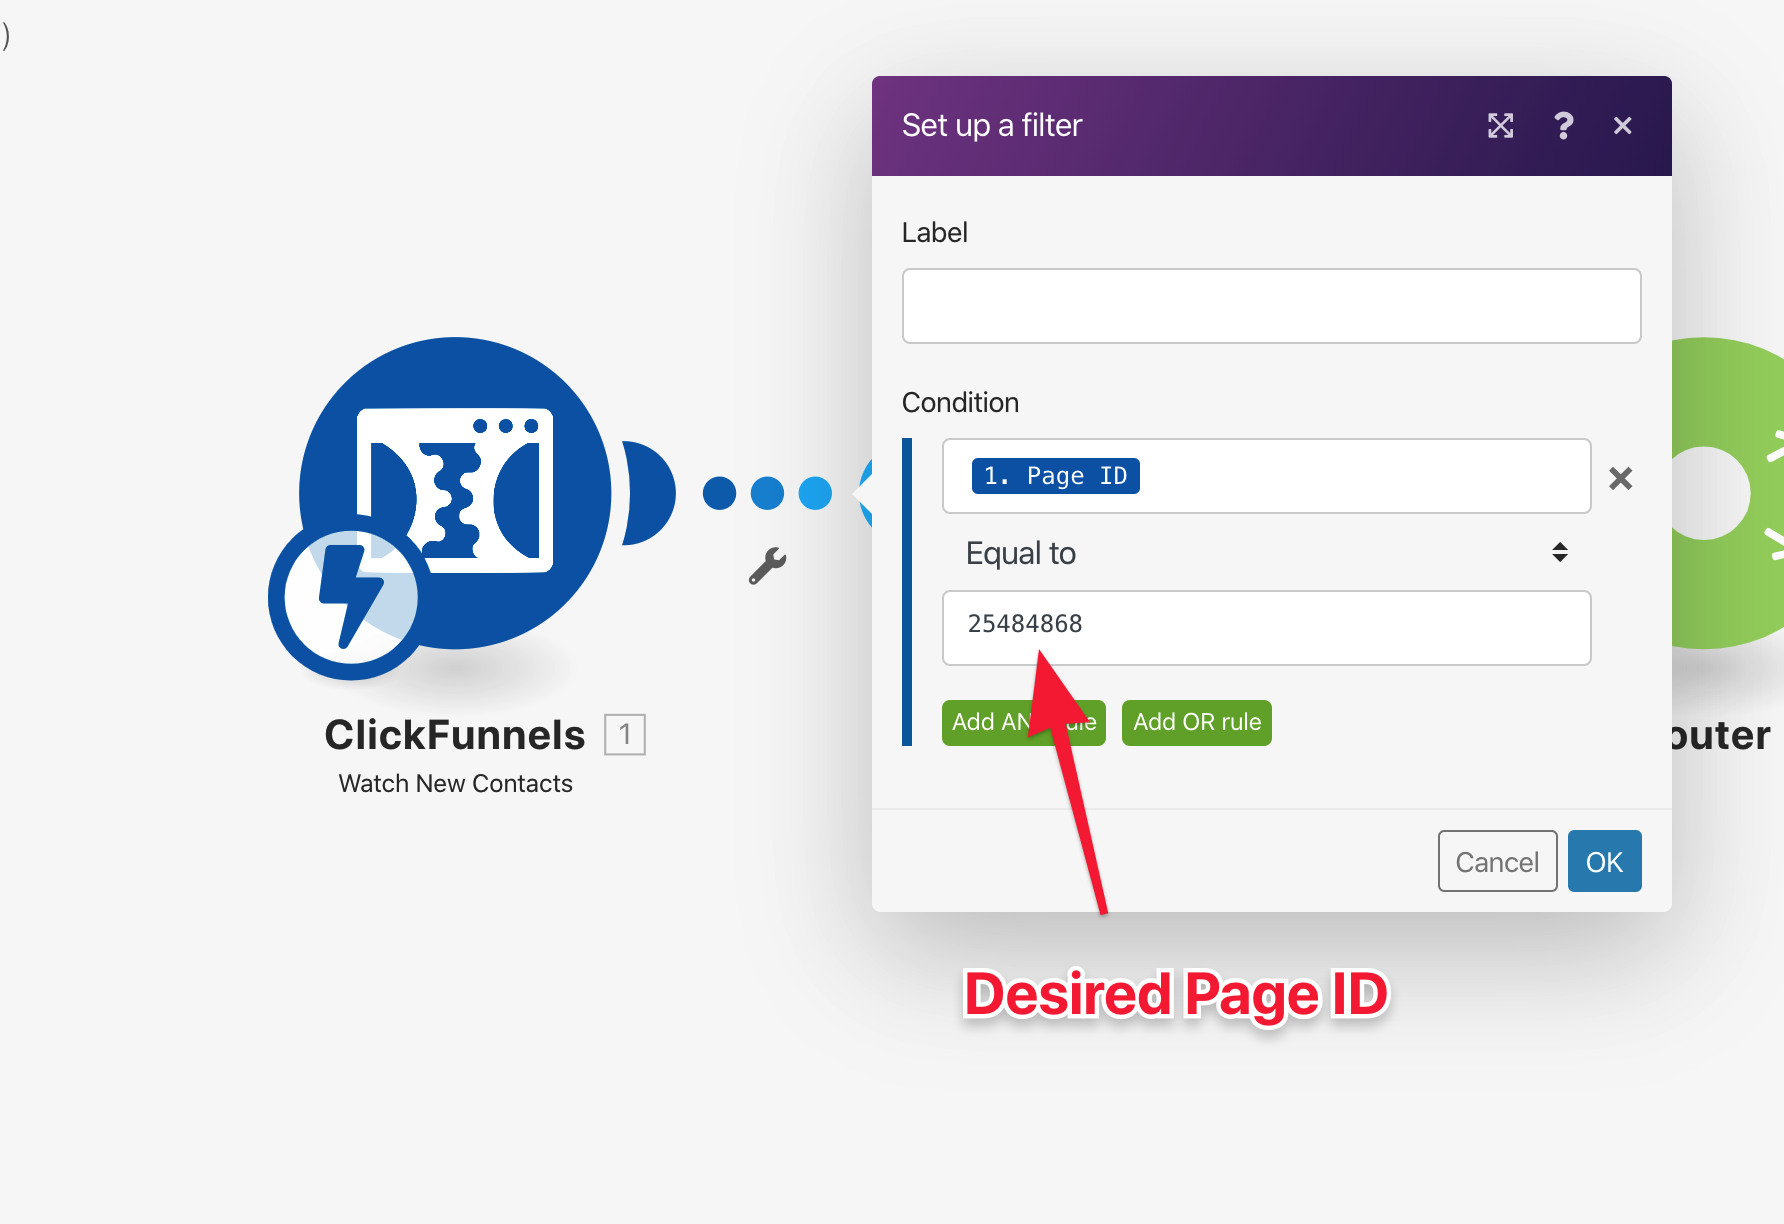
The solution for thisis to put a filter to filter by page ID (placing the filter after the ClickFunnels’ webhook module in Boost.space Integrator) you can notice that duplicated webhooks come from another page with different ID:
Filter example:
If a new contact is created in the funnel then this module reads its data. The data can be further processed in the Boost.space Integrator scenario.
To run this module, you need to add a webhook to the desired funnel.
Retrieves purchase data (product details, contact details, amount, etc.) when a new purchase is made.
To run this module, you need to add a webhook to the desired funnel.
You can find sample scenario templates with ClickFunnels modules here, www.make.com/en/templates/click-funnels.
