Creating custom fields in Boost.space
Custom fieldsA feature in Boost.space that allows you to define and manage data within each module according to your specific needs. allow you to store additional information for your modulesThe module is an application or tool within the Boost.space system. The entire system is built on this concept of modularity. (module - Contacts) and add-ons. Those fields can be created only by the adminAdmins in Boost.space have exclusive access to system settings. They manage the overall system setup, including appearance, language, currency, user settings, and the availability of individual modules to users and teams.. Although anyone can connect them to a specific spaceSubunits are created within modules to maintain organization and clarity, even with large amounts of data.. You can create your custom fields in the system settingsMain settings of the Boost.space system that is accessible only by admins. You can change a variety of things here (custom fields, actions and triggers, design, etc.). In this article, you will learn how you can create a custom fieldA feature in Boost.space that allows you to define and manage data within each module according to your specific needs. in the warehouse’s addonTools in Boost.space system. With them you can customize your workflow to fit your company's needs. They offer a range of features from creating forms and managing projects, to chat functionality and more. Each addon integrates with others, enhancing the overall functionality of your workspace.. We have also prepared a variety of custom fields for you. The advantage of these premade fields is that they are already mapped, making them easier to use in various scenarios.
Video guide
Visual explanation – Creation + Usage
1. On your home screen, click System Settings in the bottom right corner.
2. Select Warehouses in the navigation bar on the left side and then click on Custom Fields and click Create custom field group.

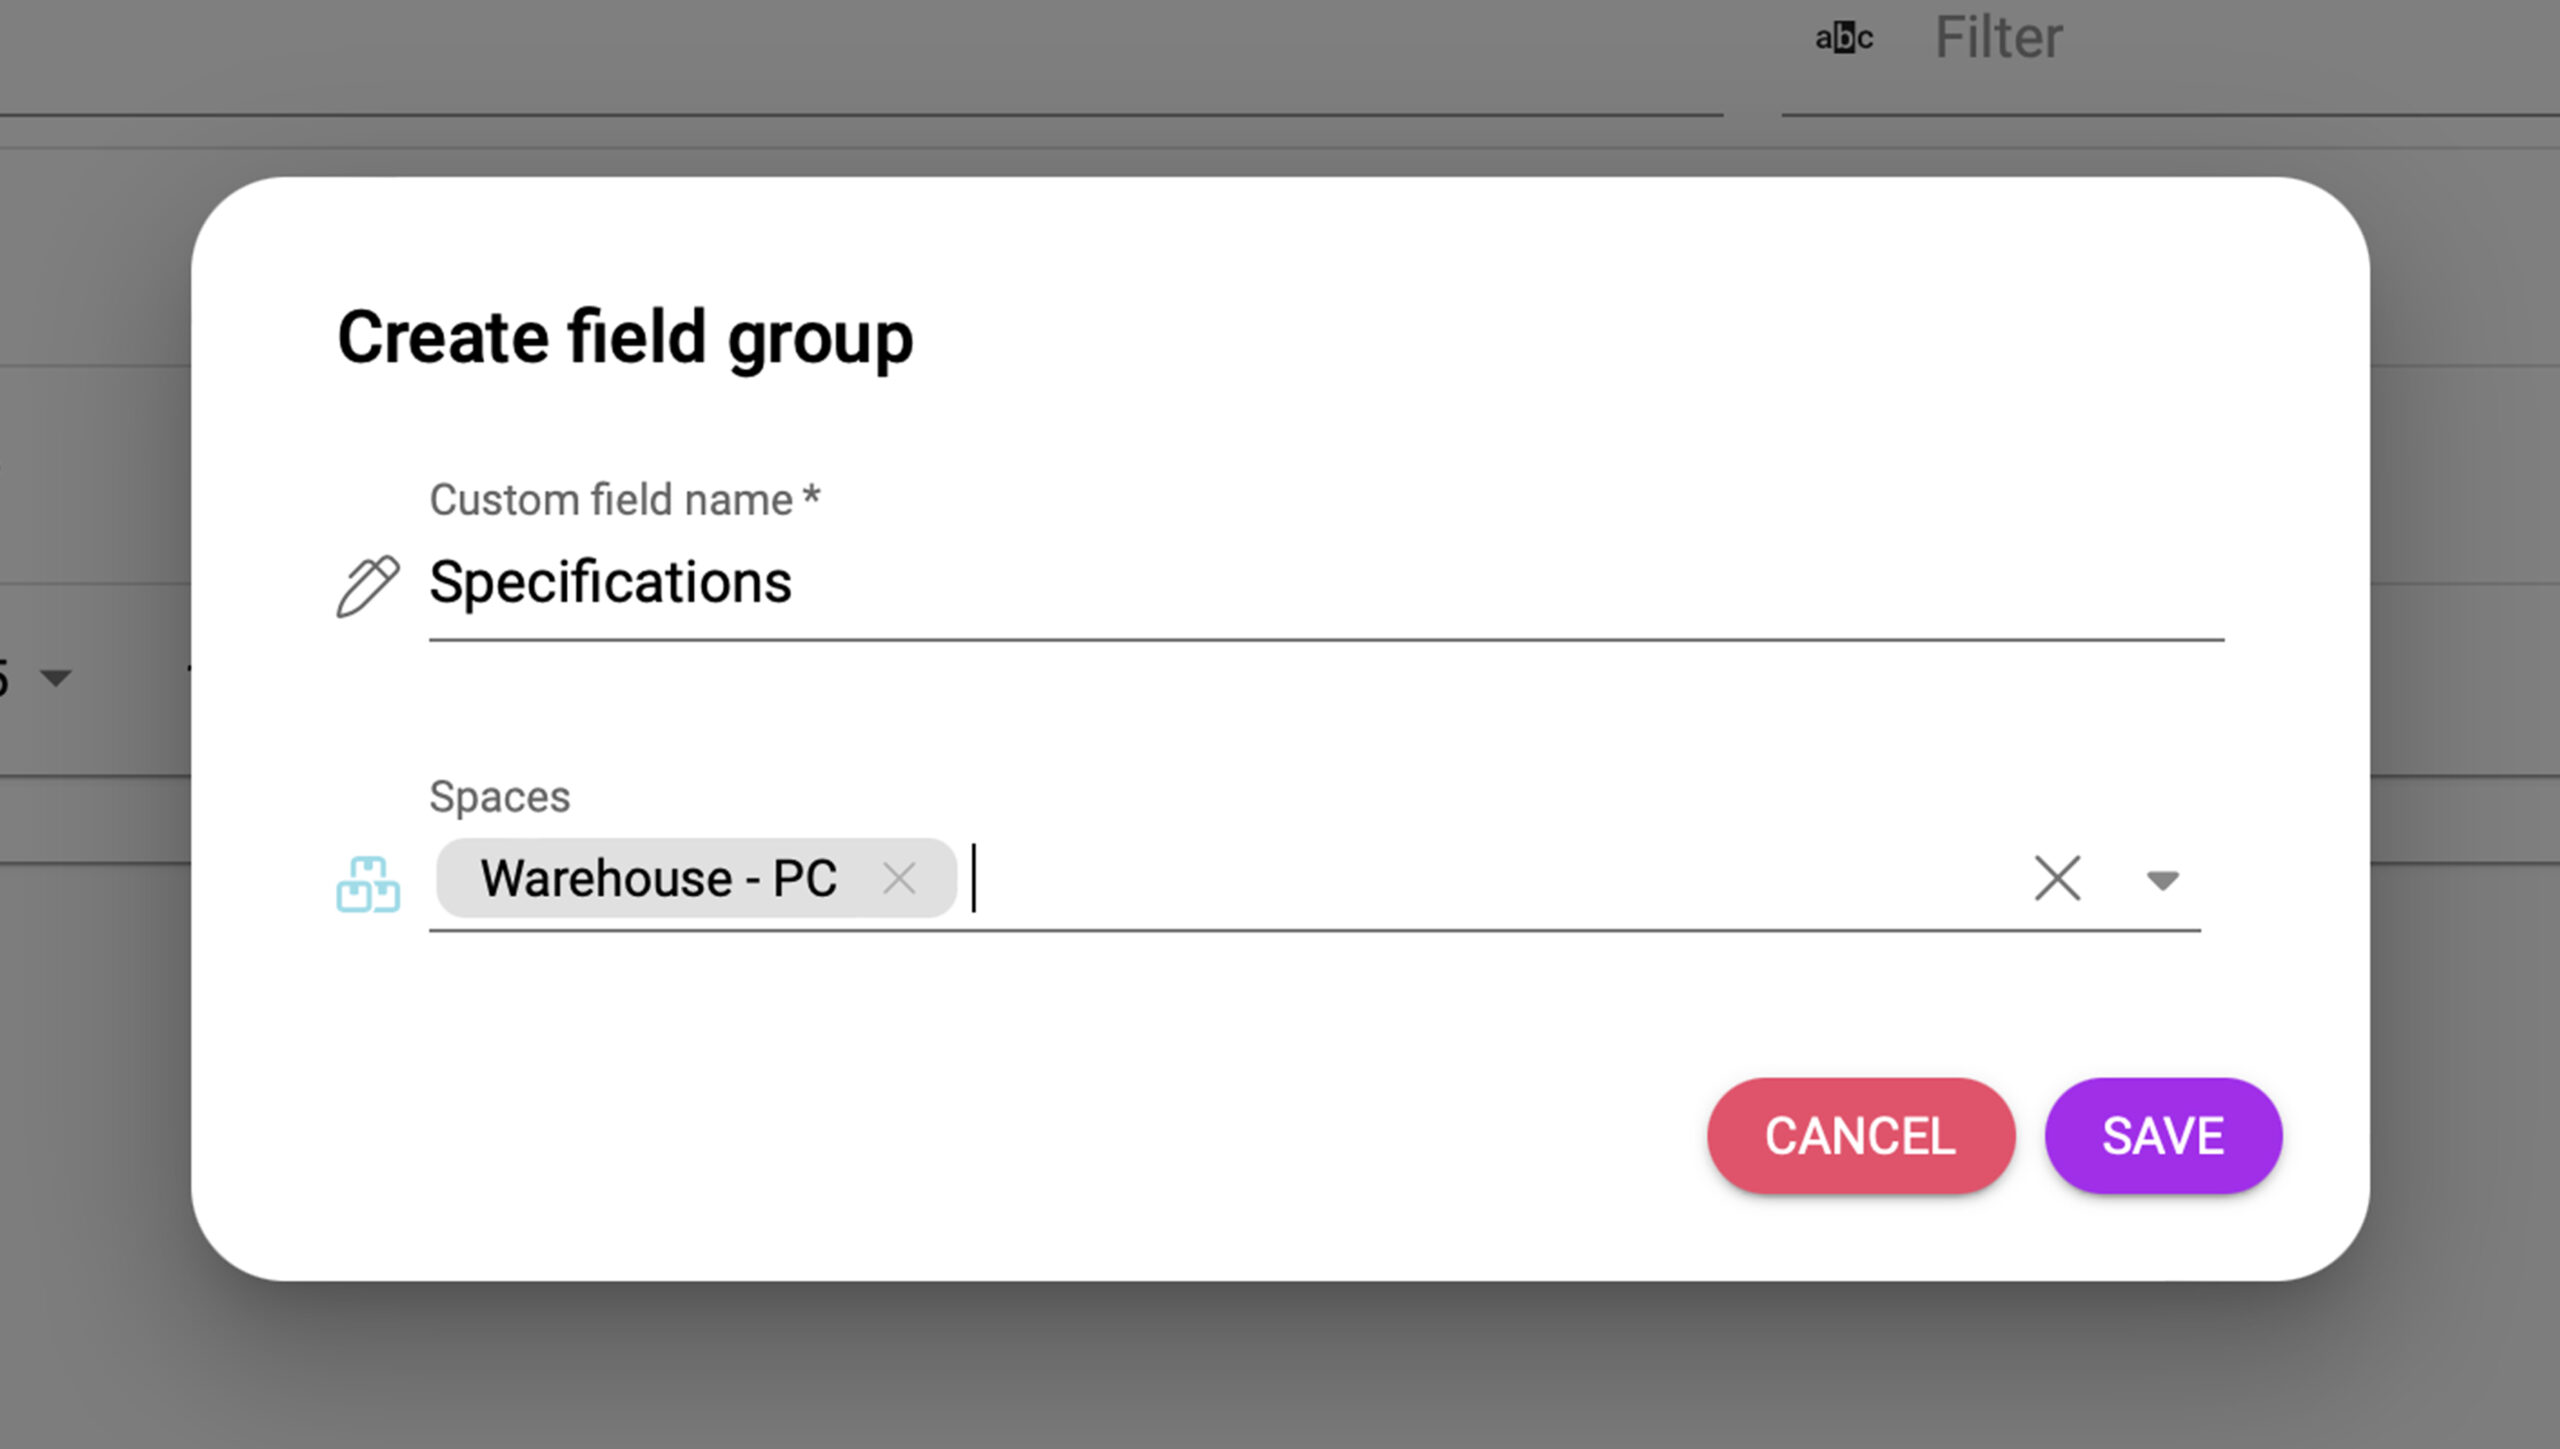
3. Name your new group you can choose a space and then click on save.
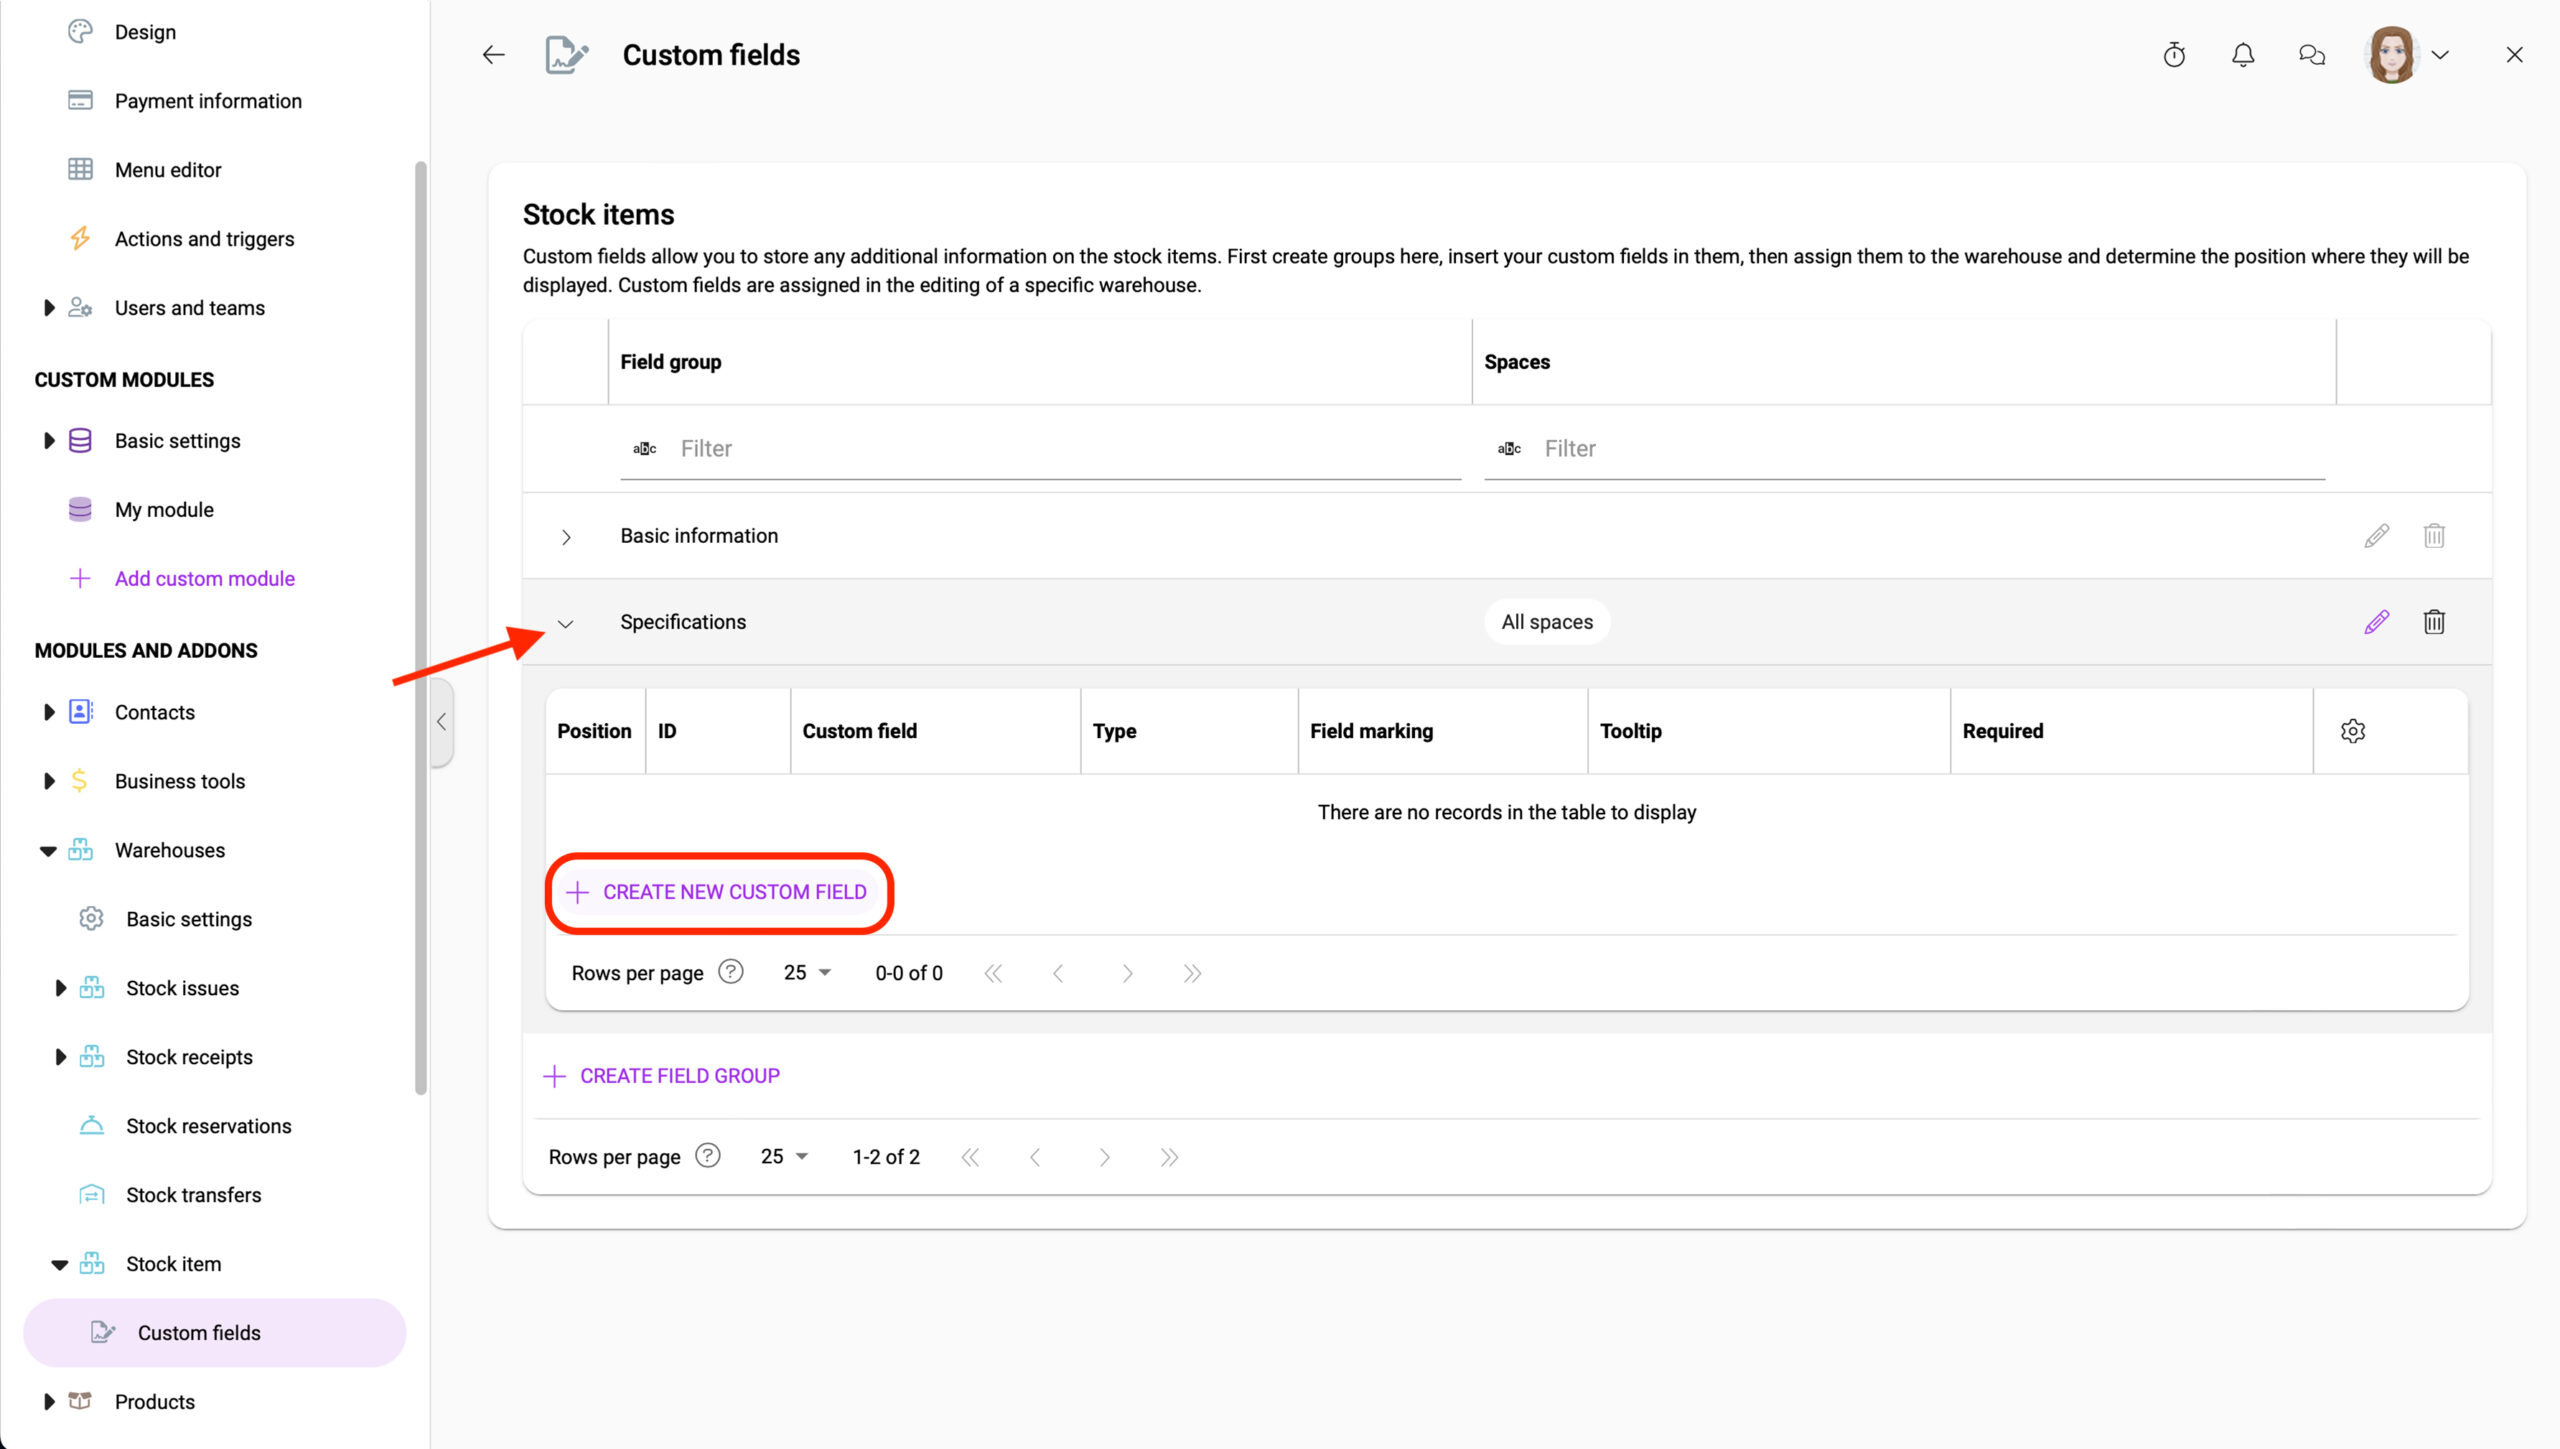
4. When the group is created, click on the arrow next to its name, then click on Create a new custom field button.
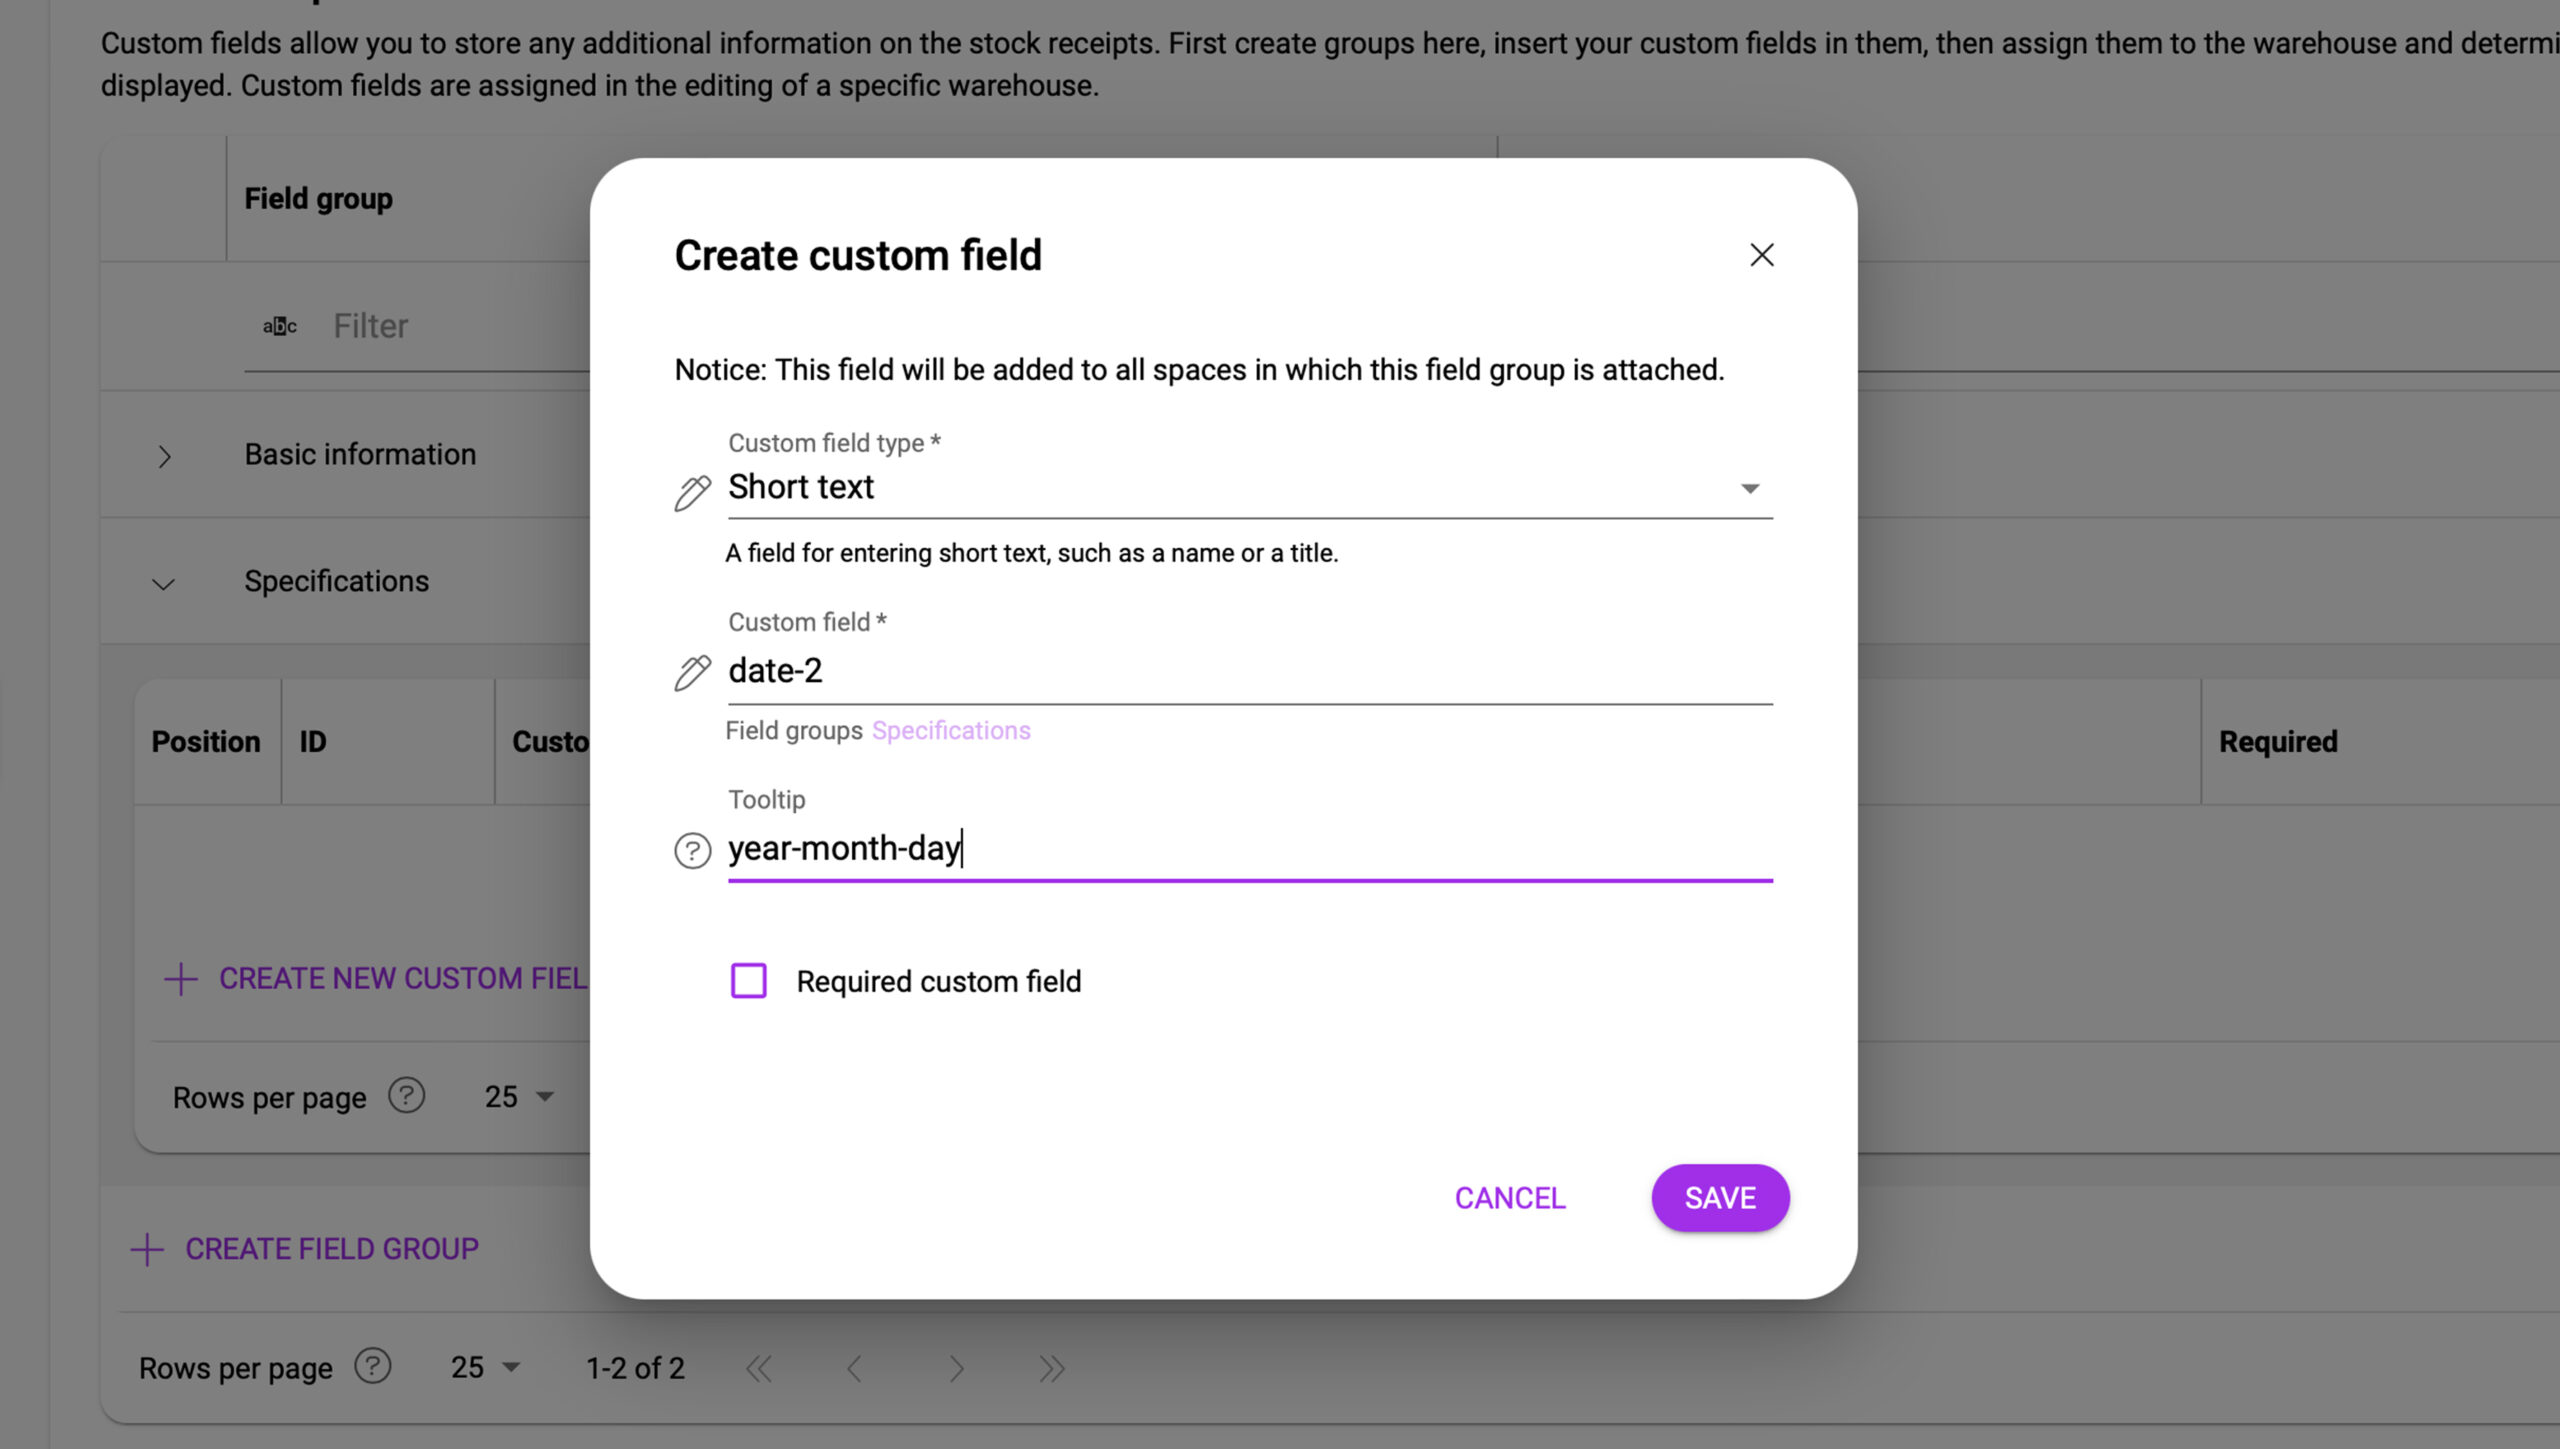
5. Name the custom field and select the value to be displayed (text, number, date and time, email, selection, etc.). Then click on save.
You have now created your new custom field.
Practical use of custom fields (in the Warehouses addonOne of the addons of the Boost.space system. With this addon, you can easily manage your business warehouses and inventory. addon)
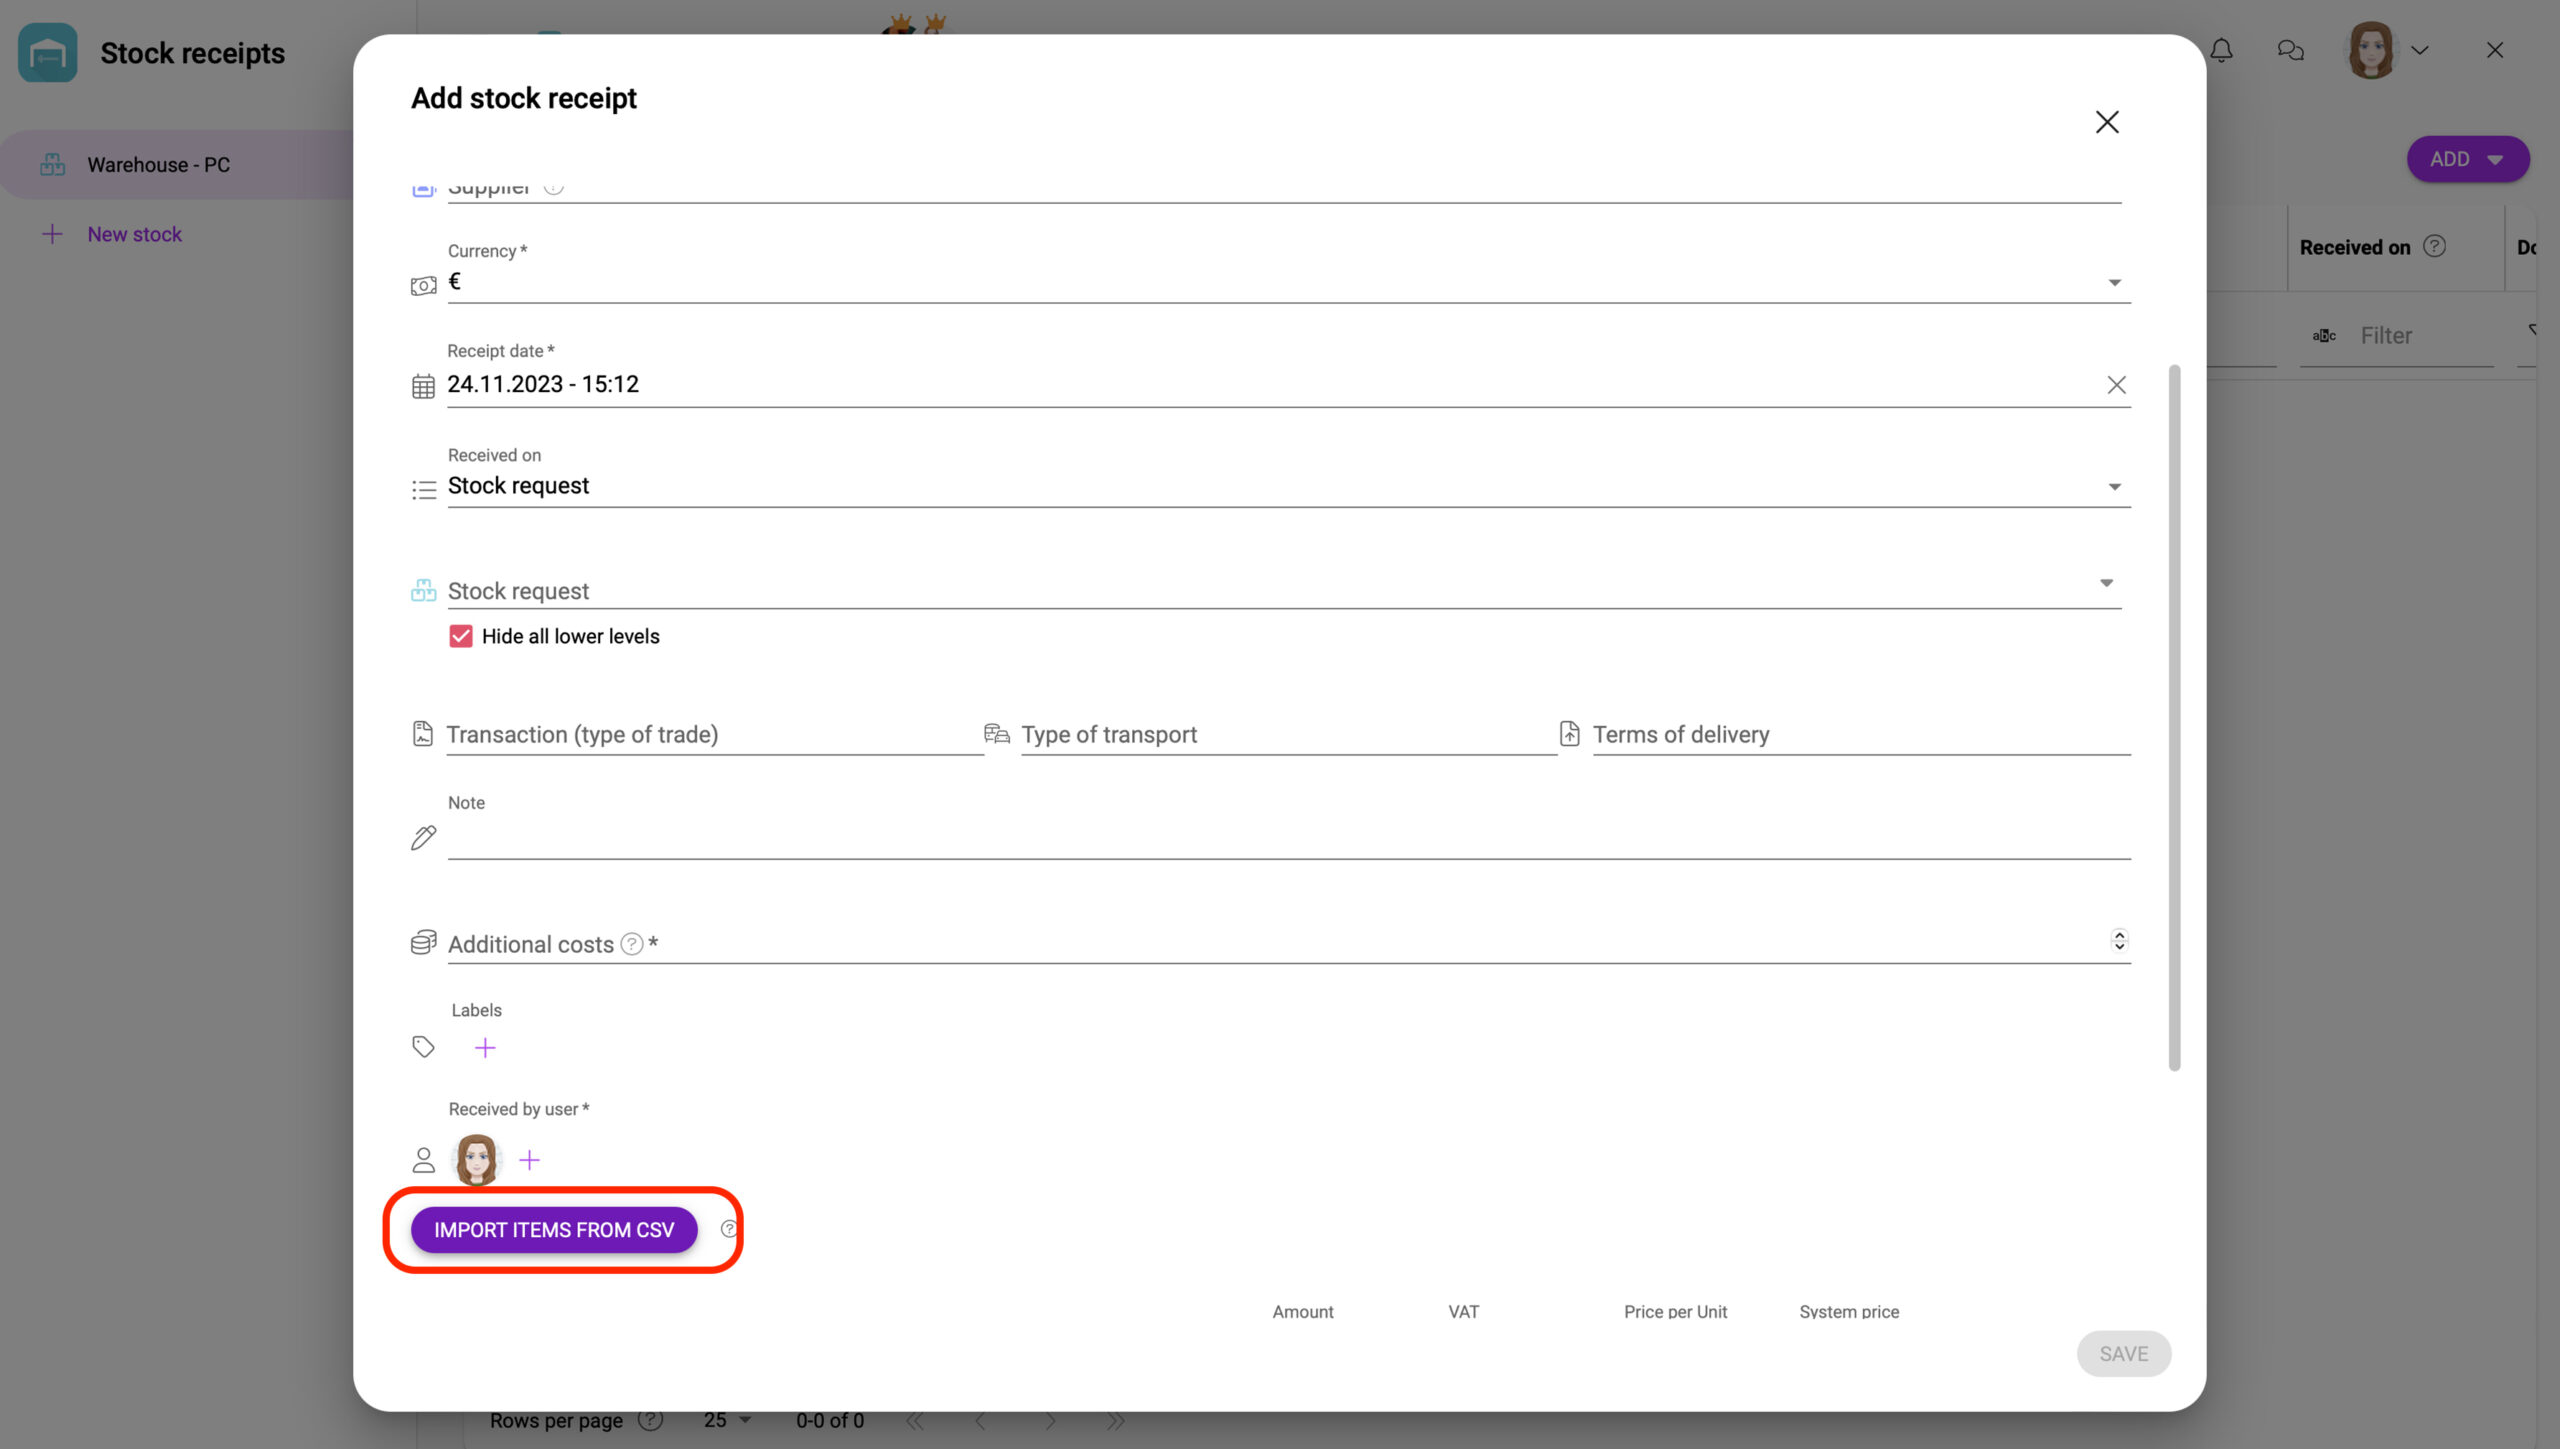
💡 NOTE – to import stock itemsItems are rows in records (order/request/invoice/purchase...) you need to have existing stock cards . The name of the card must match the table (step 3).
1. Open the Stock items addon, select space and click on the three dots icon (= action) in the top middle. Then click on Edit.
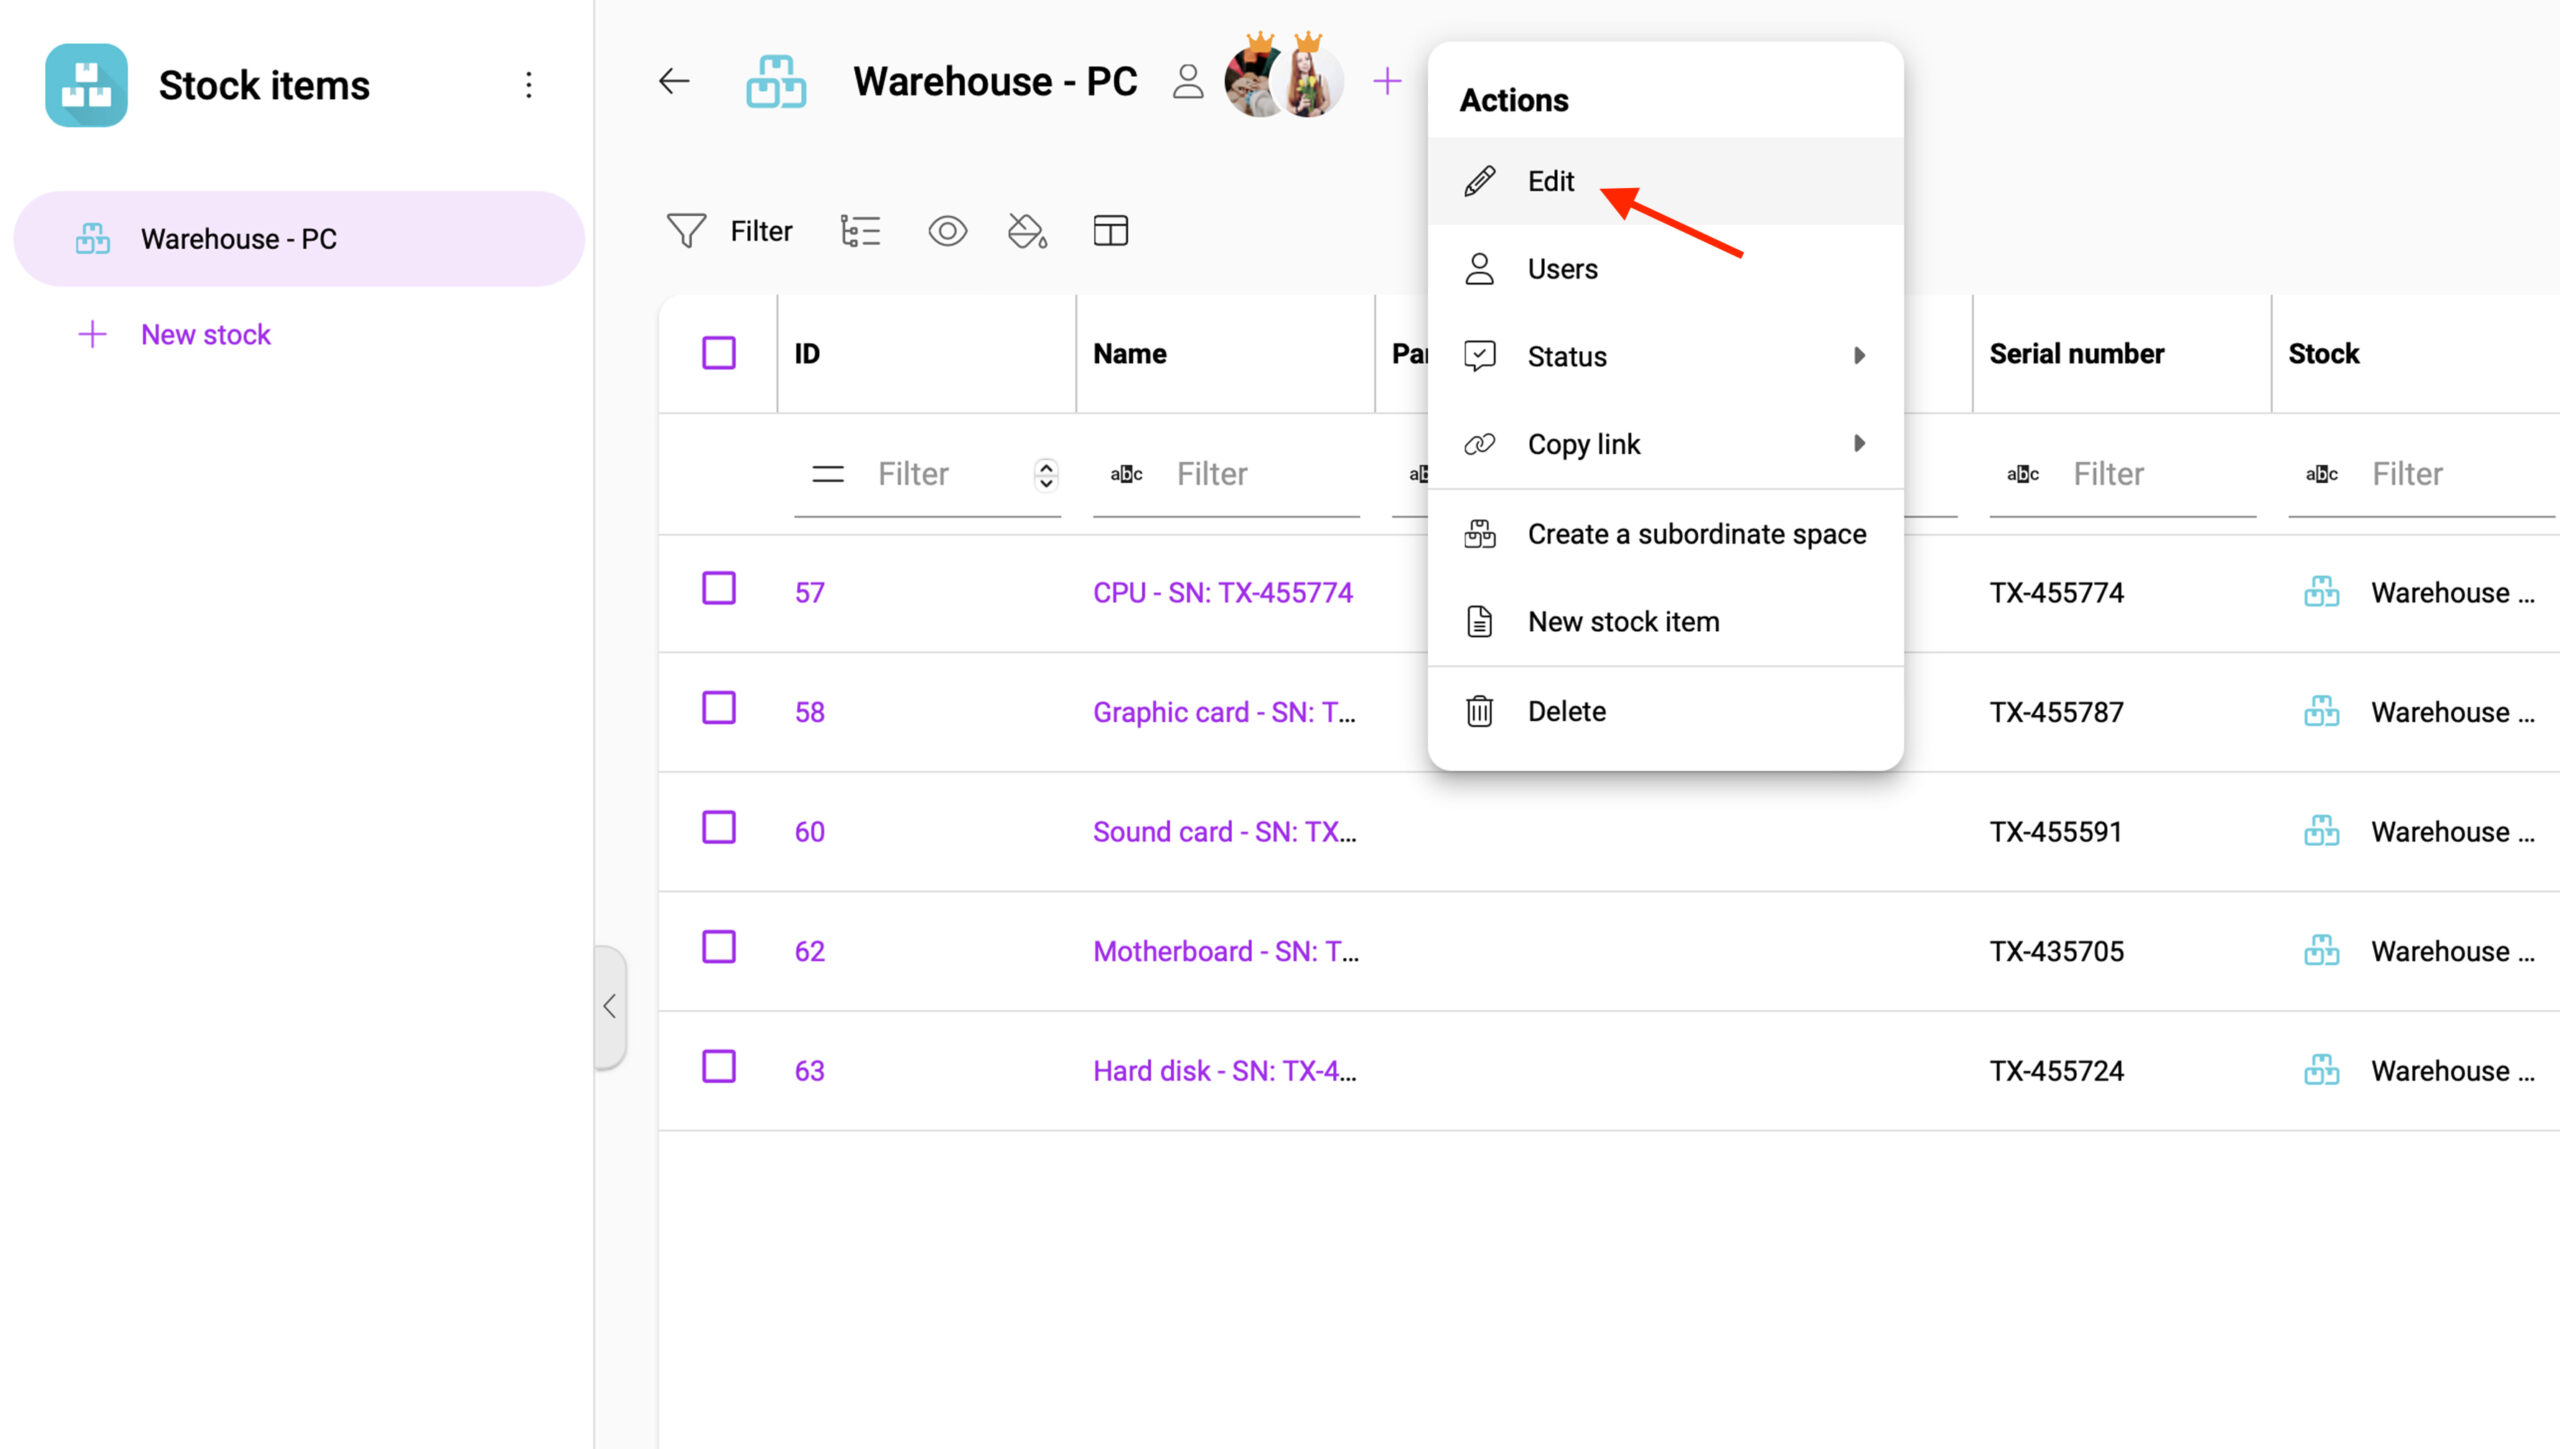
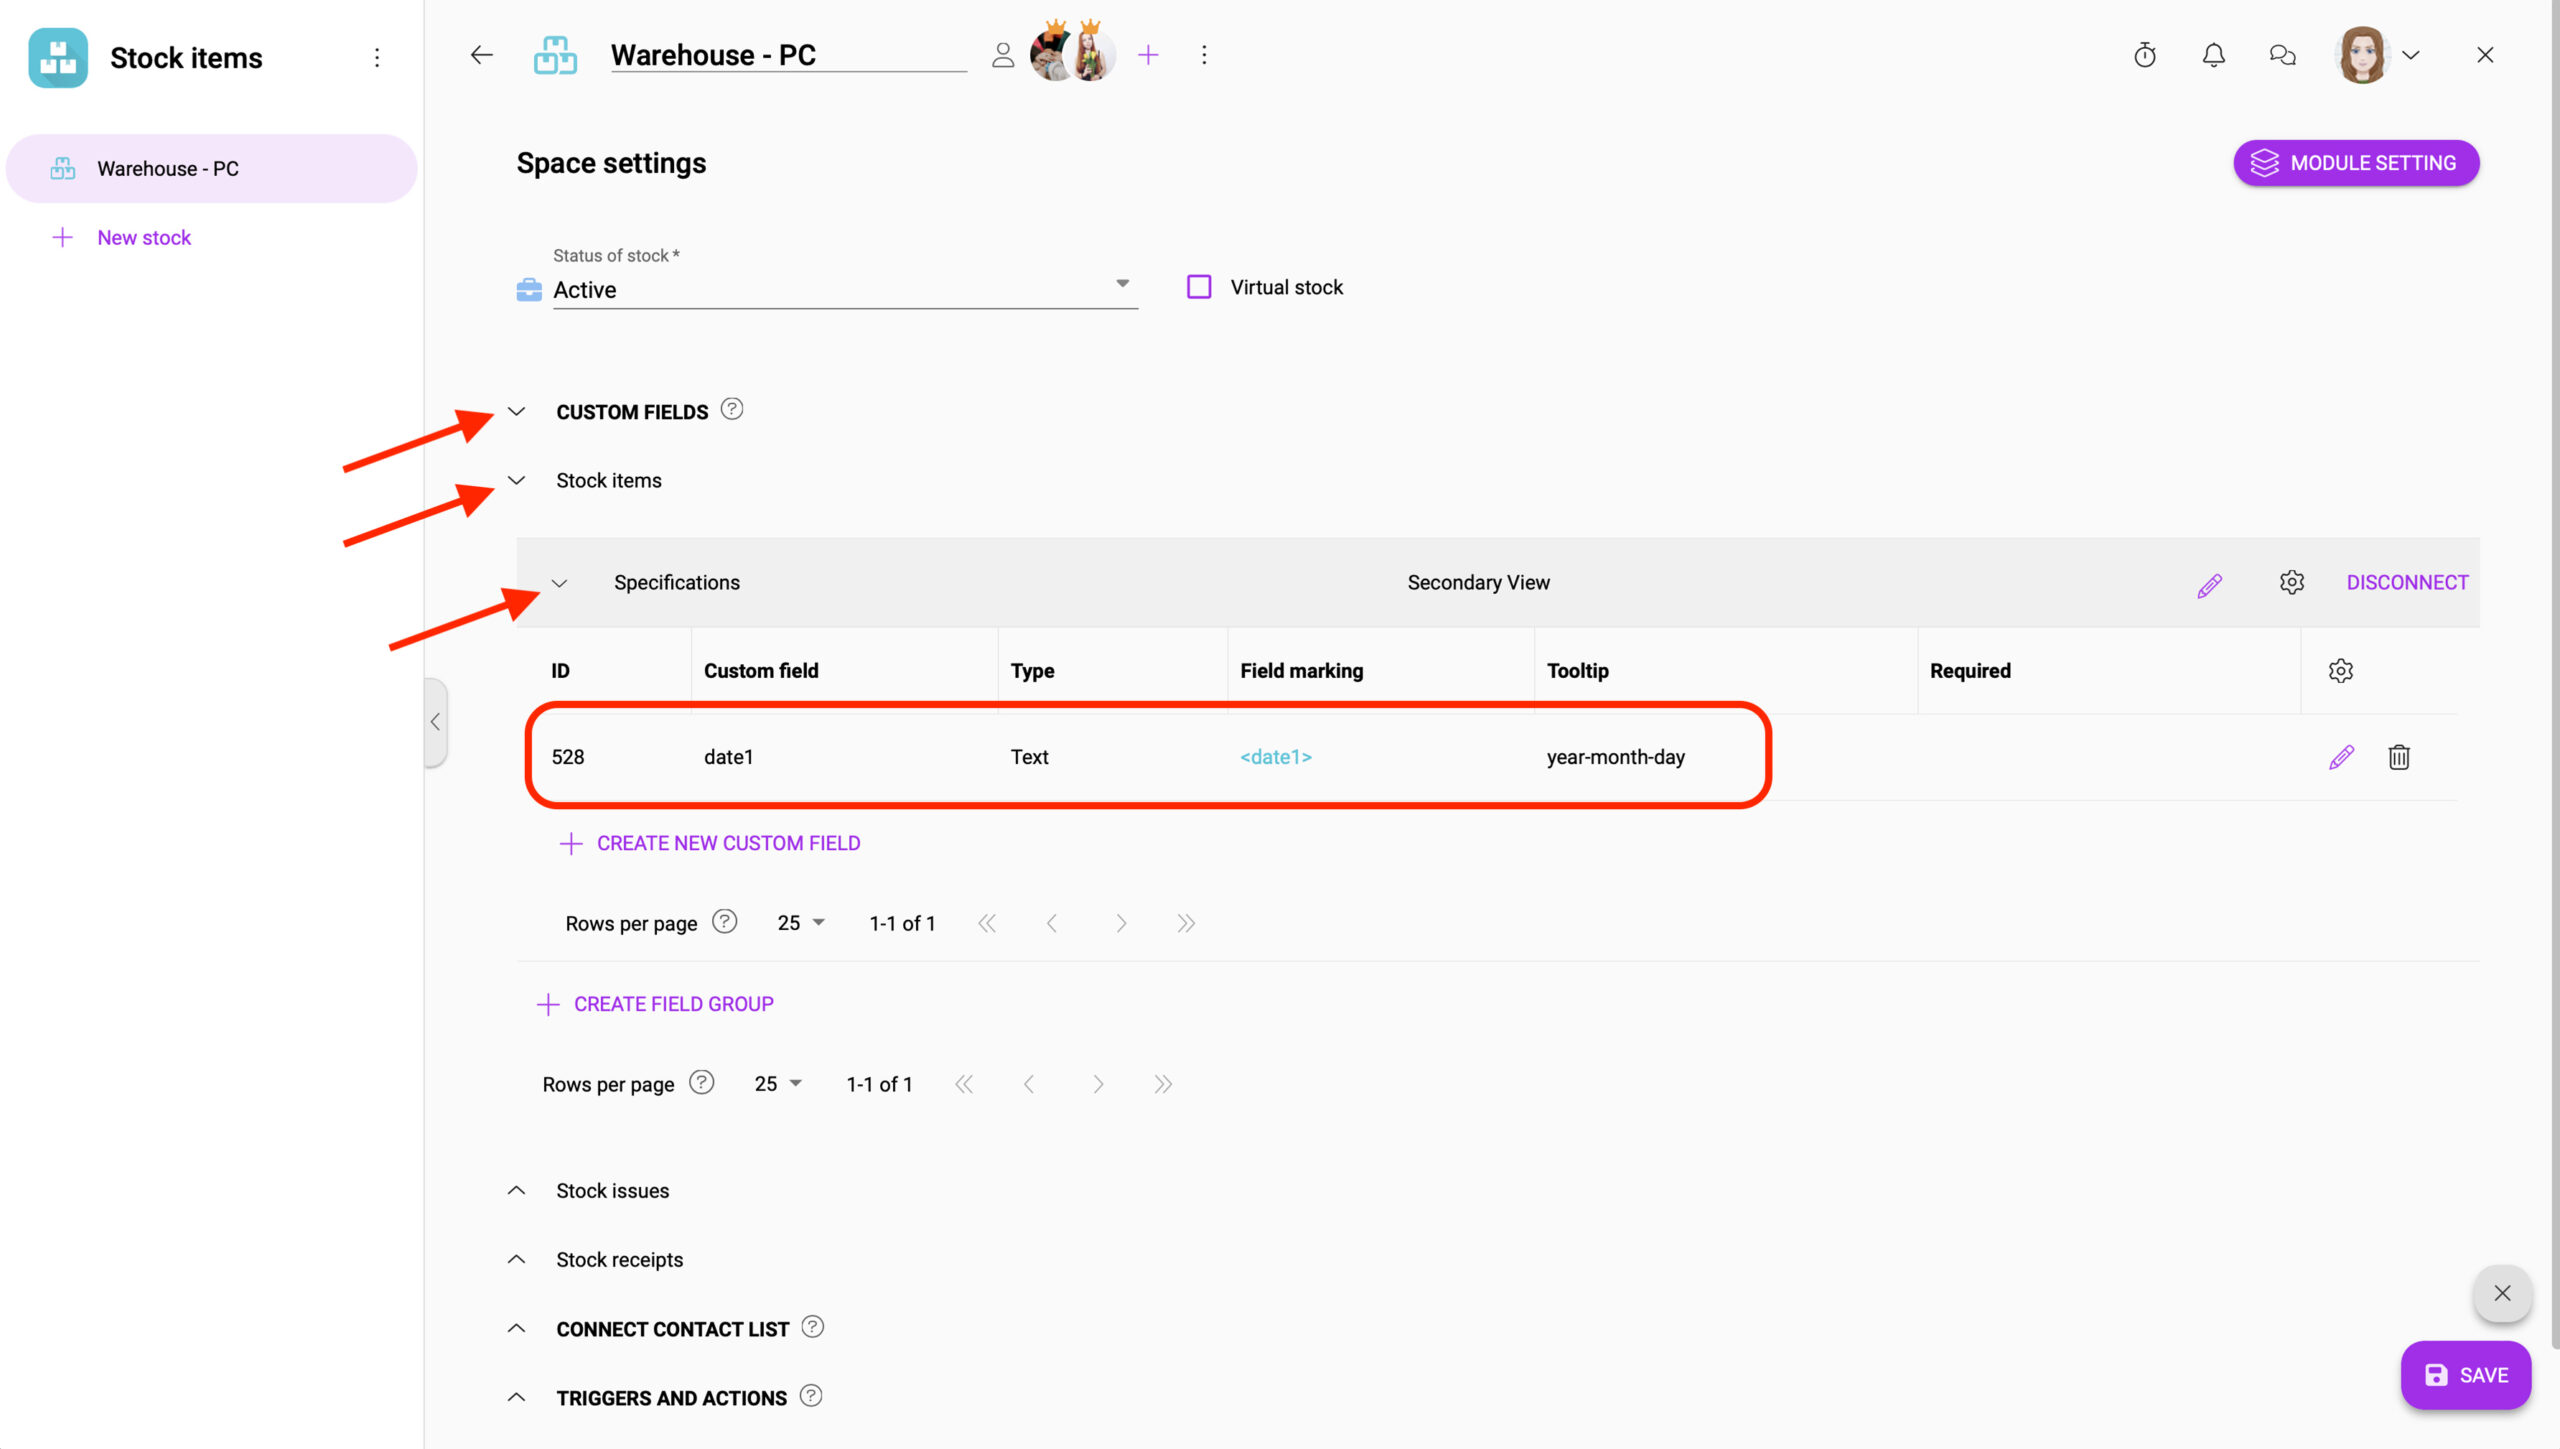
2. The options will open. Click on Custom Fields, then click on Stock items and then your field group. Here you can see new Custom field. Also here you can edit and add new groups and fields.
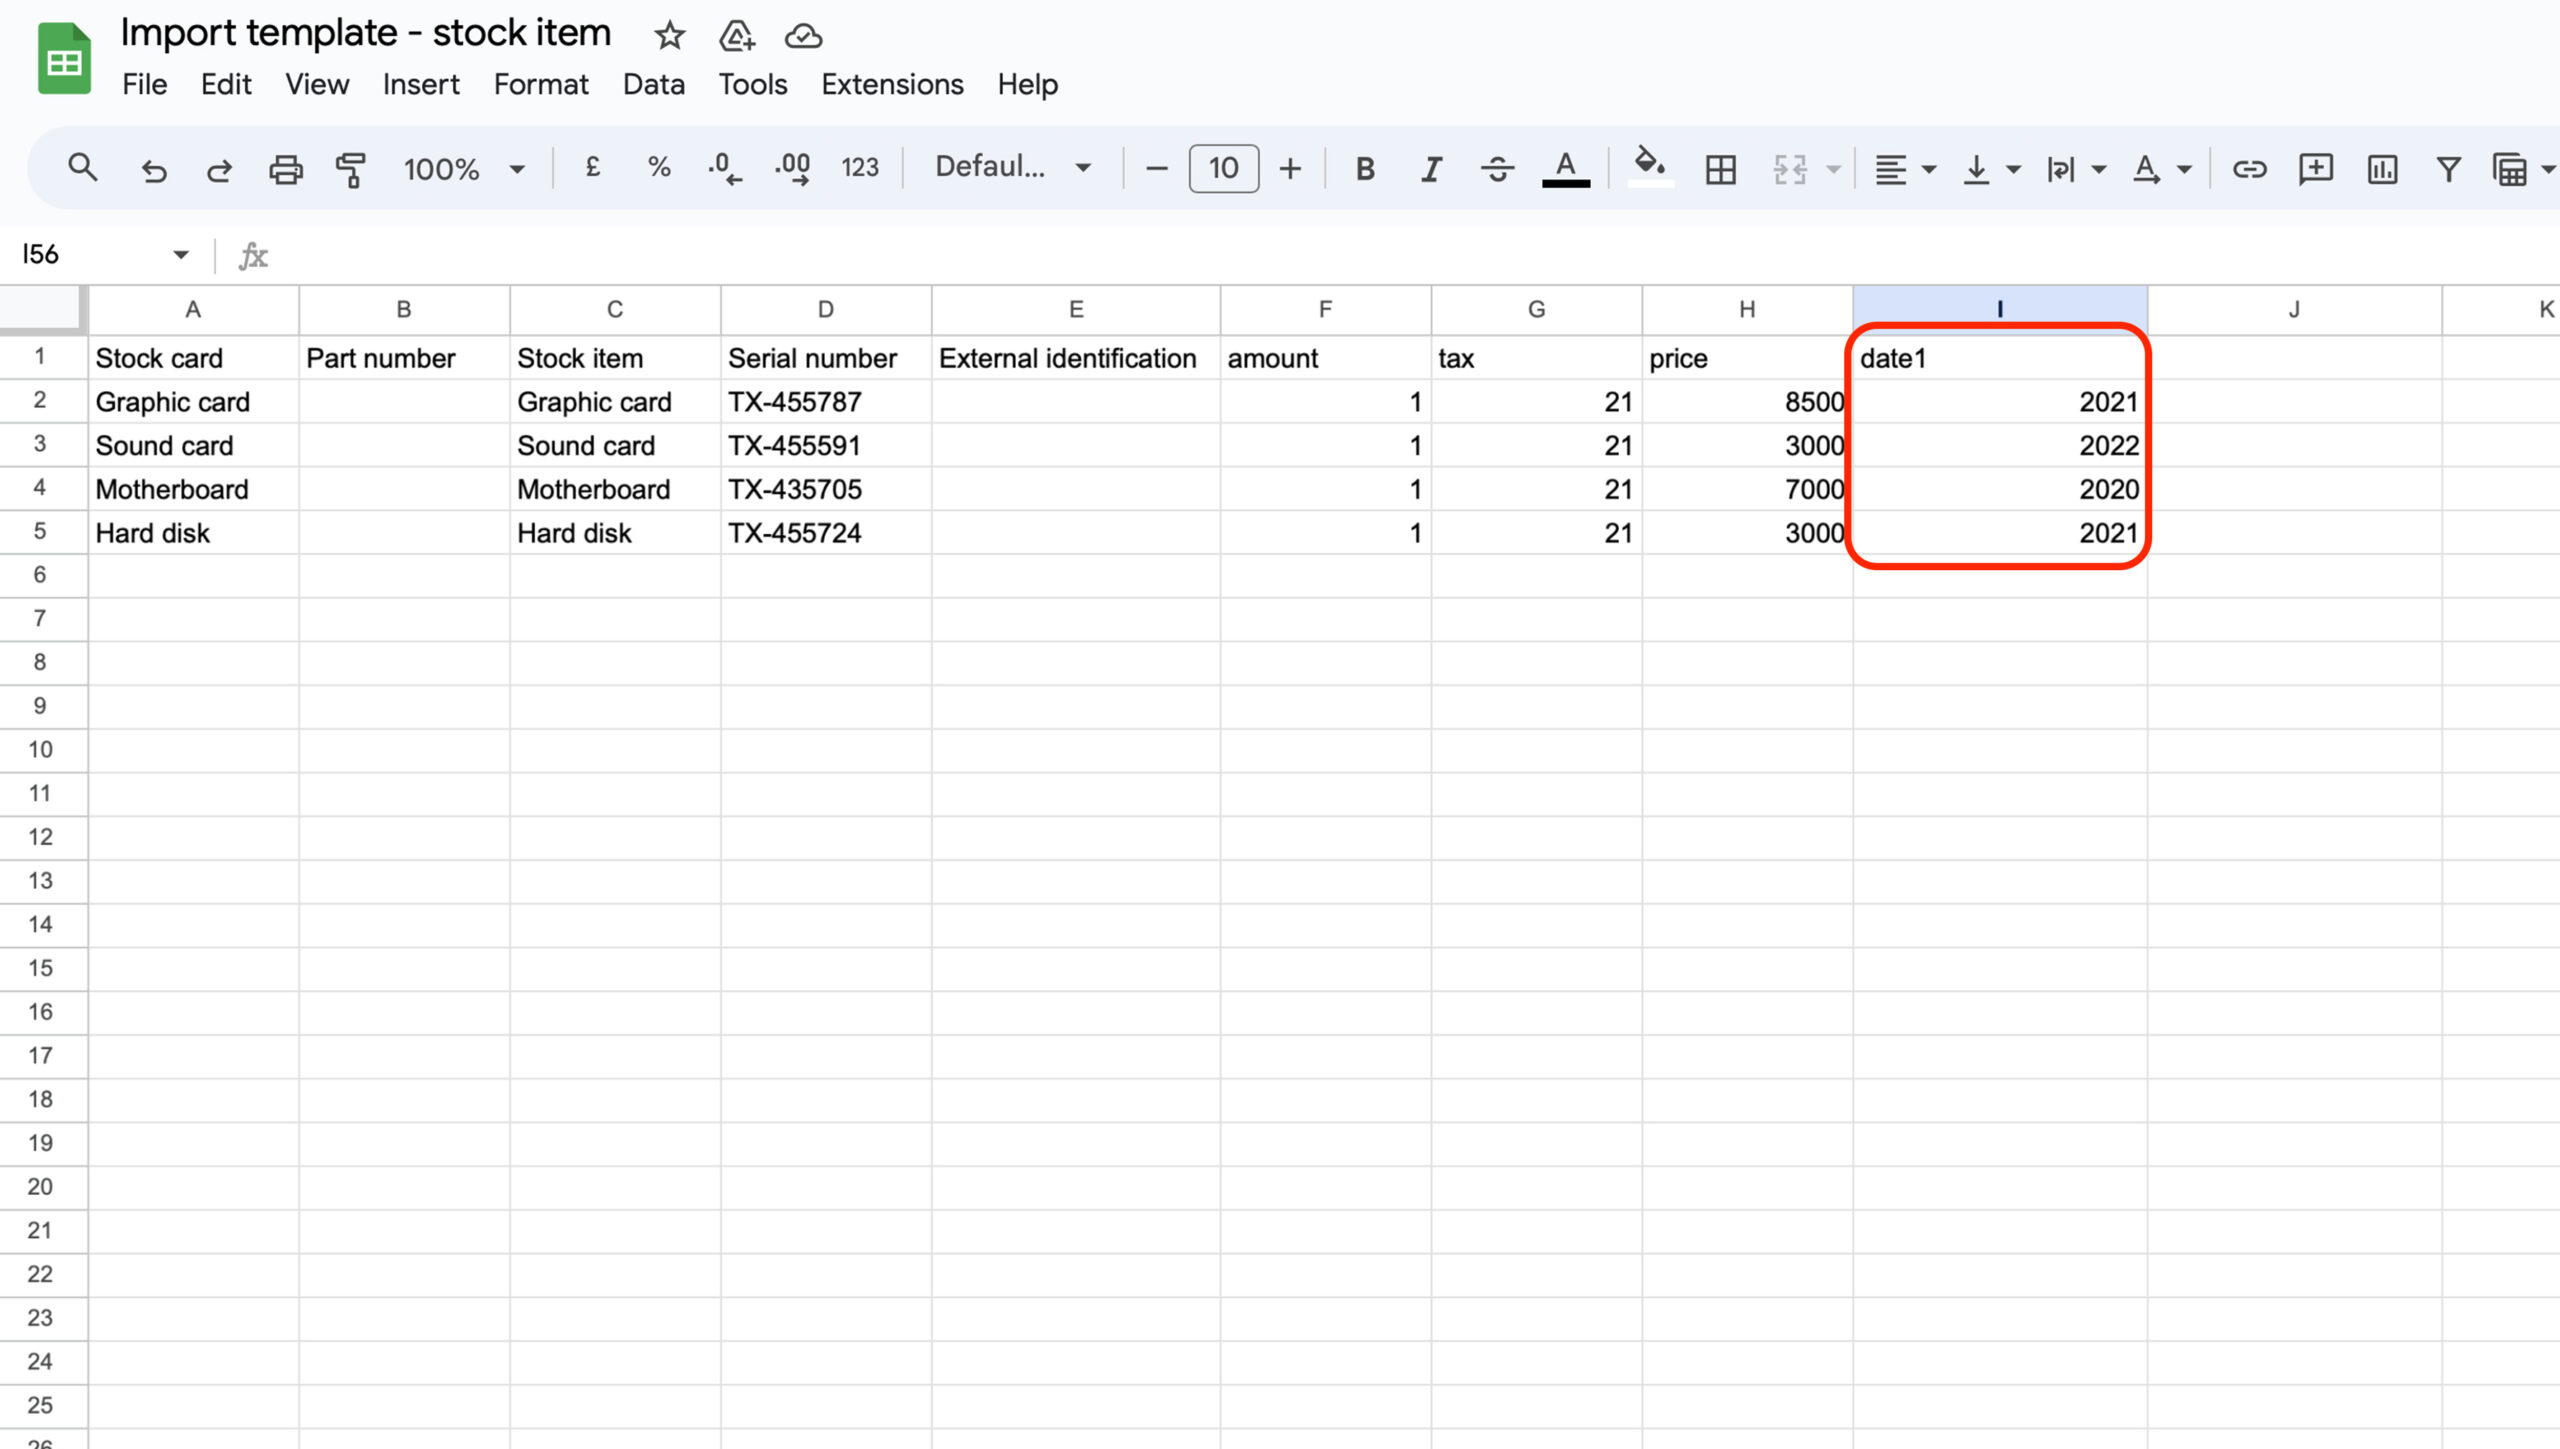
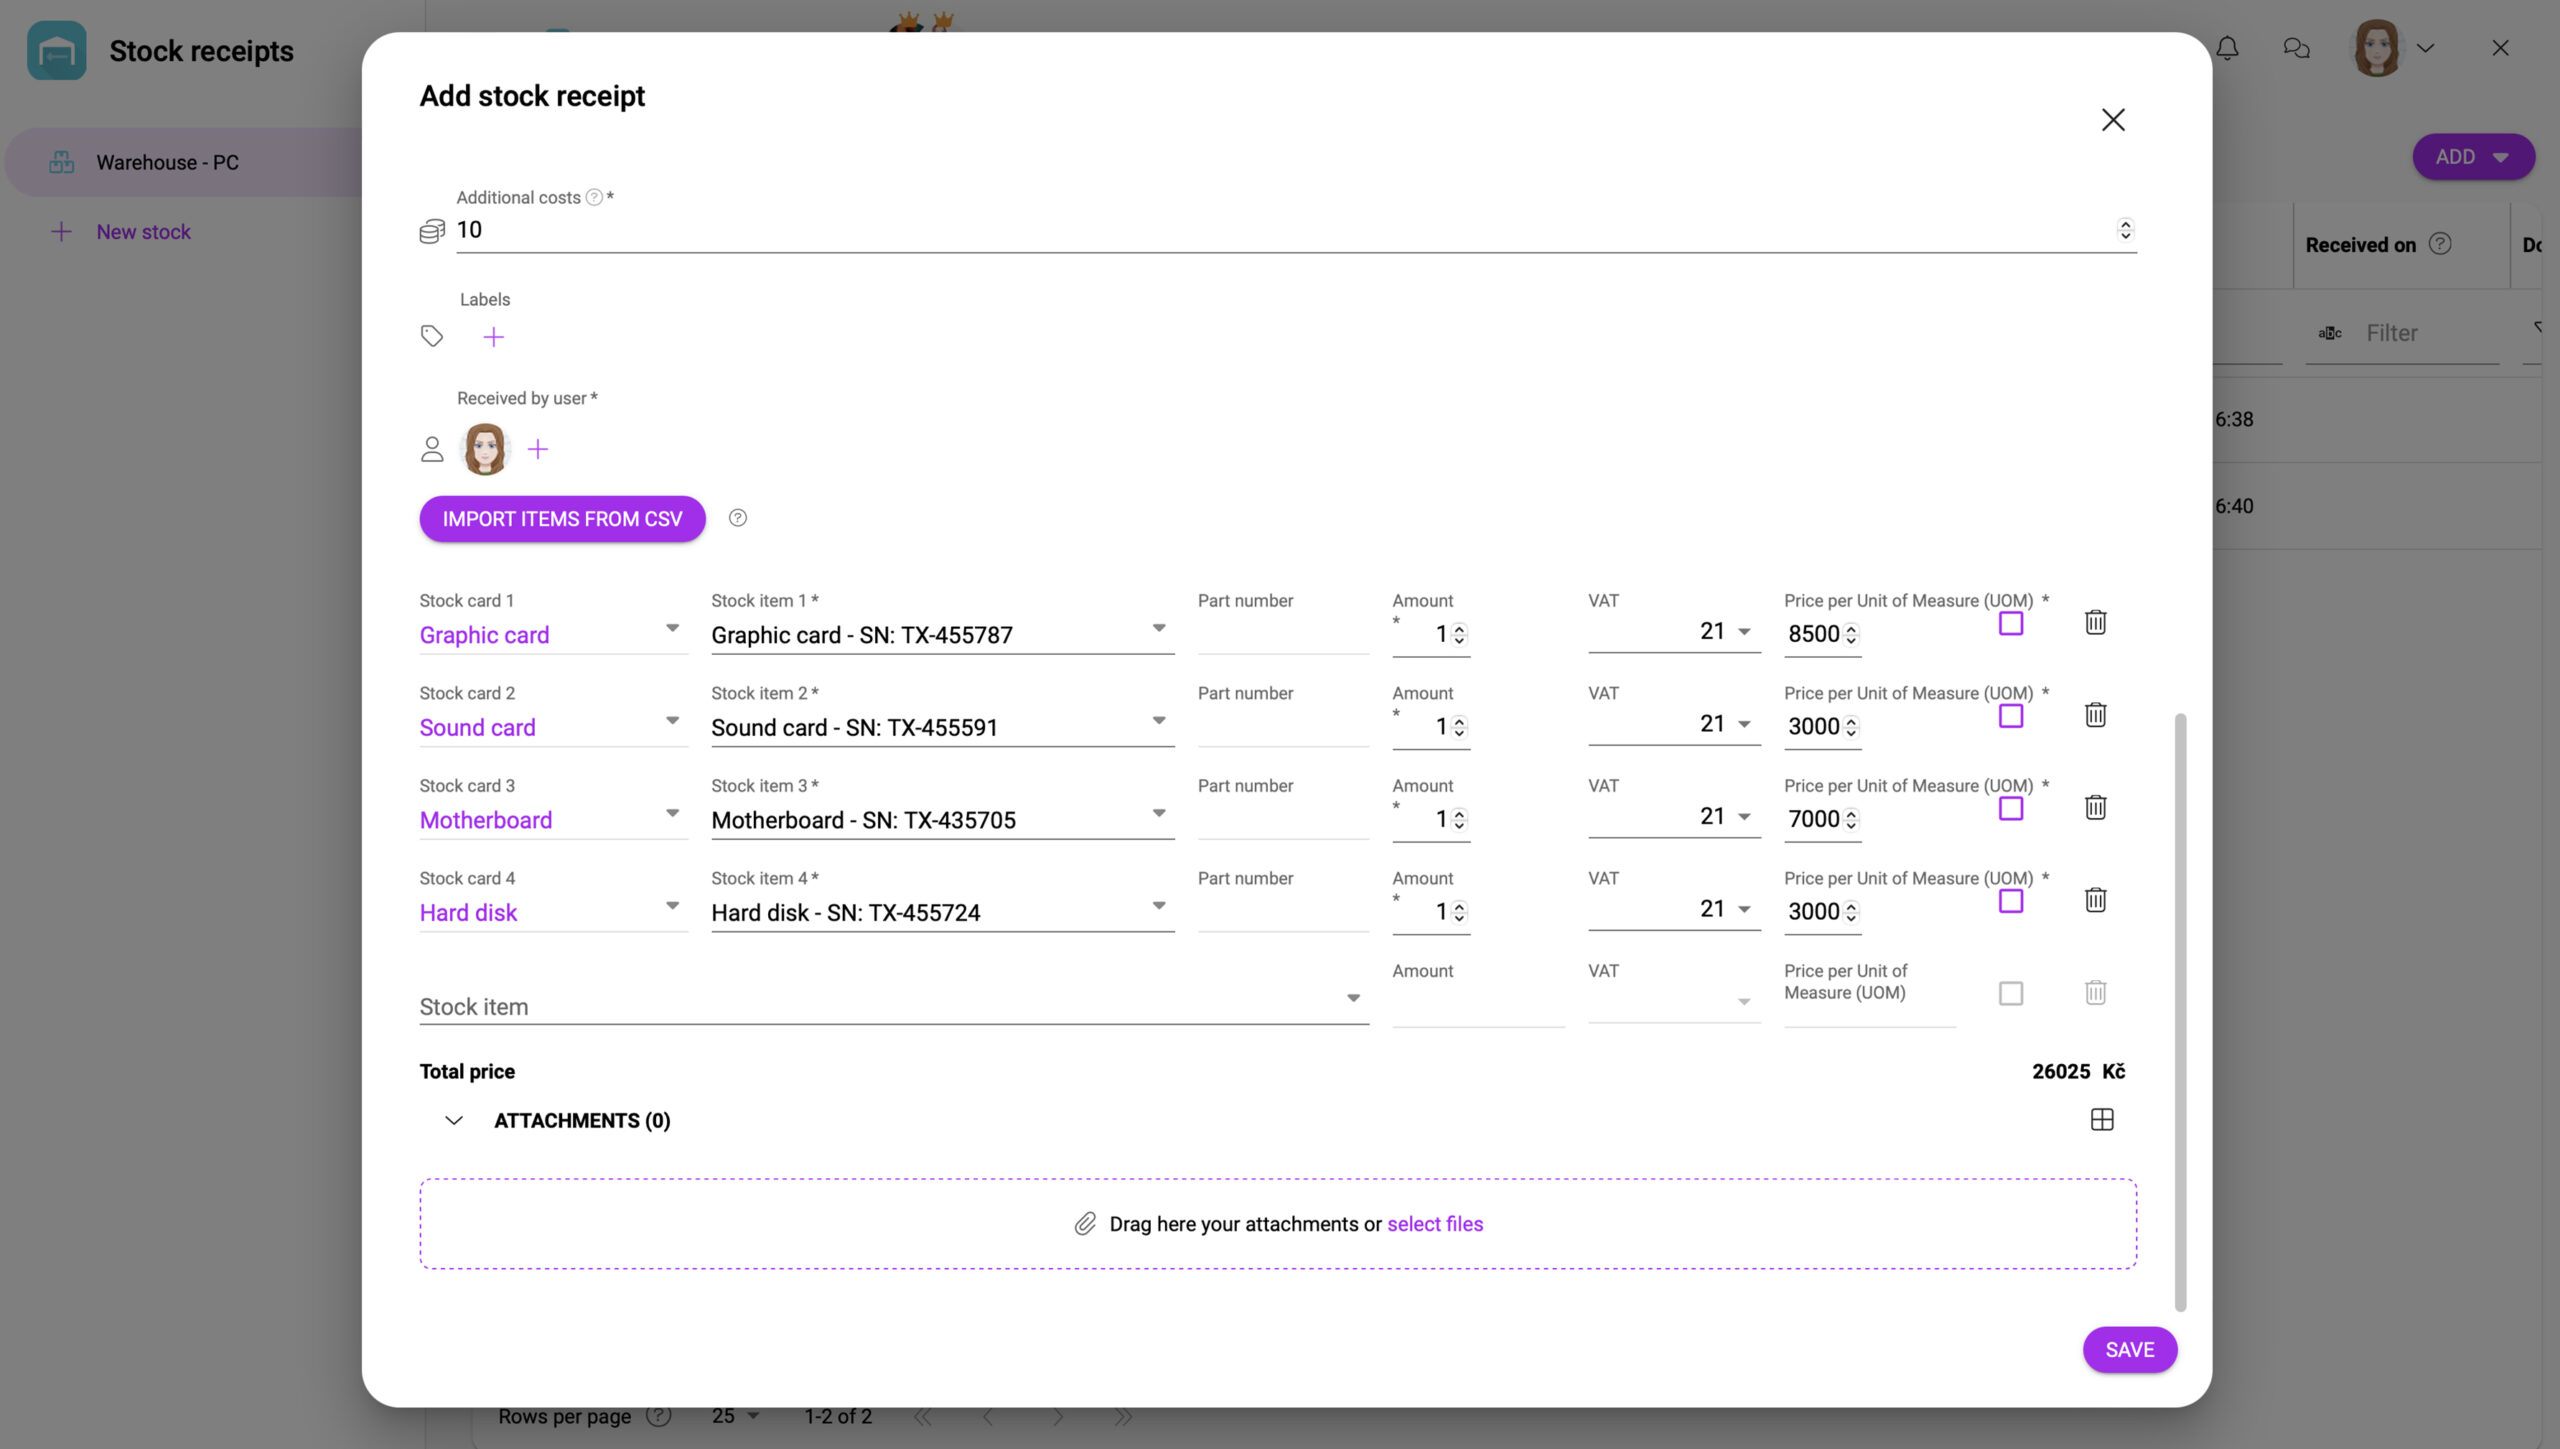
3. Create a spreadsheet (e.g. Excel, Google Sheets,…) and create 8 fields – exactly in this order: stock card, part number, stock itemItems are rows in records (order/request/invoice/purchase...), serial number, external identification, amount, tax, and price. These fields are mandatory. Your custom fields must be entered AFTER these mandatory fields. Their order is arbitrary.
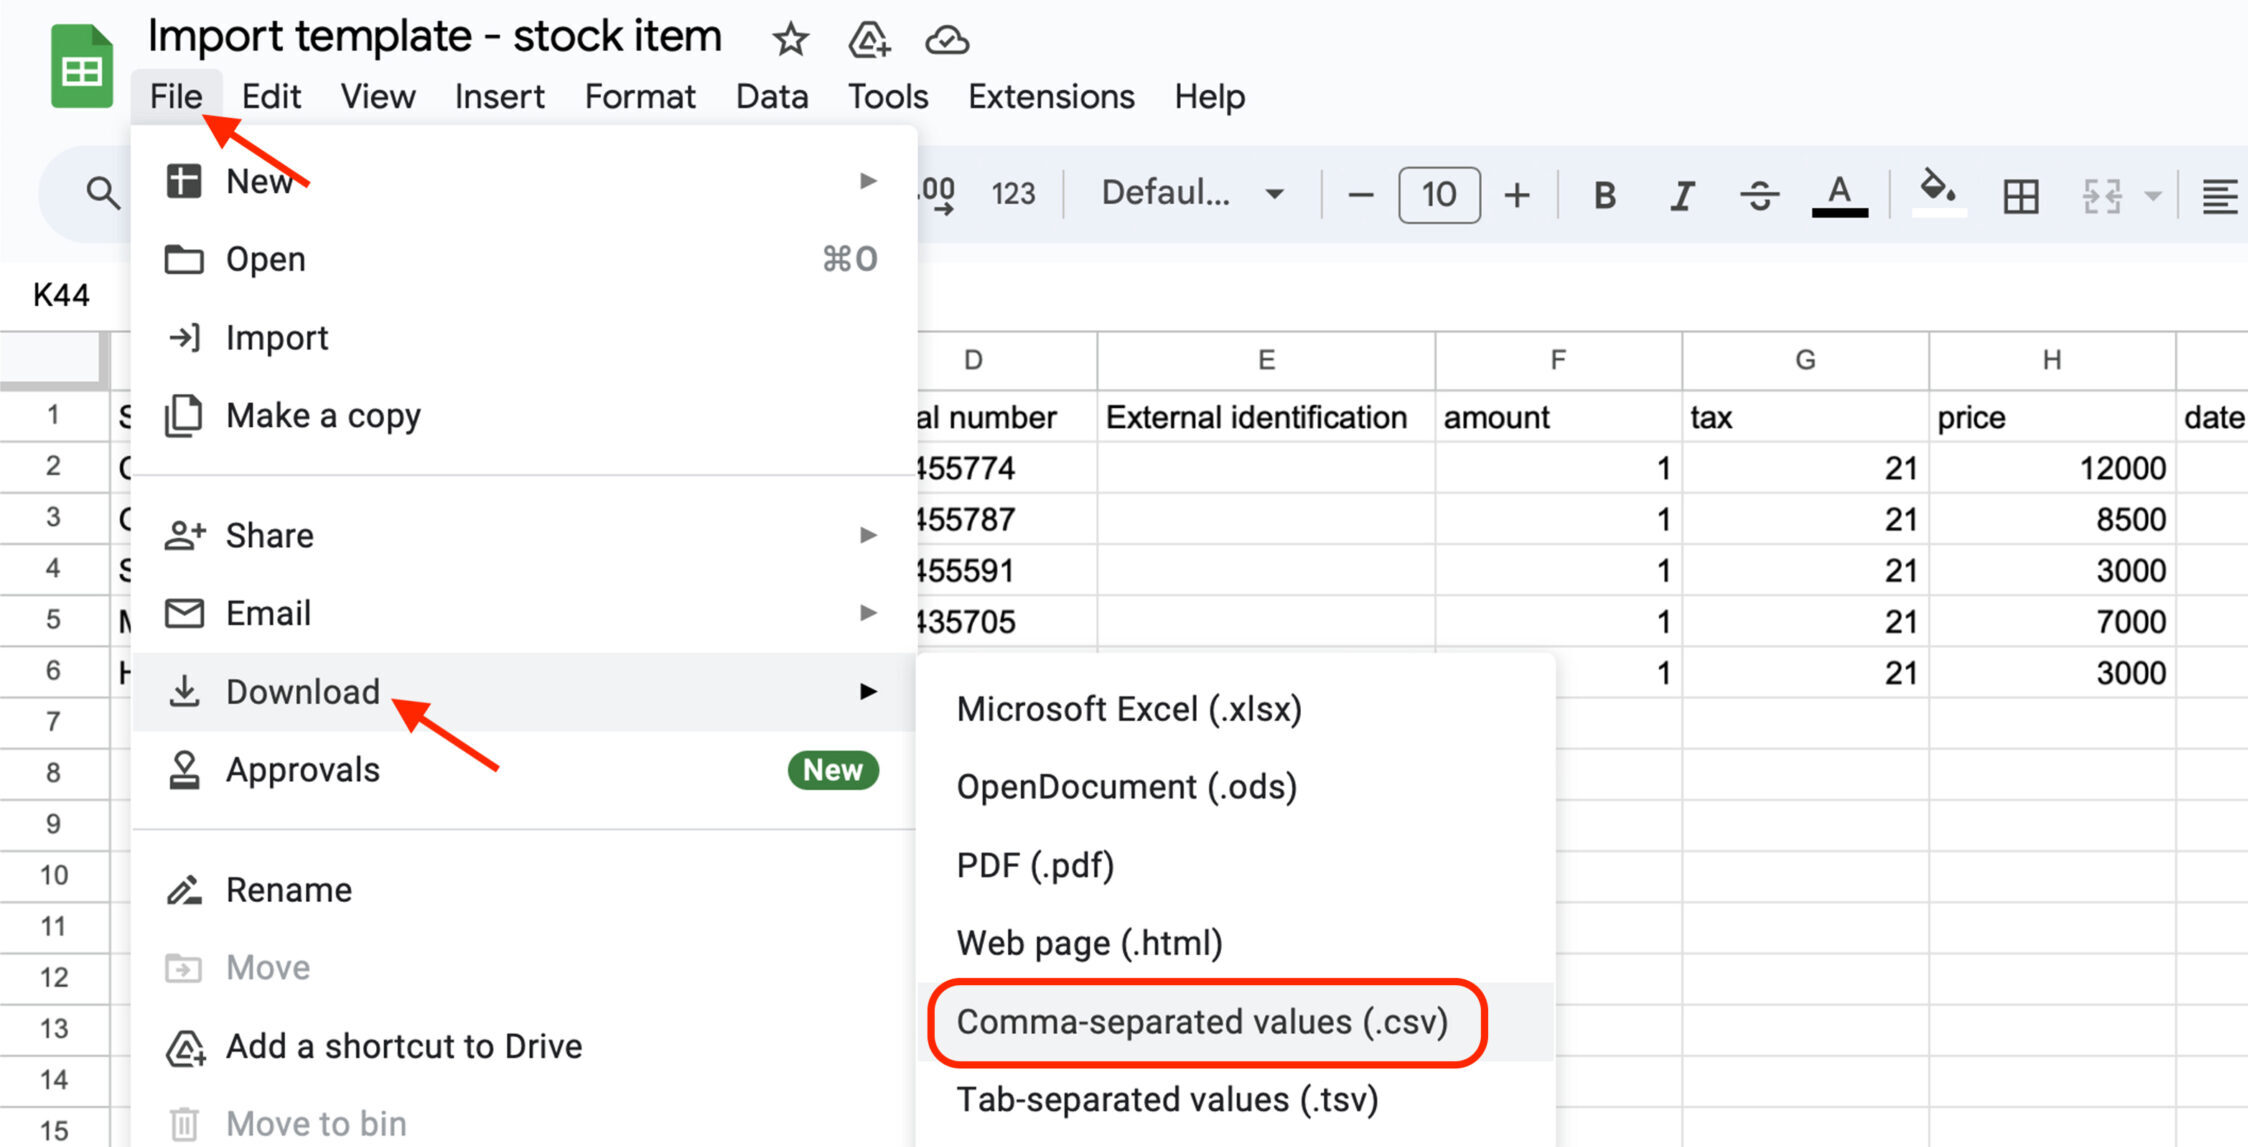
4. Then you need to save the document in .csv format.
5. In the Stock receipts addon, click Create new stock receipt. Fill in the necessary information and upload your .csv file.
6. Once created, you can see the new recordsOne row in the Boost.space database. These are individual rows under spaces in each module. For example single products, but not their variants. in the stock items addon.
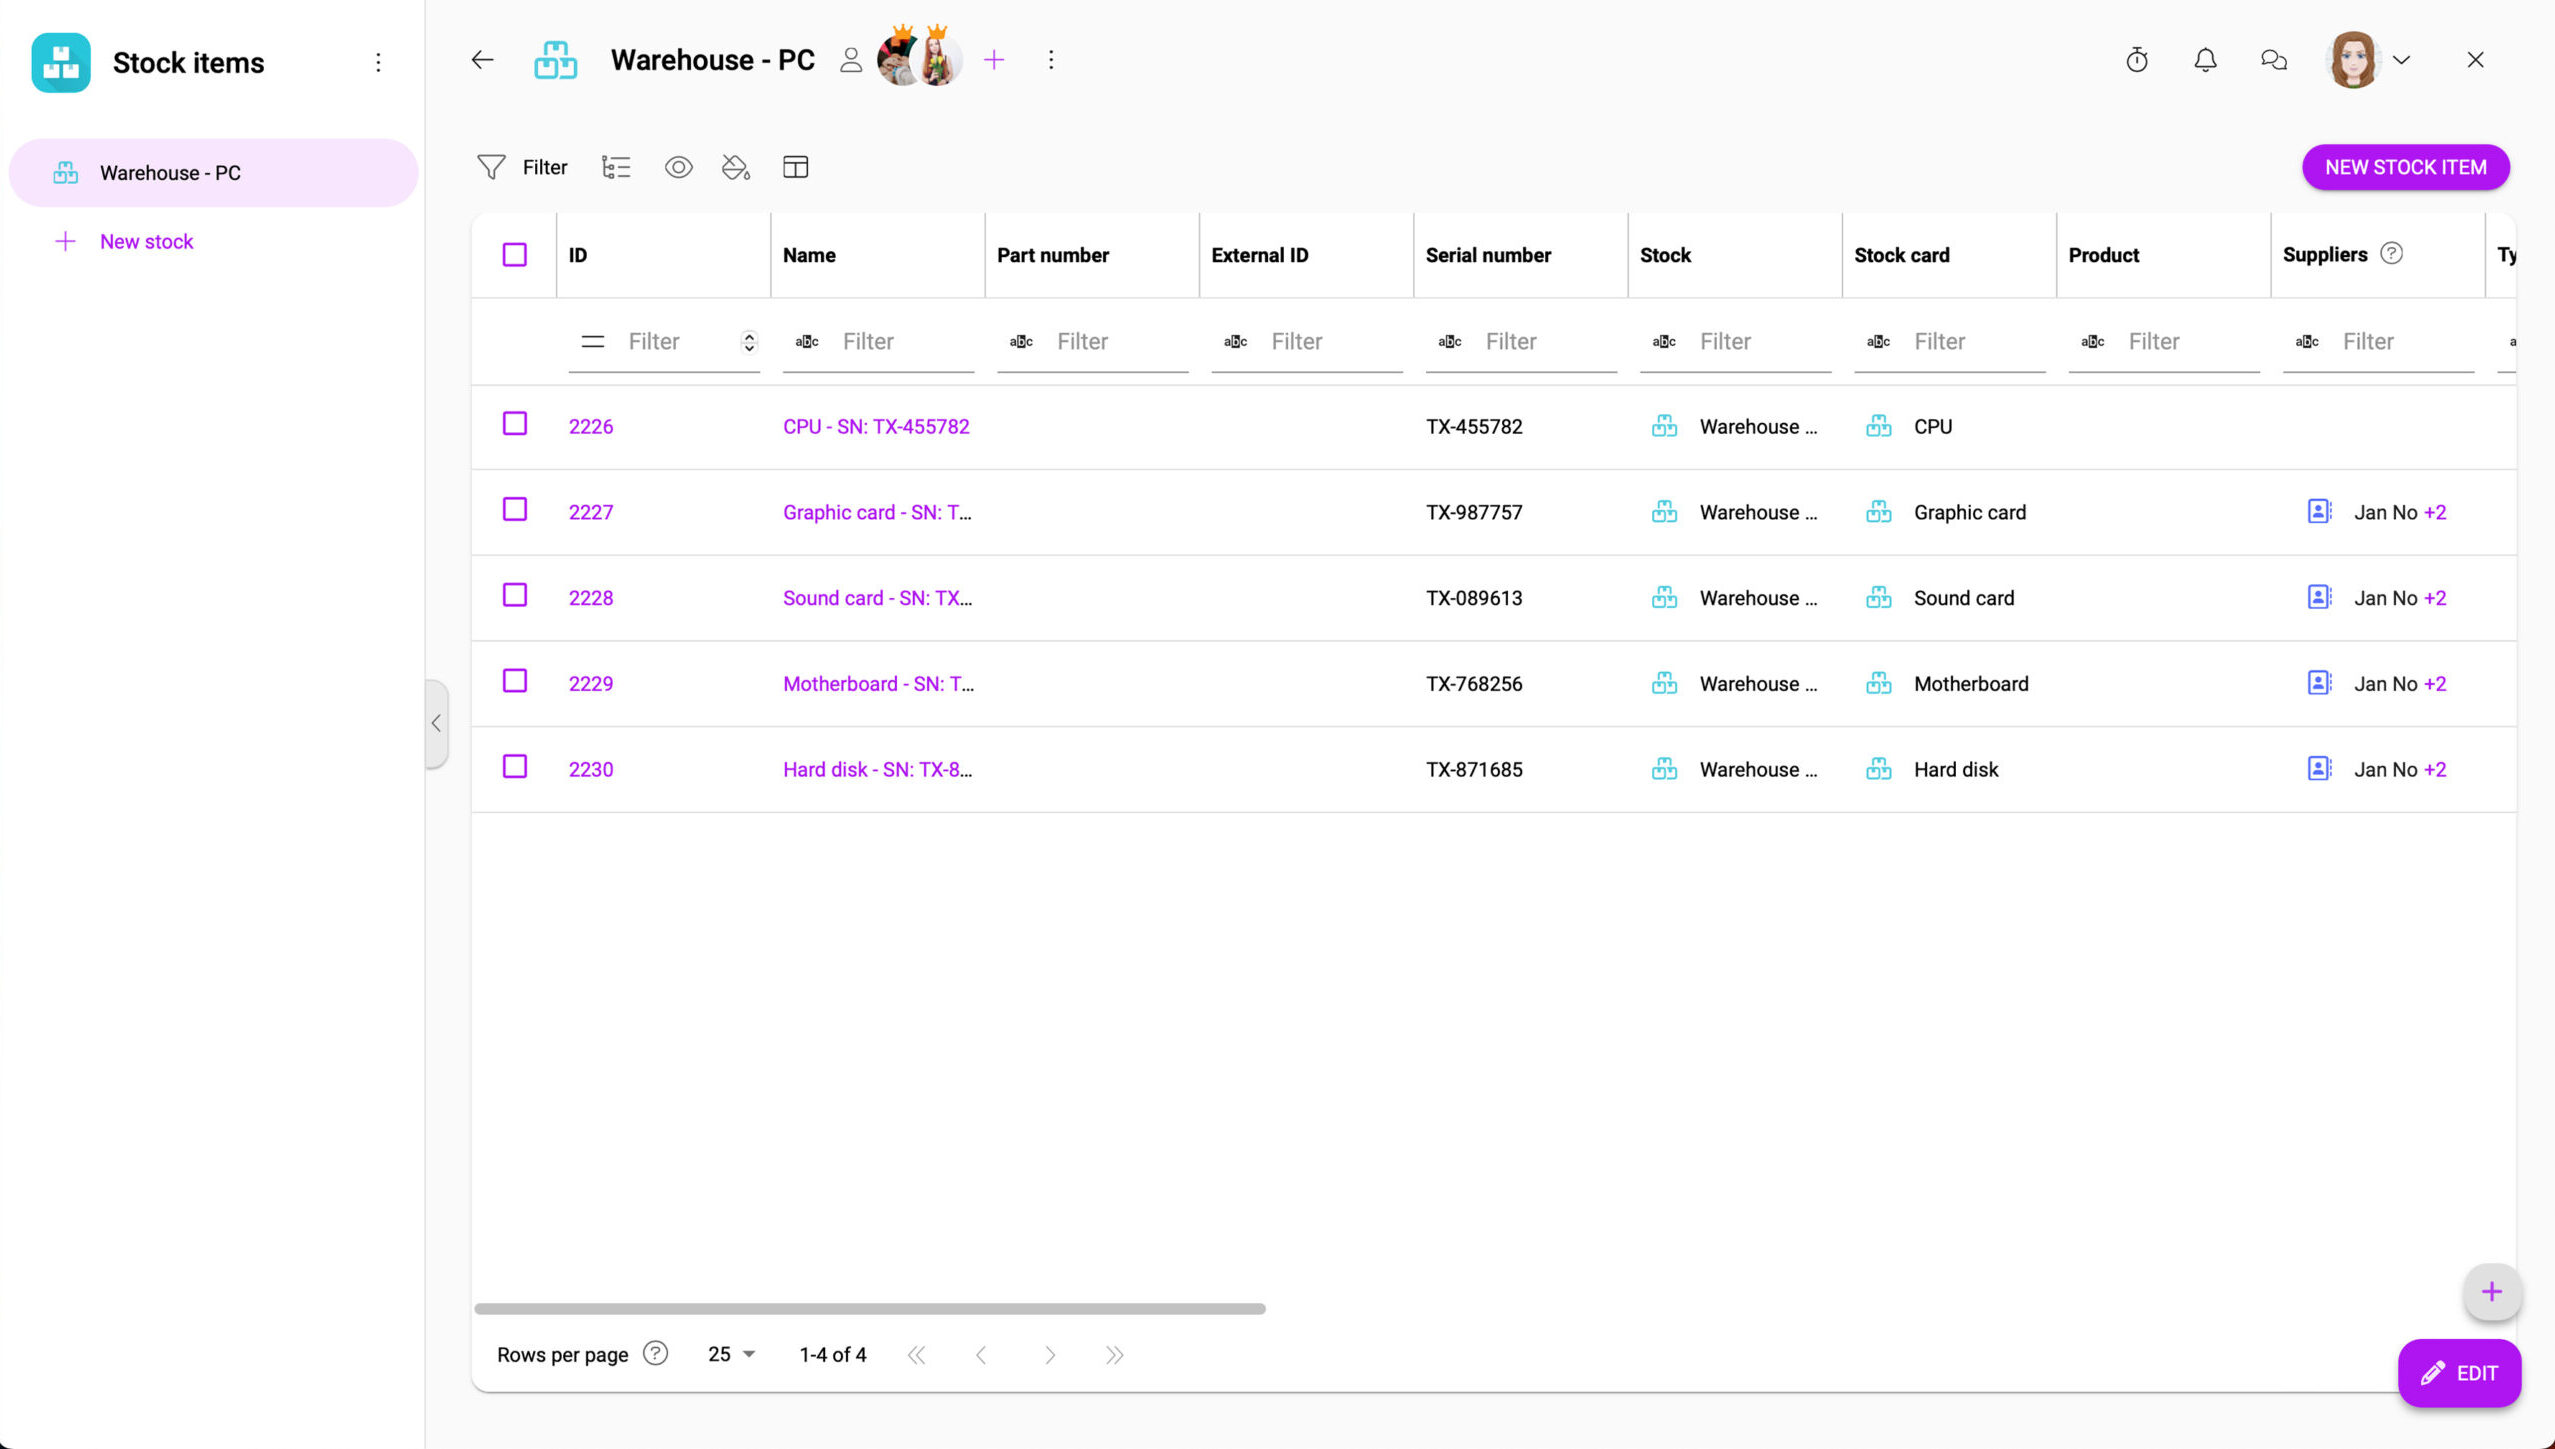
7. After clicking on each records, click on the Detail information. Here you will see your own field.
If you encounter any problems during creation, please do not hesitate to contact us.