How to Create a Custom Module and Configure It for Your System
Creating a Custom Module
Custom modulesa module is an application or tool designed to handle specific business functions, such as CRM, project management, or inventory. The system's modular architecture allows you to activate only the modules you need, enabling customization and scalability as your business requirements evolve. allow you to tailor Boost.spaceA platform that centralizes and synchronizes company data from internal and external sources, offering a suite of modules and addons for project management, CRM, data visualization, and more. Has many features to optimize your workflow! to your specific processes and data structureWhen you create a data store, you need to create a data structure that formats your data store in Boost.space Integrator. Think of the data store as a spreadsheet and the data structure as the headers. The data structure defines the kind of data (i.e. text, numeric, etc.) that the data store records. You can view and manage your data.... When creating a custom modulea module is an application or tool designed to handle specific business functions, such as CRM, project management, or inventory. The system's modular architecture allows you to activate only the modules you need, enabling customization and scalability as your business requirements evolve., you can choose between two different approaches:
- Create a module from scratch – full manual control over structure and settings
- Create a module with AI – faster setup based on a natural-language description
Both options start from the same place in the system. The steps below will guide you through the process.
Video
Step-by-step guide
You can start creating a custom module in two ways:
- Click the ➕ icon on your system Homepage
- Click ➕ New in the left sidebar
In both cases, a popup window appears.
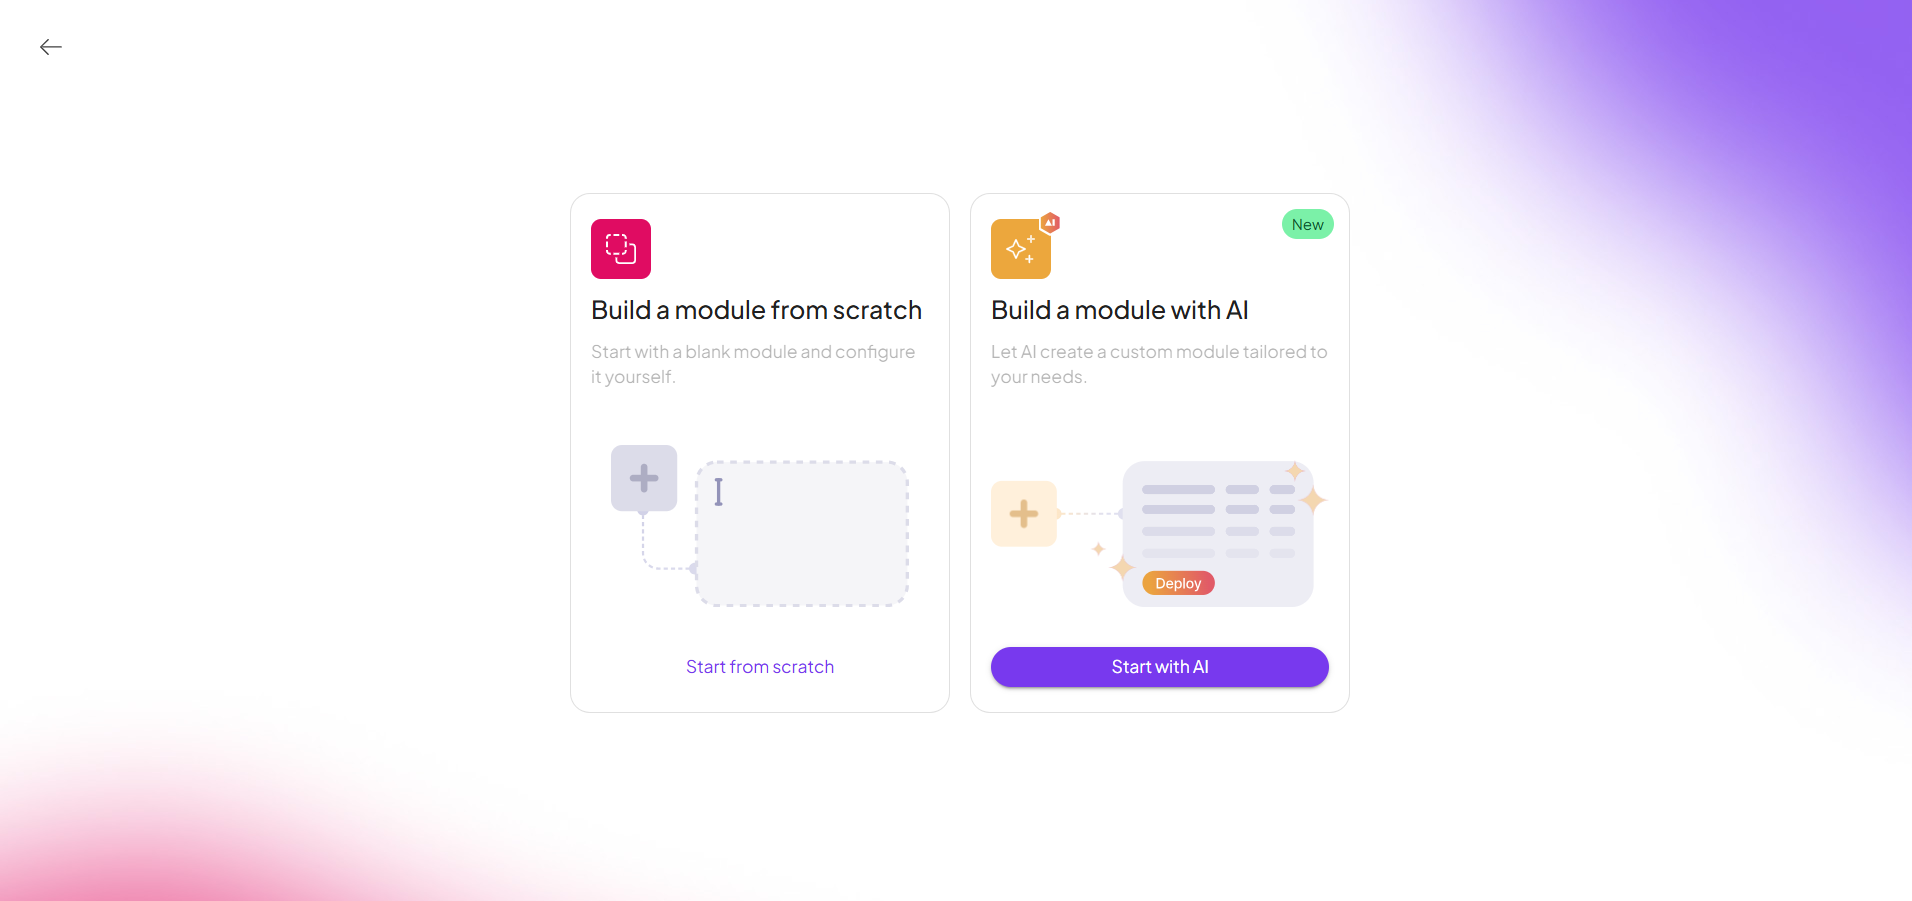
You will then see two options for creating your custom module:
- Build a module from scratch
- Build a module with AI
Choose one of the options below and follow the corresponding steps.
Option 1: Build a Module from Scratch
This option is ideal if you want full control o ver the module’s structure, fields, and configuration.
Creating the Module
After choosing Start from scratch:
- Select its icon and color (by clicking on the dropper).
- Choose the name of the module.
- Select the menu where the module should appear.
- Click Create.

Option 2: Build a Module with AI
This option allows you to create a custom module faster by describing your requirements in natural language.
Creating the Module with AI
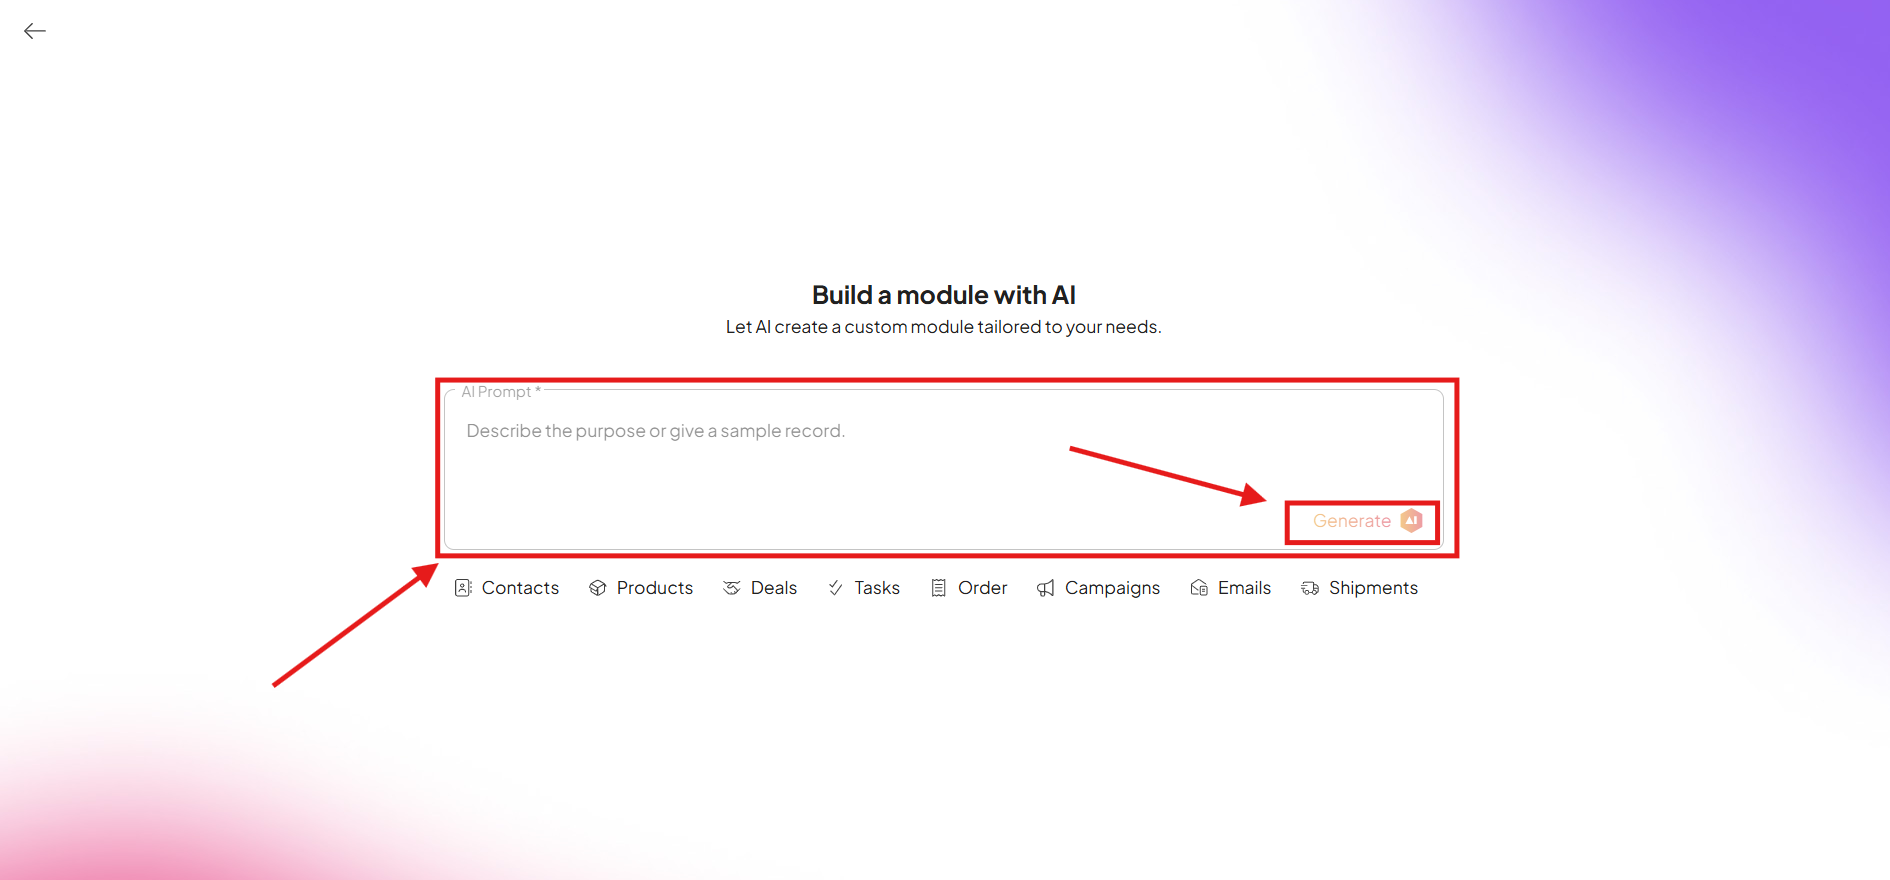
- After selecting New custom module, choose Build a module with AI.
- Click Start with AI.
- Give the AI clear instructions about the kind of module you need — for example: “I want a module that contains information about marketing campaigns.”
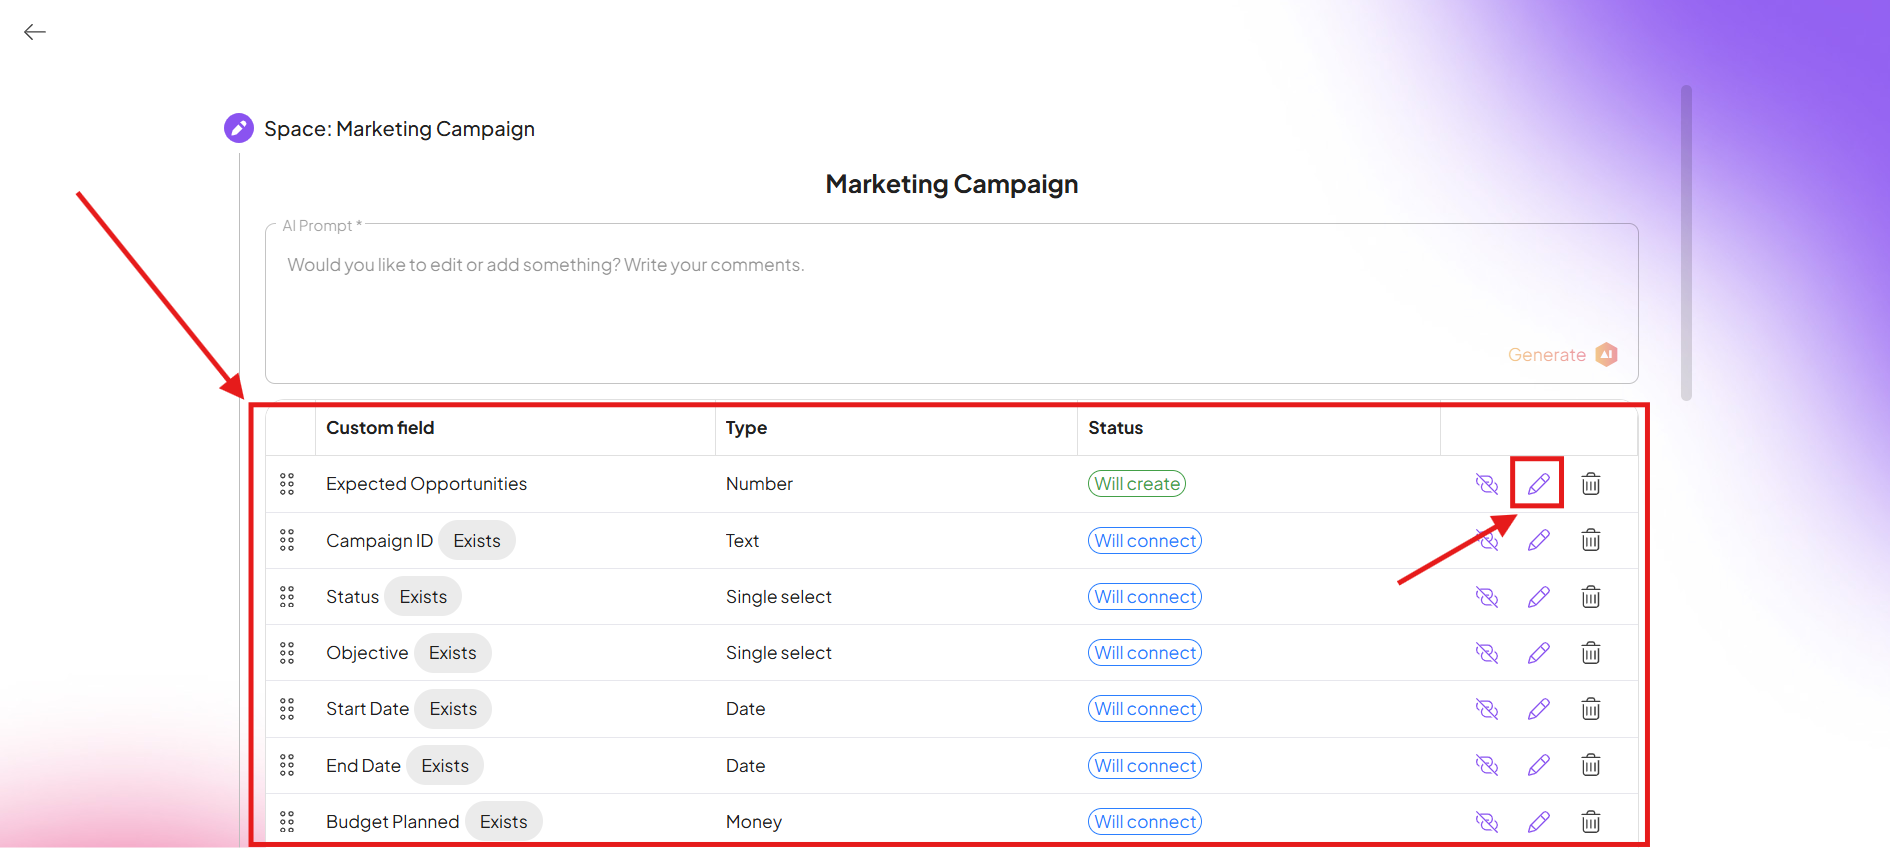
The AI has created a custom module for you.
You can always provide new instructions to adjust or expand it, or manually edit the module to fit your needs. Once you’re satisfied, click “Publish SpaceIn Boost.space, a space is a subunit within a module that helps organize and categorize data, ensuring clarity even with large volumes. For example, within the Contacts module, you might have spaces like "Client Database" or "Supplier Database." Access to each space is restricted to users who have created it or have been granted access..”
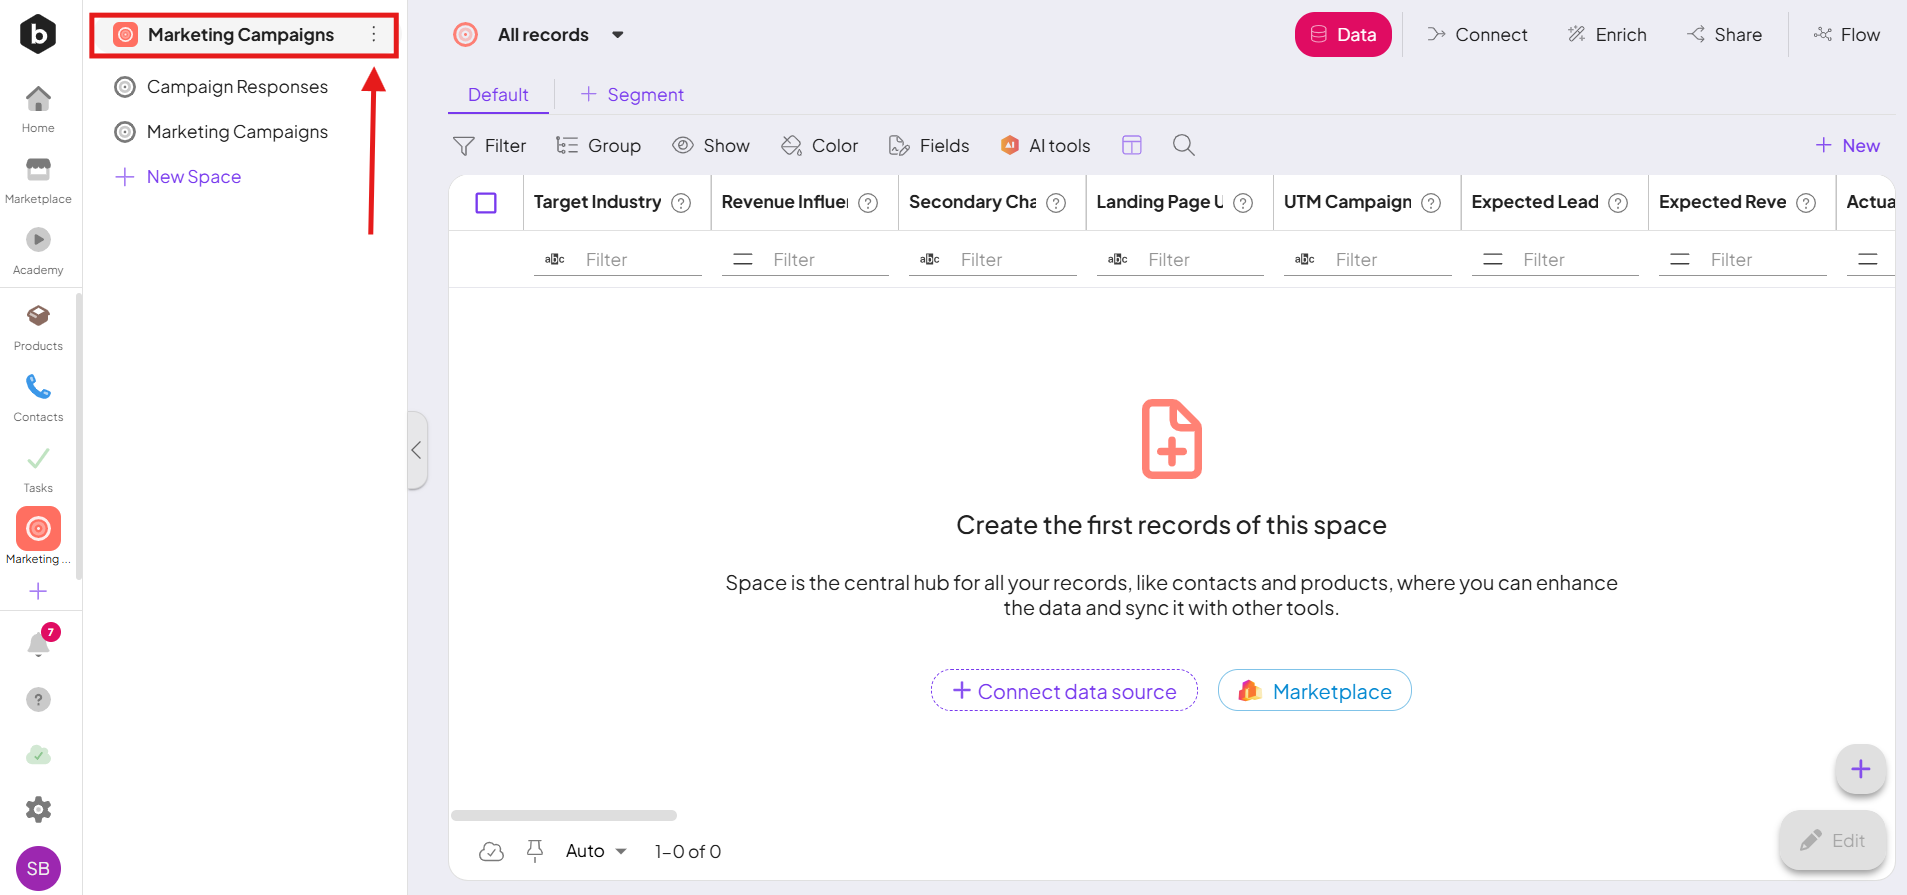
After this, you’ll see your new custom module along with its new space.
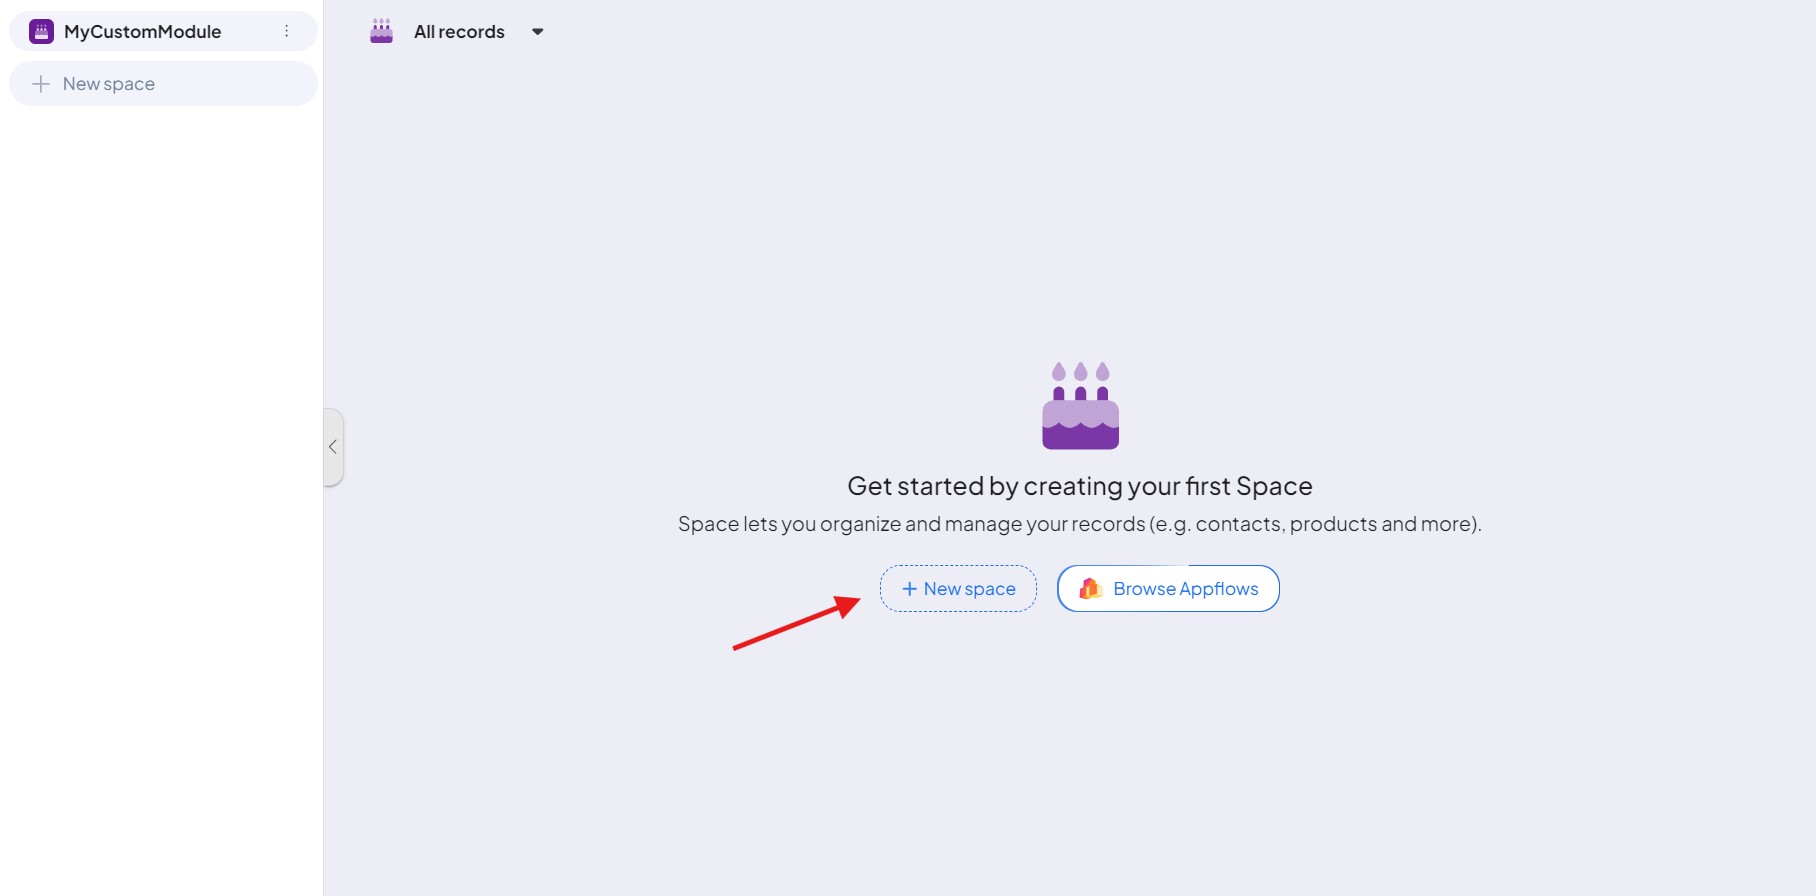
Creating a space
Now, you can create a space – simply click on “+ New space”.
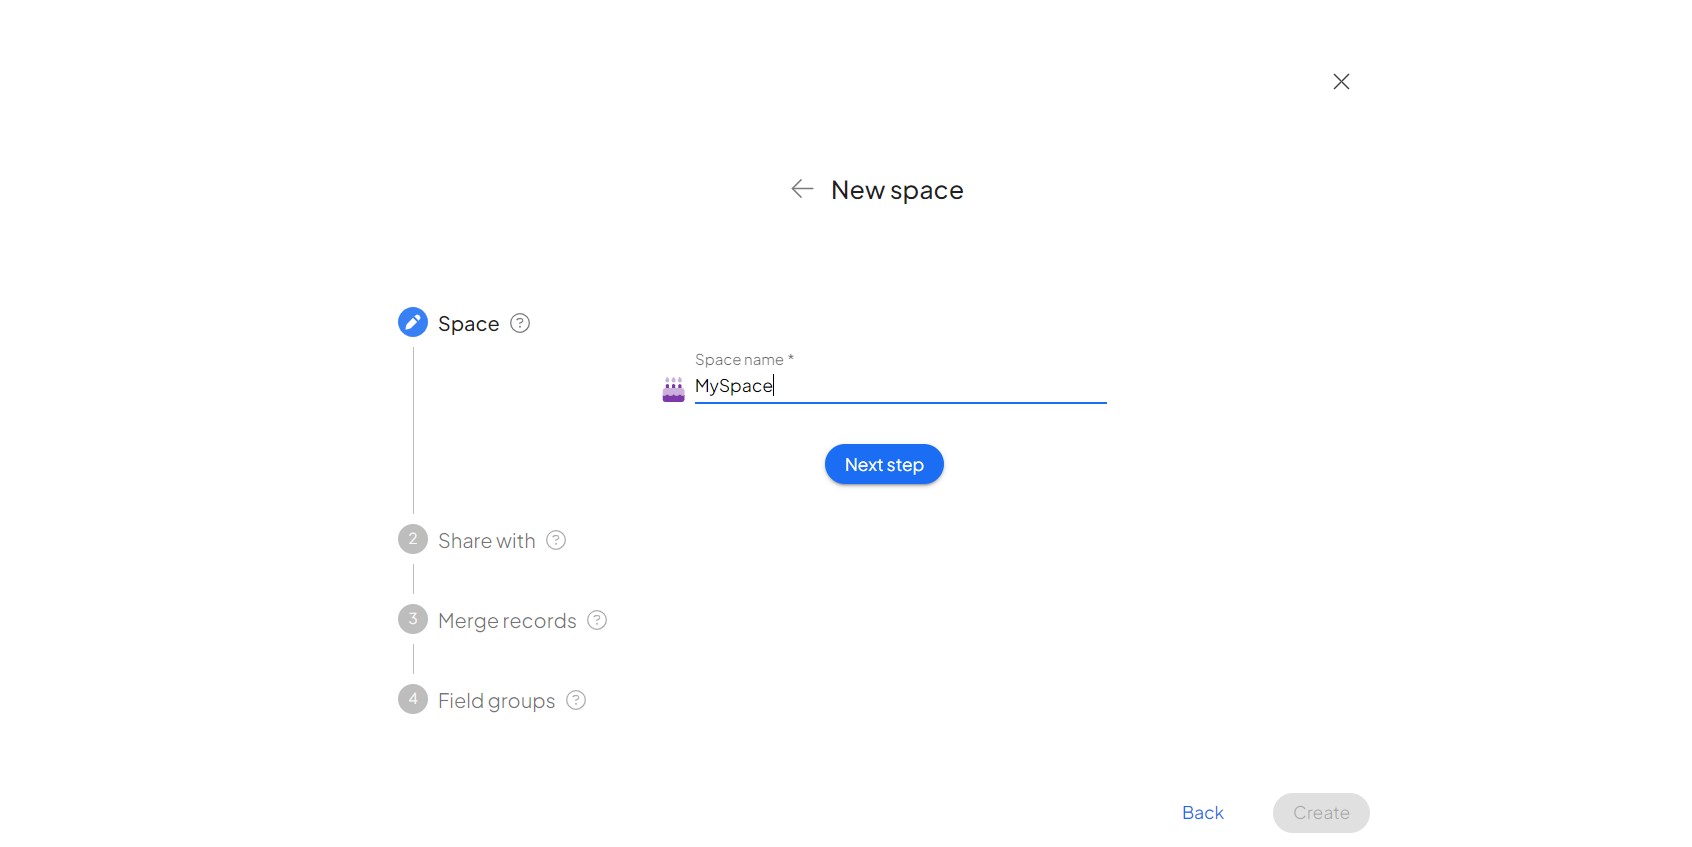
6. Name your space and click on “Next step”.
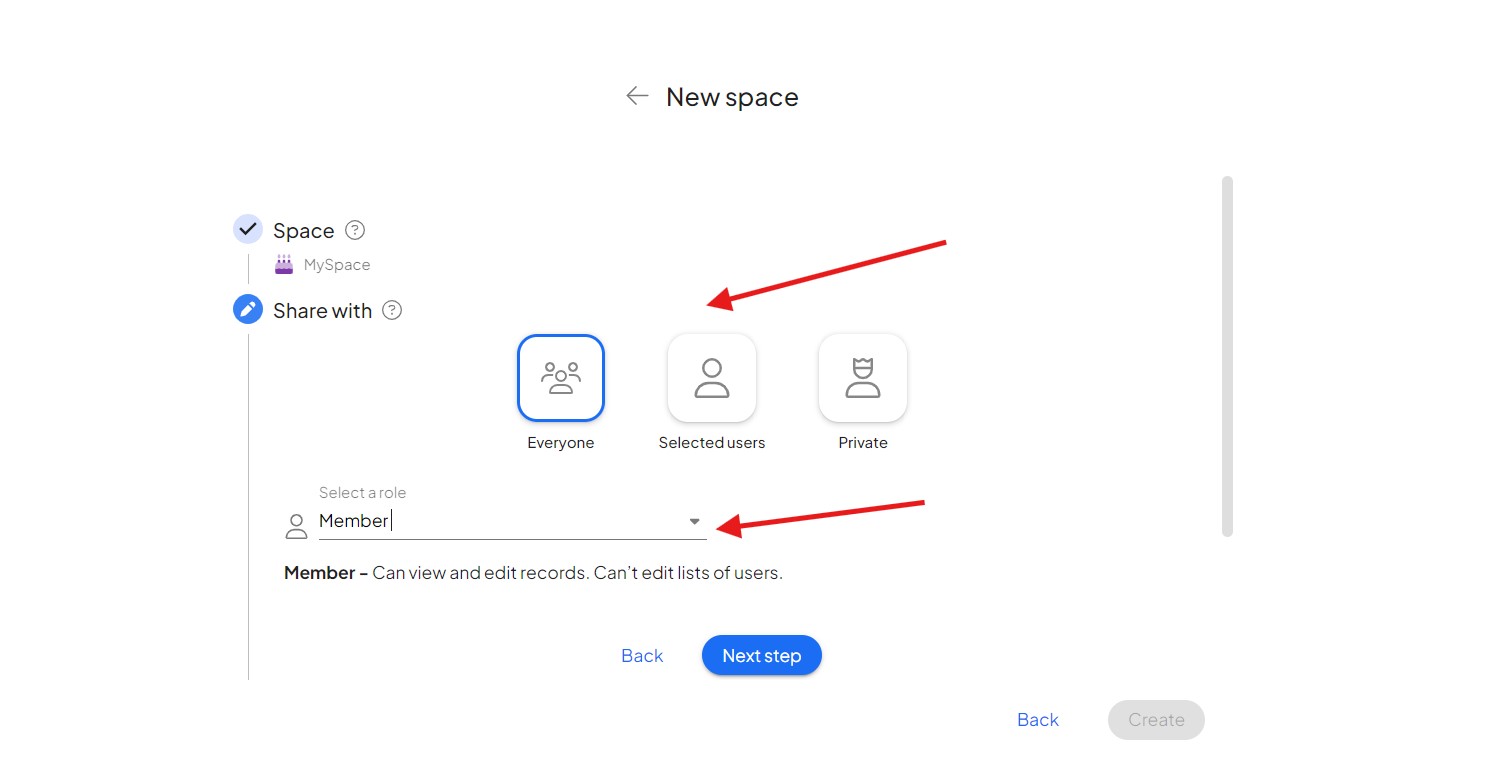
7. Choose with whom you want to share this custom module and what role it should have in it. Then click on “Next step“.
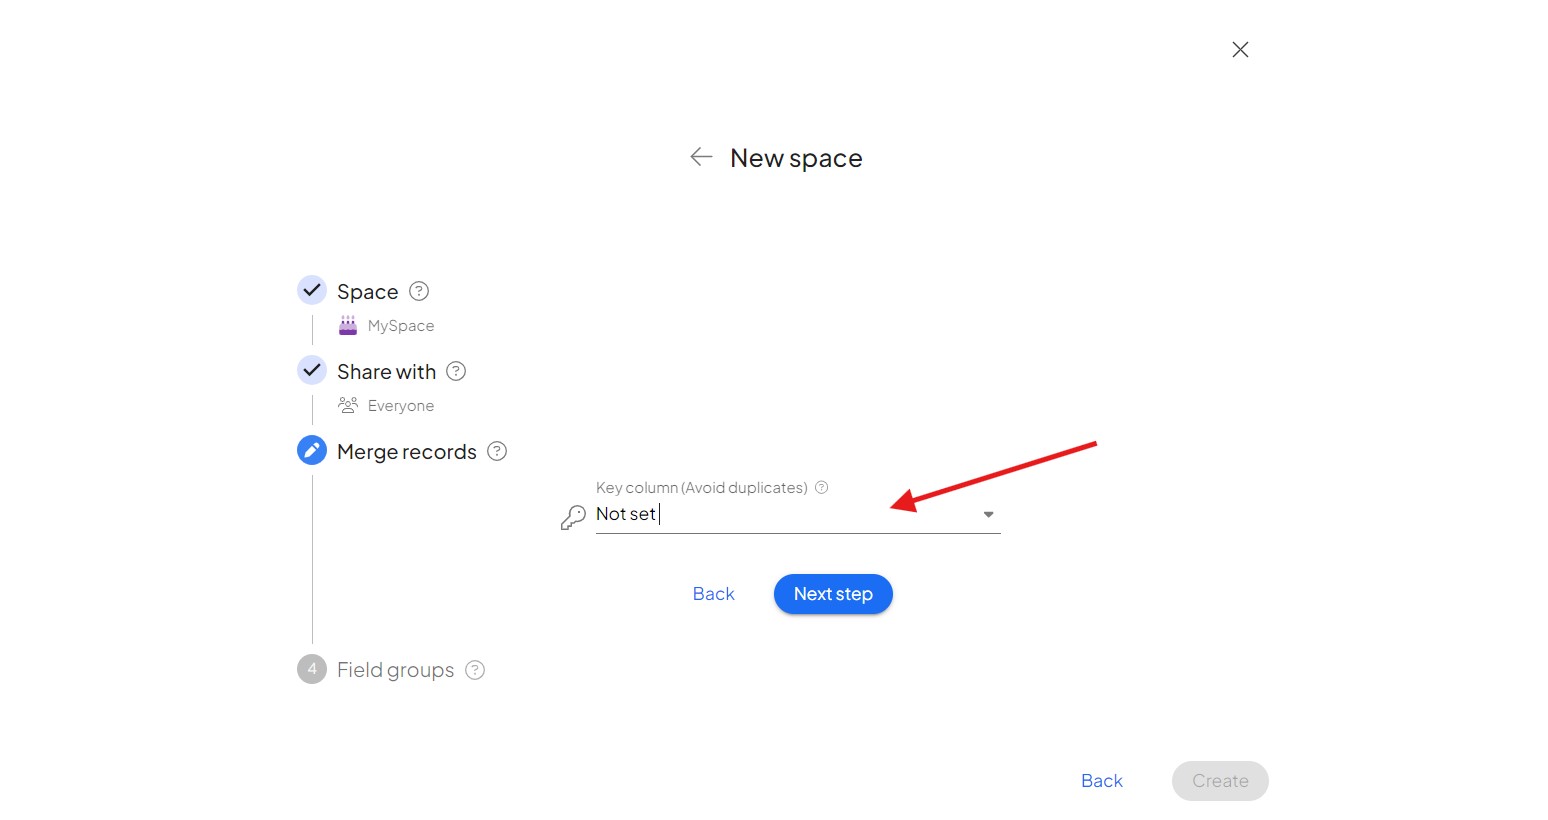
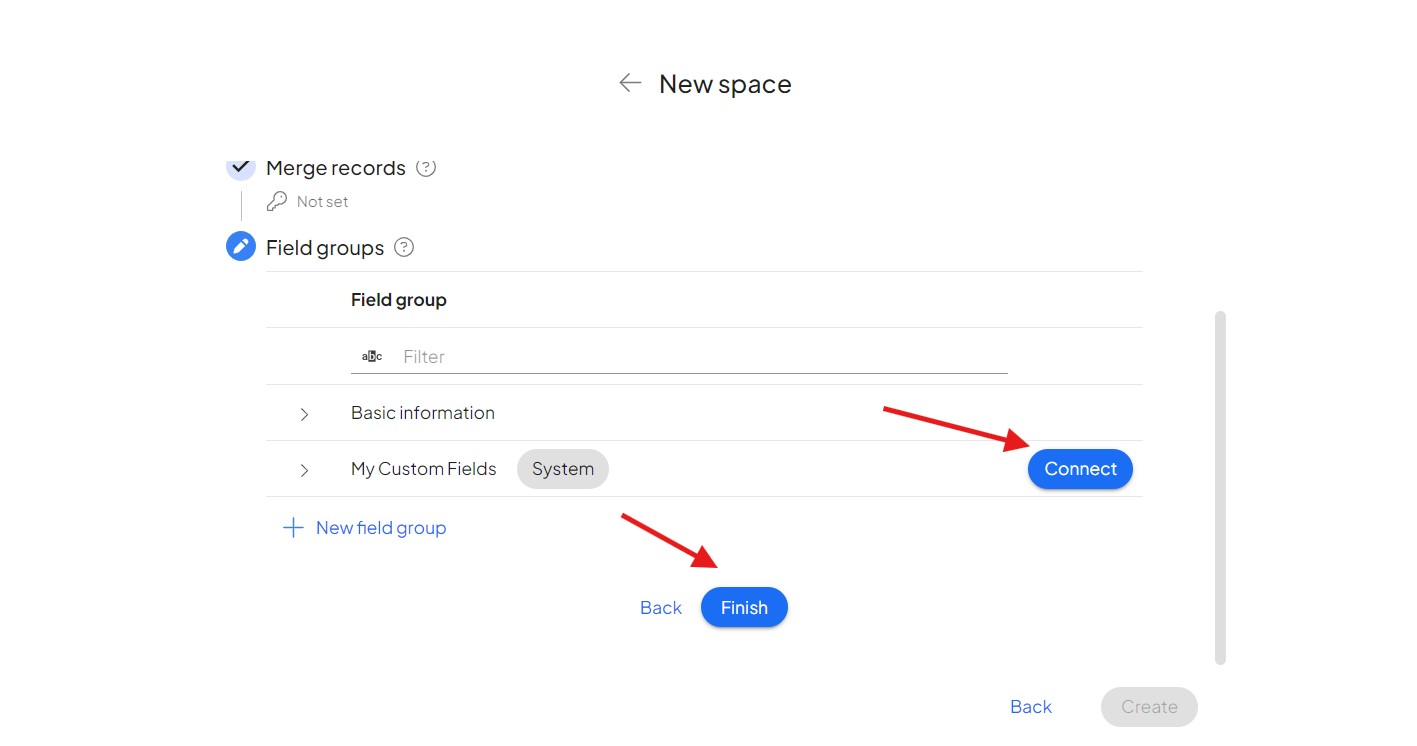
8. This field is used to match (merge) recordsIn Boost.space, a record is a single data entry within a module, like a row in a database. For example, a contact in the Contacts module or a task in the Tasks module. in the context of integrations. Whenever a recordIn Boost.space, a record is a single data entry within a module, like a row in a database. For example, a contact in the Contacts module or a task in the Tasks module. comes through an integration that has the same key column as an existing record, its data is consolidated to the existing record.
9. If you want, you can add custom fieldsA feature in Boost.space that allows administrators to define and manage additional data fields within each module, tailoring the system to specific organizational needs. to your new custom module (creating custom fields here). If so, just look them up and then click on “Connect“. Next, click on “Finish”.
Creating a Custom field
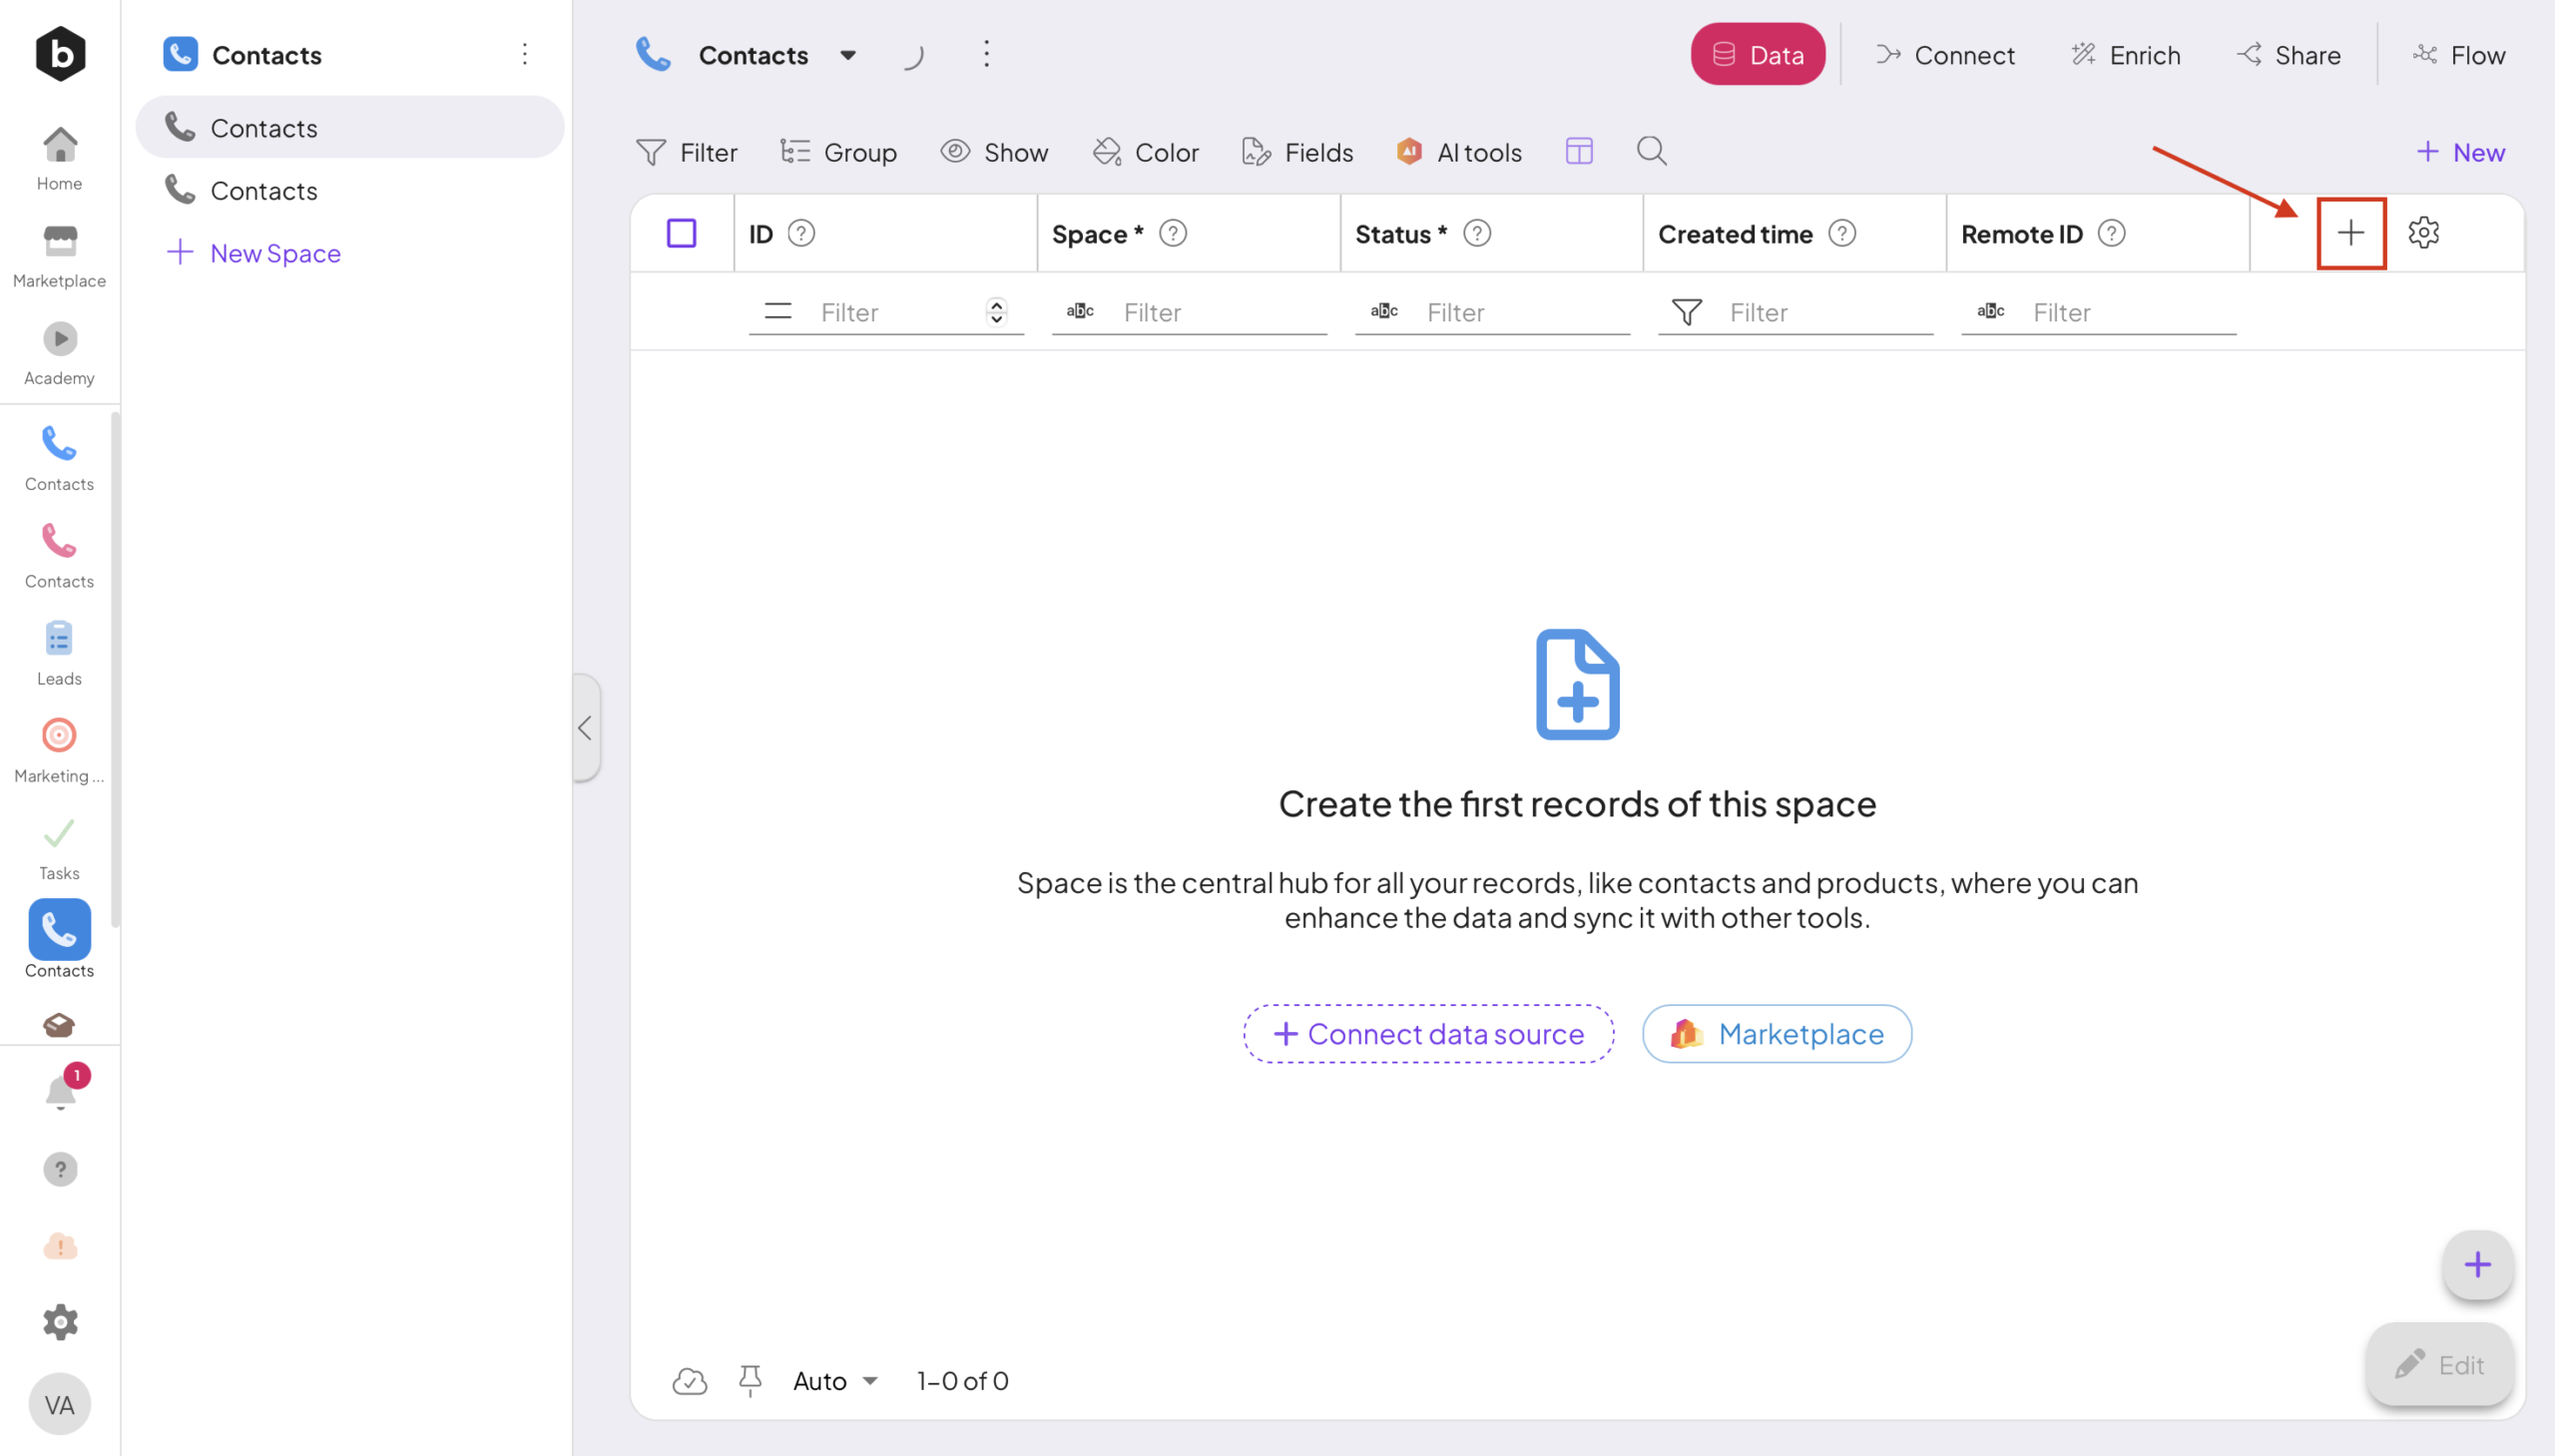
In custom modules, you can now create new custom fields in two different ways. In your Space, just click the + Icon.
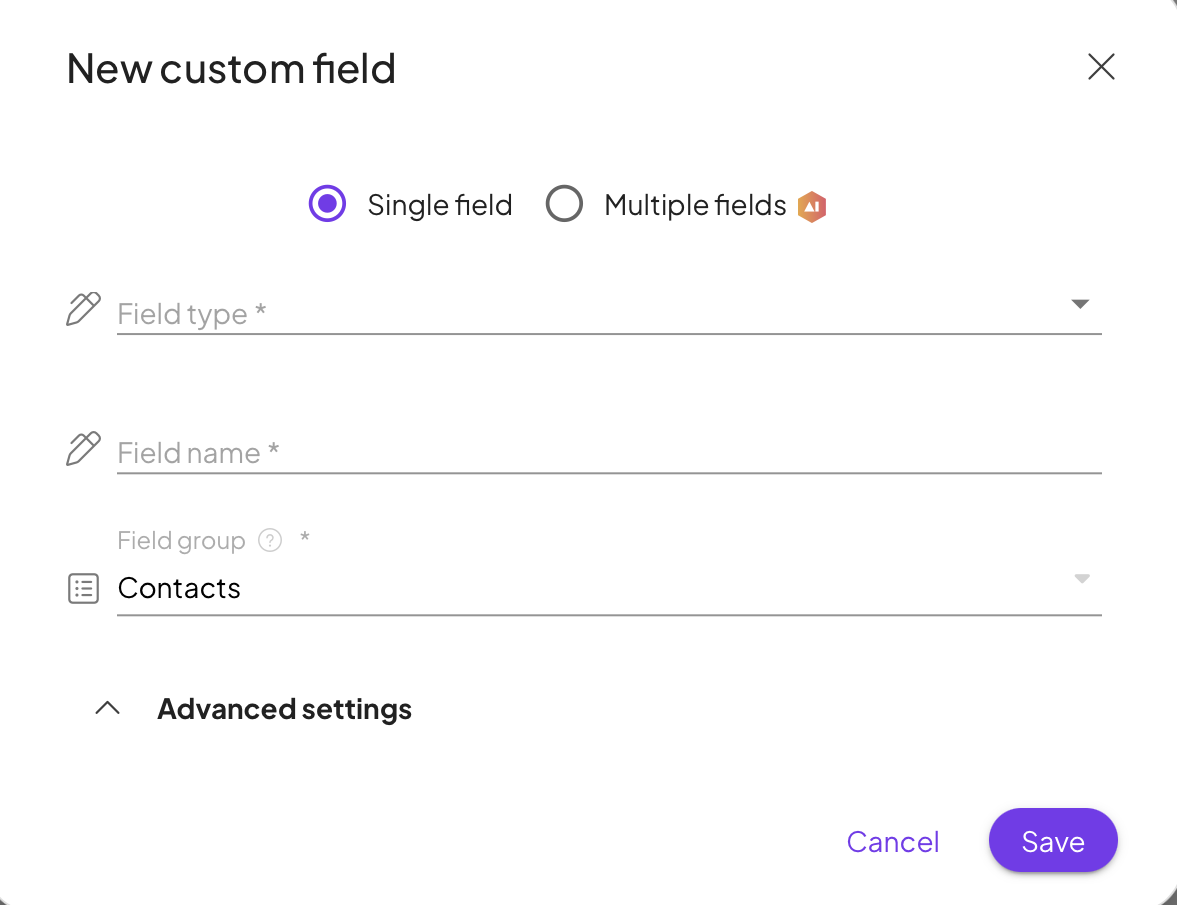
The first option is to create a single custom fieldA feature in Boost.space that allows administrators to define and manage additional data fields within each module, tailoring the system to specific organizational needs. manually, where you define its name, type, and settings individually.
The second option is to use AI to generate multiple custom fields at once. In this case, you simply describe what kind of fields you need, and the system will automatically create them for you.
For more detailed info about Custom field creation refer to our article.
Congratulations! You have just created your Custom module, created a space in it, and learned the basic information. If you want to learn more about setting up modules – try the article on Custom Fields or Shared Labels and Statuses.
Deleting a Custom module
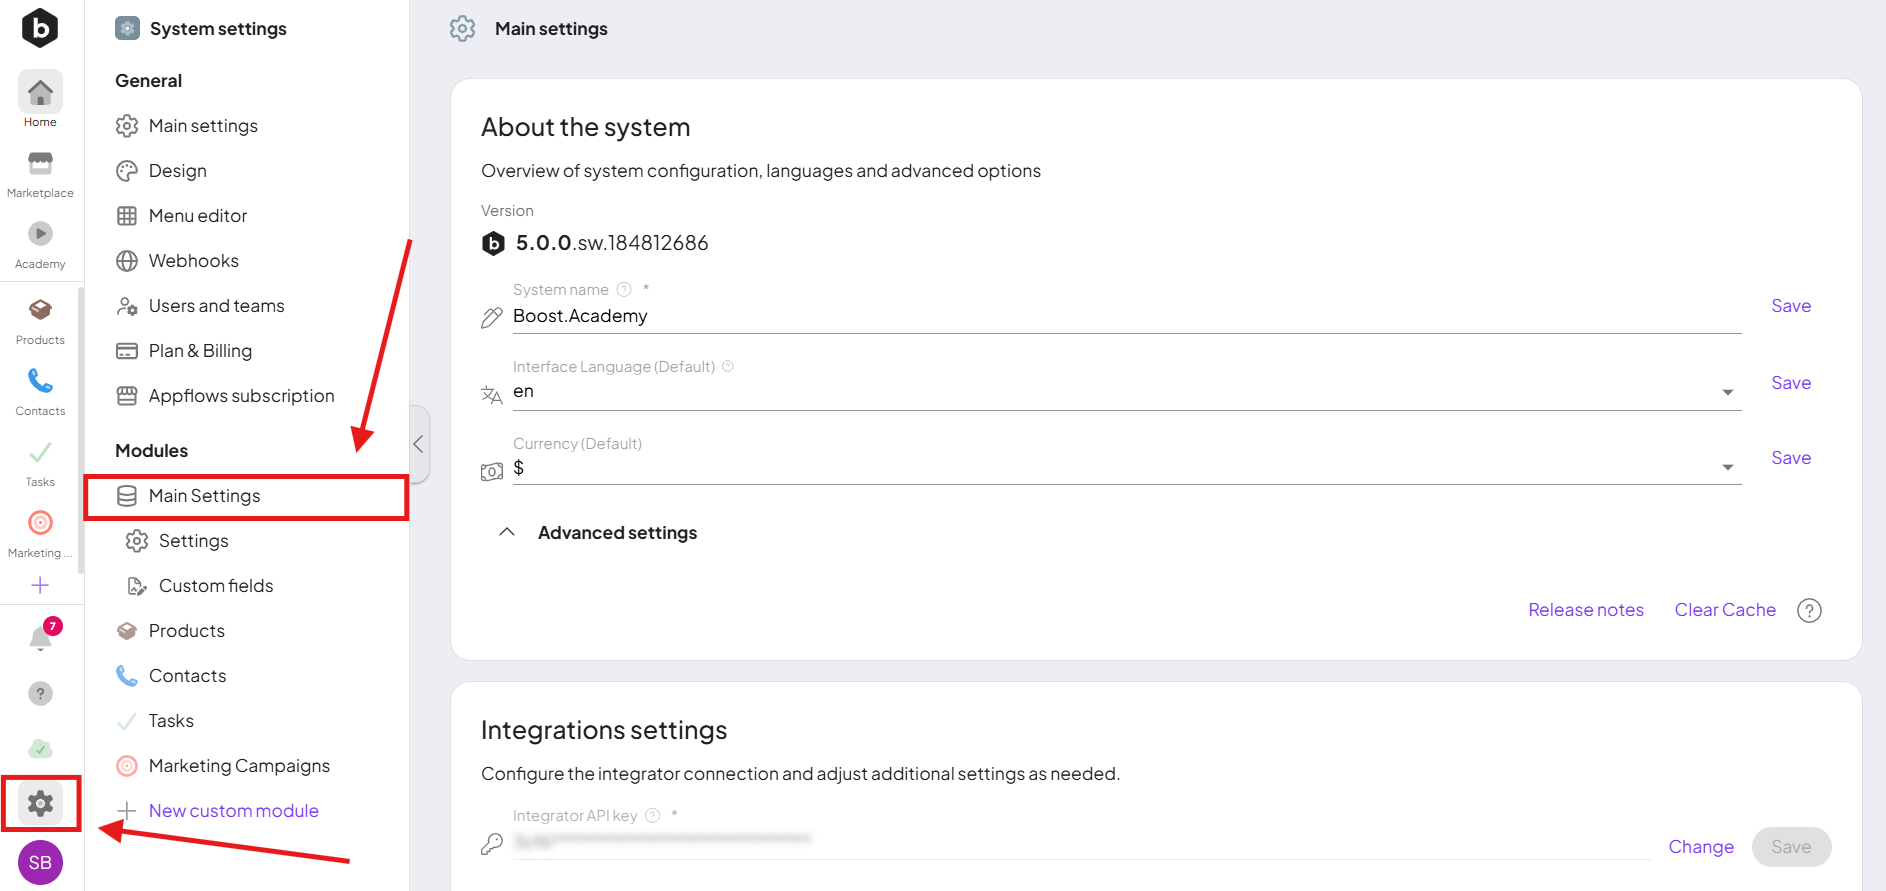
If you decide to remove a custom module from your system, you can do so in the System settingsMain settings of the Boost.space system that is accessible only by admins. You can change a variety of things here (custom fields, actions and triggers, design, etc.).
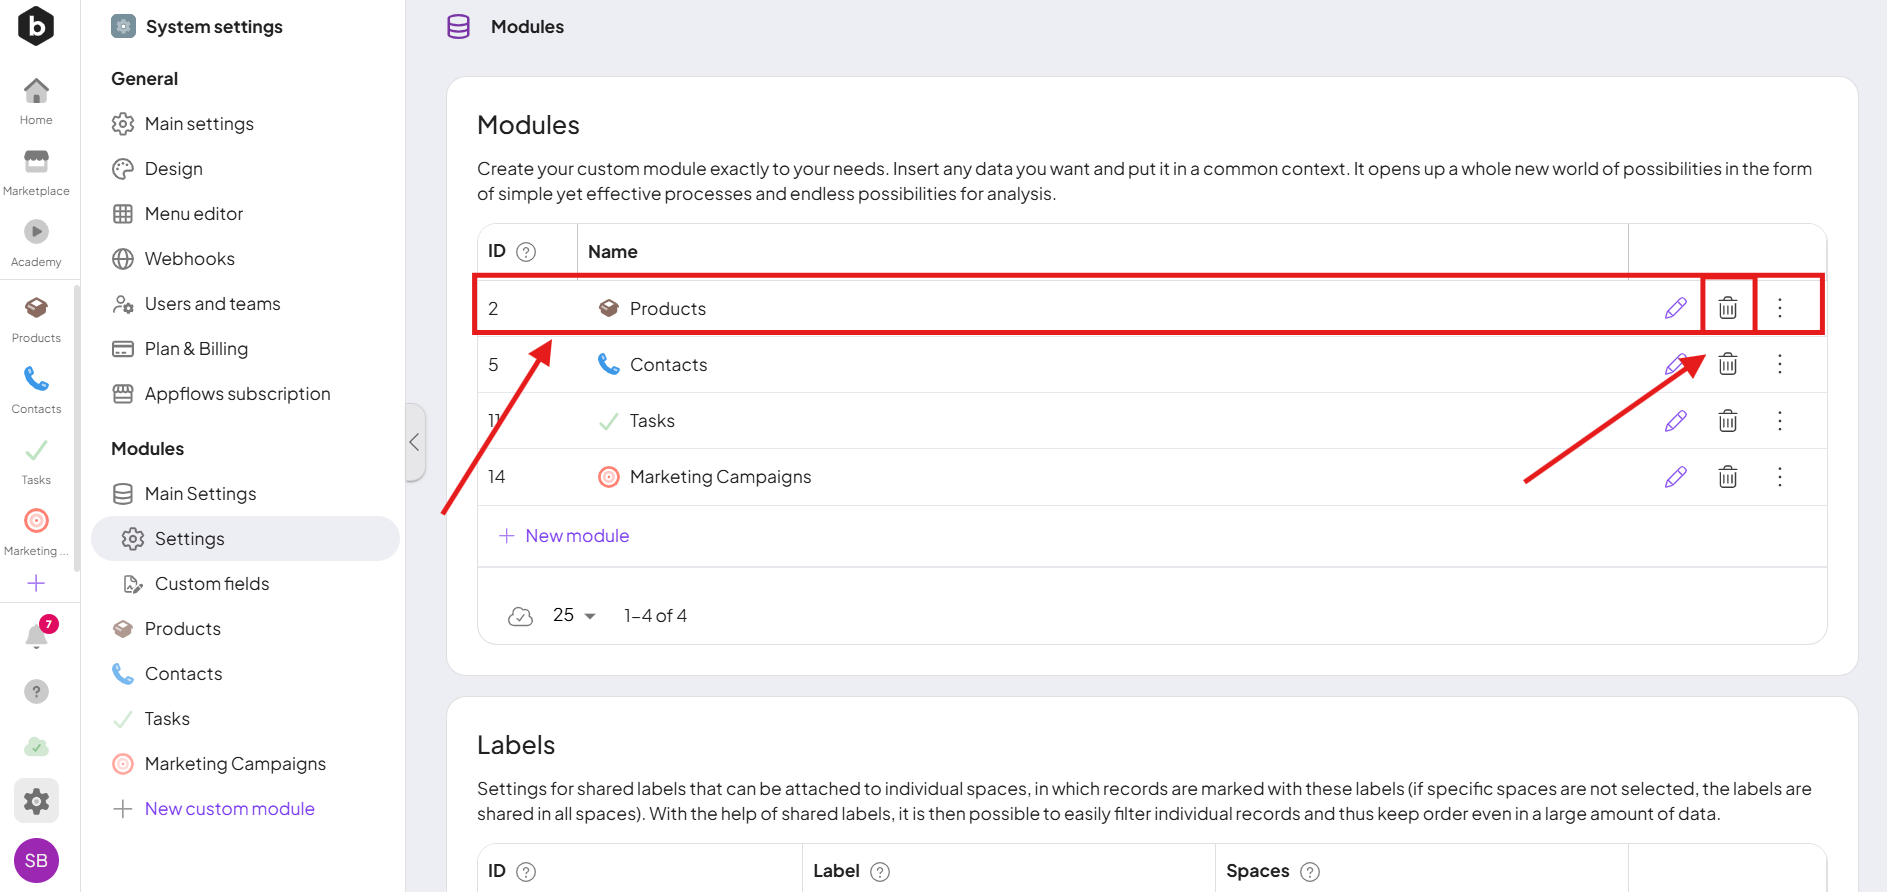
- 1. Go to System settings → Modules → Main Settings.
-
2. In the list of custom modules, find the module you want to delete, and click the trash-bin icon.
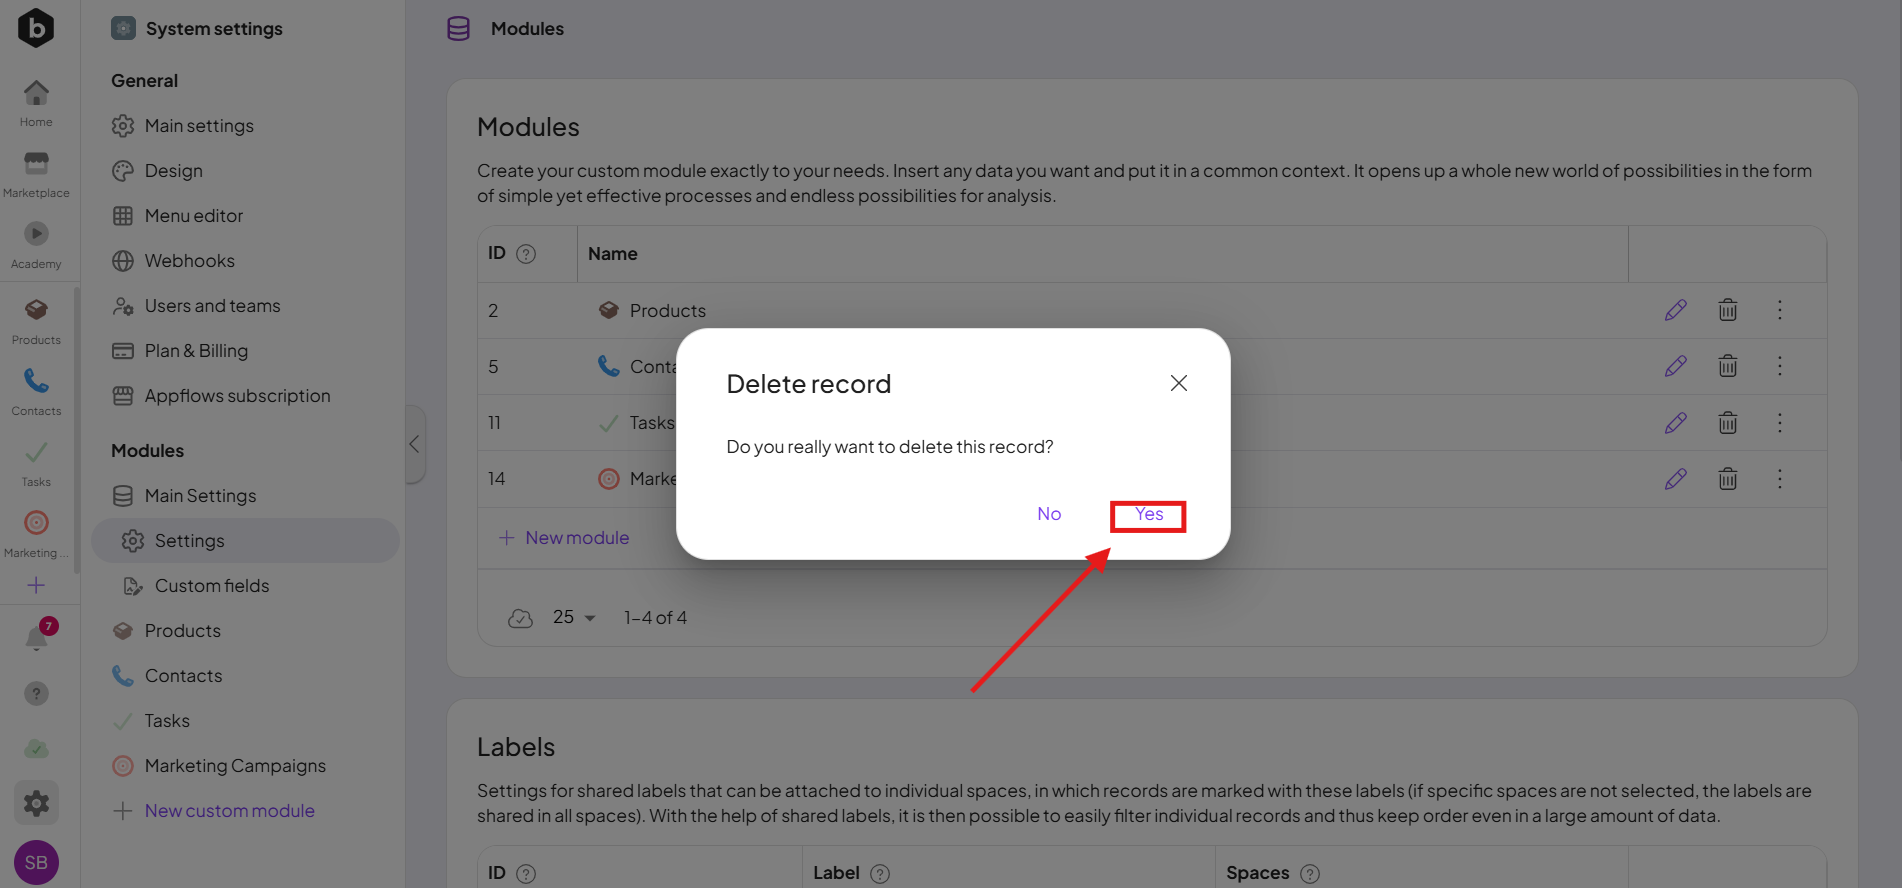
-
3. A confirmation window will appear. Just click yes.
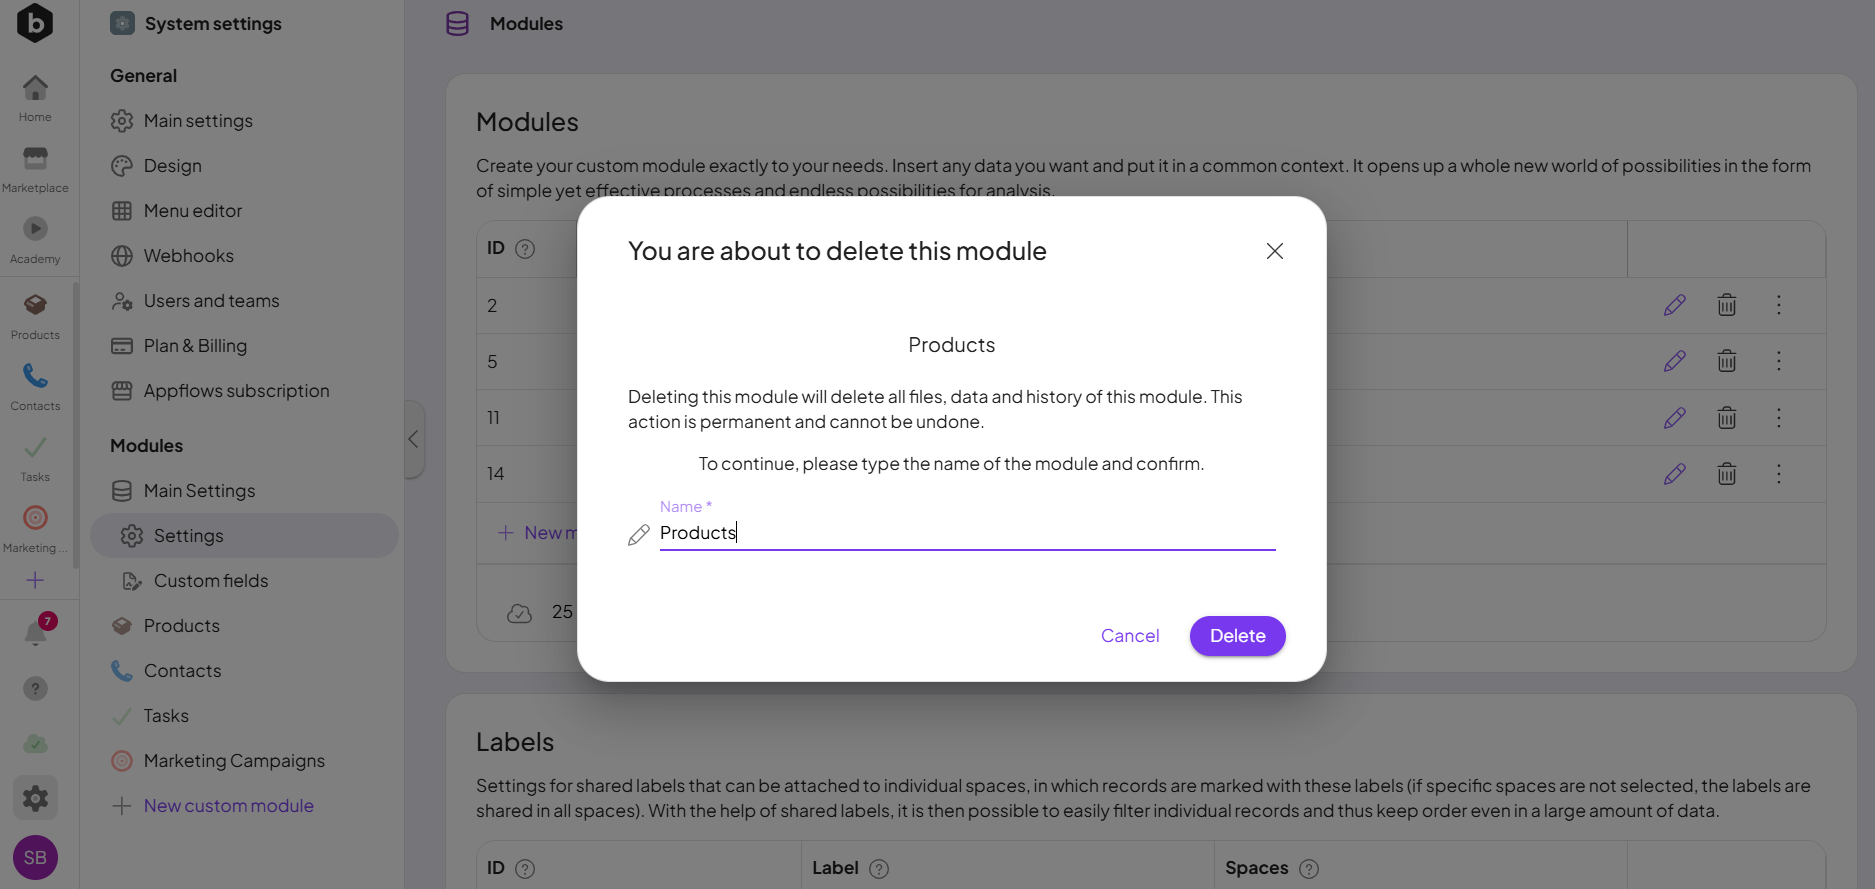
- 4. Now, you must type the exact name of the module and confirm the deletion.
It is possible that even if you rewrite the module name exactly as you see it, the system may still report that it is incorrect.
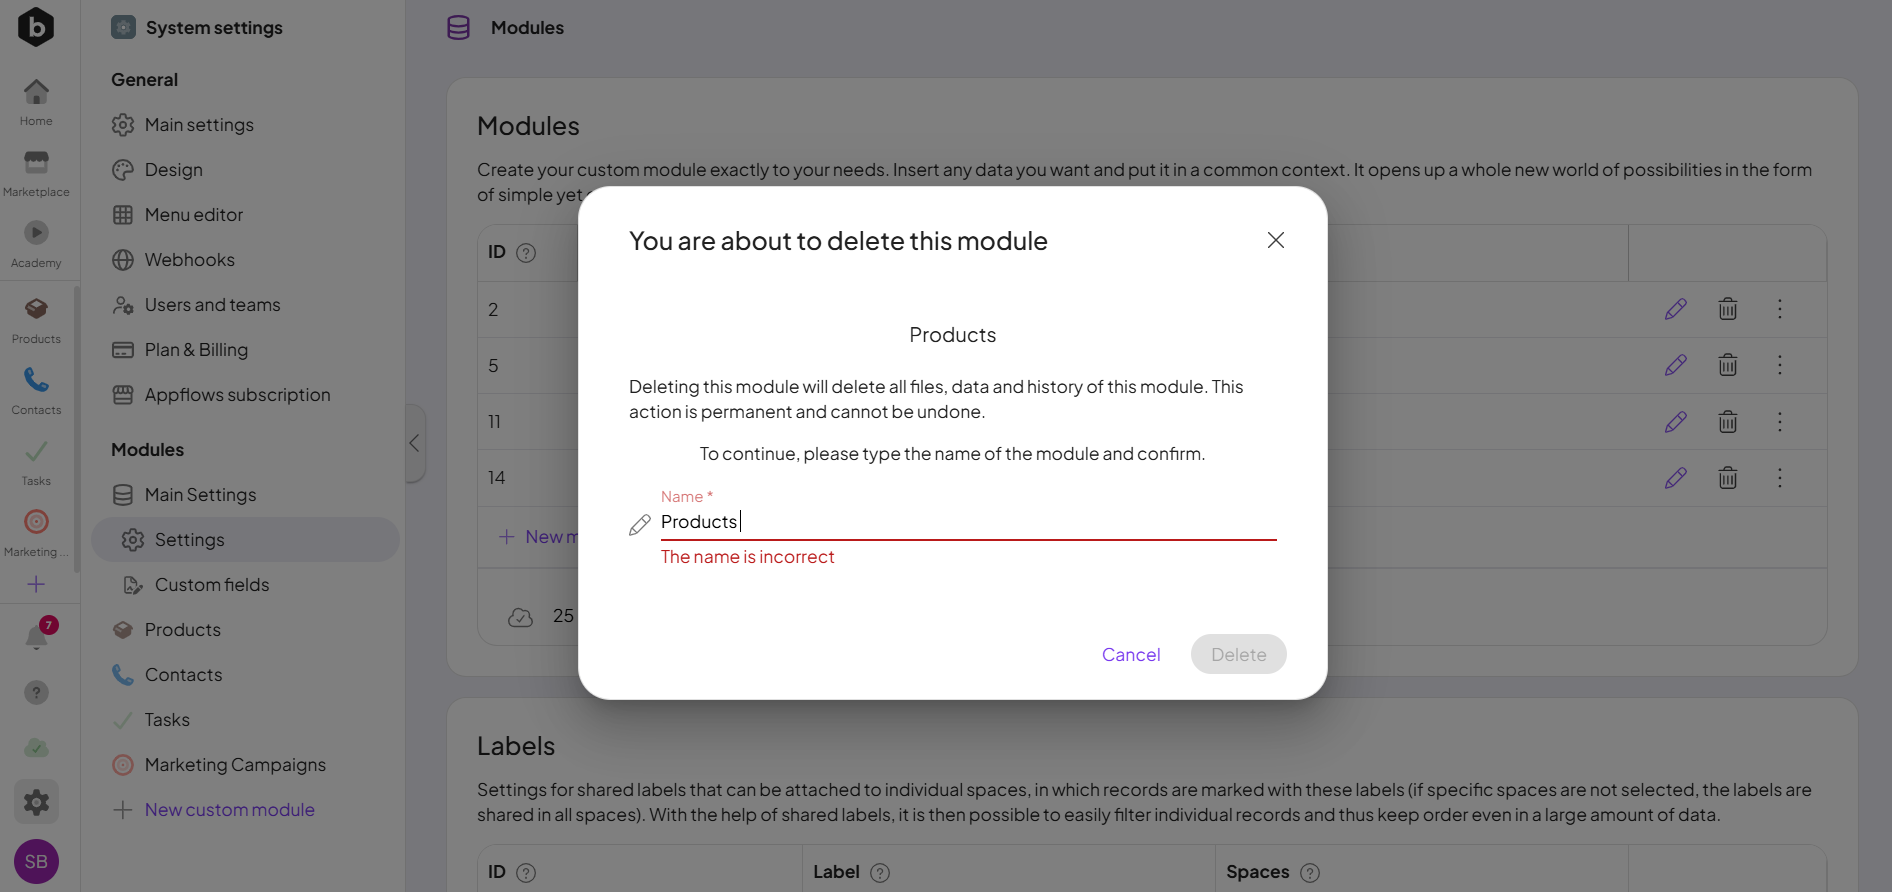
Here are the reasons why this can happen:
-
Leading or trailing spacesIn Boost.space, a space is a subunit within a module that helps organize and categorize data, ensuring clarity even with large volumes. For example, within the Contacts module, you might have spaces like "Client Database" or "Supplier Database." Access to each space is restricted to users who have created it or have been granted access. are included in the module name.
-
Multiple spaces between words also count as part of the name.
-
Any extra or missing space will cause the confirmation to fail.
Make sure to check carefully for any spaces before, after, or between the words in the module name.
Creating a custom module gives you the flexibility to tailor the system to your specific processes. From selecting its structure, fields, and permissions to managing labelsIn Boost.space, a label is a tag that can be added to items within a module. It's a flexible tool used to categorize and organize data, making it easier to customize workflows and processes. and statusesIn Boost.space, statuses are indicators assigned to records within modules to represent their current state or progress. They can be system-defined, such as "Active" or "Done," or custom-created to fit specific workflows. Statuses help track and manage tasks, projects, and processes efficiently., you can fully adapt the module to your needs. And if you ever need to remove a module, make sure to follow the deletion steps carefully—especially when confirming the module name. With these guidelines, you can confidently create, configure, and maintain your custom modules.
If you will need any help along the way please contact us at [email protected]