| Active with remarks |
|---|
| This application needs additional settings. Please follow the documentation below to create your own connectionUnique, active service acces point to a network. There are different types of connections (API key, Oauth…).. |
Connecting to Uteach: A Comprehensive Guide
In this guide, we’ll walk you through how to establish a connection with Uteach using your domain name and API key.
Prerequisites
To connect to Uteach, you need to have the following:
- Your Uteach domain name: The domain name is the URL associated with your Uteach account.
- Your API Key: This is a unique identifier that allows other applications to communicate with your Uteach account.
Step-by-step Connection Process
Here are the step-by-step instructions on how to connect to Uteach:
Step 1: Navigate to Your Uteach Profile
Step 2: Access Settings
You will see a panel on the left side of your screen. Find the settings and click on them.
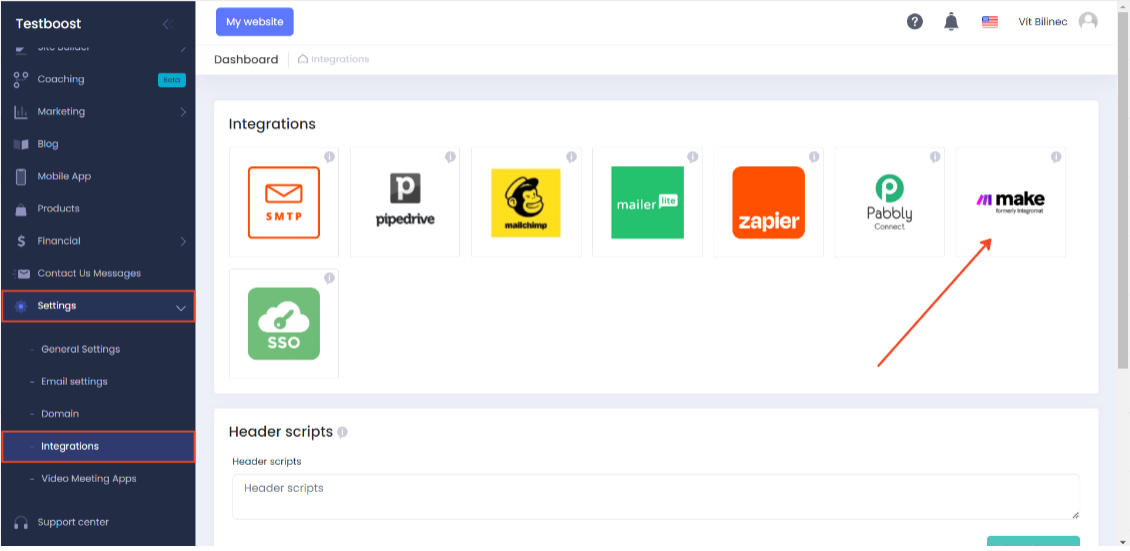
Step 3: Go to Integrations
Under the ‘Settings’ tab, navigate to ‘Integrations‘. This section is where you manage the connections between Uteach and other platforms or applications.
Step 4: Select ‘Make’ from Integration Apps
In the ‘Integrations’ section, you will find a list of applications that you can connect with. Look for ‘Make’ among these applications and select it to start the integration process with Uteach.
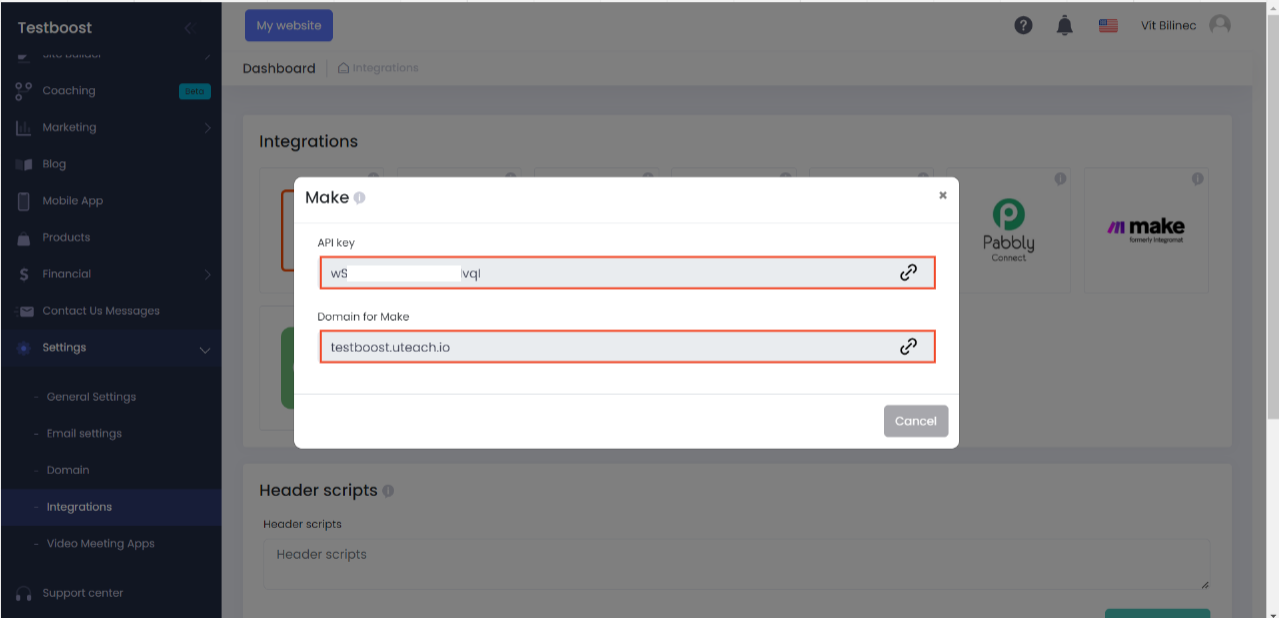
Step 5: Copy Your API Key and Domain
Now you will need your API key and domain. Uteach will present these to you in this step. Copy these details, as you will need them for the next step.
Step 6: Insert API Key and Domain in IntegratorPart of the Boost.space system, where you can create your connections and automate your processes.
Go to your Integrator application. Here, you will find fields where you need to input your API key and domain. Paste your API key and domain into their respective fields.
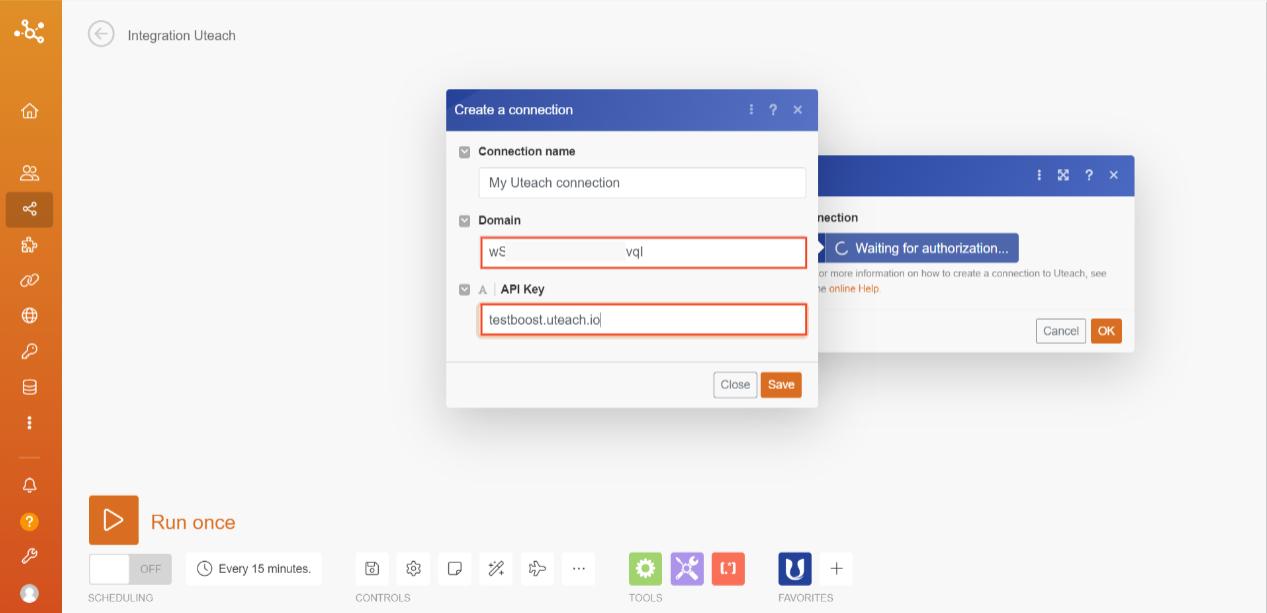
Step 7: Finalize the Connection
Once you have entered your API key and domain, finalize the process by confirming the details and completing the connection.
Congratulations, your connection was established successfully. If you will encounter any problems while creating your connection, please do not hesitate to contact us at support@boost.spaceCentralization and synchronization platform, where you can organize and manage your data..