| Active with remarks |
|---|
| This application needs additional settings. Please follow the documentation below to create your own connectionUnique, active service acces point to a network. There are different types of connections (API key, Oauth…).. |
The Customer.io modulesThe module is an application or tool within the Boost.space system. The entire system is built on this concept of modularity. (module - Contacts) allow you to track, create, update, and delete a customer event and customers in your Customer.io account.
Prerequisites
-
A Customer.io account
In order to use Customer.io with Boost.spaceCentralization and synchronization platform, where you can organize and manage your data. IntegratorPart of the Boost.space system, where you can create your connections and automate your processes., it is necessary to have a Customer.io account. If you do not have one, you can create a Customer.io account at customer.io/signup.
![[Note]](https://docs.boost.space/wp-content/themes/bsdocs/docs-parser/HTML/css/image/note.png) |
Note |
|---|---|
|
The moduleThe module is an application or tool within the Boost.space system. The entire system is built on this concept of modularity. (module - Contacts) dialog fields that are displayed in bold (in the Boost.space Integrator scenarioA specific connection between applications in which data can be transferred. Two types of scenarios: active/inactive., not in this documentation article) are mandatory! |
To connect your Customer.io account to Boost.space Integrator you need to obtain the Site ID and API Key from your Customer.io account and insert it in the Create a connection dialog in the Boost.space Integrator module.
-
Log in to your Customer.io account and open your Dashboard.
-
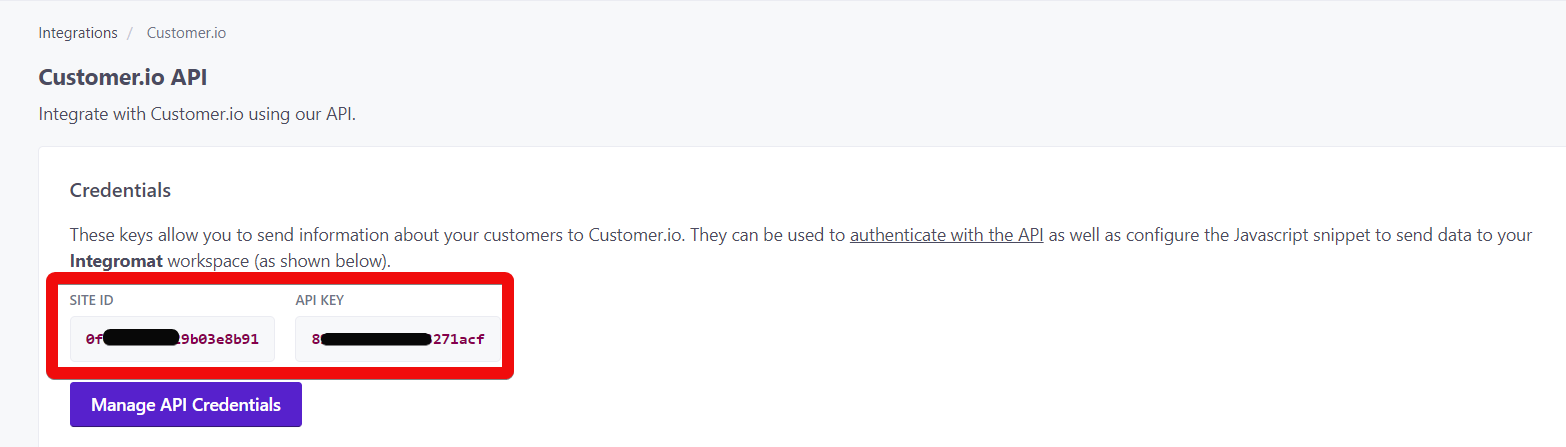
Click Integrations > API .
-
Copy the Site ID and API Key to your clipboard.
-
Go to Boost.space Integrator and open the Customer.io module’s Create a connection dialog.
-
In the Connection name field, enter a name for the connection.
-
In the Site ID and Secret API Key fields, enter the Site ID and secret API key copied in step 3 respectively. Click Continue.
The connection has been established.
Tracks a new customer event.
|
Connection |
|
|
Customer ID |
Enter the Customer ID whose events you want to track. |
|
Event Name |
Enter the event name which you want to track. |
|
Event Type |
Enter the event type. For example, to view the page events, enter page. |
|
Data |
Enter the custom data to include with the event. For example, |
Creates a new customer or updates the existing one.
|
Connection |
|
|
Customer ID |
Enter the Customer ID for the new customer or the existing customer you want to update. |
|
|
Enter the email address of the customer. |
|
Created At |
Enter the ID at which the customer is created. |
|
Attributes |
Adds people to a manual segment.
|
Connection |
|
|
Segment ID |
Enter the Segment ID to which you want to add the people. |
|
Customer IDs |
Add the Customer IDs you want to add to the Segment ID. |
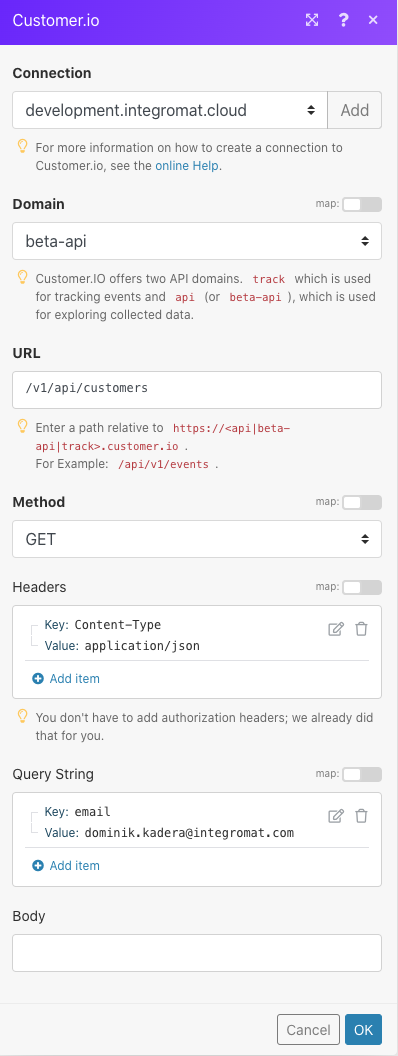
Performs an arbitrary authorized API call.
|
Connection |
||||
|
Domain |
Select the domain whose API calls you are making:
|
|||
|
URL |
Enter a path relative to
|
|||
|
Method |
Select the HTTP method you want to use: GET to retrieve information for an entry. POST to create a new entry. PUT to update/replace an existing entry. PATCH to make a partial entry update. DELETE to delete an entry. |
|||
|
Headers |
Enter the desired request headers. You don’t have to add authorization headers; we already did that for you. |
|||
|
Query String |
Enter the request query string. |
|||
|
Body |
Enter the body content for your API call. |
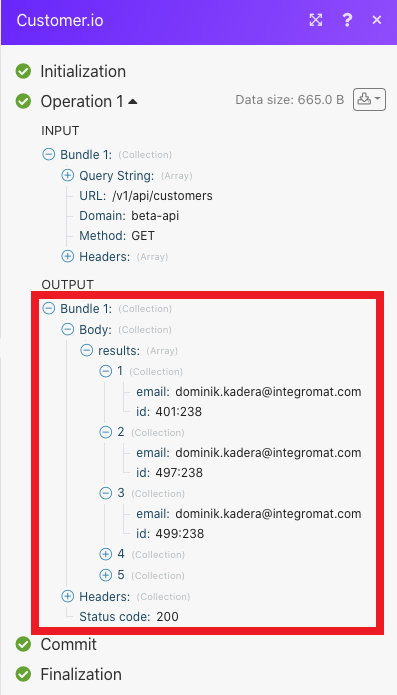
The following API call returns all tasks from your Customer.io account:
URL:
/v1/api/customers
Method:
GET
Matches of the search can be found in the module’s Output under BundleA bundle is a chunk of data and the basic unit for use with modules. A bundle consists of items, similar to how a bag may contain separate, individual items. > Body > results.
In our example, 5 were returned:
Deletes a customer and all their information from Customer.io.
|
Connection |
|
|
Customer ID |
Enter the Customer ID you want to delete. |