| Active |
|---|
| This application does not need additional settings. So you can make connection only by using your login credentials or by following the instructions below . |
With SurveyMonkey modules in Boost.space Integrator, you can create, retrieve, and search for collectors, retrieve and search for surveys and responses, retrieve your info, and watch new response events in your SurveyMonkey account.
To get started with SurveyMonkey, create an account at surveymonkey.com.
![[Note]](https://docs.boost.space/wp-content/themes/bsdocs/docs-parser/HTML/css/image/note.png) |
Note |
|---|---|
|
Refer to the SurveyMonkey API documentation for the list of available endpoints. |
-
Log in to your Boost.space Integrator account and add a SurveyMonkey module to a scenario.
-
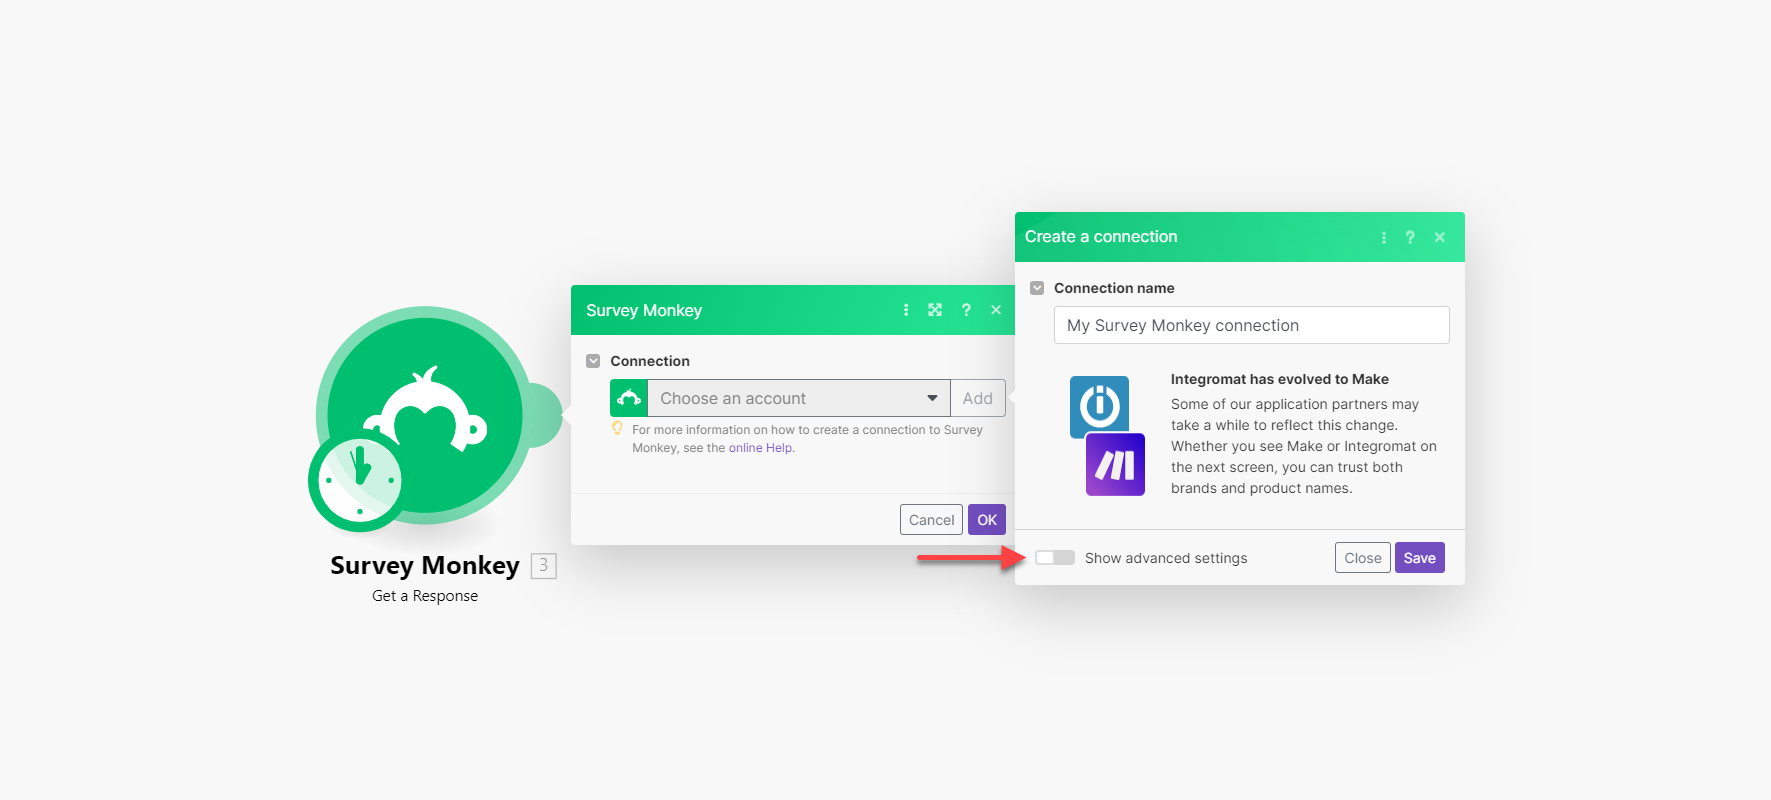
Click Add next to the Connection field.
Note: If you add a module with an
instanttag, you will first be prompted to add a Webhook. Click Add next to the Webhook field, followed by Add next to the Connection field. -
Optional: In the Connection name field, enter a name for the connection.
-
Optional: Click Show advanced settings and enter your custom application’sClient ID and Client Secret values. To create these values, see the Create App ID and Secret for SurveyMonkey section.
-
Click Save.
You have successfully established the connection. You can now edit your scenario and add more SurveyMonkey modules. If your connection requires reauthorization at any point, follow the connection renewal steps here.
You can create your own application and connect it to Boost.space Integrator using the App ID and Secret values from the application. To create these credentials:
-
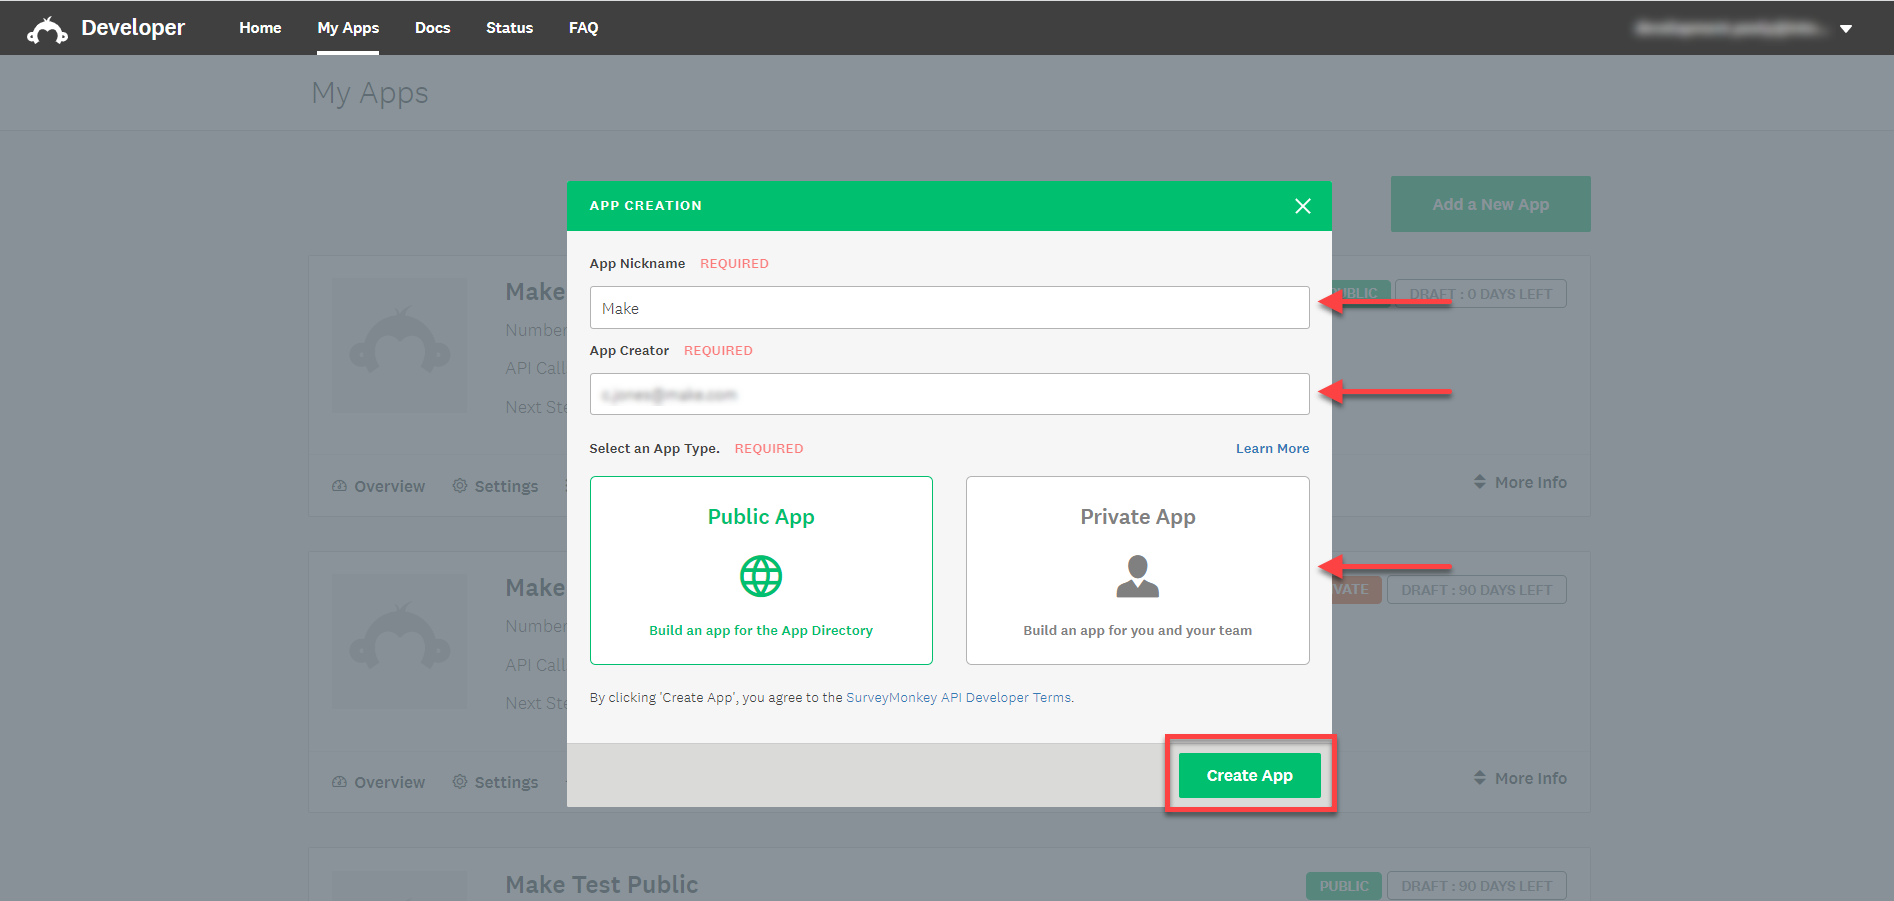
Go to your SurveyMonkey Developer My Apps page.
-
Click Add a New App.
-
Fill in the App Nickname and App Creator fields, select the App Type, and click Create App.
-
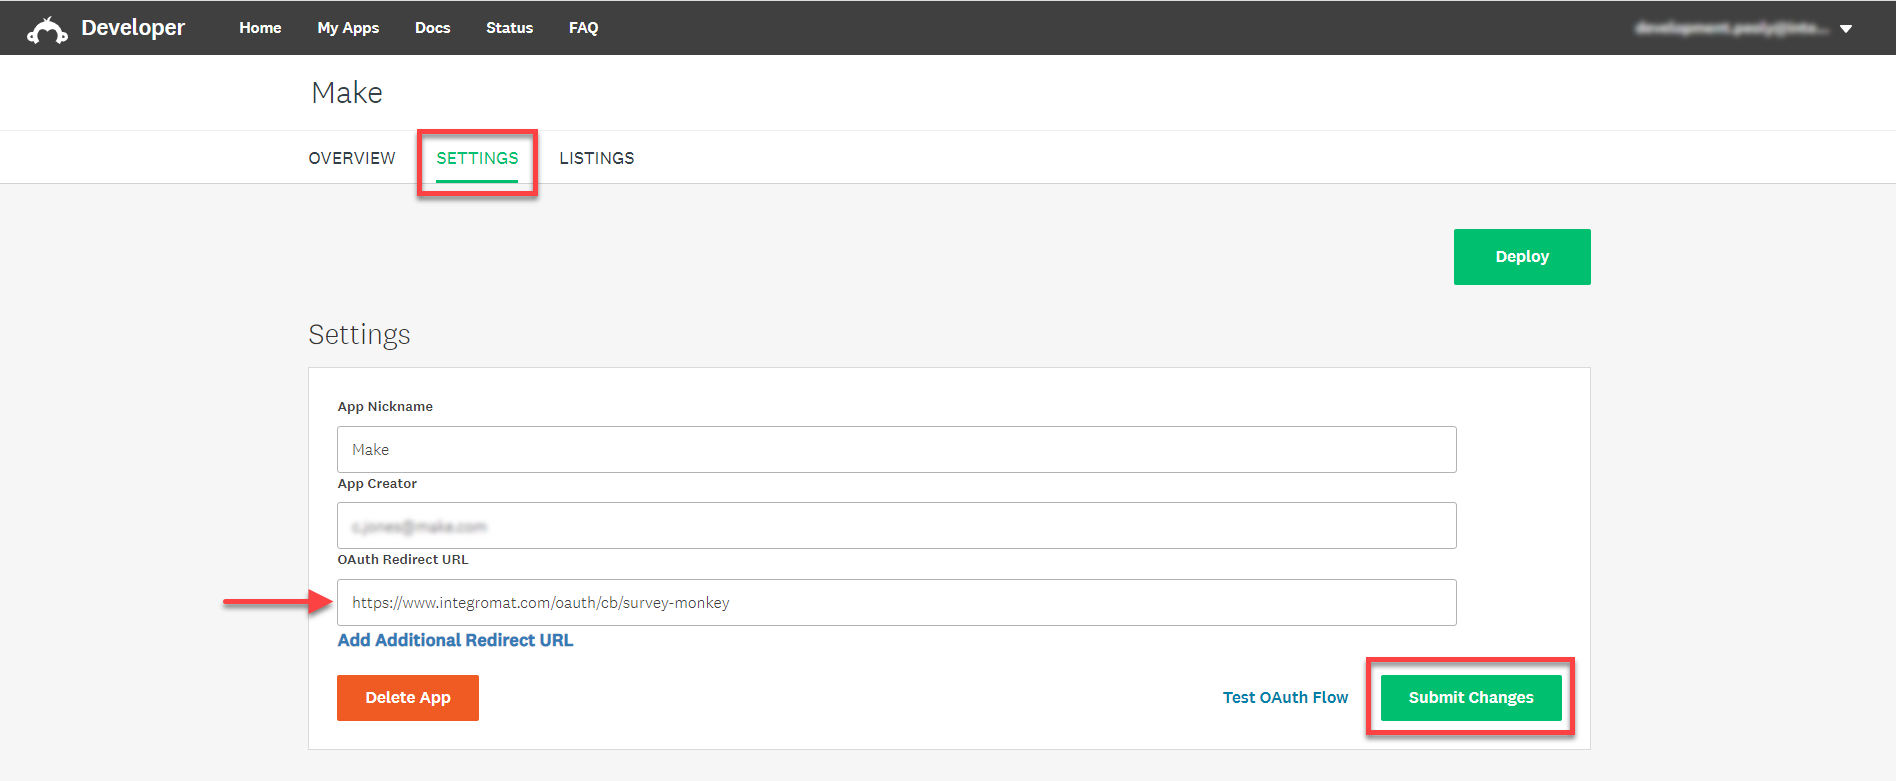
Click on the Settings tab, update the OAuth Redirect URL to
https://integrator.boost.space/oauth/cb/survey-monkey, and click Submit Changes. -
Scroll down to the Scopes section, update your required scopes, and click Update Scopes.
Note: If you update the app’s scopes after creating the connection, you will be prompted in Boost.space Integrator to update the connection by clicking Continue when adding a new module.
-
Scroll back up the page to the Credentials section, copy your Client ID and Secret, and store them in a safe place.
You will use these credentials in the Client ID and Client Secret fields when establishing the connection in Boost.space Integrator.
After connecting the app, you can perform the following actions:
-
Create a Collector
Creates a new collector.
-
Get a Collector
Retrieves a collector’s information.
-
Search for a Collector
Retrieves a list of collectors.
-
Get a Survey
Retrieves a specific survey’s information.
-
Search for a Survey
Returns a list of surveys.
-
Get a Response
Retrieves response information with a given ID.
Note: A paid SurveyMonkey account is required (Advantage or higher).
-
Search for a Response
Returns a list of responses.
-
New Response Event
Triggers when a new response event occurs.
-
Get My Info
Returns the current user’s account details including their plan.
-
Make an API Call
Performs an arbitrary authorized API call.
![[Note]](https://docs.boost.space/wp-content/themes/bsdocs/docs-parser/HTML/css/image/note.png) |
Note |
|---|---|
|
Module Survey fields list surveys by title, unless otherwise stated. |


